
Food And Drinks
How to Grind Spices: A Professional’s Guide
Introduction
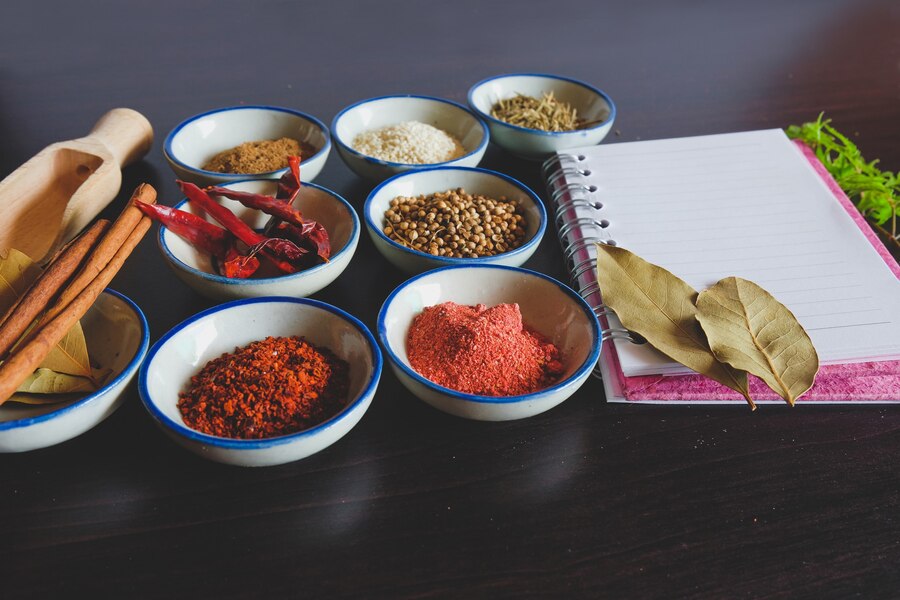
In the culinary world, spices are the cornerstone of flavor. Whether you’re crafting an exquisite dish for fine dining or preparing a hearty meal for a family gathering, freshly ground spices can make a world of difference. While pre-ground spices offer convenience, they often lack the depth and complexity that whole spices provide. For professional chefs, the ability to grind spices to the perfect texture is an essential skill that enhances both the aroma and the flavor profile of their dishes.
Freshly ground spices bring out essential oils and compounds that are otherwise locked inside the spice’s natural structure. The process of grinding not only releases these oils but also intensifies the spice’s flavor. As a professional in the culinary field, knowing how to grind spices effectively can elevate your cooking to new heights, ensuring that every dish is bursting with vibrant, authentic flavor.
This guide will explore the various tools, techniques, and best practices for grinding spices, helping you understand how to maximize their potential in your cooking.
1. Understanding the Spice Grinding Process
Grinding spices is more than just a task of breaking them down into smaller pieces; it’s a process that unlocks their true flavor potential. Spices are packed with essential oils, which are volatile and aromatic. When you grind a spice, you’re releasing these oils, which enhances its aroma and flavor profile.
Why Grinding Spices Matters
Whole spices maintain their integrity much longer than ground spices. For example, a whole black peppercorn will keep its pungency far longer than pre-ground pepper, which starts to lose its aroma soon after grinding. Freshly ground spices not only release more flavor but also bring more vibrant colors and fragrances to your dishes.
Chemical and Physical Changes
Grinding spices causes a physical change by breaking them into smaller particles, which increases the surface area exposed to air. This exposure speeds up the release of essential oils, enhancing the flavor of the spice. Additionally, grinding can cause chemical changes as heat is generated during the process. This heat may slightly alter the spice’s profile, which is why fresh grinding is often preferred to avoid losing its natural flavors.
When to Grind Spices
For the best results, grinding spices just before use is crucial. Pre-ground spices, even when stored properly, lose their potency over time, while freshly ground spices offer the most intense and vibrant flavors. In professional kitchens, this principle applies to spices like cumin, coriander, cardamom, and cinnamon, which release their oils most effectively when ground just before use.
2. Choosing the Right Tools for Grinding Spices
The choice of tool for grinding spices can significantly impact the consistency and quality of your grind. From traditional mortar and pestle to electric grinders, each tool has its advantages and disadvantages depending on the task at hand.
Manual vs. Electric Spice Grinders
- Mortar and Pestle: This age-old tool allows for a more hands-on approach. It gives you full control over the grind size and is perfect for small quantities of spices. While it takes more time and effort, many chefs prefer the tactile experience, as it lets them adjust the grind to suit the dish. For spices like cardamom and cloves, a mortar and pestle offers precision and consistency.
- Blade Grinders: Blade grinders are inexpensive and commonly used in kitchens for quick grinding. However, they are less consistent than other methods, producing unevenly sized particles that can affect the flavor. Blade grinders are best suited for smaller, less delicate tasks where speed is more important than precision.
- Burr Grinders: Burr grinders provide the most consistent grind, as they crush spices between two abrasive surfaces, ensuring uniform particle size. This is ideal for grinding larger quantities of spices or for spices that require a uniform texture. Burr grinders are especially helpful for professionals who need precision, as the consistent grind helps maintain flavor integrity.
Specialized Grinders for Specific Spices
Some spices require specialized tools for optimal results. For example, cinnamon sticks are hard and fibrous, making them difficult to grind without the right equipment. A high-quality electric grinder or a heavy-duty manual grinder is necessary for achieving the fine, smooth consistency required for a cinnamon powder. Similarly, certain spices like cloves or nutmeg benefit from manual grating or grinding to avoid overheating or overprocessing in automatic grinders.
Other Tools
Other tools, such as spice mills or pepper grinders, are commonly used in professional kitchens. These tools offer a consistent and easy method for grinding spices like pepper, which are often used in large quantities. Spice mills can be particularly useful for chefs who require precision during service, offering quick, consistent results.
3. Methods for Grinding Spices
Grinding spices may seem straightforward, but different methods produce distinct textures that can dramatically affect the outcome of a dish. Professional chefs understand that the grind size impacts both the cooking process and the final flavor.
Dry Grinding
Most spices, such as black pepper, coriander, cumin, and turmeric, are best ground dry. Dry grinders or manual tools like the mortar and pestle can achieve a range of textures, from coarse to fine. The key is to select the right grind for the intended dish. For instance, a fine grind of cumin is perfect for a smooth curry, while a coarser grind is better for a marinade.
Wet Grinding
Some dishes, particularly in Indian, Thai, or other Southeast Asian cuisines, require wet grinding. This technique involves adding a small amount of liquid (like water or oil) to the spice mixture, allowing it to become a paste. Wet grinders or stone grinders are ideal for making spice pastes, such as curry or garam masala, as they create a smoother, more cohesive texture. Wet grinding preserves the freshness and potency of spices in these mixtures, and is crucial when grinding fresh ingredients like ginger, garlic, or chilies.
Blending and Mixing Spices
Often, professional chefs need to grind a combination of spices to create complex flavor profiles. When blending spices, it’s important to adjust the grind size to suit the specific mix. Some spices, like cinnamon and cloves, may need a finer grind, while others, like mustard seeds, can be coarsely ground. Ensuring uniformity in the blend is key for consistency in flavor across multiple servings or batches.
Time Considerations
For efficiency, grinding spices in batches is often a practical choice. However, you should avoid grinding too much in advance, as ground spices lose their potency relatively quickly. When grinding in batches, it’s essential to use the freshest spices available and grind only as much as needed.
4. Understanding Spice Textures and Their Impact on Dish Flavor
The texture of ground spices plays a significant role in the final dish. The grind size directly impacts the release and absorption of the spice’s flavor during cooking.
Fine Grinding
A fine grind leads to more intense, immediate flavor release. It’s ideal for smooth sauces, soups, and curries, where the spices need to dissolve completely into the liquid. Fine grinding also works well when making spice blends like garam masala or curry powder, where uniformity in texture is crucial.
Coarse Grinding
Coarse grinding is typically used for rubs, stews, or broths, where a subtler spice presence is desired. Coarser particles release their flavors more gradually, allowing the dish to take on the spice flavor over a longer cooking period.
Crushing Spices vs. Grinding
In some cases, lightly crushing spices (such as peppercorns) instead of grinding them can enhance the texture of a dish. Crushed spices add a burst of flavor and texture without overwhelming the dish with too much spice.
5. Best Practices for Storing Ground Spices
Proper storage is essential for maintaining the flavor and potency of ground spices. Storing them in airtight containers, away from heat, light, and moisture, will significantly prolong their shelf life.
Proper Containers
Spices should be stored in airtight containers to prevent exposure to air, which accelerates flavor degradation. Glass jars with sealed lids or vacuum-sealed bags are ideal. For larger quantities, consider bulk storage options that still offer protection from light and moisture.
Storage Location
Spices should be kept in a cool, dry, and dark place, such as a pantry or spice drawer. Avoid storing them near heat sources like stovetops or windows, as direct sunlight can cause them to lose their flavor more quickly.
Expiration and Freshness
Ground spices typically lose their potency after six months to a year. To maintain their full flavor, buy spices in smaller quantities, and replace them regularly. Regularly checking the freshness of your spices ensures you’re always using the best quality ingredients in your cooking.
Conclusion: Maximizing the Potential of Freshly Ground Spices
Grinding spices is an art that combines precision and technique. Whether you’re using manual tools or electric grinders, each method has its unique advantages in the kitchen. By understanding the science behind grinding, choosing the right tools, and practicing the best grinding methods, professional chefs can maximize the impact of spices in their dishes. Freshly ground spices will always yield the best flavor and aroma, ensuring that your culinary creations stand out and delight your guests.
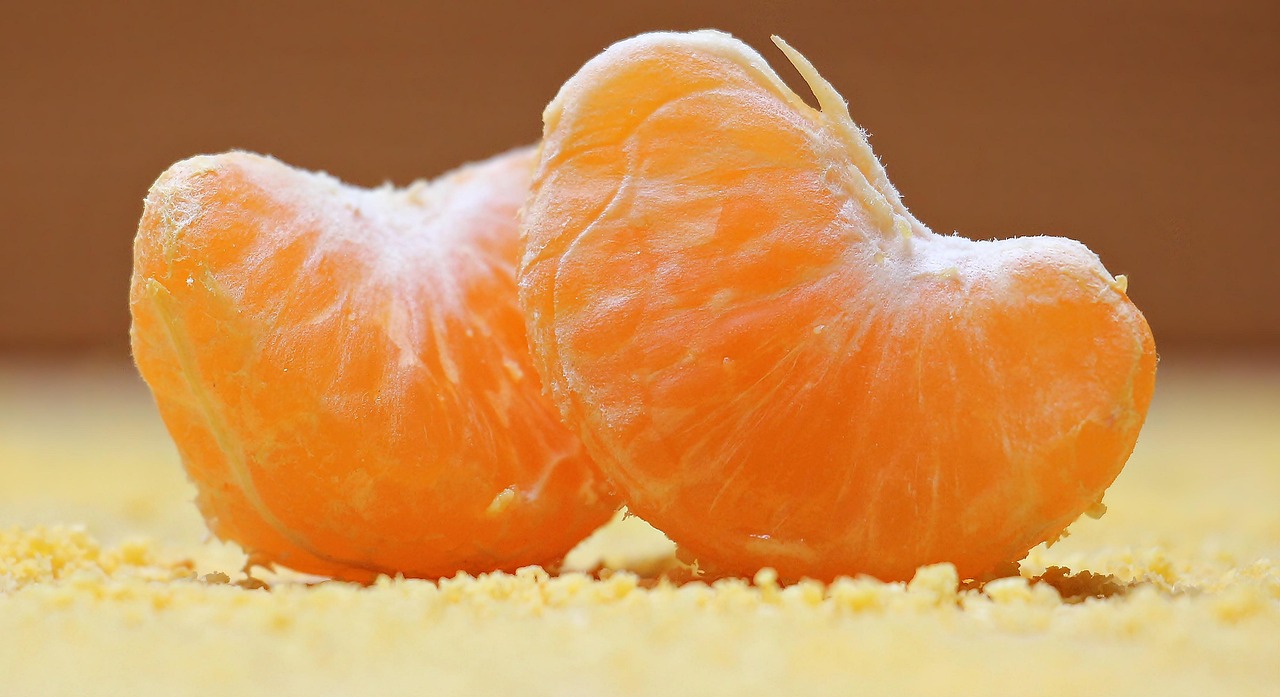
Ever wondered why orange slices are a staple at kids’ soccer games and high-end spas alike? This humble snack packs more than just a sweet-tangy punch—it’s a powerhouse of nutrition, a hydration booster, and a versatile ingredient. Whether you’re snacking, cooking, or looking for a natural energy boost, orange slices deserve a spot in your daily routine.
In this article, we’ll explore:
✅ The health benefits backed by science
✅ Creative ways to use orange slices (beyond snacking)
✅ Pro tips for selecting, storing, and serving them
✅ Unexpected uses in beauty and home hacks
Let’s peel back the layers and discover why orange slices are more than just a refreshing treat.
Why Orange Slices Are a Nutritional Powerhouse
Oranges are famous for their vitamin C content, but there’s much more beneath the peel. Here’s why nutritionists and athletes swear by them:
1. Immune-Boosting Vitamin C
A single medium orange provides 93% of your daily vitamin C needs (NIH), crucial for:
✔ Fighting colds and infections
✔ Collagen production for healthy skin
✔ Enhancing iron absorption
2. Hydration & Electrolyte Balance
With 87% water content, orange slices are a natural way to stay hydrated. They also contain potassium, helping regulate fluid balance and muscle function—perfect for post-workout recovery.
3. Fiber for Gut Health
The 3.1g of fiber per orange (USDA) aids digestion and keeps you full longer, making it a smart snack for weight management.
4. Antioxidants That Fight Inflammation
Oranges are rich in flavonoids like hesperidin, which studies link to reduced blood pressure and inflammation (Journal of Nutrition).
Beyond Snacking: 6 Creative Ways to Use Orange Slices
1. Upgrade Your Water
Add orange slices to:
✔ Infused water (with mint or cucumber)
✔ Iced tea for a citrusy twist
✔ Cocktails/mocktails (e.g., Aperol Spritz)
2. Sweet & Savory Recipes
✔ Salads: Toss with arugula, feta, and balsamic glaze
✔ Desserts: Bake into cakes or dry for homemade fruit chips
✔ Marinades: Mix with soy sauce, garlic, and ginger for grilled chicken
3. Natural Energy Booster
Skip sugary sports drinks—orange slices offer quick natural sugars + electrolytes, ideal for:
✔ Pre-workout fuel
✔ Midday slumps
4. DIY Beauty Treatments
✔ Face mask: Blend with yogurt for brightening
✔ Sugar scrub: Mix with coconut oil for exfoliation
5. Home Freshener
Simmer orange peels with cinnamon sticks for a chemical-free air freshener.
6. Kid-Friendly Fun
✔ Freeze slices for edible “popsicles”
✔ Use as cupcake toppers
How to Pick, Store & Serve Orange Slices Like a Pro
Choosing the Best Oranges
🔹 Navel oranges – Sweet, easy to peel (best for snacking)
🔹 Blood oranges – Tart, deep red flesh (great for juices)
🔹 Valencia oranges – Juicy, ideal for slicing
Look for:
✔ Firm, heavy fruit
✔ Bright, smooth skin (avoid green patches)
Storing for Freshness
✔ Whole oranges: Keep at room temp for a week or refrigerate for up to two.
✔ Sliced oranges: Store in an airtight container with a paper towel to absorb moisture (lasts 2–3 days).
Serving Tips
✔ Sprinkle with chili powder or tajín for a Mexican-inspired kick.
✔ Dip in dark chocolate for a healthy dessert.
The Bottom Line: Why You Should Keep Orange Slices Handy
Orange slices are more than just a snack—they’re a multipurpose superfood that boosts health, enhances recipes, and even simplifies home care. Whether you’re an athlete, a busy parent, or a cooking enthusiast, their versatility is unmatched.
Next time you grab an orange, slice it up—you might just discover a new favorite way to enjoy it!

Introduction
You grab a bottle of cranberry juice, thinking it’s a healthy choice—only to find out it’s packed with added sugars. Sound familiar? Many cranberry juice brands market themselves as “natural” or “healthy,” but they’re often loaded with sweeteners to mask the fruit’s natural tartness.
Enter no sugar added cranberry juice—a cleaner, lower-calorie alternative. But is it really better for you? Does it still offer the same health benefits as traditional cranberry juice? Let’s dive into the facts, benefits, and potential drawbacks of this beverage to help you make an informed choice.
What Is No Sugar Added Cranberry Juice?
No sugar added cranberry juice is made purely from cranberries and water, without any extra sweeteners like sugar, high-fructose corn syrup, or artificial alternatives. Since cranberries are naturally tart, some brands may use small amounts of other fruit juices (like apple or grape) to balance the flavor, but the best options contain 100% pure cranberry juice.
How It Differs from Regular Cranberry Juice
| Feature | No Sugar Added Cranberry Juice | Regular Cranberry Juice |
|---|---|---|
| Sweeteners | None (or minimal natural juice blends) | Often contains sugar, corn syrup, or artificial sweeteners |
| Calories | Lower (around 30–40 per 8 oz) | Higher (100+ per 8 oz) |
| Taste | Very tart, may be an acquired taste | Sweeter, more palatable |
| Health Benefits | More concentrated antioxidants | May have diluted benefits due to added sugars |
Health Benefits of No Sugar Added Cranberry Juice
1. Rich in Antioxidants
Cranberries are packed with polyphenols, including flavonoids and proanthocyanidins, which help fight oxidative stress and inflammation. Studies suggest these compounds may reduce the risk of chronic diseases like heart disease and cancer.
2. Supports Urinary Tract Health
One of the most well-known benefits of cranberry juice is its ability to prevent UTIs. The proanthocyanidins in cranberries prevent bacteria like E. coli from sticking to the urinary tract walls.
3. May Improve Heart Health
Research shows that cranberry juice can help:
✔ Lower LDL (“bad”) cholesterol
✔ Improve blood pressure
✔ Enhance blood vessel function
4. Better Blood Sugar Control
Since no sugar added cranberry juice has a lower glycemic impact, it’s a smarter choice for diabetics or those watching their sugar intake.
5. Aids Digestion
Cranberries contain fiber and compounds that promote gut health by supporting beneficial bacteria.
Potential Downsides to Consider
1. Extremely Tart Taste
Pure cranberry juice is very sour, which can be off-putting for some. If you find it too harsh, try diluting it with water or mixing it with a splash of unsweetened apple juice.
2. Possible Stomach Upset
Due to its high acidity, drinking too much cranberry juice may cause:
-
Acid reflux
-
Stomach irritation
-
Diarrhea (if consumed in excess)
3. Not All “No Sugar Added” Juices Are Equal
Some brands sneak in fruit juice concentrates (like white grape juice), which still add sugar. Always check the label for 100% cranberry juice.
How to Choose the Best No Sugar Added Cranberry Juice
✔ Look for 100% Pure Cranberry Juice
Avoid anything labeled “cocktail” or “juice blend,” as these often contain added sugars.
✔ Check for Pasteurization
Unpasteurized (raw) cranberry juice may carry bacteria risks. Most store-bought options are pasteurized for safety.
✔ Opt for Organic (If Possible)
Organic cranberries reduce exposure to pesticides.
✔ Consider Concentrate vs. Not From Concentrate
-
Concentrate: More affordable, but may lose some nutrients during processing.
-
Not from concentrate: Fresher taste, but pricier.
Top Recommended Brands:
-
Lakewood Organic Pure Cranberry Juice (100% pure, no additives)
-
R.W. Knudsen Just Cranberry (no sugar added)
-
Ocean Spray Pure Unsweetened Cranberry Juice (widely available)
Ways to Enjoy No Sugar Added Cranberry Juice
If the taste is too intense, try these delicious and healthy alternatives:
1. Dilute with Water or Sparkling Water
A 1:1 ratio makes it more refreshing.
2. Mix into Smoothies
Blend with banana, spinach, and almond milk for a nutrient-packed drink.
3. Use in Cooking
-
Add to marinades for chicken or pork.
-
Make a tangy salad dressing with olive oil and herbs.
4. Make a Mocktail
Mix with soda water, lime, and fresh mint for a sugar-free cranberry spritzer.
Final Verdict: Is No Sugar Added Cranberry Juice Worth It?
If you’re looking for a low-sugar, antioxidant-rich beverage, no sugar added cranberry juice is an excellent choice—just be prepared for its bold tartness. It offers real health benefits without the empty calories of sugary juices.
Best for:
✔ Health-conscious individuals
✔ Those managing diabetes or heart health
✔ Anyone seeking natural UTI prevention
Not ideal for:
✖ People who dislike sour flavors
✖ Those with acid sensitivity
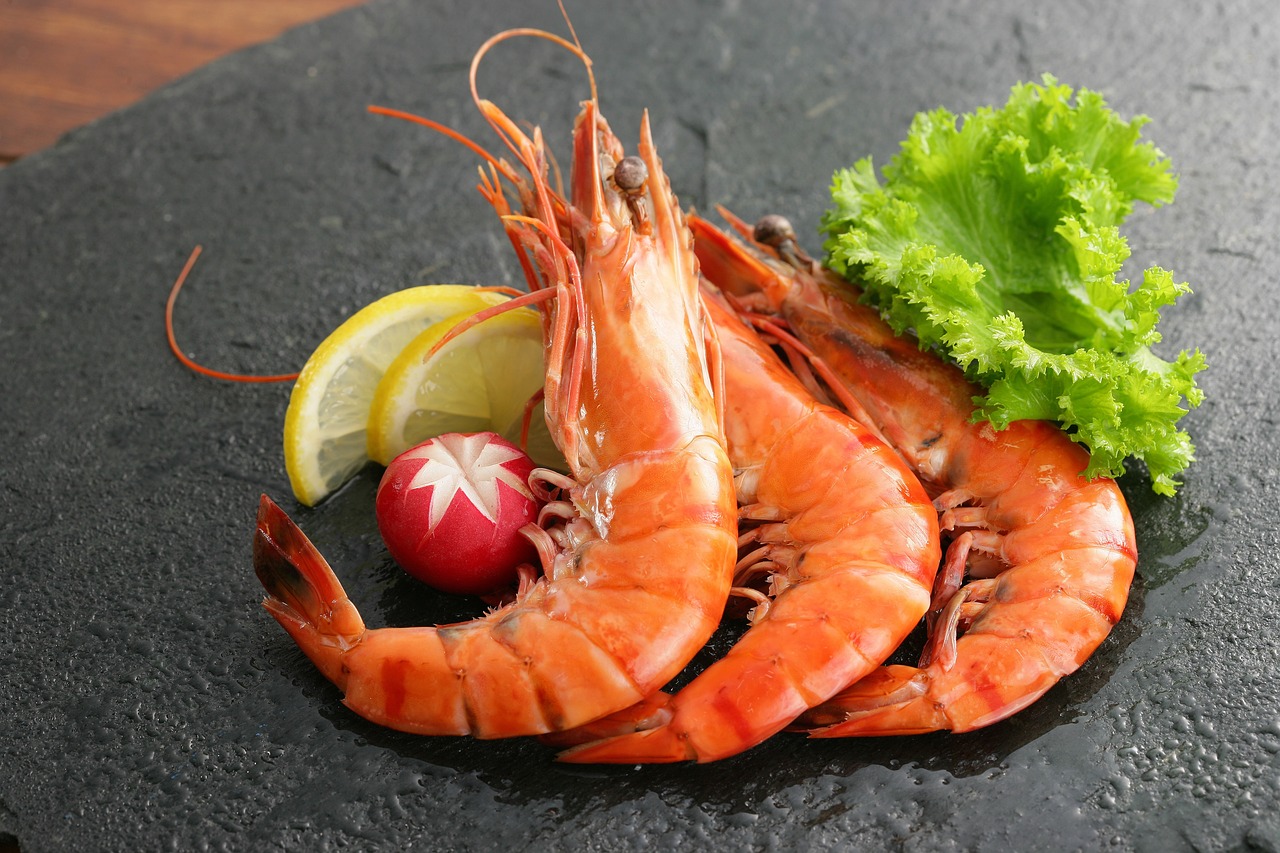
Have you ever thawed a batch of shrimp for dinner, only to change your meal plans last minute? Suddenly, you’re left wondering: Can you refreeze shrimp? The answer isn’t as simple as yes or no—it depends on how you thawed and stored them.
Shrimp is a delicate seafood that can spoil quickly if mishandled. Refreezing it improperly can lead to texture changes, flavor loss, and even foodborne illnesses. But with the right techniques, you can safely refreeze shrimp without compromising quality.
In this guide, we’ll break down the science behind freezing shrimp, expert-backed safety tips, and best practices to keep your seafood fresh.
The Short Answer: Can You Refreeze Shrimp?
Yes, but only if thawed properly in the refrigerator. If shrimp were thawed at room temperature or in warm water, refreezing them is risky due to bacterial growth.
When Refreezing Shrimp Is Safe:
✅ Thawed in the fridge (below 40°F / 4°C)
✅ Never left out for more than 2 hours (or 1 hour in hot environments)
✅ Still firm, odorless, and not slimy
When You Should NOT Refreeze Shrimp:
❌ Thawed on the counter or in warm water
❌ Left out for too long (risk of bacteria like Salmonella or Listeria)
❌ Already cooked and sitting in the fridge for days
Why Proper Thawing Matters Before Refreezing
Bacteria multiply rapidly between 40°F and 140°F (4°C–60°C)—the “danger zone.” If shrimp sit in this temperature range too long, toxins form that cooking won’t always destroy.
Safe Thawing Methods:
-
Refrigerator Thawing (Best for Refreezing)
-
Place frozen shrimp in a sealed container or bag.
-
Thaw in the fridge for 12–24 hours (depending on size).
-
Once thawed, refreeze within 1–2 days if unused.
-
-
Cold Water Thawing (Use Immediately, Don’t Refreeze)
-
Submerge shrimp in a sealed bag under cold running water.
-
Cook immediately—do not refreeze.
-
-
Microwave Thawing (Cook Immediately, Don’t Refreeze)
-
Use the “defrost” setting, but cook right after.
-
Partial cooking during microwaving makes refreezing unsafe.
-
How Refreezing Affects Shrimp Quality
Even when done safely, refreezing can alter shrimp’s:
-
Texture: Repeated freezing breaks down cell walls, making shrimp mushy.
-
Flavor: Exposure to air causes freezer burn, leading to a bland taste.
-
Moisture: Ice crystals form, dehydrating the shrimp.
Tips to Maintain Quality When Refreezing:
✔ Use airtight, freezer-safe bags (remove excess air to prevent freezer burn).
✔ Label with dates (shrimp lasts 3–6 months in the freezer).
✔ Portion before freezing to avoid thawing more than needed.
Real-World Scenarios: Can You Refreeze Shrimp?
1. “I Thawed Shrimp in the Fridge but Didn’t Use Them”
✅ Safe to refreeze if they’ve been in the fridge for less than 2 days and show no signs of spoilage.
2. “I Left Shrimp on the Counter for 3 Hours”
❌ Do not refreeze—bacteria may have started growing. Cook immediately or discard.
3. “I Cooked Thawed Shrimp—Can I Freeze the Leftovers?”
✅ Yes! Cooked shrimp can be frozen for up to 3 months. Store in airtight containers with minimal liquid.
Expert-Backed Safety Tips for Handling Shrimp
The FDA and USDA recommend:
-
Never refreeze raw shrimp thawed outside the fridge.
-
Discard shrimp with:
-
A strong ammonia or sour smell
-
Slimy or discolored flesh
-
An off-putting texture
-
Chef’s tip: If unsure, cook and then freeze—heat kills bacteria, making cooked shrimp safer to refreeze.
Strong Conclusion: Smart Shrimp Storage = No Waste, No Risk
So, can you refreeze shrimp? Yes—if done right. The key is thawing safely in the fridge and refreezing quickly. If shrimp have been left out too long, it’s better to cook or toss them than risk food poisoning.
Key Takeaways:
✔ Refreeze only if thawed in the fridge.
✔ Never refreeze shrimp left at room temperature.
✔ Cooked shrimp freezes better than raw.
✔ When in doubt, follow the smell and texture test.
By following these guidelines, you’ll keep your shrimp dishes delicious and safe—every time. Next time your dinner plans change, you’ll know exactly what to do!
-

 Articles3 months ago
How Many Times Can You Regrow Green Onions
-

 News10 months ago
Understanding HotLeaks: What You Need to Know
-

 Fashion7 months ago
Opals in the USA: A Gemstone Transforming the Crystal Healing Market
-

 Technology1 year ago
The Wonders of Oh Em Gee Blog
-

 Entertainment7 months ago
How to Use Snaptik: A Complete Guide to Download TikTok Videos
-

 Entertainment1 year ago
Bare it All: Unforgettable Skinny Dipping Stories Shared
-

 Health1 year ago
Can You Smoke Shrooms? Exploring the Myths and Realities
-
 Articles5 months ago
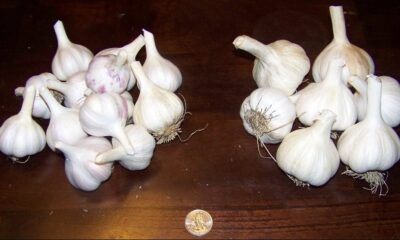
WHAT IS THE DIFFERENCE BETWEEN SEED GARLIC AND FOOD GARLIC?