Food And Drinks
How to Grind Spices: A Professional’s Guide

Introduction
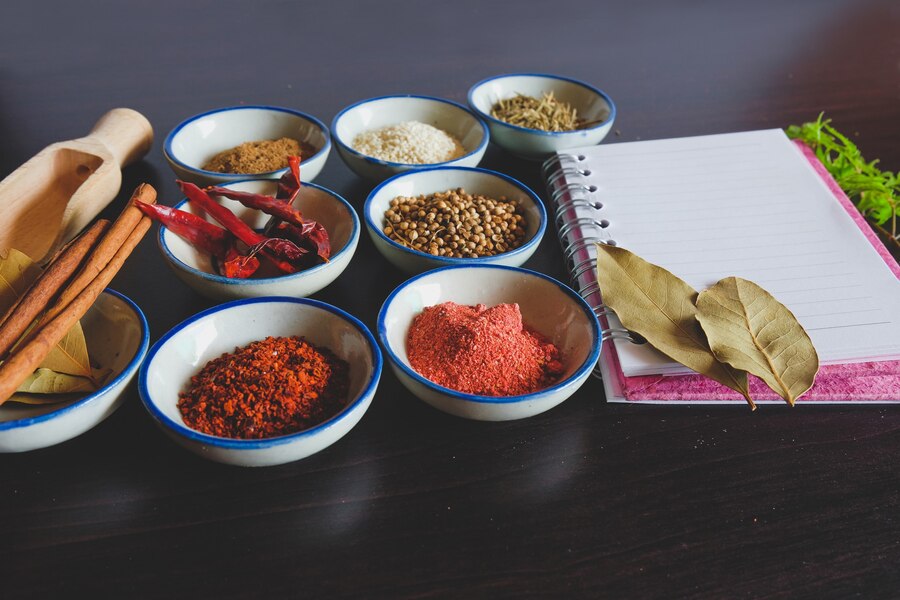
In the culinary world, spices are the cornerstone of flavor. Whether you’re crafting an exquisite dish for fine dining or preparing a hearty meal for a family gathering, freshly ground spices can make a world of difference. While pre-ground spices offer convenience, they often lack the depth and complexity that whole spices provide. For professional chefs, the ability to grind spices to the perfect texture is an essential skill that enhances both the aroma and the flavor profile of their dishes.
Freshly ground spices bring out essential oils and compounds that are otherwise locked inside the spice’s natural structure. The process of grinding not only releases these oils but also intensifies the spice’s flavor. As a professional in the culinary field, knowing how to grind spices effectively can elevate your cooking to new heights, ensuring that every dish is bursting with vibrant, authentic flavor.
This guide will explore the various tools, techniques, and best practices for grinding spices, helping you understand how to maximize their potential in your cooking.
1. Understanding the Spice Grinding Process
Grinding spices is more than just a task of breaking them down into smaller pieces; it’s a process that unlocks their true flavor potential. Spices are packed with essential oils, which are volatile and aromatic. When you grind a spice, you’re releasing these oils, which enhances its aroma and flavor profile.
Why Grinding Spices Matters
Whole spices maintain their integrity much longer than ground spices. For example, a whole black peppercorn will keep its pungency far longer than pre-ground pepper, which starts to lose its aroma soon after grinding. Freshly ground spices not only release more flavor but also bring more vibrant colors and fragrances to your dishes.
Chemical and Physical Changes
Grinding spices causes a physical change by breaking them into smaller particles, which increases the surface area exposed to air. This exposure speeds up the release of essential oils, enhancing the flavor of the spice. Additionally, grinding can cause chemical changes as heat is generated during the process. This heat may slightly alter the spice’s profile, which is why fresh grinding is often preferred to avoid losing its natural flavors.
When to Grind Spices
For the best results, grinding spices just before use is crucial. Pre-ground spices, even when stored properly, lose their potency over time, while freshly ground spices offer the most intense and vibrant flavors. In professional kitchens, this principle applies to spices like cumin, coriander, cardamom, and cinnamon, which release their oils most effectively when ground just before use.
2. Choosing the Right Tools for Grinding Spices
The choice of tool for grinding spices can significantly impact the consistency and quality of your grind. From traditional mortar and pestle to electric grinders, each tool has its advantages and disadvantages depending on the task at hand.
Manual vs. Electric Spice Grinders
- Mortar and Pestle: This age-old tool allows for a more hands-on approach. It gives you full control over the grind size and is perfect for small quantities of spices. While it takes more time and effort, many chefs prefer the tactile experience, as it lets them adjust the grind to suit the dish. For spices like cardamom and cloves, a mortar and pestle offers precision and consistency.
- Blade Grinders: Blade grinders are inexpensive and commonly used in kitchens for quick grinding. However, they are less consistent than other methods, producing unevenly sized particles that can affect the flavor. Blade grinders are best suited for smaller, less delicate tasks where speed is more important than precision.
- Burr Grinders: Burr grinders provide the most consistent grind, as they crush spices between two abrasive surfaces, ensuring uniform particle size. This is ideal for grinding larger quantities of spices or for spices that require a uniform texture. Burr grinders are especially helpful for professionals who need precision, as the consistent grind helps maintain flavor integrity.
Specialized Grinders for Specific Spices
Some spices require specialized tools for optimal results. For example, cinnamon sticks are hard and fibrous, making them difficult to grind without the right equipment. A high-quality electric grinder or a heavy-duty manual grinder is necessary for achieving the fine, smooth consistency required for a cinnamon powder. Similarly, certain spices like cloves or nutmeg benefit from manual grating or grinding to avoid overheating or overprocessing in automatic grinders.
Other Tools
Other tools, such as spice mills or pepper grinders, are commonly used in professional kitchens. These tools offer a consistent and easy method for grinding spices like pepper, which are often used in large quantities. Spice mills can be particularly useful for chefs who require precision during service, offering quick, consistent results.
3. Methods for Grinding Spices
Grinding spices may seem straightforward, but different methods produce distinct textures that can dramatically affect the outcome of a dish. Professional chefs understand that the grind size impacts both the cooking process and the final flavor.
Dry Grinding
Most spices, such as black pepper, coriander, cumin, and turmeric, are best ground dry. Dry grinders or manual tools like the mortar and pestle can achieve a range of textures, from coarse to fine. The key is to select the right grind for the intended dish. For instance, a fine grind of cumin is perfect for a smooth curry, while a coarser grind is better for a marinade.
Wet Grinding
Some dishes, particularly in Indian, Thai, or other Southeast Asian cuisines, require wet grinding. This technique involves adding a small amount of liquid (like water or oil) to the spice mixture, allowing it to become a paste. Wet grinders or stone grinders are ideal for making spice pastes, such as curry or garam masala, as they create a smoother, more cohesive texture. Wet grinding preserves the freshness and potency of spices in these mixtures, and is crucial when grinding fresh ingredients like ginger, garlic, or chilies.
Blending and Mixing Spices
Often, professional chefs need to grind a combination of spices to create complex flavor profiles. When blending spices, it’s important to adjust the grind size to suit the specific mix. Some spices, like cinnamon and cloves, may need a finer grind, while others, like mustard seeds, can be coarsely ground. Ensuring uniformity in the blend is key for consistency in flavor across multiple servings or batches.
Time Considerations
For efficiency, grinding spices in batches is often a practical choice. However, you should avoid grinding too much in advance, as ground spices lose their potency relatively quickly. When grinding in batches, it’s essential to use the freshest spices available and grind only as much as needed.
4. Understanding Spice Textures and Their Impact on Dish Flavor
The texture of ground spices plays a significant role in the final dish. The grind size directly impacts the release and absorption of the spice’s flavor during cooking.
Fine Grinding
A fine grind leads to more intense, immediate flavor release. It’s ideal for smooth sauces, soups, and curries, where the spices need to dissolve completely into the liquid. Fine grinding also works well when making spice blends like garam masala or curry powder, where uniformity in texture is crucial.
Coarse Grinding
Coarse grinding is typically used for rubs, stews, or broths, where a subtler spice presence is desired. Coarser particles release their flavors more gradually, allowing the dish to take on the spice flavor over a longer cooking period.
Crushing Spices vs. Grinding
In some cases, lightly crushing spices (such as peppercorns) instead of grinding them can enhance the texture of a dish. Crushed spices add a burst of flavor and texture without overwhelming the dish with too much spice.
5. Best Practices for Storing Ground Spices
Proper storage is essential for maintaining the flavor and potency of ground spices. Storing them in airtight containers, away from heat, light, and moisture, will significantly prolong their shelf life.
Proper Containers
Spices should be stored in airtight containers to prevent exposure to air, which accelerates flavor degradation. Glass jars with sealed lids or vacuum-sealed bags are ideal. For larger quantities, consider bulk storage options that still offer protection from light and moisture.
Storage Location
Spices should be kept in a cool, dry, and dark place, such as a pantry or spice drawer. Avoid storing them near heat sources like stovetops or windows, as direct sunlight can cause them to lose their flavor more quickly.
Expiration and Freshness
Ground spices typically lose their potency after six months to a year. To maintain their full flavor, buy spices in smaller quantities, and replace them regularly. Regularly checking the freshness of your spices ensures you’re always using the best quality ingredients in your cooking.
Conclusion: Maximizing the Potential of Freshly Ground Spices
Grinding spices is an art that combines precision and technique. Whether you’re using manual tools or electric grinders, each method has its unique advantages in the kitchen. By understanding the science behind grinding, choosing the right tools, and practicing the best grinding methods, professional chefs can maximize the impact of spices in their dishes. Freshly ground spices will always yield the best flavor and aroma, ensuring that your culinary creations stand out and delight your guests.
Food And Drinks
Low Sodium Cheese: A Healthier Choice Without Sacrificing Flavor

Ever wondered if you can enjoy cheese without the guilt of high sodium? Cheese is a beloved staple in many diets, but its high sodium content can be a concern for those watching their blood pressure or heart health. The good news? Low sodium cheese exists—and it doesn’t have to be bland or boring.
In this guide, we’ll explore the best low sodium cheese options, their health benefits, and how to incorporate them into your meals without missing out on flavor.
Why Choose Low Sodium Cheese?
Excess sodium is linked to high blood pressure, heart disease, and stroke. The American Heart Association recommends no more than 2,300 mg of sodium per day, with an ideal limit of 1,500 mg for most adults. Yet, just one ounce of some cheeses can contain 200–400 mg of sodium—adding up quickly in a cheese-heavy diet.
Low sodium cheeses (typically with 140 mg or less per serving) offer a smarter alternative. They allow cheese lovers to indulge while keeping sodium intake in check.
Top Low Sodium Cheese Options
Not all cheeses are created equal when it comes to sodium. Here are some of the best low sodium choices:
1. Swiss Cheese
-
Sodium: ~50 mg per ounce
-
Why It’s Great: Naturally lower in sodium due to its aging process, Swiss cheese has a mild, nutty flavor perfect for sandwiches and melting.
2. Goat Cheese (Fresh)
-
Sodium: ~40–80 mg per ounce
-
Why It’s Great: Soft and tangy, goat cheese is a versatile option for salads, spreads, and even desserts.
3. Mozzarella (Fresh, Low-Sodium Varieties)
-
Sodium: ~85 mg per ounce
-
Why It’s Great: A pizza and pasta favorite, fresh mozzarella is naturally lower in sodium than processed versions.
4. Ricotta Cheese
-
Sodium: ~30–50 mg per ½ cup
-
Why It’s Great: Creamy and mild, ricotta works well in both savory dishes (lasagna) and sweet treats (cheesecake).
5. Emmental Cheese
-
Sodium: ~60 mg per ounce
-
Why It’s Great: Similar to Swiss but with a slightly stronger taste, Emmental is excellent for cheese boards and fondue.
6. Low-Sodium Cottage Cheese
-
Sodium: ~100 mg per ½ cup (varies by brand)
-
Why It’s Great: Packed with protein, cottage cheese makes a great high-protein, low-sodium snack.
7. Homemade Cheese (Paneer, Queso Fresco)
-
Sodium: Varies (can be made salt-free)
-
Why It’s Great: Making cheese at home lets you control the salt content entirely.
How to Find the Best Low SodiumCheese
✔ Read Labels Carefully
-
Look for “low so-dium” or “reduced so-dium” labels.
-
Avoid processed cheeses (American, Velveeta), which are often high in sodium.
✔ Opt for Fresh Over Aged
-
Aged cheeses (Parmesan, blue cheese, feta) tend to have more salt.
-
Fresh cheeses (mozzarella, ricotta, goat cheese) are naturally lower.
✔ Try Unsalted or DIY Versions
-
Some brands offer no-salt-added cheese.
-
Making cheese at home (like paneer or farmer’s cheese) lets you skip added salt.
Delicious Ways to Enjoy Low Sodium Cheese
🍕 On Pizza
-
Use fresh mozzarella instead of processed shredded cheese.
-
Add flavor with herbs (basil, oregano) instead of extra salt.
🥗 In Salads
-
Crumble goat cheese or feta (look for low so-dium versions) over greens.
🥪 In Sandwiches
-
Swap processed cheese for Swiss or Emmental for a melty, low so-dium option.
🧀 On Cheese Boards
-
Pair lowsodium cheeses with nuts, fruits, and whole-grain crackers.
🍝 In Pasta & Casseroles
-
Use ricotta or homemade paneer in lasagna for a creamy, lower-sodium alternative.
Myths About Low SodiumCheese
❌ “LowSodium Cheese Tastes Bland”
-
Truth: Many low sodium cheeses (like Swiss or fresh mozzarella) are naturally flavorful. Herbs and spices can enhance taste without salt.
❌ “All Cheese Is High in Sodium”
-
Truth: Some cheeses are naturally low in sodium—you just need to choose wisely.
❌ “Reduced Sodium Means No Flavor”
-
Truth: Brands like Boar’s Head and Organic Valley offer tasty low sodium options.
Final Thoughts: Can You Have Cheese on a Low-Sodium Diet?
Absolutely! With the right choices, you can enjoy cheese without overloading on so-dium. Stick to fresh, naturally low-sodium varieties, read labels, and experiment with homemade versions.
Whether you’re managing blood pressure or just cutting back on salt, low sodium cheese lets you savor the flavors you love—healthily and deliciously.
Food And Drinks
The Dirty Dozen Organic: 12 Foods to Always Buy Organic

Ever wonder which foods are worth the organic price tag? You’re not alone. With rising grocery costs and confusing labels, knowing where to invest in organic produce can save you money—and protect your health.
Enter the Dirty Dozen—a list of the most pesticide-contaminated fruits and vegetables, updated annually by the Environmental Working Group (EWG). If you’re going to buy organic, start with these 12.
In this guide, we’ll break down:
✔ What the Dirty Dozen is (and why it matters)
✔ The 2024 list of worst offenders
✔ Expert-backed tips to reduce pesticide exposure
✔ Affordable organic shopping hacks
What Is the Dirty Dozen?
The Dirty Dozen is an annual list of conventionally grown fruits and vegetables with the highest pesticide residues, based on USDA and FDA testing. Since organic produce is often more expensive, this list helps consumers prioritize which foods to buy organic for maximum health benefits.
Why Should You Care?
Pesticides have been linked to:
-
Hormone disruption
-
Neurological issues
-
Increased cancer risk
-
Developmental problems in children
A 2020 Harvard study found that people who ate high-pesticide-residue foods had lower fertility rates. Another study linked pesticide exposure to higher ADHD rates in kids.
While washing helps, some pesticides penetrate deep into the flesh—making organic the safer choice for these 12 foods.
The 2024 Dirty Dozen List
Here are the 12 most pesticide-heavy foods you should always buy organic, ranked from highest to lowest contamination:
1. Strawberries
🍓 Why? A single strawberry can contain 20+ different pesticides.
🚫 Risks: Linked to endocrine disruption and cancer.
2. Spinach
🥬 Why? 76% of samples had permethrin (a neurotoxic insecticide).
🚫 Risks: Can affect brain development in children.
3. Kale, Collard & Mustard Greens
🥦 Why? Up to 103 pesticides detected in some samples.
🚫 Risks: Possible carcinogens and hormone disruptors.
4. Grapes
🍇 Why? 96% tested positive for pesticide residues.
🚫 Risks: Linked to liver and kidney toxicity.
5. Peaches
🍑 Why? Thin skin absorbs pesticides easily.
🚫 Risks: Contains fungicides that may harm fertility.
6. Pears
🍐 Why? Over 50% had residues of neurotoxic pesticides.
🚫 Risks: Potential harm to the nervous system.
7. Nectarines
🍑 Why? 94% had detectable pesticide residues.
🚫 Risks: Some contain organophosphates, linked to ADHD.
8. Apples
🍎 Why? An old favorite, but 90% had pesticide residues.
🚫 Risks: Diphenylamine (a post-harvest chemical) is banned in Europe.
9. Bell & Hot Peppers
🌶️ Why? 115 pesticides found—highest diversity of any crop.
🚫 Risks: Some are neurotoxins and possible carcinogens.
10. Cherries
🍒 Why? 42% had bifenthrin, a possible carcinogen.
🚫 Risks: Linked to thyroid dysfunction.
11. Blueberries
🫐 Why? Over 50 different pesticides detected.
🚫 Risks: Some chemicals may affect brain development.
12. Green Beans
🫛 Why? Found to contain acephate, a banned pesticide.
🚫 Risks: Can overstimulate the nervous system.
How to Avoid Pesticides (Even If You Can’t Buy Organic)
Can’t always afford organic? Try these expert-backed tips:
1. Prioritize the Dirty Dozen
If you only buy one thing organic, make it strawberries or spinach—they’re consistently the worst offenders.
2. Use a Baking Soda Wash
A Harvard study found soaking produce in 1 tsp baking soda + water for 15 minutes removes most surface pesticides.
3. Peel When Possible
Removing skins from apples, pears, and cucumbers reduces pesticide exposure (but also some nutrients).
4. Buy Frozen Organic
Frozen organic produce is often cheaper than fresh and just as nutritious.
5. Grow Your Own
Herbs, greens, and strawberries are easy to grow at home, even in small spaces.
6. Check the Clean Fifteen
Not all produce needs to be organic. Avocados, sweet corn, and pineapples have low pesticide levels and are safe to buy conventional.
Final Thoughts: Is Organic Always Better?
While the Dirty Dozen highlights the riskiest produce, organic isn’t always necessary. If budget is tight, focus on the top 5 worst offenders and opt for frozen or locally grown alternatives when possible.
Key Takeaway:
✅ Always buy organic for Dirty Dozen foods (especially leafy greens & berries).
✅ Wash all produce thoroughly—even organic can have traces.
✅ Balance cost & safety by using the Clean Fifteen guide for low-risk foods.
By making strategic organic choices, you can slash pesticide exposure without breaking the bank.
Food And Drinks
Elimination Diet Recipes: The Meals to Identify Food Sensitivities

Have you ever felt bloated, fatigued, or just “off” after eating—but couldn’t pinpoint why? You’re not alone. Millions struggle with hidden food sensitivities that trigger inflammation, digestive issues, and low energy. An elimination diet can help uncover problem foods, but many people dread the idea of restrictive, bland meals.
Good news: Elimination diets don’t have to be boring! With the right recipes, you can enjoy flavorful, nutrient-packed meals while identifying your triggers. In this guide, we’ll share easy, delicious elimination diet recipes backed by nutrition science, plus expert tips to make the process smoother.
What Is an Elimination Diet? (A Quick Refresher)
An elimination diet temporarily removes common inflammatory foods (like gluten, dairy, soy, eggs, and processed sugars) to identify sensitivities. After 3–6 weeks, foods are reintroduced one by one while monitoring symptoms.
Why it works:
✔ Reduces guesswork in identifying food triggers.
✔ Helps manage conditions like IBS, migraines, and eczema.
✔ Resets gut health by removing irritants.
Now, let’s dive into tasty, satisfying recipes that keep you nourished—without the deprivation.
Breakfast: Elimination Diet-Friendly Starts to Your Day
1. Creamy Coconut Chia Pudding (Dairy-free, gluten-free, nut-free)
Ingredients:
-
3 tbsp chia seeds
-
1 cup coconut milk (unsweetened)
-
½ tsp vanilla extract
-
1 tbsp maple syrup (optional)
-
Fresh berries for topping
Instructions:
-
Mix chia seeds, coconut milk, vanilla, and maple syrup in a jar.
-
Refrigerate overnight (or at least 2 hours).
-
Top with berries before serving.
Why it works: Chia seeds are packed with fiber and omega-3s, while coconut milk provides healthy fats to keep you full.
2. Sweet Potato & Turkey Breakfast Hash (Egg-free, gluten-free)
Ingredients:
-
1 cup diced sweet potatoes
-
½ lb ground turkey
-
1 tbsp coconut oil
-
½ tsp turmeric
-
Salt & pepper to taste
Instructions:
-
Sauté sweet potatoes in coconut oil until tender.
-
Add turkey, turmeric, salt, and pepper. Cook until browned.
-
Serve with avocado slices for extra creaminess.
Expert tip: Sweet potatoes are a gut-friendly carb that won’t spike blood sugar.
Lunch: Quick, Nutrient-Dense Meals
3. Quinoa & Roasted Veggie Bowl (Vegan, gluten-free)
Ingredients:
-
1 cup cooked quinoa
-
1 cup roasted zucchini, bell peppers, and carrots
-
½ avocado, sliced
-
1 tbsp olive oil + lemon dressing
Instructions:
-
Toss veggies in olive oil, roast at 400°F for 20 mins.
-
Layer quinoa, veggies, and avocado in a bowl.
-
Drizzle with lemon-olive oil dressing.
Why it’s great: Quinoa is a complete protein, and roasted veggies add fiber and antioxidants.
4. Lemon-Garlic Shrimp & Spinach Salad (Dairy-free, low-FODMAP option)
Ingredients:
-
8 oz shrimp, peeled
-
2 cups baby spinach
-
1 tbsp olive oil
-
1 clove garlic (omit for low-FODMAP)
-
Juice of ½ lemon
Instructions:
-
Sauté shrimp in olive oil and garlic until pink.
-
Toss with spinach and lemon juice.
-
Optional: Add diced cucumber for crunch.
Nutrition perk: Shrimp provides lean protein, while spinach offers iron and magnesium.
Dinner: Satisfying Elimination Diet Meals
5. Herb-Roasted Chicken with Root Vegetables (Gluten-free, dairy-free)
Ingredients:
-
2 chicken breasts
-
1 cup diced carrots, parsnips, and beets
-
1 tbsp rosemary, thyme, and olive oil
-
Salt & pepper to taste
Instructions:
-
Toss veggies and chicken with herbs and oil.
-
Roast at 375°F for 30–35 mins.
-
Serve with a side of steamed greens.
Why it works: This meal is rich in protein and fiber, keeping digestion smooth.
6. Lentil & Kale Soup (Vegan, gluten-free)
Ingredients:
-
1 cup lentils (rinsed)
-
4 cups vegetable broth
-
2 cups chopped kale
-
1 tsp cumin, turmeric
-
1 tbsp coconut oil
Instructions:
-
Sauté garlic (if tolerated) in coconut oil.
-
Add lentils, broth, and spices. Simmer 25 mins.
-
Stir in kale before serving.
Gut health boost: Lentils are prebiotic, feeding good gut bacteria.
Snacks & Desserts (Yes, You Can Have Them!)
7. Crispy Roasted Chickpeas (Nut-free, gluten-free)
Ingredients:
-
1 can chickpeas (drained, dried)
-
1 tbsp olive oil
-
½ tsp paprika, sea salt
Instructions:
-
Toss chickpeas with oil and spices.
-
Roast at 400°F for 20–25 mins until crispy.
Crunchy & satisfying: A great replacement for processed snacks.
8. Banana “Nice Cream” (Dairy-free, no added sugar)
Ingredients:
-
2 frozen bananas
-
1 tbsp almond butter (optional)
-
Splash of coconut milk
Instructions:
-
Blend all ingredients until creamy.
-
Freeze for 10 mins before serving.
Sweet tooth fix: Naturally sweet and creamy—no guilt!
Pro Tips for Elimination Diet Success
✅ Meal prep ahead to avoid temptation.
✅ Keep a food journal to track symptoms.
✅ Stay hydrated—many cravings are actually thirst.
✅ Reintroduce foods slowly (one every 3 days).
Final Thoughts: Elimination Diet Recipes
An Elimination Diet Recipes doesn’t mean eating bland, repetitive meals. With these flavorful, easy recipes, you can enjoy nourishing foods while uncovering your food triggers. The key? Focus on whole, unprocessed ingredients and get creative with spices and herbs.
Ready to reset your gut and feel your best? Try these recipes and listen to your body—it knows best!
-
Articles2 months ago
How Many Times Can You Regrow Green Onions
-
News10 months ago
Understanding HotLeaks: What You Need to Know
-
Fashion7 months ago
Opals in the USA: A Gemstone Transforming the Crystal Healing Market
-
Technology1 year ago
The Wonders of Oh Em Gee Blog
-
Entertainment7 months ago
How to Use Snaptik: A Complete Guide to Download TikTok Videos
-
Entertainment1 year ago
Bare it All: Unforgettable Skinny Dipping Stories Shared
-
Health1 year ago
Can You Smoke Shrooms? Exploring the Myths and Realities
-
Articles5 months ago
WHAT IS THE DIFFERENCE BETWEEN SEED GARLIC AND FOOD GARLIC?