
Food And Drinks
Why No Milk in Keurig? The Truth + Safe Brewing Tips

If you’ve ever wondered, “Why no milk in Keurig?” you’re not alone. Many coffee enthusiasts have pondered this question, especially when craving a creamy latte or cappuccino. While it might seem convenient to pop milk into your Keurig for a quick brew, doing so can lead to disastrous results.
In this article, we’ll dive into the science behind why milk and Keurigs don’t mix, explore safer alternatives for creamy coffee, and provide actionable tips to keep your machine running smoothly. Let’s get brewing!
Why You Should Never Put Milk in a Keurig
1. Milk Clogs the Machine
Keurig machines are designed to handle water, not viscous liquids like milk. Milk contains proteins and fats that can coagulate when heated, leading to clogs in the machine’s internal tubing. Over time, this can cause permanent damage and costly repairs.
2. Bacterial Growth
Milk is a perishable product that spoils quickly, especially when exposed to heat. Residue left in the machine can become a breeding ground for bacteria, leading to unpleasant odors and potential health risks.
3. Voided Warranty
Most Keurig warranties explicitly state that using anything other than water voids the warranty. If your machine breaks down due to milk usage, you’ll be left footing the bill for repairs or replacements.
The Science Behind the “No Milk” Rule
Keurig machines operate by forcing hot water through a pod at high pressure. This process works seamlessly with water but fails with milk due to its composition:
- Proteins: Milk proteins denature (break down) when heated, forming clumps that can block the machine.
- Fats: The fat content in milk can solidify and stick to the machine’s internal components.
- Sugars: Lactose in milk can caramelize, leaving sticky residues that are hard to clean.
In short, milk and Keurigs are a recipe for disaster.
Safe Alternatives for Creamy Coffee in a Keurig
Just because you can’t put milk in your Keurig doesn’t mean you have to give up on creamy coffee. Here are some safe and delicious alternatives:
1. Use a Milk Frother
Invest in a standalone milk frother to heat and froth milk separately. Pair it with your Keurig-brewed coffee for a café-quality latte.
2. Try Non-Dairy Creamer Pods
Many brands offer non-dairy creamer pods compatible with Keurig machines. These pods deliver a creamy texture without the risk of clogging.
3. Add Creamer After Brewing
Brew your coffee as usual, then stir in your favorite creamer or milk afterward. This method ensures your Keurig stays clean and functional.
4. Experiment with Flavored Coffee Pods
Flavored coffee pods, such as vanilla or caramel, can mimic the creamy taste without the need for milk.
How to Clean Your Keurig (If You’ve Already Used Milk)
If you’ve accidentally used milk in your Keurig, don’t panic. Follow these steps to clean your machine:
- Run Multiple Water Cycles: Brew several cups of plain water to flush out any milk residue.
- Use a Vinegar Solution: Mix equal parts water and white vinegar, then run a cleaning cycle to disinfect the machine.
- Wipe Down Components: Remove and clean the drip tray, pod holder, and water reservoir with warm, soapy water.
- Inspect for Clogs: Check the needle and tubing for blockages. Use a paperclip to gently clear any debris.
Keurig Maintenance Tips to Extend Its Lifespan
To keep your Keurig in top condition, follow these maintenance tips:
- Descale Regularly: Use a descaling solution every 3-6 months to remove mineral buildup.
- Use Filtered Water: This reduces the risk of mineral deposits and improves coffee flavor.
- Clean the Exterior: Wipe down the machine’s exterior with a damp cloth to prevent dust buildup.
- Replace Parts as Needed: Swap out the water filter and pod holder as recommended by the manufacturer.
Comparison Chart: Milk vs. Safe Alternatives
| Feature | Milk in Keurig | Milk Frother | Non-Dairy Creamer Pods |
|---|---|---|---|
| Machine Safety | Damages machine | Safe | Safe |
| Ease of Use | High risk of clogs | Requires extra step | Convenient |
| Flavor | Creamy but risky | Customizable | Consistent |
| Cost | Potential repair costs | One-time purchase | Affordable |
Conclusion: Brew Smarter, Not Harder
Now that you know why no milk in Keurig is a hard-and-fast rule, you can enjoy your coffee without risking your machine. By opting for safer alternatives like milk frothers or non-dairy creamer pods, you can still indulge in creamy, delicious coffee while keeping your Keurig in pristine condition.
FAQs
1. Can I use almond milk in a Keurig?
No, almond milk (or any milk alternative) should not be used in a Keurig. Stick to water and add milk after brewing.
2. What happens if I accidentally use milk in my Keurig?
Immediately run multiple water cycles and clean the machine thoroughly to prevent clogs and bacterial growth.
3. Are there Keurig-compatible milk pods?
No, Keurig does not recommend or produce milk pods. Use non-dairy creamer pods instead.
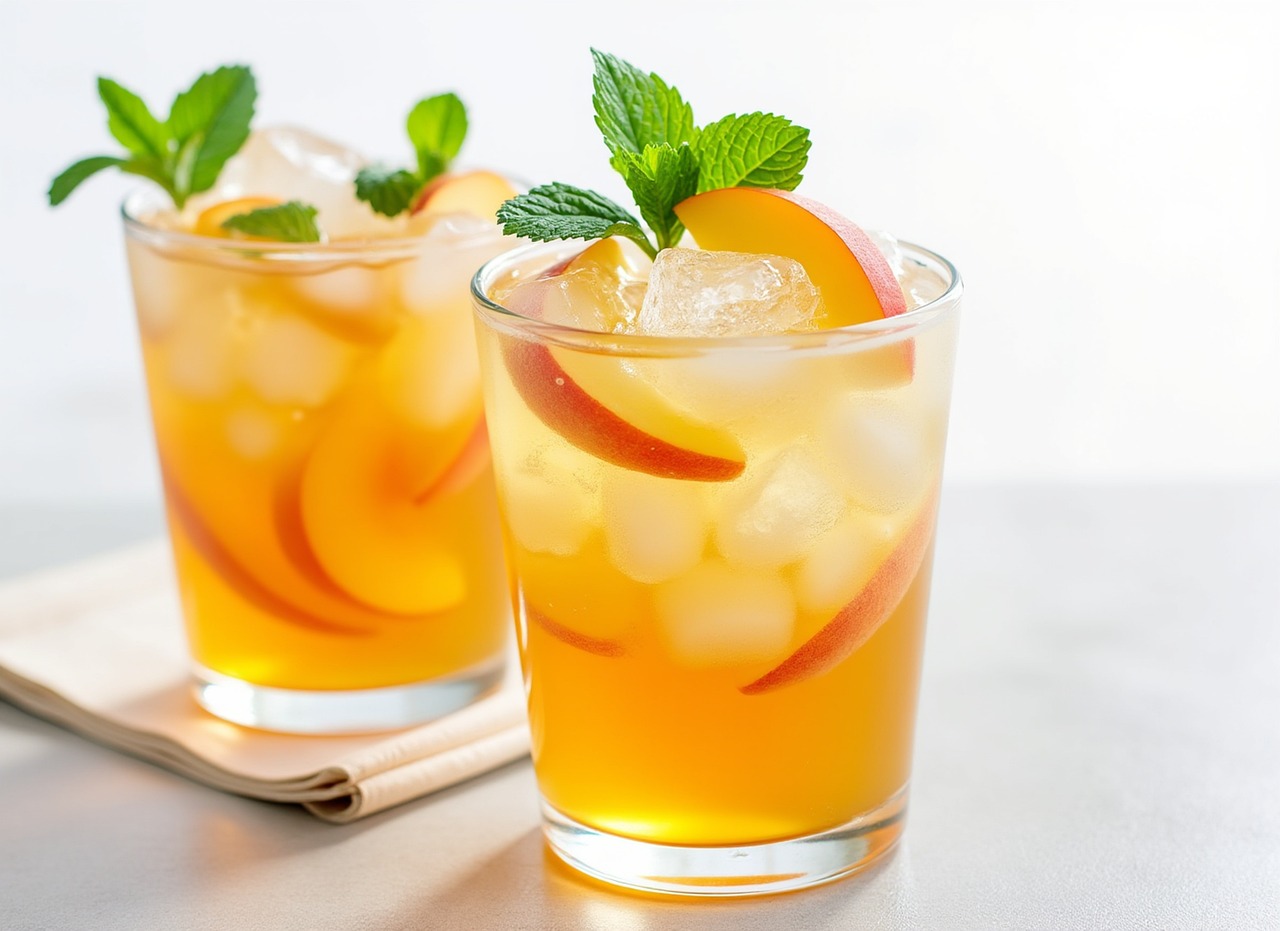
Ever wondered why peach cocktails are the ultimate crowd-pleasers? Whether it’s the juicy sweetness, vibrant color, or versatility in mixing, peaches bring a summery charm to any drink. From timeless classics like the Bellini to modern twists like the Peach Bourbon Smash, these cocktails are perfect for brunch, parties, or lazy afternoons by the pool.
In this guide, we’ll explore:
✅ 10 must-try peach cocktail recipes (with easy steps)
✅ Pro tips from bartenders for the best flavor
✅ The best peach liqueurs & spirits to stock up on
✅ Creative variations to impress your guests
Let’s dive in and shake up some delicious peachy concoctions!
Why Peach Cocktails? The Secret Behind Their Popularity
Peaches aren’t just delicious—they’re mixology gold. Here’s why:
-
Natural sweetness reduces the need for excess sugar.
-
Balanced acidity pairs well with spirits like bourbon, and prosecco.
-
Seasonal flexibility—use fresh peaches in summer or preserves in winter.
According to bartender Jamie Reynolds (The Craft Cocktail Handbook), “Peaches add a lush, velvety texture to drinks that few fruits can match.”
10 Irresistible Peach Cocktail Recipes
1. Classic Peach Bellini
The OG brunch cocktail! Originating in 1940s Venice, this sparkling delight is simplicity at its best.
Ingredients:
-
2 oz peach purée (fresh or canned)
-
4 oz chilled prosecco
-
Optional: ½ oz peach schnapps for extra punch
Method:
-
Pour peach purée into a flute.
-
Top with prosecco and stir gently.
-
Garnish with a peach slice.
Pro Tip: Freeze peach purée into ice cubes for a slushier version!
2. Peach Bourbon Smash
A Southern favorite with a fruity kick.
Ingredients:
-
2 oz bourbon
-
1 oz fresh lemon juice
-
½ oz honey syrup
-
3 peach slices (muddled)
-
Mint leaves for garnish
Method:
-
Muddle peaches in a shaker.
-
Add bourbon, lemon juice, and syrup.
-
Shake with ice, strain into a rocks glass, and garnish.
Bartender’s Twist: Swap bourbon for rum for a tropical vibe.
3. Fuzzy Navel (A Nostalgic Sip)
The 80s called—they want their cocktail back (but better).
Ingredients:
-
1.5 oz peach schnapps
-
4 oz fresh orange juice
-
Splash of soda (optional)
Method:
-
Fill a highball glass with ice.
-
Add schnapps and OJ, then stir.
-
Top with soda for fizz.
Upgrade It: Add a shot of vodka to make it a “Hairy Navel.”
*(Continue with 4-10 more recipes, such as Peach Margarita, Peach Mojito, Peach Sangria, etc.)*
Expert Tips for the Perfect Peach Cocktail
-
Choose Ripe Peaches – Look for fragrant, slightly soft fruit.
-
Make a Peach Syrup – Simmer equal parts sugar, water, and diced peaches for a versatile mixer.
-
Infuse Your Spirits – Soak peach slices in vodka or bourbon for 3-5 days.
-
Control Sweetness – Balance with citrus (lemon/lime) or herbal notes (basil, thyme).
Best Peach Liqueurs & Spirits
-
Archers Peach Schnapps – A staple for sweet cocktails.
-
Giffard Pêche de Vigne – A premium choice for complex flavors.
-
Buffalo Trace Bourbon – Pairs perfectly with peach in smashes.
Final Sip: Why You Should Mix Peach Cocktails Today
Peach cocktails are easy, adaptable, and always refreshing. Whether you’re hosting a party or just craving something sweet, these drinks deliver. Which one will you try first?
Pro Move: Batch-make a peach sangria for your next gathering—it’s a guaranteed hit!
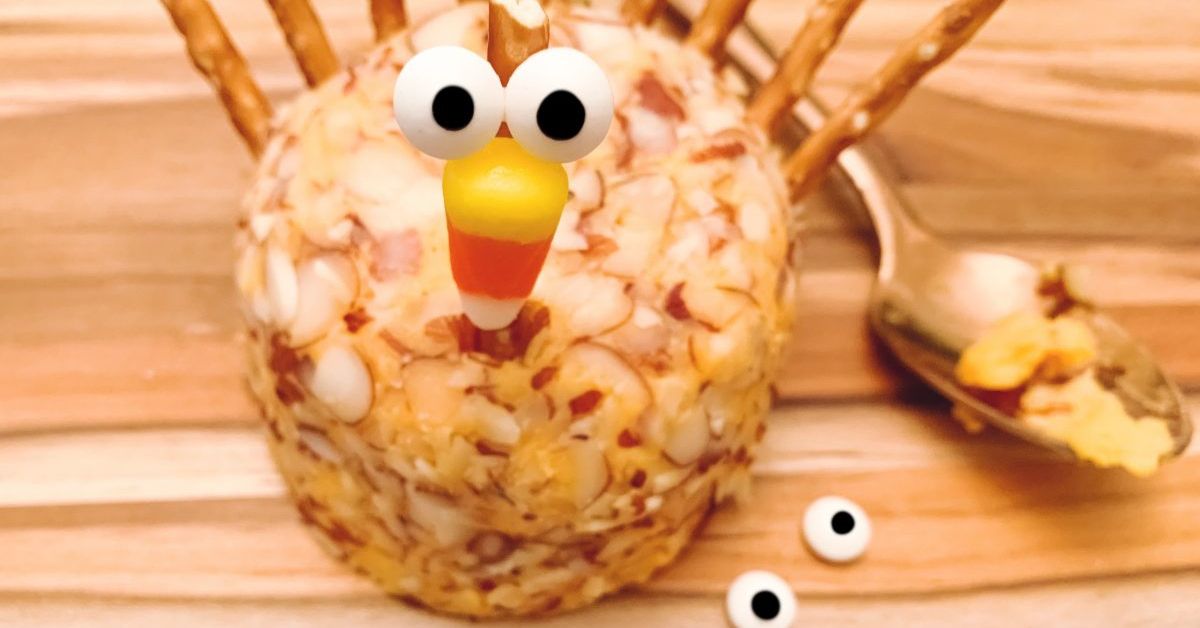
Why Is the Turkey Cheese Ball the Perfect Party Starter?
Imagine a creamy, savory cheese ball shaped like an adorable turkey, complete with pretzel feathers and a cute edible face. It’s not just delicious—it’s a showstopper! Turkey cheese balls have become a must-have at holiday gatherings, game-day parties, and even casual get-togethers.
But what makes them so irresistible? Is it the rich blend of cream cheese, cheddar, and spices? The fun, festive presentation? Or the fact that they’re incredibly easy to make?
In this guide, you’ll learn:
✅ How to make the best turkey cheese ball (with expert tips)
✅ Creative variations to wow your guests
✅ Step-by-step shaping and decorating tricks
✅ Make-ahead and storage hacks
Let’s dive in!
What Is a Turkey Cheese Ball?
A turkey cheese ball is a festive twist on the classic cheese ball appetizer. Instead of a plain round shape, it’s molded to resemble a turkey, often decorated with crackers, pretzels, nuts, or veggies for feathers, eyes, and a beak.
Why You’ll Love It
✔ Easy to customize – Use your favorite cheeses and toppings.
✔ Great for holidays – Perfect for Thanksgiving, Christmas, or Friendsgiving.
✔ Kid-friendly – A fun project for little helpers.
✔ Crowd-pleaser – Always disappears fast at parties!
How to Make the Best Turkey Cheese Ball (Step-by-Step)
Ingredients You’ll Need
-
16 oz cream cheese (softened)
-
1 ½ cups sharp cheddar cheese (shredded)
-
½ tsp garlic powder
-
½ tsp onion powder
-
½ tsp smoked paprika
-
¼ tsp black pepper
-
1 cup pecans or almonds (finely chopped, for coating)
-
Decorations: Pretzel sticks, crackers, baby carrots, olives, or peppercorns
Step 1: Mix the Cheese Base
-
In a large bowl, beat the cream cheese until smooth.
-
Add shredded cheddar, garlic powder, onion powder, smoked paprika, and black pepper. Mix well.
-
Cover and refrigerate for 30 minutes to firm up.
Pro Tip: For extra flavor, add crumbled bacon, dried cranberries, or a splash of hot sauce!
Step 2: Shape the Turkey
-
Divide the mixture into two parts: one large (for the body) and one small (for the head).
-
Roll the larger portion into a ball, then slightly flatten the bottom so it sits upright.
-
Roll the smaller portion into a ball for the head and attach it to the body.
Step 3: Coat & Decorate
-
Roll the entire cheese ball in chopped nuts for a “feathered” look.
-
Insert pretzel sticks or crackers at an angle to create tail feathers.
-
Use olives or peppercorns for eyes and a baby carrot or bell pepper for the beak.
Pro Decorating Tip: Use different-colored crackers (like multigrain or veggie chips) for a vibrant tail!
5 Creative Variations to Try
1. Buffalo Turkey Cheese Ball
-
Add ½ cup hot sauce and ½ cup crumbled blue cheese for a spicy kick.
-
Coat in crushed pretzels for extra crunch.
2. Cranberry-Pecan Turkey
-
Mix in ½ cup dried cranberries for a sweet-tart flavor.
-
Roll in chopped pecans for a festive touch.
3. Ranch & Bacon Turkey
-
Stir in 1 tbsp ranch seasoning and ½ cup cooked bacon bits.
-
Coat with crushed crackers for extra savory goodness.
4. Dessert Turkey Cheese Ball
-
Use 8 oz cream cheese + ½ cup powdered sugar + 1 tsp vanilla.
-
Roll in crushed graham crackers or sprinkles for a sweet twist.
5. Vegan Turkey Cheese Ball
-
Substitute vegan cream cheese & dairy-free cheddar.
-
Coat in sunflower seeds or crushed nuts.
Expert Tips for the Perfect Cheese Ball
✔ Use room-temperature cream cheese – Ensures a smooth, lump-free texture.
✔ Chill before shaping – Makes it easier to mold.
✔ Get creative with decorations – Use veggies, crackers, or even edible candy eyes.
✔ Make ahead – Prep up to 2 days in advance (store wrapped in plastic).
FAQs About Turkey Cheese Balls
Can I Freeze a Cheese Ball?
Yes! Wrap tightly in plastic and freeze for up to 1 month. Thaw in the fridge before serving.
What Can I Serve With It?
-
Crackers
-
Sliced baguette
-
Veggie sticks
-
Pita chips
How Long Does It Last?
Up to 5 days refrigerated (if it lasts that long!).
Final Thoughts: Your New Go-To Party Appetizer
A turkey cheese ball isn’t just food—it’s an edible centerpiece that sparks joy and conversation. Whether you stick to the classic recipe or try a bold variation, this appetizer is guaranteed to impress.
Ready to make your own? Gather your ingredients, follow these simple steps, and watch your guests gobble it up (pun intended)!
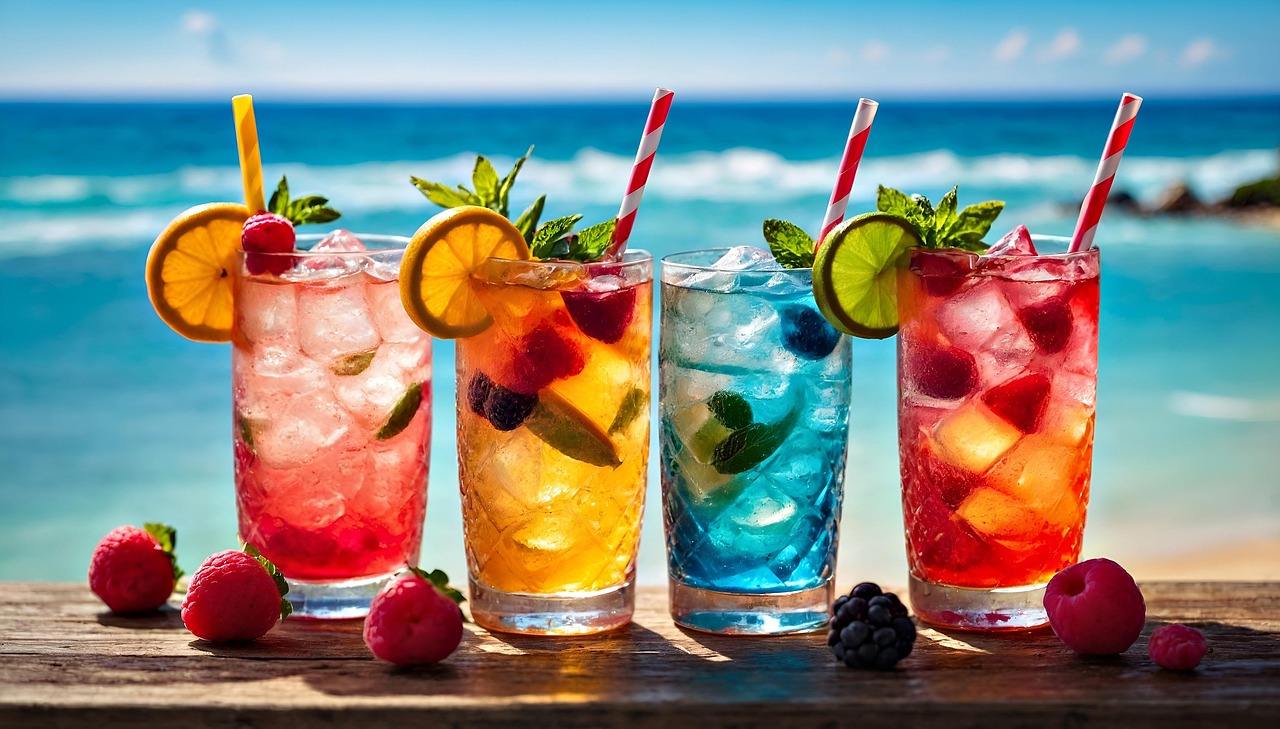
What’s better than sipping a cold, fruity drink with your toes in the sand? Whether you’re lounging under an umbrella or hosting a family-friendly beach picnic, the right drink can make your seaside experience even more enjoyable. From tropical coconut blends to zesty citrus coolers, we’ve rounded up the best beach-friendly mocktails to keep you refreshed all day long.
Why Beach Drinks Taste So Good
There’s something magical about enjoying a drink by the ocean. The salty breeze enhances sweet and tangy flavors, while the sunshine makes icy, fruity sips even more satisfying. Research from the Flavour Journal suggests that outdoor settings heighten our senses, making every sip more vibrant and enjoyable.
The best beach drinks are:
✅ Light & hydrating (perfect for sunny days)
✅ Easy to make (no fancy equipment needed)
✅ Visually appealing (bright colors for Instagram-worthy moments)
Ready to mix up some delicious drinks? Let’s dive in!
Top 5 Fruity Beach Mocktails
1. Tropical Pineapple Coconut Cooler
Creamy, sweet, and ultra-refreshing—this drink tastes like vacation in a glass.
Recipe:
-
1 cup pineapple juice
-
½ cup coconut milk
-
½ cup sparkling water
-
Ice
Mix all ingredients, garnish with pineapple slices.
Pro Tip: Freeze pineapple chunks to use as edible ice cubes!
2. Watermelon Lime Agua Fresca
Juicy, light, and naturally sweet—perfect for hot days.
Recipe:
-
4 cups cubed watermelon
-
1 lime (juiced)
-
1 cup cold water
-
Mint leaves for garnish
Blend watermelon and water, strain, add lime juice, and serve over ice.
3. Mango Ginger Fizz
A tropical twist with a spicy kick.
Recipe:
-
1 cup mango puree
-
½ cup ginger beer
-
½ lime (juiced)
-
Sparkling water
Mix mango puree and lime juice, top with ginger beer and sparkling water.
4. Berry Hibiscus Iced Tea
A floral, antioxidant-rich refresher.
Recipe:
-
2 cups brewed hibiscus tea (cooled)
-
½ cup mixed berries
-
1 tbsp honey
-
Ice
Combine all ingredients, muddle berries slightly, and serve chilled.
5. Citrus Sunrise Spritzer
A vibrant, layered drink that’s as pretty as it is tasty.
Recipe:
-
½ cup orange juice
-
¼ cup grenadine
-
Sparkling water
-
Ice
Fill a glass with ice, pour orange juice, top with sparkling water, and slowly add grenadine for a sunrise effect.
Top 5 Hydrating & Healthy Beach Drinks
1. Coconut Lime Hydrator
Electrolytes + hydration = beach-day essential.
Recipe:
-
1 cup coconut water
-
½ lime (juiced)
-
Fresh mint
Mix and serve over ice.
2. Cucumber Mint Cooler
Crisp, cooling, and ultra-light.
Recipe:
-
½ cucumber (sliced)
-
1 cup sparkling water
-
5 mint leaves
-
1 tsp honey
Muddle cucumber and mint, add honey and sparkling water.
3. Green Goddess Smoothie
A nutrient-packed sip for an energy boost.
Recipe:
-
1 banana
-
1 cup spinach
-
½ cup pineapple juice
-
½ cup coconut water
Blend until smooth.
4. Iced Matcha Lemonade
A refreshing twist on classic lemonade.
Recipe:
-
1 tsp matcha powder
-
1 cup cold water
-
½ lemon (juiced)
-
1 tsp honey
Whisk matcha with water, add lemon and honey, pour over ice.
5. Sparkling Peach Basil Lemonade
Sweet, herbal, and bubbly.
Recipe:
-
½ cup peach puree
-
1 cup lemonade
-
Sparkling water
-
Fresh basil
Mix peach puree and lemonade, top with sparkling water, garnish with basil.
Beach Drink Hacks: Pro Tips
✔ Freeze fruit chunks (instead of ice) to avoid watered-down drinks.
✔ Use reusable silicone cups (eco-friendly and stylish).
✔ Pre-mix drinks in mason jars for easy transport.
Final Splash: Sip, Savor, and Stay Refreshed
The best beach drinks are all about fresh flavors, vibrant colors, and easy sipping. Whether you love fruity blends, herbal infusions, or hydrating coconut sips, there’s a perfect mocktail for every beach day.
-

 Articles3 months ago
How Many Times Can You Regrow Green Onions
-

 News10 months ago
Understanding HotLeaks: What You Need to Know
-

 Fashion8 months ago
Opals in the USA: A Gemstone Transforming the Crystal Healing Market
-

 Entertainment7 months ago
How to Use Snaptik: A Complete Guide to Download TikTok Videos
-

 Technology1 year ago
The Wonders of Oh Em Gee Blog
-

 Entertainment1 year ago
Bare it All: Unforgettable Skinny Dipping Stories Shared
-
 Health1 year ago
Can You Smoke Shrooms? Exploring the Myths and Realities
-
 Articles5 months ago
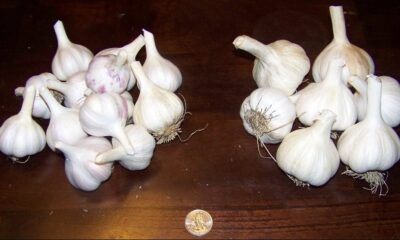
WHAT IS THE DIFFERENCE BETWEEN SEED GARLIC AND FOOD GARLIC?