
Food And Drinks
Step-by-Step Guide to Making Authentic Greek Spinach Pie
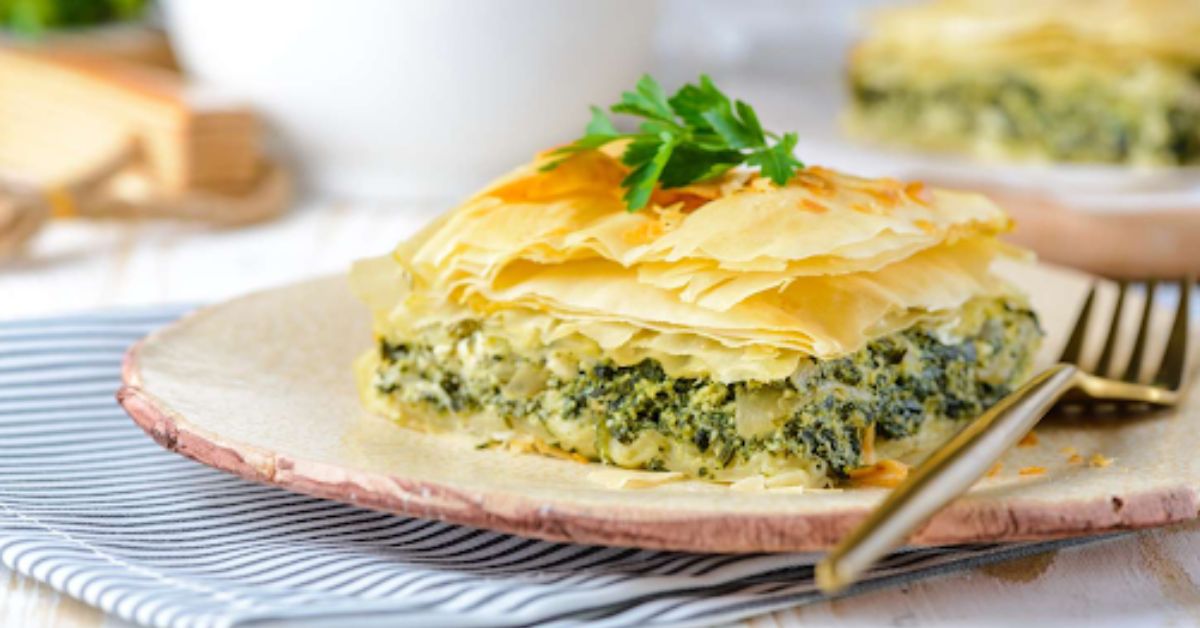
Greek spinach pie, also known as spanakopita, is a classic dish that combines flaky phyllo pastry with a savory filling of spinach, herbs, and feta cheese. With its crispy layers and rich flavors, this dish is ideal for any meal, whether as a light lunch, appetizer, or side dish. This guide will walk you through each step of creating an authentic Greek spinach pie that’s sure to impress!
Ingredients for Greek Spinach Pie
To make an authentic Greek spinach pie, gather the following ingredients:
For the Filling:
- 1 lb fresh spinach (washed and chopped, or use frozen spinach, thawed and drained)
- 1 cup crumbled feta cheese
- 1/2 cup ricotta cheese (optional for added creaminess)
- 2-3 green onions (finely chopped)
- 1/4 cup fresh parsley (chopped)
- 1/4 cup fresh dill (chopped)
- 2-3 large eggs (beaten)
- Salt and pepper to taste
- 1/4 cup olive oil
For the Phyllo Pastry:
- 1 pack phyllo dough (thawed if frozen)
- 1/2 cup olive oil or melted butter (for brushing between phyllo layers)
Step 1: Prepare the Spinach Filling
In a large mixing bowl, combine the spinach, green onions, parsley, and dill. If using fresh spinach, wilt it down in a pan for a few minutes before combining. Add the crumbled feta cheese, ricotta cheese, and beaten eggs to the mixture. Stir well to incorporate the ingredients.
Season with salt and pepper, keeping in mind that feta is already salty, so add sparingly. The olive oil can be mixed into the filling to help keep it moist and flavorful.
Step 2: Prepare the Phyllo Dough
Phyllo dough can be delicate, so it’s best to work carefully. Place a clean, damp kitchen towel over the phyllo sheets while working to prevent them from drying out. Lightly brush a baking dish with olive oil or melted butter.
Step 3: Assemble the Spinach Pie
Layer the Phyllo Dough
- Place a sheet of phyllo dough at the bottom of the baking dish, gently pressing it into place. Brush the phyllo with olive oil or butter.
- Add another sheet, brush with oil, and continue this process until you have layered about 6-8 sheets, ensuring each one is coated.
Add the Spinach Filling
Spread the prepared spinach and cheese filling evenly over the layered phyllo. Ensure the filling is well-distributed so each slice of pie has a generous amount.
Top with More Phyllo
Place another sheet of phyllo on top of the filling, brush with oil, and continue layering and brushing each sheet until you’ve used about 6-8 more sheets on top. This will create a golden, crispy crust for the pie.
Step 4: Bake the Spinach Pie
Preheat your oven to 350°F (175°C). Use a sharp knife to score the top of the pie into squares or triangles. This will make it easier to cut once baked and prevents the top from cracking.
Place the pie in the oven and bake for 45-50 minutes, or until the top is golden brown and the filling is set. Keep an eye on the pie to avoid over-baking.
Step 5: Serve Your Greek Spinach Pie
Allow the spinach pie to cool for about 10 minutes before serving. This makes it easier to cut and helps the flavors meld together. Serve warm as an appetizer, main dish, or side. Greek spinach pie pairs beautifully with a fresh Greek salad, olives, or even a dollop of Greek yogurt.
Final Tips for Making Greek Spinach Pie
- Use quality phyllo dough for a flakier result.
- Experiment with herbs like mint for added depth.
- Make it ahead as spanakopita reheats well and tastes even better the next day.
With these steps, you’ll have a delicious, authentic Greek spinach pie that’s both impressive and packed with flavor.
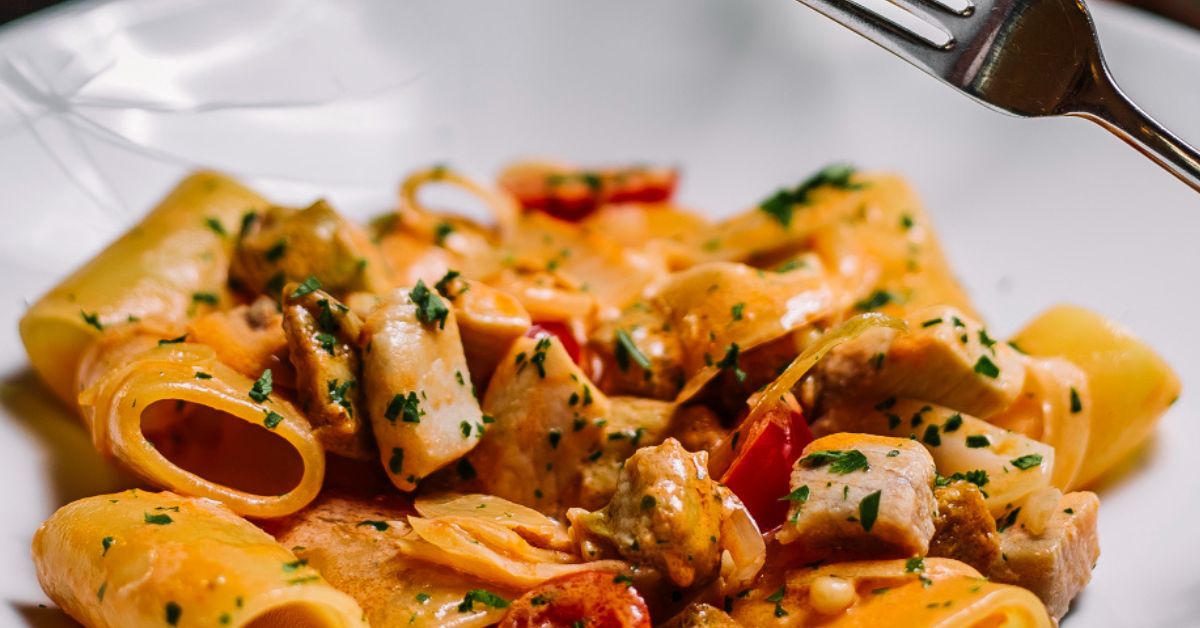
Craving a restaurant-quality pasta dish at home? Learn how to make creamy steak fettuccine—a rich, indulgent meal that’s easier than you think!
Few dishes deliver the luxurious satisfaction of creamy steak fettuccine. Tender slices of steak, silky pasta, and a velvety sauce come together in a dish that feels gourmet yet is simple enough for a weeknight dinner.
But how do you achieve that perfect balance of flavor and texture? What’s the best cut of steak? And how can you prevent your sauce from breaking?
In this guide, we’ll break down everything you need to know—from expert cooking tips to step-by-step instructions—so you can make the best creamy steak fettuccine every time.
Why Creamy Steak Fettuccine is a Must-Try
Before diving into the recipe, let’s talk about why this dish is worth mastering:
✅ Restaurant-Worthy at Home – Skip the overpriced Italian eatery and enjoy a high-end meal in your kitchen.
✅ Customizable – Swap ingredients based on preference (try mushrooms, spinach, or sun-dried tomatoes).
✅ Impressive Yet Simple – With a few key techniques, you’ll wow guests or just treat yourself.
The Best Steak for Fettuccine
Not all steaks are created equal when it comes to pasta. You want a cut that’s:
✔ Tender – No one likes chewy meat in pasta.
✔ Flavorful – Well-marbled steaks add richness.
✔ Quick-Cooking – Thin cuts work best for fast searing.
Top Choices:
-
Ribeye – Juicy, marbled, and full of flavor.
-
Sirloin – Leaner but still tender.
-
Filet Mignon – Ultra-soft but pricier.
-
Flank or Skirt Steak – Budget-friendly; slice thinly against the grain.
Pro Tip: Let the steak rest at room temperature for 20-30 minutes before cooking for even doneness.
How to Cook the Perfect Steak for Pasta
A perfectly seared steak makes all the difference. Follow these steps:
-
Season Generously – Salt and pepper are musts; add garlic powder or smoked paprika for extra depth.
-
Sear on High Heat – Use a cast-iron skillet or stainless-steel pan for a golden crust.
-
Rest Before Slicing – Let the steak sit for 5-10 minutes to retain juices.
-
Slice Against the Grain – This ensures tenderness in every bite.
Common Mistake: Overcooking the steak—medium-rare to medium is ideal for pasta dishes.
Crafting the Perfect Creamy Sauce
The sauce is where magic happens. A great creamy fettuccine sauce should be:
-
Rich but not heavy
-
Smooth (no curdling!)
-
Packed with umami flavor
Key Ingredients:
-
Heavy cream (for thickness)
-
Parmesan cheese (freshly grated melts better)
-
Garlic & shallots (for depth)
-
Butter & olive oil (for richness)
-
Pasta water (helps emulsify the sauce)
How to Prevent a Broken Sauce:
-
Avoid boiling the cream—simmer gently.
-
Toss pasta in the sauce immediately after draining.
-
Add starchy pasta water to help bind everything.
Step-by-Step Creamy Steak Fettuccine Recipe
Ingredients:
-
8 oz fettuccine pasta
-
1 lb ribeye or sirloin steak
-
1 cup heavy cream
-
½ cup grated Parmesan
-
3 cloves garlic (minced)
-
2 tbsp butter
-
1 tbsp olive oil
-
Salt & pepper to taste
-
Fresh parsley (for garnish)
Instructions:
-
Cook the Pasta – Boil fettuccine in salted water until al dente. Reserve ½ cup pasta water.
-
Sear the Steak – Heat oil in a skillet over high heat. Cook steak 3-4 minutes per side for medium-rare. Rest, then slice thinly.
-
Make the Sauce – In the same pan, melt butter, sauté garlic, then add cream and Parmesan. Simmer until thickened.
-
Combine Everything – Toss pasta in the sauce, adding pasta water as needed. Fold in steak slices.
-
Garnish & Serve – Top with parsley, extra Parmesan, and cracked black pepper.
Elevate Your Dish: Pro Tips & Variations
Want to take it up a notch? Try these tweaks:
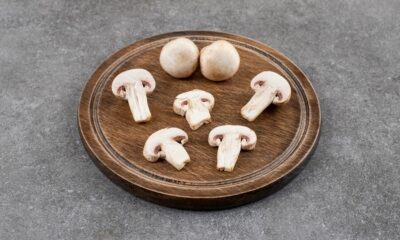
🔥 Add Mushrooms – Sautéed creminis add earthy flavor.
🌶 Kick of Heat – Red pepper flakes or a dash of hot sauce.
🍷 Deglaze with Wine – White wine adds acidity and depth.
🧀 Extra Cheesy – Stir in a spoonful of mascarpone for ultra-creaminess.
What to Serve with Creamy Steak Fettuccine
Round out your meal with:
-
Garlic bread (for soaking up sauce)
-
Crisp salad (balances the richness)
-
Roasted asparagus (adds a fresh crunch)
Final Thoughts: A Dish Worth Mastering
Creamy steak fettuccine is more than just pasta—it’s a restaurant-quality experience you can easily recreate at home. With the right steak, a foolproof sauce, and a few chef-approved tricks, you’ll have a dish that’s both impressive and comforting.
So, next time you’re craving something indulgent, skip the takeout and whip up this decadent, creamy steak fettuccine instead. Your taste buds (and anyone lucky enough to join you) will thank you!
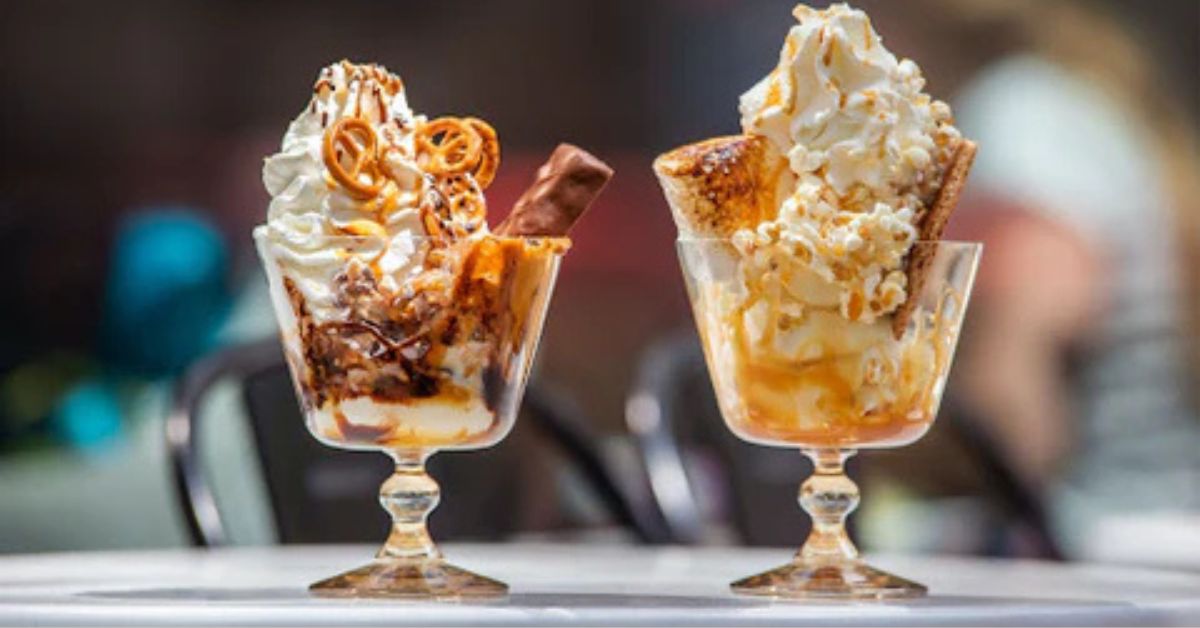
Ever wondered how your favorite ice cream shops get that perfect swirl of creamy, dreamy soft serve? Unlike traditional hard ice cream, soft serve is all about smooth texture, light consistency, and that irresistible melt-in-your-mouth quality. The good news? You don’t need a fancy machine or professional training to make it at home.
In this guide, we’ll break down the science, ingredients, and techniques to help you craft restaurant-quality soft serve ice cream in your own kitchen. Whether you’re prepping for a summer party or just satisfying a late-night craving, these expert-backed tips will ensure success.
What Makes Soft Serve Different?
Soft serve isn’t just under-churned ice cream—it’s a science. The key differences include:
-
Higher air content (overrun): Soft serve contains 30–60% air, making it lighter.
-
Lower butterfat (3–6%): Less fat than regular ice cream (10–18%) keeps it soft.
-
Served at a warmer temperature (-4°C to 0°C): Prevents it from freezing solid.
-
Emulsifiers & stabilizers: Ingredients like guar gum prevent ice crystals.
Now, let’s dive into how to make it at home—with or without a machine.
Ingredients You’ll Need
For authentic soft serve, stick to this base recipe (scalable for larger batches):
Classic Vanilla Soft Serve (Makes ~4 servings)
-
2 cups heavy cream (or half-and-half for a lighter version)
-
1 cup whole milk
-
¾ cup granulated sugar
-
1 tbsp corn syrup or honey (for smoothness)
-
1 tbsp vanilla extract
-
¼ tsp xanthan gum or guar gum (optional, improves texture)
-
Pinch of salt
Pro Tip: For chocolate soft serve, add ¼ cup cocoa powder. For fruit-flavored, blend in ½ cup pureed strawberries or mango.
Equipment Options
You don’t need a commercial soft serve machine, but here are your options:
-
Stand Mixer or Hand Mixer (with a chilled bowl)
-
Ice Cream Maker (with a freezing canister)
-
Blender or Food Processor (for a quick fix)
-
Commercial Soft Serve Machine (if you’re serious about consistency)
Step-by-Step Instructions
Step 1: Mix the Base
-
Whisk milk, sugar, corn syrup, and salt until dissolved.
-
Add heavy cream, vanilla, and xanthan gum (if using). Blend well.
-
Chill the mixture for at least 4 hours (overnight is best).
Why chilling matters: Cold base = smaller ice crystals = smoother texture.
Step 2: Churn It Right
-
With an ice cream maker:
-
Pour the mix into the machine and churn 15–20 mins until thick.
-
Serve immediately for the softest texture.
-
-
Without a machine:
-
Freeze the mix in a shallow container, stirring every 30 mins for 3–4 hours.
-
Once slushy, blend in a food processor before serving.
-
Step 3: Serve Like a Pro
-
Use a piping bag with a star tip for that classic swirl.
-
For McDonald’s-style cones, dip the cone in chocolate shell first.
-
Top with sprinkles, caramel, or fresh fruit for extra flair.
Troubleshooting Common Issues
| Problem | Solution |
|---|---|
| Too icy | Add more fat (cream) or a stabilizer (xanthan gum). |
| Not creamy enough | Churn longer or increase sugar/corn syrup. |
| Melts too fast | Serve colder (-6°C) or reduce sugar slightly. |
| Too hard | Let it sit at room temp for 2–3 mins before serving. |
Pro Tips from Ice Cream Experts
✔ Use ultra-pasteurized dairy for a smoother melt.
✔ Pre-chill your machine’s bowl for faster freezing.
✔ Experiment with mix-ins (cookie crumbs, Nutella swirls).
✔ For vegan soft serve, swap dairy for coconut milk + banana.
Final Scoop: Why Homemade Soft Serve Wins
Store-bought soft serve can’t beat the freshness and customization of homemade. With this guide, you’ve got everything needed to whip up silky, dreamy soft serve anytime.
Ready to impress your friends with your own ice cream stand? Grab your ingredients, fire up that machine, and start swirling!

Halloween is all about creepy costumes, eerie decorations, and—most importantly—spooktacular drinks! But who has time for complicated recipes when you’re busy perfecting your zombie makeup or untangling fake cobwebs?
Whether you’re hosting a haunted bash or just want a fun treat for the kids, we’ve got easy Halloween drinks that are quick, delicious, and Instagram-worthy. From blood-red punches to ghoulish smoothies, these recipes require minimal effort for maximum fright-night delight.
Why These Halloween Drinks Are a Must-Try
Before we dive into the recipes, here’s why these drinks will be the life (or death?) of your party:
✅ Super simple – No fancy ingredients or skills needed.
✅ Budget-friendly – Most ingredients are pantry staples.
✅ Kid-approved – Fun, festive, and safe for little monsters.
✅ Visually spooky – Perfect for that eerie Halloween vibe.
Now, let’s brew up some magic!
1. Witches’ Brew Punch
Perfect for: A cauldron-worthy centerpiece.
Ingredients:
-
2 cups green apple juice
-
1 cup lemon-lime soda
-
1 cup pineapple juice
-
Gummy worms & dry ice (optional, for extra creep factor)
How to Make It:
-
Mix all liquids in a punch bowl.
-
Add gummy worms for a “wiggly” effect.
-
For a smoky look, add a small piece of food-safe dry ice (handle with gloves!).
Pro Tip: Freeze berries in ice cubes for “eyeball” surprises!
2. Poison Apple Cider
Perfect for: A cozy yet creepy sip.
Ingredients:
-
2 cups apple cider
-
1 tsp caramel syrup
-
Whipped cream & green food coloring (for the “poison” effect)
How to Make It:
-
Warm cider and stir in caramel.
-
Top with green-tinted whipped cream.
3. Eyeball Punch
Perfect for: Grossing out your guests (in a fun way).
Ingredients:
-
2 cups white grape juice
-
1 cup lemon soda
-
Lychees stuffed with blueberries (as “eyeballs”)
How to Make It:
-
Mix juice and soda in a bowl.
-
Add lychee “eyeballs” for a floating surprise.
4. Candy Corn Milkshake
Perfect for: A sweet, colorful treat.
Ingredients:
-
Vanilla ice cream
-
Orange soda
-
Whipped cream & candy corn
How to Make It:
-
Blend ice cream and soda until smooth.
-
Top with whipped cream and candy corn.
5. Ghostly White Hot Chocolate
Perfect for: A cozy, spooky sip.
Ingredients:
-
White chocolate chips
-
Milk
-
Marshmallow ghosts (draw faces with edible marker)
How to Make It:
-
Melt chocolate into warm milk.
-
Top with marshmallow ghosts.
6. Bloody Shirley Temple
Perfect for: A playful, gory look.
Ingredients:
-
Lemon-lime soda
-
Grenadine
How to Make It:
-
Fill a glass with soda.
-
Slowly pour grenadine to create a “blood” effect.
7. Spiderweb Hot Chocolate
Perfect for: A creepy-cute twist on a classic.
Ingredients:
-
Hot chocolate
-
Chocolate syrup
-
Marshmallow fluff
How to Make It:
-
Make hot cocoa as usual.
-
Drizzle chocolate syrup in a web pattern.
-
Add a dollop of marshmallow fluff for spiders.
Final Tricks for the Best Halloween Drinks
-
Presentation matters: Use skull cups, test tubes, or mason jars for extra spookiness.
-
Prep ahead: Batch drinks in pitchers for easy serving.
-
Label creatively: Call drinks “Witch’s Potion” or “Monster Mash Smoothie” for fun.
Conclusion
No Halloween party is complete without creepy, delicious drinks. These easy Halloween drinks are perfect for kids, families, and anyone who loves a festive (but fuss-free) celebration.
Now, tell us—which one will you try first? Drop your favorite in the comments, and don’t forget to share your spooky creations with us!
-

 Articles3 months ago
How Many Times Can You Regrow Green Onions
-

 News10 months ago
Understanding HotLeaks: What You Need to Know
-

 Fashion8 months ago
Opals in the USA: A Gemstone Transforming the Crystal Healing Market
-

 Entertainment7 months ago
How to Use Snaptik: A Complete Guide to Download TikTok Videos
-

 Technology1 year ago
The Wonders of Oh Em Gee Blog
-

 Entertainment1 year ago
Bare it All: Unforgettable Skinny Dipping Stories Shared
-
 Health1 year ago
Can You Smoke Shrooms? Exploring the Myths and Realities
-
 Articles5 months ago
WHAT IS THE DIFFERENCE BETWEEN SEED GARLIC AND FOOD GARLIC?