
Food And Drinks
Kua Gai Noodles: A Delectable Thai Street Food Delightlong drives
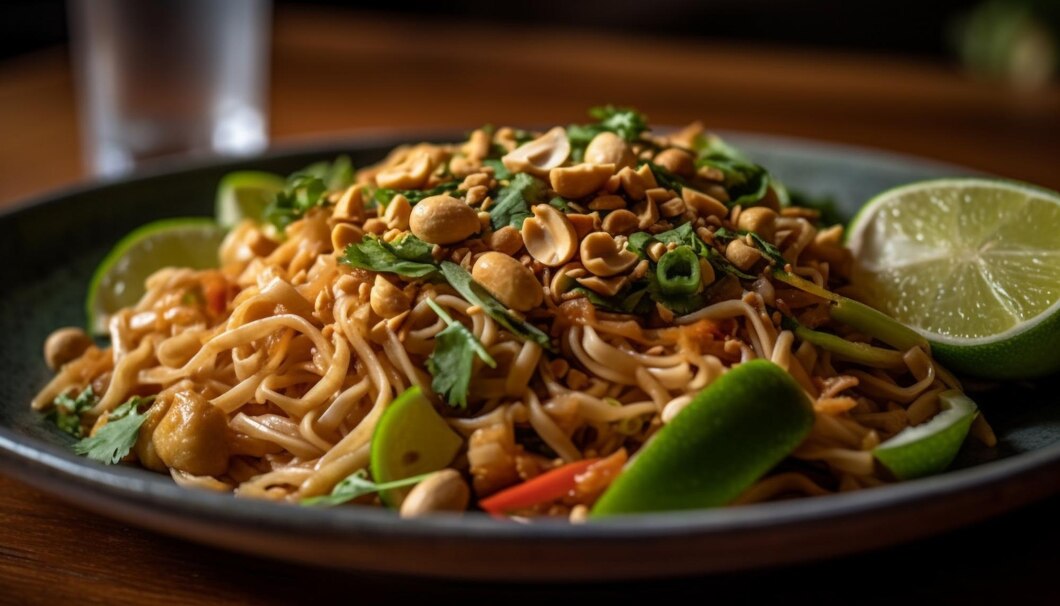
Kua Gai Noodles, also known as “Kuay Teow Kua Gai,” is a popular Thai street food dish that has captured the hearts and taste buds of food enthusiasts worldwide. This savory and aromatic dish combines stir-fried rice noodles with tender chicken, vegetables, and a distinctive blend of seasonings, creating a delightful symphony of flavors and textures. Let’s explore the origins, ingredients, preparation, and why Kua Gai Noodles are a must-try for anyone who loves Thai cuisine.
Origins of Kua Gai Noodles
The roots of Kua Gai Noodles can be traced back to the vibrant street food culture of Thailand. While the exact origin of the dish is unclear, it is believed to have emerged from the bustling markets and food stalls of Bangkok, where vendors would cook up quick and flavorful meals for busy locals and tourists. The dish has since become a staple in Thai cuisine, enjoyed both at home and in restaurants.
Ingredients
The magic of Kua Gai Noodles lies in its simplicity and the harmonious blend of ingredients. Here’s what you typically need to make this delicious dish:
- Rice Noodles: Wide rice noodles are preferred for their chewy texture and ability to absorb flavors.
- Chicken: Sliced or diced chicken breast or thigh, marinated to enhance flavor.
- Vegetables: Common choices include Chinese broccoli, bean sprouts, and green onions.
- Eggs: Scrambled into the noodles to add richness.
- Garlic: Finely chopped for a fragrant base.
- Oyster Sauce: Adds depth and umami.
- Soy Sauce: Provides saltiness and color.
- Fish Sauce: Adds a unique savory note.
- White Pepper: For a hint of spice.
- Cooking Oil: Typically vegetable oil, for stir-frying.
Optional ingredients can include mushrooms, tofu, or shrimp, depending on personal preference.
Preparation
Making Kua Gai Noodles is straightforward, making it an excellent choice for a quick and satisfying meal. Here’s a step-by-step guide to preparing this delightful dish:
- Prepare the Ingredients:
- Soak the rice noodles in warm water until they are soft, then drain and set aside.
- Marinate the chicken with a bit of soy sauce and white pepper.
- Chop the vegetables and garlic.
- Cook the Chicken:
- Heat a wok or large skillet over medium-high heat and add a splash of oil.
- Add the garlic and sauté until fragrant.
- Add the marinated chicken and stir-fry until it is cooked through.
- Add the Noodles and Vegetables:
- Push the chicken to one side of the wok and add a little more oil if needed.
- Add the rice noodles and stir-fry for a couple of minutes.
- Mix in the vegetables and continue to stir-fry until they are just tender.
- Incorporate the Eggs:
- Push the noodles and chicken to the side and crack the eggs into the wok.
- Scramble the eggs until they are mostly cooked, then mix them into the noodle mixture.
- Season and Serve:
- Add oyster sauce, soy sauce, and fish sauce to taste, and mix well to coat the noodles evenly.
- Stir-fry everything together for another minute to ensure the flavors are well combined.
- Serve hot, garnished with fresh green onions or cilantro if desired.
Why Kua Gai Noodles Are a Must-Try
- Flavor Explosion: The combination of savory sauces, tender chicken, and fresh vegetables creates a mouthwatering flavor profile that is both comforting and exciting.
- Texture Variety: The chewiness of the rice noodles, the tenderness of the chicken, and the crunchiness of the vegetables provide a delightful mix of textures in every bite.
- Versatility: Kua Gai Noodles can be customized with various proteins and vegetables, making it adaptable to different tastes and dietary preferences.
- Quick and Easy: The dish is relatively simple to prepare, making it an excellent choice for a weeknight dinner or a quick lunch.
- Authentic Thai Experience: Enjoying Kua Gai Noodles is like taking a culinary trip to Thailand, offering an authentic taste of the country’s rich street food culture.
Conclusion
Kua Gai Noodles are a delicious representation of Thai street food that combines simple ingredients with bold flavors and delightful textures. Whether you’re a seasoned Thai food lover or new to the cuisine, this dish is sure to impress and satisfy. So, next time you’re looking for a quick and tasty meal, try making Kua Gai Noodles and experience the magic of Thai street food right in your own kitchen.
Ever wondered how a simple shift in what you drink could transform your health and spirituality?
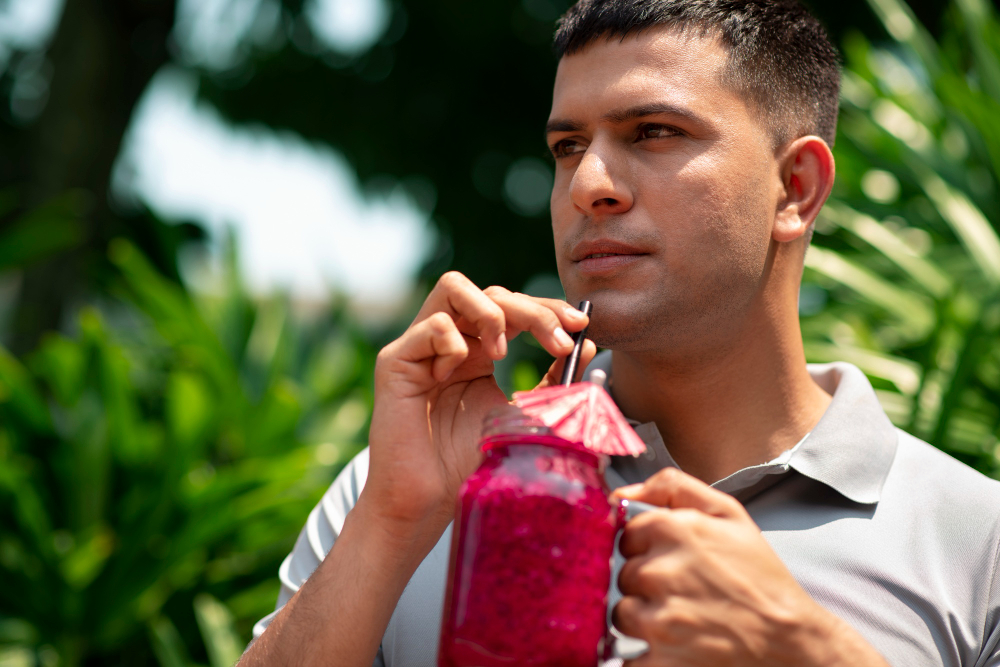
For Rastafarians, Ital is more than just a diet—it’s a sacred way of life. Rooted in the belief that the body is a temple, Ital living emphasizes natural, unprocessed foods and drinks that nourish both the body and soul. If you’re curious about how to “drink Ital” and harness its benefits, this guide will walk you through its principles, health perks, and practical ways to incorporate it into your daily routine.
What Does “Drink Ital” Mean?
Ital (derived from “vital”) is a cornerstone of Rastafarian culture, promoting purity, natural living, and a deep connection to the Earth. When it comes to drinking Ital, the focus is on:
✔ Pure, chemical-free beverages
✔ No artificial additives or processed sugars
✔ Herbal teas, fresh juices, and coconut water
✔ Avoiding alcohol, caffeine, and dairy
This lifestyle isn’t just for Rastafarians—anyone seeking cleaner, more mindful consumption can benefit.
Why Drink Ital? Health Benefits Backed by Science
1. Boosts Digestion and Gut Health
Ital drinks like ginger tea, peppermint tea, and fresh coconut water support digestion and reduce bloating. Studies show that herbal teas can aid in gut motility and reduce inflammation (Journal of Gastroenterology, 2020).
2. Enhances Hydration Naturally
Unlike sodas or energy drinks, Ital beverages (like hibiscus tea or aloe vera juice) hydrate without artificial sweeteners. Coconut water, a staple in Ital living, is rich in electrolytes—perfect for post-workout recovery (Nutrition Reviews, 2019).
3. Reduces Toxins in the Body
By avoiding alcohol, caffeine, and processed drinks, Ital living helps detoxify the liver and kidneys. Dandelion root tea, for example, is known for its liver-cleansing properties (National Institutes of Health, 2021).
4. Supports Mental Clarity and Spiritual Connection
Rastafarians believe that clean eating and drinking enhance livity (life force). Herbal infusions like chamomile and lemongrass promote relaxation and mindfulness, aligning with Ital’s spiritual principles.
How to Drink Ital: 5 Simple Swaps for Everyday Life
You don’t have to fully adopt Rastafarian practices to benefit from Ital drinking. Here are easy ways to start:
1. Replace Coffee with Herbal Teas
Instead of caffeine-loaded coffee, try:
-
Moringa tea (energizing, high in antioxidants)
-
Rooibos tea (naturally sweet, caffeine-free)
-
Turmeric-ginger tea (anti-inflammatory)
2. Ditch Soda for Fresh Juices & Infusions
Swap sugary sodas for:
-
Homemade ginger-lemonade (supports immunity)
-
Hibiscus iced tea (lowers blood pressure)
-
Watermelon juice (hydrating and refreshing)
3. Choose Coconut Water Over Sports Drinks
For natural electrolytes, opt for fresh coconut water instead of Gatorade. It’s lower in sugar and packed with potassium.
4. Avoid Alcohol with Herbal Alternatives
Instead of beer or cocktails, try:
-
Kombucha (fermented, gut-friendly)
-
Soursop leaf tea (calming, supports sleep)
-
Non-alcoholic ginger beer (spicy and refreshing)
5. Sweeten Naturally, Not Artificially
Skip refined sugar and use:
-
Raw honey (antibacterial)
-
Maple syrup (mineral-rich)
-
Dates (blended into smoothies for sweetness)
Real-World Examples: How People Are Embracing Ital Drinking
-
Reggae Artists & Wellness Advocates – Artists like Protoje and Jah9 promote Ital living through music and lifestyle choices, inspiring fans to adopt healthier habits.
-
Vegan Cafés & Juice Bars – From Kingston to Brooklyn, Ital-inspired spots serve fresh juices, herbal tonics, and plant-based elixirs.
-
Everyday Health Seekers – Many are turning to Ital drinks as a way to reduce processed food intake and improve well-being.
Final Thoughts: Is Drinking Ital Right for You?
Drinking Ital isn’t about strict rules—it’s about making mindful choices that honor your body. Whether you’re looking to detox, boost energy, or simply explore a more natural lifestyle, small changes can make a big difference.
Ready to try? Start with one Ital swap this week—maybe a herbal tea instead of coffee or coconut water instead of soda. Notice how your body responds. Over time, these shifts can lead to lasting vitality.
“Let food be thy medicine and medicine be thy food.” – Hippocrates (a philosophy deeply aligned with Ital living).
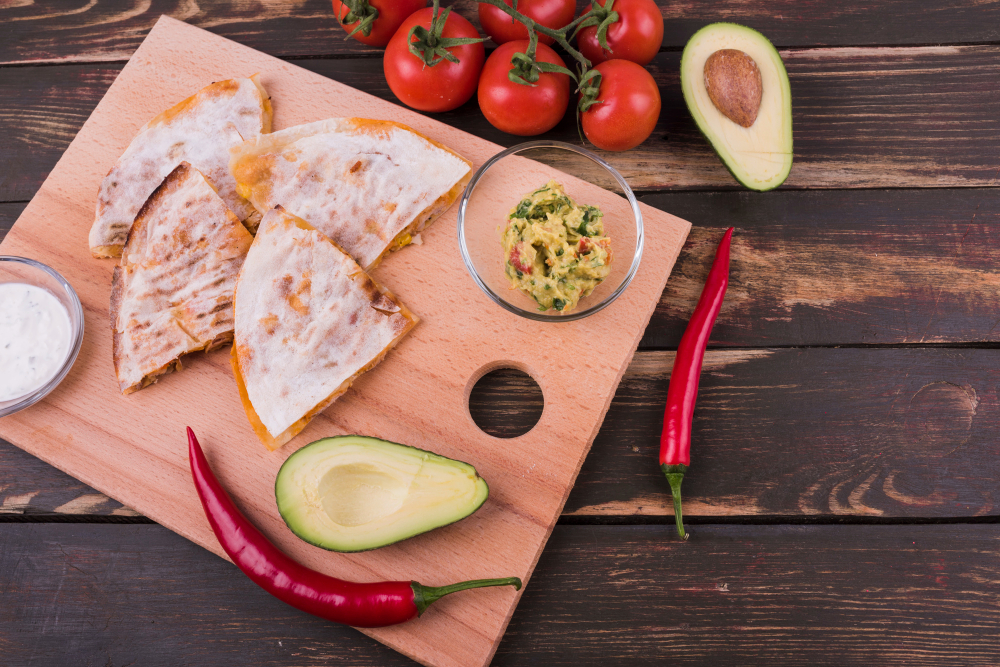
Ever crave a quick, healthy meal that doesn’t skimp on flavor? Look no further than this whole grain quesadilla with chicken, tomato, and lettuce—a protein-packed, fiber-rich twist on a Mexican classic. Perfect for busy weeknights, post-workout fuel, or a satisfying lunch, this dish balances nutrition and taste effortlessly.
In this guide, you’ll discover:
✅ Why whole grain tortillas outshine refined flour (hint: more fiber, fewer blood sugar spikes!)
✅ The best chicken prep for maximum juiciness (science-backed tips included)
✅ How to layer ingredients for the perfect crispy-gooey texture
✅ Easy swaps for dietary preferences (vegetarian? dairy-free? No problem!)
Let’s dive in!
Why This Quesadilla Works (Nutrition + Flavor)
1. Whole Grain Tortillas: The Healthier Base
Refined flour tortillas lack fiber, causing quick digestion and hunger pangs. Whole grain tortillas, however, offer:
-
5x more fiber (supports gut health and keeps you full)
-
Slow-release carbs (steady energy, per a Harvard School of Public Health study)
-
Extra nutrients like magnesium and B vitamins
Pro Tip: Look for 100% whole grain or sprouted grain tortillas (e.g., Ezekiel brand) for the best texture and nutrition.
2. Chicken: Lean Protein Done Right
Skip dry, rubbery chicken with these chef-approved tricks:
-
Brine it (30 minutes in saltwater = juicier meat)
-
Shred vs. chop (more surface area for melting cheese to cling to)
-
Season generously (cumin, smoked paprika, and garlic powder add depth)
Bonus: Use rotisserie chicken for a 5-minute shortcut!
3. The Veggie Boost: Tomato + Lettuce
Fresh tomatoes add umami-rich glutamates (natural flavor enhancers, per Food Chemistry Journal), while lettuce brings crunch. For best results:
-
Pat lettuce dry to prevent sogginess
-
Use Roma tomatoes (less watery than beefsteak)
Step-by-Step Recipe (Ready in 15 Minutes!)
Ingredients (Serves 2)
-
2 whole grain tortillas
-
1 cup shredded cooked chicken
-
½ cup shredded cheese (cheddar, Monterey Jack, or dairy-free alternative)
-
½ cup diced tomatoes
-
½ cup chopped romaine lettuce
-
1 tsp olive oil
-
Spices: ½ tsp cumin, ¼ tsp garlic powder, salt, and pepper
Instructions
-
Prep Chicken: Toss shredded chicken with cumin, garlic powder, salt, and pepper.
-
Layer: On half of each tortilla, add cheese, chicken, tomatoes, and lettuce. Fold tortillas over.
-
Cook: Heat olive oil in a skillet over medium. Cook quesadillas 2–3 minutes per side until golden and crispy.
-
Serve: Slice into wedges. Pair with Greek yogurt (sour cream substitute) or salsa.
Customizations for Every Diet
-
Vegetarian? Swap chicken for black beans + sautéed mushrooms.
-
Keto? Use low-carb almond flour tortillas.
-
Dairy-free? Opt for cashew-based cheese.
Why You’ll Make This Weekly
This quesadilla isn’t just tasty—it’s a balanced meal with:
✔ Protein (chicken, cheese) → muscle repair
✔ Fiber (whole grains, veggies) → digestion
✔ Healthy fats (olive oil, cheese) → satiety
Real-World Win: Fitness coach Sarah D. shares: “I meal-prep the filling for quick lunches. My kids don’t even realize it’s whole grain!”
Final Tip: Whole Grain Quesadilla with Chicken, Tomato, and Lettuce
For extra crunch, air-fry at 375°F for 4 minutes instead of pan-frying.
Hungry yet? Whip up this quesadilla tonight and enjoy a meal that’s as nutritious as it is delicious. Got a twist on the recipe? Share it in the comments!

Ever wondered what happens when juicy shrimp meets the bold flavors of Mexican street corn? The result is street corn shrimp—a mouthwatering fusion dish that’s taking social media and home kitchens by storm. Combining smoky grilled shrimp with creamy, tangy, and spicy elote (Mexican street corn) toppings, this dish is a guaranteed crowd-pleaser.
In this guide, we’ll break down everything you need to know about street corn shrimp, from expert cooking tips to creative serving ideas. Whether you’re hosting a summer BBQ or just craving a restaurant-quality meal at home, this recipe delivers big on flavor with minimal effort.
What Is Street Corn Shrimp?
Street corn shrimp is a fusion dish inspired by elote—a popular Mexican street food featuring grilled corn slathered in mayo, cotija cheese, chili powder, and lime. Instead of corn, this version stars plump, seasoned shrimp coated in the same irresistible toppings.
Why It’s a Must-Try
✅ Bold, balanced flavors – Sweet shrimp + smoky, spicy, creamy toppings.
✅ Quick & easy – Ready in under 20 minutes.
✅ Versatile – Serve as tacos, skewers, salads, or appetizers.
How to Make Perfect Street Corn Shrimp (Step-by-Step)
Ingredients You’ll Need
(Serves 4)
For the Shrimp:
-
1 lb large shrimp, peeled & deveined
-
1 tbsp olive oil
-
1 tsp smoked paprika
-
1 tsp chili powder
-
½ tsp garlic powder
-
½ tsp cumin
-
Salt & pepper to taste
For the Street Corn Topping:
-
¼ cup mayonnaise (or Greek yogurt for a lighter option)
-
¼ cup sour cream
-
½ cup crumbled cotija cheese (or feta as a substitute)
-
1 tsp chili powder (adjust to taste)
-
1 lime, juiced
-
2 tbsp fresh cilantro, chopped
-
Optional: Hot sauce or Tajín for extra kick
Step 1: Season & Cook the Shrimp
-
Pat shrimp dry to ensure a good sear.
-
Toss with olive oil and spices (smoked paprika, chili powder, garlic powder, cumin, salt, and pepper).
-
Grill or sauté for 2-3 minutes per side until pink and slightly charred.
Pro Tip: Skewer shrimp before grilling for easy flipping and a fun presentation.
Step 2: Prepare the Street Corn Dressing
In a bowl, mix:
-
Mayo & sour cream
-
Lime juice
-
Half the cotija cheese
-
Chili powder
Step 3: Assemble & Serve
-
Option 1 (Tacos): Warm corn tortillas, add shrimp, drizzle with sauce, and top with extra cheese, cilantro, and lime.
-
Option 2 (Bowls): Serve over cilantro-lime rice with avocado and black beans.
-
Option 3 (Skewers): Thread shrimp onto sticks, drizzle with sauce, and sprinkle with toppings.
Expert Tips for the Best Street Corn Shrimp
-
Don’t Overcook the Shrimp – They turn rubbery fast! Remove from heat as soon as they curl into a “C” shape.
-
Char for Extra Flavor – A grill or cast-iron skillet adds smoky depth.
-
Make It Ahead – Prep the sauce and season shrimp in advance for quick cooking.
-
Adjust Heat Levels – Add cayenne or jalapeños for more spice.
Creative Serving Ideas
-
Elote Shrimp Nachos – Swap traditional toppings for street corn shrimp over crispy tortilla chips.
-
Street Corn Shrimp Salad – Toss with romaine, grilled corn, and avocado.
-
Appetizer Bites – Serve on mini tostadas with a dollop of sauce.
Why This Dish Is Trending
Streetcorn shrimp has gained popularity thanks to:
🔥 Social media food trends (#StreetCornShrimp has thousands of posts)
🔥 The rise of fusion cuisine (mixing Mexican and seafood flavors)
🔥 Easy gourmet meals at home (affordable yet impressive)
Restaurants like Beso Modern Mexican (Las Vegas) and El Vez (Philadelphia) have even added their own twists to menus.
Final Thoughts: A Must-Try Fusion Dish
Street corn shrimp is the perfect marriage of zesty, creamy, and smoky flavors—all in one bite. Whether you’re grilling for friends or spicing up weeknight dinners, this dish is a guaranteed hit.
Ready to try it? Grab some shrimp, fire up the grill, and let the fiesta begin!
-

 Articles3 months ago
How Many Times Can You Regrow Green Onions
-

 News11 months ago
Understanding HotLeaks: What You Need to Know
-

 Fashion8 months ago
Opals in the USA: A Gemstone Transforming the Crystal Healing Market
-

 Entertainment8 months ago
How to Use Snaptik: A Complete Guide to Download TikTok Videos
-

 Technology1 year ago
The Wonders of Oh Em Gee Blog
-

 Entertainment1 year ago
Bare it All: Unforgettable Skinny Dipping Stories Shared
-

 Health1 year ago
Can You Smoke Shrooms? Exploring the Myths and Realities
-

 Articles6 months ago
WHAT IS THE DIFFERENCE BETWEEN SEED GARLIC AND FOOD GARLIC?