Connect with us

Food And Drinks

How to Roast Cacao? Guide for Perfecting the Process

Published

on

How to Roast Cacao?

he Roasting cacao is a key step in transforming raw cacao beans into the rich, flavorful chocolate we all know and love. Whether you’re a chocolate enthusiast or a hobbyist looking to create your own chocolate from scratch, understanding how to roast cacao beans is an essential skill. In this comprehensive guide, we’ll walk you through the roasting process, highlight the best techniques, and provide up-to-date, valuable information on this time-honored tradition.

What is Cacao, and Why Should You Roast It?

Cacao beans are the seeds of the cacao tree (Theobroma cacao), a tropical evergreen found in regions like South America, West Africa, and Southeast Asia. Cacao is the raw material used to create all types of chocolate, from dark to milk chocolate, as well as cocoa powder and cocoa butter.

Roasting cacao is essential for several reasons:

  1. Flavor Development: Raw cacao beans have a very bitter and harsh flavor. Roasting enhances the complex flavors, bringing out the characteristic chocolate notes.
  2. Ease of Processing: Roasting helps separate the cacao nibs from the shell, making it easier to process the beans into a smooth paste.
  3. Aroma: The roasting process releases aromatic oils that give chocolate its distinctive smell, which is one of the most recognizable and appealing qualities of chocolate.

The Science Behind Roasting Cacao

Roasting cacao is a delicate process that requires careful temperature control. The heat causes chemical reactions within the beans, primarily Maillard reactions (which contribute to flavor development) and caramelization (which gives the beans a rich, roasted taste). Temperature and time are key factors—too much heat can burn the beans, while too little will leave them underdeveloped in flavor.

Step-by-Step Guide: How to Roast Cacao Beans

Roasting cacao beans is straightforward once you understand the process and the variables that affect the outcome. Here’s how to do it, whether you’re using an oven, stovetop, or specialized cacao roaster.

Step 1: Prepare Your Cacao Beans

Start by sourcing high-quality cacao beans. You can buy raw, unroasted cacao beans online or from specialty shops. Ensure the beans are cleaned, removing any debris or damaged beans.

Step 2: Preheat Your Roaster or Oven

The temperature at which you roast cacao beans is crucial for achieving the right flavor. For most methods, the ideal temperature range is between 250°F and 320°F (121°C to 160°C). Preheat your roaster, oven, or stovetop accordingly.

Step 3: Choose Your Roasting Method

There are a few different ways to roast cacao beans, each with its own pros and cons. Let’s explore the most common methods:

Method 1: Oven Roasting
  1. Preheat the oven to around 300°F (150°C).
  2. Spread the cacao beans evenly on a baking sheet, ensuring they aren’t crowded. This helps the heat circulate evenly around the beans.
  3. Roast for 15 to 30 minutes, checking periodically. The beans should crack and produce a lovely chocolatey aroma.
  4. Cool the beans after roasting by removing them from the oven and letting them sit at room temperature.
The Method 2: Stovetop Roasting
  1. Use a heavy pan or skillet (preferably cast iron) to distribute heat evenly.
  2. Preheat the pan on medium-low heat.
  3. Add cacao beans and roast them for 10-20 minutes, stirring frequently to prevent burning.
  4. Cool the beans by removing them from the pan and setting them aside.
Method 3: Dedicated Cacao Roaster

For those who are serious about cacao roasting, a cacao roaster can provide precise control over the temperature and airflow. Roasters are designed specifically to handle cacao beans, ensuring a consistent and even roast.

  1. Set your roaster to the desired temperature (typically between 250°F and 300°F).
  2. Load the cacao beans into the machine.
  3. Roast for 20 to 30 minutes, depending on your preferred level of roast.
  4. Cool the beans as soon as the roasting process is complete.

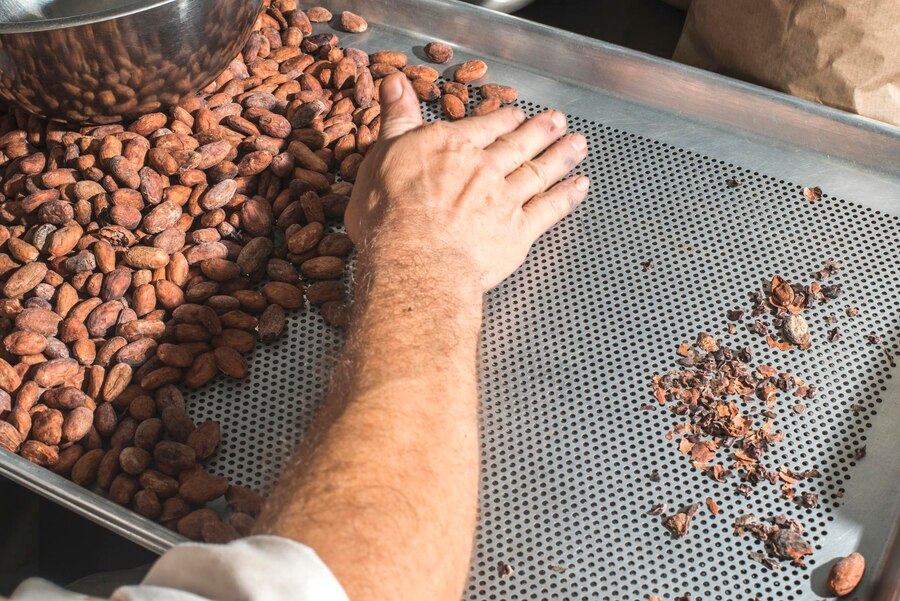
Step 4: Cracking and Winnowing the Beans

After roasting, you’ll need to separate the cacao nibs from the outer shell. This process is called winnowing. The beans will naturally crack into smaller pieces once they’ve cooled, making it easier to remove the shells.

  1. Crack the beans by gently crushing them with a rolling pin or in a food processor.
  2. Separate the nibs from the husks by hand or by using a winnower (a specialized machine that helps sift the nibs from the shells).
  3. Collect the nibs for the next stages of chocolate-making, or enjoy them as they are—raw cacao nibs are incredibly healthy and flavorful.

Step 5: Grind the Nibs (Optional)

If you’re planning to make chocolate, you’ll need to grind the nibs into a smooth paste, called cocoa liquor. This can be done using a food processor, a stone grinder, or a specialized chocolate grinder.

Factors to Consider While Roasting Cacao

When roasting cacao, several factors can impact the final product, including:

  1. Roast Level: Cacao beans can be roasted lightly, medium, or dark, depending on your preference. Lighter roasts preserve more of the original bean flavors, while darker roasts tend to bring out bolder, more bitter notes.
  2. Bean Type: Different varieties of cacao beans, like Forastero, Criollo, and Trinitario, have unique flavor profiles that respond differently to roasting.
  3. Time and Temperature: The longer you roast, the more the flavors will develop, but be cautious not to overdo it. The optimal roasting time is between 15 to 30 minutes at 250°F to 320°F, depending on your method.

Common Mistakes to Avoid When Roasting Cacao

  1. Over-roasting: If you leave the beans in the heat too long, they can burn, resulting in a bitter, unpleasant taste.
  2. Uneven Roasting: Ensure the beans are spread evenly for consistent roasting. Crowding the beans can lead to uneven results.
  3. Not Monitoring the Temperature: Overheating can cause bitterness and off-flavors. Be sure to use a thermometer to keep the temperature consistent.

Different Cacao Roasting Methods

Method Equipment Needed Time Temperature Range Flavor Profile Pros Cons
Oven Roasting Oven, Baking Sheet 15-30 minutes 250°F – 320°F Rich, chocolatey, less bitter Easy, accessible, even heat distribution Can be slow, requires monitoring
Stovetop Roasting Cast Iron Pan, Spatula 10-20 minutes Medium heat Smoky, bold, caramelized notes Quick, direct control over heat Needs constant stirring, uneven heat
Cacao Roaster Cacao Roaster Machine 20-30 minutes 250°F – 300°F Consistent, deep chocolate flavor Precise control, optimal results Expensive, requires specialized equipment

Health Benefits of Roasting Cacao Beans

In addition to its rich flavor, roasted cacao offers several health benefits. Cacao is packed with antioxidants, magnesium, and iron, which contribute to overall health. The roasting process retains many of these nutrients, making roasted cacao a healthy snack choice.

  1. Rich in Antioxidants: Roasted cacao is a powerful source of flavonoids, which help protect the body from oxidative stress.
  2. Heart Health: The compounds in cacao may help lower blood pressure, improve blood flow, and reduce the risk of heart disease.
  3. Brain Function: Cacao contains neuroprotective compounds that may help improve cognitive function and memory.

Conclusion: Mastering the Art of Cacao Roasting

Learning how to roast cacao is both a rewarding and enjoyable process. By following these steps, you can create perfectly roasted cacao beans, whether for homemade chocolate or as a tasty treat in its own right. Experiment with different roast levels, time, and temperature to discover your preferred flavor profile. Whether you use an oven, stovetop, or dedicated cacao roaster, roasting cacao opens up a world of flavors, health benefits, and possibilities.

By following this guide and avoiding common mistakes, you’ll be well on your way to perfecting the art of cacao roasting. Remember, the key to great cacao lies in a balance of temperature, time, and technique. Happy roasting!

Continue Reading
Click to comment

Leave a Reply

Your email address will not be published. Required fields are marked *

Food And Drinks

Float Dr Pepper: The Refreshing Drink Hack You Need to Try

Published

on

Float Dr Pepper

Why Is Everyone Raving About Float Dr Pepper?

Have you ever craved a drink that’s both nostalgic and refreshingly unique? Enter Float Dr Pepper—a fizzy, creamy, and utterly delicious twist on the classic soda float. Combining the bold, caramel-infused flavor of Dr Pepper with smooth vanilla ice cream creates a taste sensation that’s hard to resist.

But what makes this drink so special? Is it just a passing trend, or is there real magic in this combination? In this guide, we’ll explore:

  • The origins of the Dr Pepper float

  • Why the flavor profile works so well

  • Step-by-step instructions to make the perfect float

  • Creative variations to try

  • Expert tips for the best experience

Whether you’re a soda enthusiast or just looking for a fun new treat, this guide will help you master the art of the Float Dr Pepper.

The Origins of the Dr Pepper Float

A Brief History of Floats

The classic root beer float has been a beloved American treat since the late 1800s. But as soda flavors expanded, so did float variations. Dr Pepper, with its unique 23-flavor blend, became a natural candidate for a float—offering a more complex taste than traditional root beer or cola.

Why Dr Pepper Works So Well

Dr Pepper’s flavor is a mix of:

  • Fruity notes (cherry, blackberry)

  • Warm spices (vanilla, licorice, clove)

  • Caramel undertones

When paired with vanilla ice cream, the creaminess softens the soda’s sharpness while enhancing its sweetness. The result? A perfectly balanced, creamy, and effervescent drink.

How to Make the Perfect Float Dr Pepper

What You’ll Need

  • 1 can or bottle of Dr Pepper (chilled)

  • 2 scoops of high-quality vanilla ice cream

  • A tall glass (16 oz or larger)

  • A long spoon and straw (optional)

Step-by-Step Instructions

  1. Chill Your Glass – For extra frosty goodness, place your glass in the freezer for 5–10 minutes before making your float.

  2. Add the Ice Cream – Scoop 2 generous balls of vanilla ice cream into the glass.

  3. Pour Slowly – Gently pour Dr Pepper over the ice cream to prevent excessive fizzing.

  4. Let It Settle – Wait 10–15 seconds for the foam to rise, then top off with more soda if needed.

  5. Serve Immediately – Enjoy with a spoon and straw for the full experience!

Pro Tips for the Best Float

✔ Use real cane sugar Dr Pepper (if available) for a richer taste.
✔ Try Dr Pepper Cream Soda for an even creamier twist.
✔ Add a splash of heavy cream for extra decadence.

Creative Float Dr Pepper Variations

Want to take your float to the next level? Try these fun twists:

1. Chocolate Dr Pepper Float

  • Add a scoop of chocolate ice cream instead of vanilla.

  • Drizzle with chocolate syrup for extra indulgence.

2. Spiced Dr Pepper Float

  • Sprinkle cinnamon or nutmeg on top.

  • Use eggnog ice cream during the holidays.

3. Bourbon Dr Pepper Float (For Adults)

  • Mix in 1 oz of bourbon before adding soda.

  • Garnish with a cherry for a boozy twist.

4. Vegan Dr Pepper Float

  • Swap dairy ice cream for coconut or almond milk vanilla ice cream.

  • Use organic cane sugar Dr Pepper for a fully plant-based treat.

Why Float Dr Pepper Is a Crowd-Pleaser

Perfect for Any Occasion

  • Summer BBQs – A refreshing alternative to beer or lemonade.

  • Movie Nights – A fun, nostalgic snack.

  • Dessert Menus – Impress guests with a unique sweet treat.

A Viral Sensation?

Thanks to social media, #FloatDrPepper has gained traction on TikTok and Instagram, with users sharing their own takes on the drink. Some even layer it with whipped cream and sprinkles for extra flair.

Final Thoughts: Should You Try It?

If you love Dr Pepper and enjoy creamy, fizzy treats, the Float Dr Pepper is a must-try. It’s easy to make, endlessly customizable, and delivers a satisfying mix of flavors and textures.

Ready to give it a shot? Grab a cold Dr Pepper, your favorite vanilla ice cream, and get blending! Whether you stick to the classic or experiment with fun variations, this float is guaranteed to become a new favorite.

Continue Reading

Food And Drinks

Spain Butter: A Hidden Gem in the World of Dairy

Published

on

Spain Butter

Have you ever wondered what makes Spanish butter stand out in a world dominated by French and Irish varieties? While Spain might be famous for its olive oil and jamón, its butter is an underrated culinary treasure. Rich, creamy, and often infused with regional flavors, Spanish butter offers a unique taste experience worth exploring.

In this article, we’ll dive into:
✔ The history and tradition of Spanish butter
✔ What sets it apart from other European butters
✔ Top brands to try (and where to buy them)
✔ Creative ways to use Spanish butter in your cooking

Ready to discover why this dairy delight deserves a spot in your kitchen? Let’s get started.

The Rich Heritage of Spanish Butter

Unlike France or Ireland, Spain isn’t typically associated with butter—olive oil has long been the country’s fat of choice. However, northern regions like Galicia, Asturias, and the Basque Country have a deep dairy tradition, producing high-quality butter from grass-fed cows.

Historically, butter was a staple in these cooler, rainier regions where cows thrived. Artisanal methods, such as slow churning and minimal processing, have been preserved, giving Spanish butter its distinct texture and flavor.

What Makes Spanish Butter Unique?

  1. Grass-Fed Cows – Many Spanish dairy farms prioritize pasture-raised cows, resulting in butter with a richer, more complex taste.

  2. Lower Salt Content – Unlike heavily salted European butters, Spanish varieties often use minimal salt, letting the natural creaminess shine.

  3. Regional Variations – Some butters are smoked, infused with herbs, or blended with local ingredients like honey or truffles.

Top Spanish Butter Brands to Try

If you’re eager to taste authentic Spanish butter, here are some standout brands:

1. Leche Pascual (Mantequilla de Burgos)

A well-known dairy brand, Pascual produces smooth, slightly tangy butter perfect for baking and spreading.

2. Central Lechera Asturiana

Hailing from Asturias, this butter is ultra-creamy with a subtle sweetness, ideal for toast and pastries.

3. Mantequerías Arias (Galicia)

A premium artisanal brand, Arias uses traditional churning methods for a velvety texture and rich flavor.

4. Lurpak (Spanish Variant)

While Danish in origin, Lurpak’s Spanish-produced butter is tailored to local tastes—less salty and incredibly spreadable.

Where to Buy?

  • Specialty food stores (like La Tienda or Despaña in the US)

  • Online retailers (Amazon, Mercadona’s international delivery)

  • Local markets in Spain (Mercado de San Miguel in Madrid, La Boqueria in Barcelona)

How to Use Spanish Butter Like a Pro

Spanish butter isn’t just for spreading on bread—here are some delicious ways to enjoy it:

1. Paella Finishing Touch

A dollop of butter stirred into paella at the end adds a luxurious creaminess.

2. Herb-Infused Butter

Mix Spanish butter with smoked paprika, garlic, and parsley for a flavorful topping for grilled meats.

3. Basque-Style Butter Cake (Pastel Vasco)

This traditional dessert relies on high-quality butter for its rich, crumbly texture.

4. Seared Scallops with Brown Butter

Spanish butter’s high fat content makes it perfect for achieving a golden, nutty sear.

Why Spanish Butter Deserves More Recognition

While French and Irish butters dominate global markets, Spain’s offerings bring something different—subtle sweetness, artisanal craftsmanship, and regional diversity. Whether you’re a home cook, a professional chef, or just a butter enthusiast, exploring Spanish varieties can elevate your dishes in unexpected ways.

Final Tip:

Next time you’re in Spain (or browsing gourmet food shops), skip the usual souvenirs and grab a pack of locally made butter. Your taste buds will thank you!

Continue Reading

Food And Drinks

The Irresistible World of French Sweets: A Delicious Guide

Published

on

French Sweets

Have you ever bitten into a buttery, flaky croissant and wondered why French sweets are so incredibly addictive? From delicate macarons to rich chocolate éclairs, French desserts are a celebration of flavor, texture, and artistry. But what makes them so special? And how can you enjoy them like a true connoisseur?

In this guide, we’ll explore the most iconic French sweets, their fascinating history, and expert tips on how to savor them—whether you’re in Paris or your own kitchen.

Why French Sweets Are Universally Loved

French desserts are more than just sugar and flour—they’re a blend of precision, tradition, and innovation. Here’s why they stand out:

✔ Perfect Balance – French patisserie masters the harmony of sweet, salty, and buttery flavors.
✔ Artful Presentation – Every dessert is crafted like a miniature masterpiece.
✔ Time-Tested Techniques – Centuries of refinement result in flawless textures.

Now, let’s dive into the most beloved French sweets you need to try.Top 10 Must-Try French Sweets

1. Macarons

What Makes Them Special?
These colorful almond meringue cookies, filled with ganache or buttercream, are crisp on the outside and chewy inside.

Pro Tip: Look for macarons from Ladurée or Pierre Hermé in Paris—the pioneers of this iconic treat.

2. Croissant

The King of Breakfast Pastries
A perfectly baked croissant should be golden, with layers that shatter at the first bite. The secret? High-quality butter and precise lamination.

Fun Fact: The croissant actually originated in Austria but was perfected by the French.

3. Crème Brûlée

Creamy, Vanilla-Infused Perfection
This custard dessert, topped with a caramelized sugar crust, is a textural dream.

Expert Tip: Tap the top with a spoon—it should crack cleanly!

4. Éclair

Elegance in Every Bite
A choux pastry filled with pastry cream and topped with glossy chocolate ganache.

Best Flavor Variations: Coffee, pistachio, or salted caramel.

5. Tarte Tatin

The Upside-Down Apple Tart
Caramelized apples sit atop buttery pastry—best served warm with vanilla ice cream.

History Lesson: Created by accident in the 19th century by the Tatin sisters!

6. Madeleines

The Shell-Shaped Tea Cake
Soft, spongy, and lightly citrusy, these petite cakes are perfect with coffee.

Pro Baker’s Secret: Let the batter rest overnight for the best texture.

7. Pain au Chocolat

The Chocolate Lover’s Croissant
Flaky layers wrapped around dark chocolate batons—pure indulgence.

Where to Find the Best? Try Du Pain et des Idées in Paris.

8. Canelé

Caramelized & Custardy
A Bordeaux specialty with a crispy, rum-infused exterior and soft center.

Why It’s Unique: Baked in copper molds for the perfect crust.

9. Mille-Feuille (Napoleon)

Layers of Flaky Goodness
Puff pastry stacked with pastry cream and topped with icing—a true classic.

How to Eat It? Turn it sideways to avoid a mess!

10. Profiteroles

Cream Puffs with a Chocolate Finish
Choux pastry filled with vanilla ice cream or custard, drizzled with warm chocolate sauce.

Best Served: At Le Procope, Paris’ oldest café.

How to Enjoy French Sweets Like a Pro

Want the ultimate experience? Follow these expert-backed tips:

✔ Pair with the Right Drink – Macarons go with tea, croissants with coffee, and crème brûlée with dessert wine.
✔ Eat Them Fresh – French pastries are best consumed within hours of baking.
✔ Visit Local Boulangeries – Skip tourist spots and ask locals for hidden gems.
✔ Try Making Them at Home – Start with madeleines or crème brûlée—they’re beginner-friendly!

Final Thoughts: Why French Sweets Are Worth the Hype

French desserts aren’t just treats—they’re edible art. Whether you’re biting into a crisp macaron or savoring a warm pain au chocolat, each bite tells a story of tradition and craftsmanship.

So, which French sweet will you try first? Head to a patisserie, or better yet, bake your own and taste a piece of France at home.

Continue Reading

Trending