
Food And Drinks
Exploring Baking Soda vs Cornstarch
Introduction to Baking Soda and Cornstarch
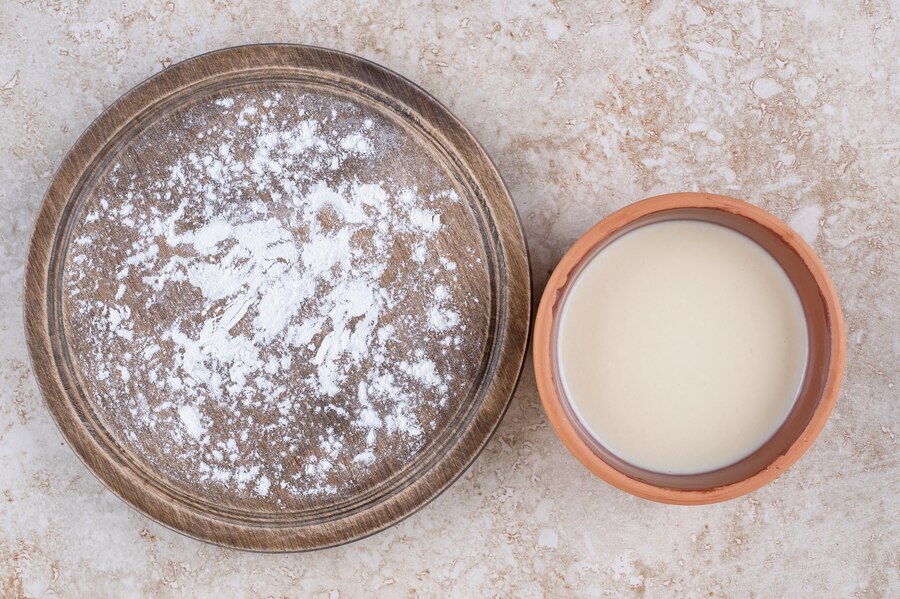
Baking Soda vs Cornstarch—two pantry staples that often find themselves in the limelight of various recipes. They may look simple, but each has its own unique role in cooking and baking. If you’ve ever mixed up these two ingredients or wondered why one is used over the other, you’re not alone! Their versatile nature can be a bit confusing, especially for home cooks just starting their culinary adventures.
Let’s dive into what makes baking soda and cornstarch distinct from each other and how you can use them effectively in your kitchen creations. Whether you’re whipping up cookies or thickening a sauce, understanding these ingredients will elevate your cooking game to new heights. Ready to unravel the mysteries behind these common kitchen heroes? Let’s get started!
Physical Properties and Uses of Baking Soda
Baking soda, or sodium bicarbonate, is a versatile white powder with remarkable chemical properties. It’s slightly alkaline and can react with acids to produce carbon dioxide gas. This reaction is what makes baking soda a leavening agent in baked goods.
In the kitchen, it plays a vital role in recipes like cookies and cakes. The bubbles formed during the reaction help create a light and airy texture. Beyond baking, baking soda also acts as a natural deodorizer. You’ll often find it sprinkled in fridges or used to neutralize odors around the house.
Its mild abrasive nature makes it effective for cleaning too. From scrubbing surfaces to removing stains from clothes, its uses extend far beyond cooking. Whether tackling tough grime or enhancing your favorite recipes, baking soda proves itself time and again as an invaluable ingredient in everyday life.
Physical Properties and Uses of Cornstarch
Cornstarch is a fine, white powder derived from corn kernels. Its texture is silky and smooth, making it a versatile ingredient in both cooking and baking.
In the kitchen, cornstarch acts as a thickening agent. When mixed with liquids, it forms a gel-like consistency that enhances sauces, gravies, and soups. It’s especially handy for achieving that perfect velvety finish in dishes like stir-fries.
Beyond its culinary uses, cornstarch plays an important role in baking. It helps to create lighter cakes by softening the flour’s gluten structure. This results in a tender crumb that melts in your mouth.
Outside of food preparation, cornstarch can be found in various household applications. It’s often used as a natural antacid or as part of homemade laundry starch for crisping shirts and linens without harsh chemicals.
Differences between Baking Soda and Cornstarch
Baking soda and cornstarch may share a spot in your pantry, but they serve very different purposes. Baking soda is a powerful leavening agent. It reacts with acidic ingredients to produce carbon dioxide, helping baked goods rise.
On the other hand, cornstarch acts as a thickening agent. It’s perfect for sauces and soups, providing that silky texture without altering the flavor.
When it comes to appearance, baking soda is a fine white powder that can clump together. Cornstarch has an ultra-fine consistency that feels almost silky to the touch.
Their chemical compositions also set them apart. Baking soda contains sodium bicarbonate, while cornstarch is made from corn grains’ starches.
Using one instead of the other can lead to unexpected results in recipes. Knowing their unique characteristics will help you achieve culinary success every time!
When to Use Baking Soda vs Cornstarch in Cooking
Baking soda and cornstarch play distinct roles in cooking. Baking soda is a leavening agent. It reacts with acids to produce carbon dioxide, helping baked goods rise and become fluffy.
Use baking soda when your recipe includes acidic ingredients like buttermilk or vinegar. It’s perfect for cookies, cakes, and quick breads that need that boost.
On the other hand, cornstarch is primarily used as a thickening agent. It’s ideal for sauces, gravies, and soups where you want a smooth texture without altering flavor significantly.
When making stir-fries or puddings, reach for cornstarch to achieve that glossy finish.
Knowing when to use each can elevate your dishes from ordinary to extraordinary. Their unique properties complement various recipes beautifully—just be sure not to mix them up!
Other Uses for Baking Soda and Cornstarch
Baking soda is a household hero, extending far beyond the kitchen. It’s an exceptional deodorizer, neutralizing odors in your refrigerator or trash can. A simple paste of baking soda and water can tackle tough stains on carpets and upholstery.
Cornstarch also shines outside culinary applications. It’s excellent for polishing furniture when mixed with vinegar, giving surfaces a gleaming finish without harsh chemicals. Additionally, cornstarch serves as a natural thickener for homemade sauces and gravies.
Both ingredients find their way into personal care routines too. Baking soda can be used as a gentle exfoliant for skin or even to freshen breath when added to toothpaste. Cornstarch acts as an effective dry shampoo alternative, absorbing excess oil from hair between washes.
These versatile powders truly transform everyday tasks into simpler solutions while maintaining eco-friendliness at home.
Conclusion: Baking Soda vs Cornstarch
Baking soda and cornstarch each play distinct roles in the kitchen. Understanding their properties can enhance your cooking and baking experience.
When you need to achieve a light texture, baking soda is your go-to leavening agent. It reacts with acids to create bubbles that lift baked goods.
Cornstarch shines when it comes to thickening sauces or soups. Its fine texture allows for a smooth consistency without altering flavor.
Both ingredients serve unique purposes beyond culinary uses. Baking soda works wonders as a natural cleaner, while cornstarch can be used in homemade cosmetics.
Choosing the right ingredient depends on the task at hand. Knowing how they differ helps ensure optimal results every time you cook or bake.
FAQs
- What is the primary difference between baking soda and cornstarch?
- Baking soda is a chemical leavening agent, while cornstarch is primarily used as a thickening agent or for texture in recipes. They serve different purposes in cooking and baking.
- Can I substitute one for the other?
- Generally, you cannot substitute them directly due to their distinct functions. If a recipe calls specifically for one ingredient, using the other may lead to undesirable results.
- Is baking powder similar to baking soda?
- Yes, but they are not identical. Baking powder contains both an acid and a base (usually cream of tartar), plus starch. It can be used as a substitute for baking soda if there’s enough acid in your recipe.
- How does storage affect these ingredients?
- Both should be stored in airtight containers away from moisture. Baking soda has an indefinite shelf life if kept dry; however, cornstarch can clump over time if exposed to humidity.
- Can I use cornstarch as a gluten-free alternative?
- Absolutely! Cornstarch is naturally gluten-free, making it an excellent option for those with gluten sensitivities when thickening sauces or soups.
- Are there health benefits associated with using either ingredient?
- Baking soda can help neutralize stomach acid when consumed properly but should be used cautiously. Cornstarch provides energy through carbohydrates but lacks nutrients compared to whole grains.
These common queries highlight how versatile both ingredients are—and why understanding their unique properties matters in everyday cooking and beyond!
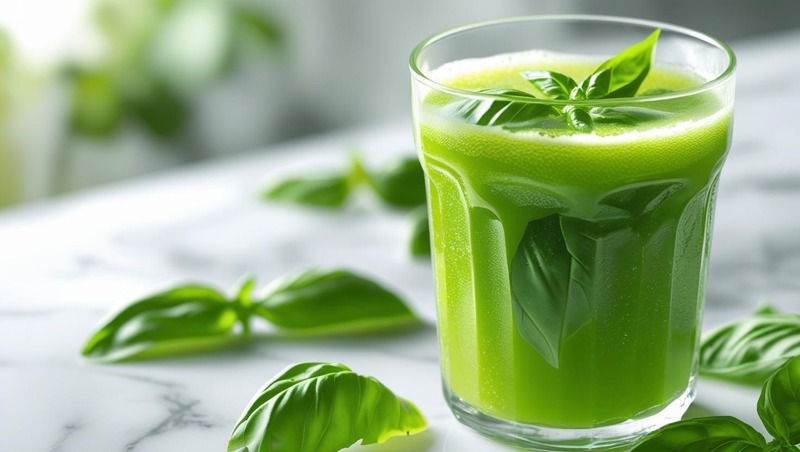
Have you ever wondered how a simple herb like basil could transform your health? Beyond its culinary charm, basil packs a powerful punch when juiced—delivering a burst of flavor and a treasure trove of wellness benefits. From boosting immunity to reducing stress, basil juice is a hidden gem in the world of natural remedies.
In this guide, we’ll explore:
✅ The science-backed benefits of basil juice
✅ How to make it at home (plus tasty recipes!)
✅ Expert tips for maximum health perks
✅ Who should (and shouldn’t) drink it
Let’s dive into why this aromatic herb deserves a spot in your daily routine.
Why Basil Juice? The Science Behind Its Superpowers
Basil (Ocimum basilicum) isn’t just for pesto—it’s a medicinal powerhouse. Research highlights its rich content of:
🔹 Antioxidants (e.g., flavonoids & polyphenols) – Combat oxidative stress.
🔹 Essential oils (e.g., eugenol & linalool) – Offer anti-inflammatory effects.
🔹 Vitamins A, C, K, and minerals – Support immunity and bone health.
Top 5 Proven Benefits of Basil Juice
-
Boosts Immunity
-
A study in Journal of Ayurveda found holy basil (Tulsi) enhances immune response.
-
Vitamin C fights infections, while eugenol acts as a natural antimicrobial.
-
-
Reduces Stress & Anxiety
-
Adaptogenic properties help regulate cortisol (the stress hormone).
-
A 2021 study in Evidence-Based Complementary Medicine showed basil lowers anxiety markers.
-
-
Supports Digestion
-
Soothes bloating and indigestion by stimulating digestive enzymes.
-
Acts as a mild diuretic, aiding detox.
-
-
Anti-Inflammatory & Pain Relief
-
Eugenol mimics NSAIDs (like ibuprofen) without side effects.
-
Helps with arthritis and muscle soreness.
-
-
Balances Blood Sugar
-
Research in Diabetes & Metabolic Syndrome found basil improves insulin sensitivity.
-
How to Make Basil Juice (3 Easy Recipes)
1. Classic Fresh Basil Juice
Ingredients:
-
1 cup fresh basil leaves
-
1 cucumber (peeled)
-
1 green apple (for sweetness)
-
½ lemon (juiced)
-
1-inch ginger (optional, for spice)
Method:
-
Blend all ingredients with ½ cup water.
-
Strain through a nut milk bag or fine sieve.
-
Serve chilled over ice.
Pro Tip: Add a pinch of black pepper to enhance nutrient absorption!
2. Detox Basil Lemonade
Ingredients:
-
½ cup basil leaves
-
Juice of 2 lemons
-
1 tbsp raw honey (or maple syrup)
-
2 cups cold water
-
Ice cubes
Method:
-
Muddle basil leaves with honey.
-
Mix in lemon juice and water.
-
Strain and enjoy!
3. Tropical Basil Smoothie
Ingredients:
-
1 cup basil
-
1 cup pineapple (anti-inflammatory)
-
½ banana (for creaminess)
-
1 cup coconut water (electrolytes)
Blend & go!
Who Should (and Shouldn’t) Drink Basil Juice?
👍 Best For:
✔ Stress-prone individuals – Calms the nervous system.
✔ Diabetics – Helps regulate blood sugar.
✔ Fitness enthusiasts – Reduces muscle inflammation.
✔ Skin health seekers – Fights acne with antibacterial properties.
👎 Avoid If:
❌ Pregnant women – High amounts may stimulate uterine contractions.
❌ Low blood pressure patients – Basil can further reduce BP.
❌ On blood thinners – Vitamin K may interfere with medication.
Always consult a doctor before making it a daily habit!
Expert Tips for Maximum Benefits
-
Use fresh leaves – Dried basil loses volatile oils.
-
Drink in the morning – Enhances digestion and mental clarity.
-
Pair with healthy fats (e.g., avocado) – Boosts absorption of fat-soluble vitamins.
Final Thoughts: Is Basil Juice Worth the Hype?
Absolutely! Whether you sip it as a morning tonic or a post-workout refresher, basil juice is a delicious way to harness nature’s healing powers. With benefits ranging from stress relief to better digestion, this humble herb deserves a prime spot in your wellness routine.
Ready to give it a try? Whip up a batch today and toast to better health—one sip at a time!
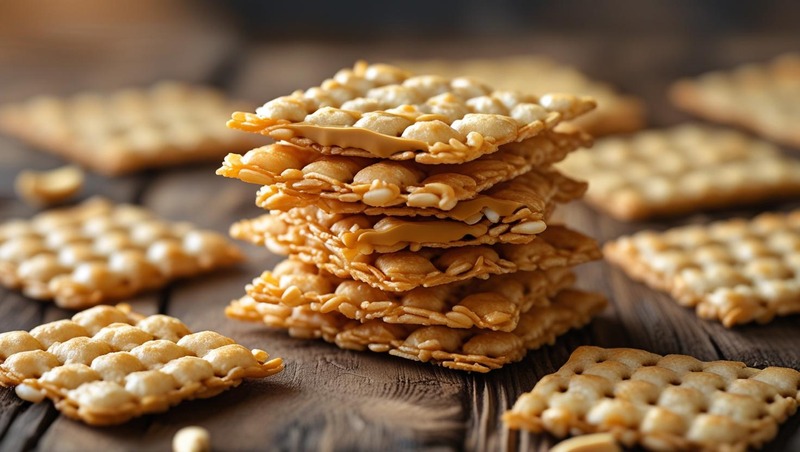
Ever crave a snack that’s crispy, protein-packed, and irresistibly delicious? Peanut butter rice crackers might just be your next go-to treat. Whether you’re looking for a quick energy boost, a gluten-free alternative, or just a satisfying crunch, these little bites deliver on taste and nutrition.
In this article, we’ll explore:
✔ What makes peanut butter rice crackers so good (hint: it’s not just the taste!)
✔ How to make them at home (easy, customizable recipes)
✔ Store-bought vs. homemade—which is better?
✔ Creative ways to enjoy them (beyond plain snacking)
Let’s dive in!
Why Peanut Butter Rice Crackers Are a Snack Superstar
1. Perfect Balance of Crunch and Creaminess
Rice crackers are light and crispy, while peanut butter adds a rich, creamy contrast. This combo satisfies both texture and flavor cravings in one bite.
2. Packed with Protein & Healthy Fats
Peanut butter is a great source of plant-based protein (about 7g per 2 tbsp) and heart-healthy monounsaturated fats. Paired with rice (a low-calorie carb), it makes for a balanced snack that keeps you full longer.
3. Gluten-Free & Vegan-Friendly
Most rice crackers are naturally gluten-free, making them a safe choice for those with sensitivities. Pair them with natural peanut butter (no additives), and you’ve got a vegan-friendly snack.
4. Quick Energy for Busy Days
Need a pre-workout boost or an afternoon pick-me-up? The carbs in rice crackers provide fast energy, while peanut butter offers sustained fuel.
How to Make Peanut Butter Rice Crackers at Home
Skip the store-bought versions (often loaded with sugar and preservatives) and try this simple, customizable recipe.
Basic Homemade Peanut Butter Rice Crackers
(Makes about 20 crackers)
Ingredients:
-
1 cup rice flour (brown or white)
-
¼ cup natural peanut butter (unsweetened)
-
2 tbsp water (adjust as needed)
-
½ tsp salt
-
1 tsp honey or maple syrup (optional for sweetness)
-
1 tbsp sesame seeds or chia seeds (optional for crunch)
Instructions:
-
Mix the dough – Combine rice flour, peanut butter, salt, and sweetener (if using). Gradually add water until a firm dough forms.
-
Roll it thin – Place dough between two sheets of parchment paper and roll to ⅛-inch thickness.
-
Cut into shapes – Use a knife or cookie cutter to make squares or circles.
-
Bake – Preheat oven to 350°F (175°C). Bake for 12–15 minutes until golden and crisp.
-
Cool & enjoy! – Let them cool completely for maximum crunch.
Pro Tip: For extra flavor, sprinkle with cinnamon, chili powder, or a drizzle of dark chocolate after baking.
Store-Bought vs. Homemade: Which Wins?
✔ Store-Bought Pros:
-
Convenient for on-the-go snacking.
-
Wide variety (e.g., Quaker, Lundberg, Asian-style rice crackers).
✖ Store-Bought Cons:
-
Often contain added sugars, oils, and preservatives.
-
Less fresh and customizable.
✔ Homemade Pros:
-
Full control over ingredients (organic, sugar-free, etc.).
-
Fresher, crispier, and more flavorful.
Verdict: If you have 20 minutes, homemade is the way to go! Otherwise, opt for brands with minimal ingredients.
5 Creative Ways to Enjoy Peanut Butter Rice Crackers
-
Top with Banana Slices – A classic combo for a sweet, filling snack.
-
Make a Mini Sandwich – Add a dab of jelly or honey for a PB&J twist.
-
Dip in Yogurt – Greek yogurt + crushed crackers = protein-packed crunch.
-
Crush Over Ice Cream – Adds texture to vanilla or chocolate scoops.
-
Trail Mix Upgrade – Break into pieces and mix with nuts and dark chocolate chips.
Final Thoughts: Are Peanut Butter Rice Crackers Worth the Hype?
Absolutely! They’re:
✅ Easy to make (even for beginners)
✅ Nutritious (protein, fiber, healthy fats)
✅ Versatile (sweet or savory, snack or meal topper)
Next time hunger strikes, skip the chips and grab (or make) peanut butter rice crackers instead. Your taste buds—and body—will thank you!

What’s better than the perfect combination of salty prosciutto and creamy mozzarella on fresh bread?
Whether you’re packing a quick lunch, hosting a picnic, or craving an Italian-inspired snack, a prosciutto and mozzarella sandwich is a timeless classic. But not all versions are created equal. With the right ingredients and techniques, you can elevate this simple sandwich into a gourmet masterpiece.
In this guide, we’ll break down everything you need to know—from selecting the best ingredients to pro assembly tips—so you can craft the perfect prosciutto and mozzarella sandwich every time.
Why Prosciutto and Mozzarella Make the Perfect Pair
Prosciutto (dry-cured Italian ham) and fresh mozzarella are a match made in culinary heaven. Here’s why:
-
Salty & Creamy Balance: The saltiness of prosciutto contrasts beautifully with the mild, milky mozzarella.
-
Texture Play: Prosciutto’s delicate crispness complements the soft, melt-in-your-mouth cheese.
-
Versatility: This duo works in paninis, cold sandwiches, or even as an appetizer on crusty bread.
According to Chef Massimo Bottura, “Italian cuisine thrives on simplicity—fewer ingredients, but of the highest quality.” That’s exactly what makes this sandwich shine.
Ingredients for the Perfect Prosciutto Mozzarella Sandwich
1. The Bread: Foundation Matters
The right bread can make or break your sandwich. Consider:
-
Ciabatta: Crispy crust, airy interior—great for paninis.
-
Focaccia: Olive oil-infused and slightly chewy.
-
Baguette: Crunchy outside, soft inside—ideal for a classic Italian feel.
Pro Tip: Lightly toast the bread to prevent sogginess from the mozzarella’s moisture.
2. The Prosciutto: Quality Over Quantity
Not all prosciutto is equal. Look for:
-
Prosciutto di Parma (DOP): Aged 18+ months, sweet and delicate.
-
Prosciutto di San Daniele: Slightly richer, nuttier flavor.
Avoid pre-sliced supermarket versions—opt for freshly sliced at a deli for the best texture.
3. The Mozzarella: Freshness is Key
-
Fresh Mozzarella (Fior di Latte): Creamy, soft, and milky.
-
Buffalo Mozzarella: Richer, tangier, and more luxurious.
Storage Tip: Keep mozzarella in its brine until use to maintain moisture.
4. The Extras: Elevate Your Sandwich
-
Greens: Arugula, basil, or spinach add freshness.
-
Condiments: Olive oil, balsamic glaze, or pesto enhance flavor.
-
Extras: Sun-dried tomatoes, roasted peppers, or a drizzle of honey for depth.
Step-by-Step Assembly: How to Build the Perfect Sandwich
1. Prep Your Ingredients
-
Slice bread (if not pre-sliced).
-
Drain mozzarella and pat dry to avoid a soggy sandwich.
-
Wash and dry greens.
2. Layer Like a Pro
-
Base Layer: Drizzle olive oil or spread pesto on bread.
-
Cheese First: Place mozzarella slices to act as a moisture barrier.
-
Prosciutto Next: Layer 2-3 thin slices for optimal flavor.
-
Add Greens & Extras: Arugula, tomatoes, or a balsamic drizzle.
-
Final Touch: Top with another bread slice and press gently.
Panini Option: Grill in a panini press for a warm, melty version.
Creative Variations to Try
1. The Classic Italian (Panino al Prosciutto e Mozzarella)
-
Ciabatta
-
Fresh mozzarella
-
Prosciutto di Parma
-
Basil leaves
-
Olive oil & cracked black pepper
2. The Gourmet Grilled Cheese
-
Sourdough bread
-
Buffalo mozzarella
-
Prosciutto
-
Fig jam (for a sweet-savory twist)
3. The Light & Fresh Wrap
-
Whole wheat tortilla
-
Mozzarella
-
Prosciutto
-
Arugula & sun-dried tomatoes
-
Balsamic reduction
Serving Suggestions & Pairings
-
Wine: Pair with a light Pinot Grigio or Prosecco.
-
Sides: Serve with olives, roasted nuts, or a simple caprese salad.
-
Occasions: Perfect for picnics, brunch, or a quick gourmet lunch.
Final Thoughts: Keep It Simple, Keep It Delicious
A prosciutto and mozzarella sandwich is all about quality ingredients and smart layering. Whether you stick to the classic or experiment with gourmet twists, this sandwich is a guaranteed crowd-pleaser.
Now, it’s your turn! Grab the freshest ingredients you can find and craft your own masterpiece. Buon appetito!
-

 Articles3 months ago
How Many Times Can You Regrow Green Onions
-

 News10 months ago
Understanding HotLeaks: What You Need to Know
-

 Fashion8 months ago
Opals in the USA: A Gemstone Transforming the Crystal Healing Market
-

 Entertainment7 months ago
How to Use Snaptik: A Complete Guide to Download TikTok Videos
-

 Technology1 year ago
The Wonders of Oh Em Gee Blog
-

 Entertainment1 year ago
Bare it All: Unforgettable Skinny Dipping Stories Shared
-
 Health1 year ago
Can You Smoke Shrooms? Exploring the Myths and Realities
-
 Articles5 months ago
WHAT IS THE DIFFERENCE BETWEEN SEED GARLIC AND FOOD GARLIC?