
Food And Drinks
Creating a Magical Minnie Mouse Cake: A Step-by-Step Guide

Welcome to the whimsical world of Minnie Mouse where magic and sweetness come together in a delightful treat! If you’re looking to create a show-stopping dessert that will charm both kids and adults alike, then crafting your very own Minnie Mouse cake is the perfect way to add some Disney flair to your next celebration. Join us on this enchanting journey as we guide you through each step of creating a magical Minnie Mouse cake that will steal the spotlight at any party!
Planning a Minnie Mouse Cake
Planning a Minnie Mouse Cake is the first step towards creating a magical dessert that will delight both kids and adults alike. To start, decide on the design you want to achieve – whether it’s a classic Minnie face or a full-body cake. Consider the number of guests to determine the size of the cake needed.
Next, gather all the necessary ingredients and tools such as flour, sugar, baking powder, fondant, food coloring gels, piping bags, and tips. Make sure you have everything on hand before starting to avoid last-minute rushes to the store.
Think about color schemes that match Minnie’s iconic red and white polka dots or pink bows. Sketch out your design if needed to visualize how you want your cake to look in the end. Remember that attention to detail is key when planning any themed cake creation.
Don’t forget about any special dietary requirements for your guests like allergies or preferences for gluten-free options. Planning ahead ensures a smooth baking process and a stunning Minnie Mouse Cake everyone will love!
Ingredients and Tools Needed
Planning to create a magical Minnie Mouse cake? Let’s dive into the essentials you’ll need for this delightful baking adventure. First up, gather your ingredients: flour, sugar, eggs, butter, baking powder, vanilla extract – all the basics for a scrumptious cake base.
In addition to the ingredients, having the right tools is key. You’ll want mixing bowls, spatulas or mixers for blending ingredients seamlessly. Don’t forget about round cake pans to bake those perfect layers! And of course, a cooling rack is essential for ensuring your cakes are at the ideal temperature before decorating. For decorating your Minnie Mouse masterpiece, consider investing in piping bags and tips for intricate designs. Food coloring gel will help bring Minnie’s iconic red bow and polka dots to life. Lastly…
Step 1: Baking the Cake Layers
Baking the cake layers is where the magic begins. Preheat your oven and gather all your ingredients. Mix flour, sugar, eggs, butter, and a touch of vanilla essence in a bowl until smooth. Pour the batter into greased cake pans evenly. As you place them in the oven, that sweet aroma starts to fill your kitchen. Keep an eye on them as they bake to golden perfection. Once done, let them cool completely before moving on to decorating.
The soft spongy layers will be perfect for absorbing flavors and adding texture to your Minnie Mouse cake creation. Remember, baking is like a delicate dance – precise measurements and timing are key for success. Get ready to elevate your baking skills with these fluffy cake layers that will form the base of your adorable Minnie Mouse masterpiece!
Step 2: Decorating the Cake
After baking the cake layers to perfection, it’s time for the fun part – decorating! This step allows your creativity to shine as you bring Minnie Mouse to life on your cake canvas. Start by preparing a smooth layer of frosting on each cake tier, creating a blank slate for your design.
Next, consider using fondant to add intricate details like Minnie’s signature bow or polka dots. Don’t forget about incorporating vibrant colors that capture Minnie’s playful personality. Edible glitter or shimmer dust can also elevate the overall look and add a touch of magic.
Remember that precision is key when piping buttercream accents or arranging edible decorations. Take your time and enjoy the process of transforming a simple cake into a whimsical masterpiece fit for any Disney enthusiast. Let your imagination run wild as you craft a visually stunning tribute to everyone’s favorite fashion-forward mouse!
Step 3: Creating Minnie Mouse’s Iconic Ears
Now comes the fun part – bringing Minnie Mouse to life with her iconic ears! To create these signature features, you’ll need black fondant or modeling chocolate. Roll out the fondant and use a round cutter to make two large circles for the ears.
Next, take a smaller round cutter to make two smaller circles for the inner part of Minnie’s ears. Attach these smaller circles on top of the larger ones using a bit of water as glue. Press gently to secure them in place.
For that extra touch of detail, use white fondant or edible paint to add those classic polka dots Minnie is known for. Once everything is assembled and decorated, allow the ears some time to set before placing them onto your cake. With Minnie’s adorable ears ready, your cake will start looking more like everyone’s favorite mouse!
Step 4: Assembling the Cake
Now that you’ve baked and decorated the cake layers, it’s time to assemble your Minnie Mouse masterpiece. Start by placing one cake layer on a serving plate or turntable. Add a generous amount of frosting on top and spread it evenly with a spatula.
Carefully place the second cake layer on top, making sure it aligns perfectly. Repeat the process by adding more frosting before gently stacking the final layer. Press down lightly to secure the layers together.
To create Minnie Mouse’s iconic ears, use round cookies or cut out fondant circles. Attach them securely with frosting to each side of the cake – these details will make your creation truly magical.
Continue building up your design by piping additional decorations like bows or polka dots around the edges for an extra touch of charm. Remember, precision is key in bringing this beloved character to life through your baking skills!
Step 5: Adding Final Touches
Now that your Minnie Mouse cake is taking shape, it’s time for the finishing touches to bring its magic to life.
Start by piping a border around the bottom of the cake with a contrasting color frosting for a pop of detail. This will help frame Minnie and give your creation a polished look. Next, consider adding edible glitter or sprinkles to add some sparkle and whimsy to your design. The shimmer will catch the light and make your cake truly enchanting.
To enhance Minnie’s iconic bow, use fondant or colored frosting to create a bold accessory on top of her head. This will draw attention to her signature style and complete her classic look. Step back and admire your masterpiece before presenting it at your event. Your guests are sure to be amazed by the charm and creativity you’ve brought to this delightful dessert!
Conclusion
Creating a magical Minnie Mouse cake can be a fun and rewarding experience. From baking the layers to decorating with precision, every step brings you closer to crafting a delightful dessert that will surely bring smiles to everyone’s faces. By following this step-by-step guide and adding your own creative touch, you can create a stunning Minnie Mouse cake that will be the highlight of any celebration. So, gather your ingredients, unleash your creativity, and enjoy the process of bringing this iconic Disney character to life in cake form. Happy baking!
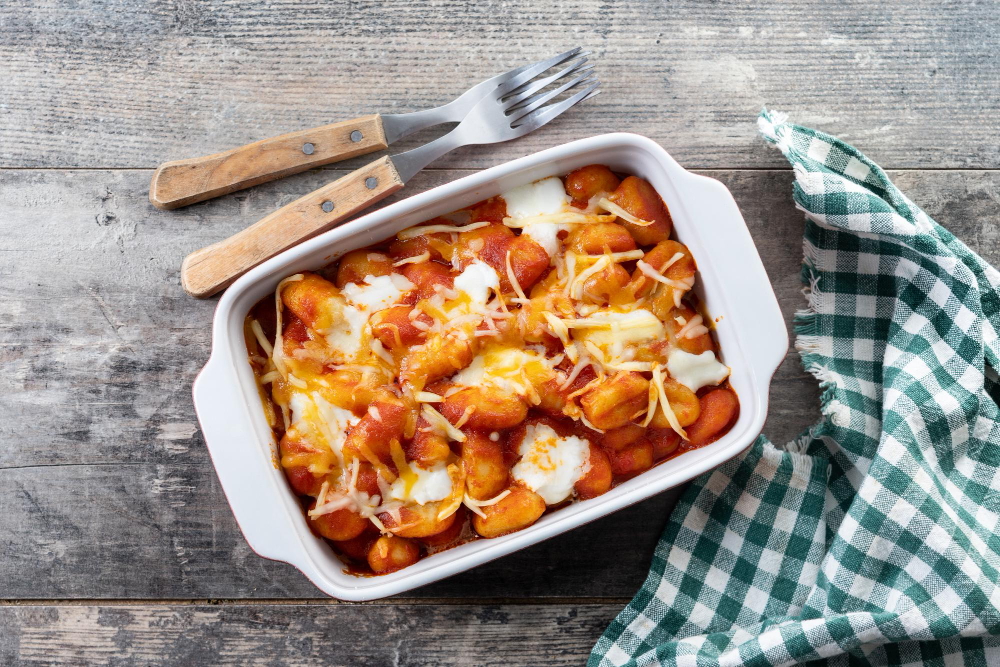
Ever crave the bold flavors of tacos and the comforting chew of gnocchi in one dish? You’re not alone. Fusion meals are taking over kitchens, and this Taco Gnocchi Bake is the ultimate crowd-pleaser—meltingly delicious, easy to make, and perfect for busy weeknights.
In this guide, you’ll get:
✅ A foolproof step-by-step recipe with expert tips
✅ Ingredient swaps for dietary preferences
✅ Meal prep hacks to save time
✅ Why this dish is a nutritional win (yes, really!)
Let’s dive into this crave-worthy mashup that’s trending on TikTok and dinner tables alike.
Why Taco Gnocchi Bake? The Best of Both Worlds
Tacos bring zest, spice, and texture. Gnocchi delivers pillowy, carb-loaded comfort. Combine them, and you get a baked masterpiece that’s:
✔ Faster than traditional lasagna (no layering needed!)
✔ More exciting than standard pasta bakes (thanks, taco seasoning!)
✔ Customizable for gluten-free, vegetarian, or high-protein diets
Chef Jamie Oliver once said, “The best dishes come from fearless mixing of flavors.” This recipe proves it.
Step-by-Step Taco Gnocchi Bake Recipe
Ingredients (Serves 6)
-
1 lb (450g) gnocchi (store-bought or homemade)
-
1 lb ground beef (or turkey/plant-based crumbles)
-
1 packet taco seasoning (or DIY blend: chili powder, cumin, paprika, garlic powder)
-
1 cup salsa (mild or spicy)
-
1 cup black beans, drained
-
1 cup corn kernels (fresh, canned, or roasted)
-
1 cup shredded cheddar (or pepper jack for heat)
-
½ cup sour cream (or Greek yogurt)
-
Fresh toppings: cilantro, avocado, jalapeños
Instructions
1️⃣ Preheat oven to 375°F (190°C).
2️⃣ Brown the meat in a skillet, drain fat, then stir in taco seasoning + ¼ cup water.
3️⃣ Mix gnocchi, salsa, beans, corn, and meat in a greased baking dish.
4️⃣ Top with cheese, cover with foil, and bake for 20 mins.
5️⃣ Uncover, broil 2-3 mins for a golden crust.
6️⃣ Dollop with sour cream and add fresh toppings.
Pro Tip: “For crispier gnocchi, pan-fry them first!” — Food Network’s Anne Burrell
Dietary Swaps & Upgrades
Gluten-Free?
➔ Use GF gnocchi (Cauliflower gnocchi works too!).
Vegetarian/Vegan?
➔ Swap beef for lentils or Beyond Meat.
➔ Use cashew cream instead of sour cream.
Extra Protein?
➔ Add diced chicken or quinoa.
Why This Dish is a Nutritional Win
Surprised? Let’s break it down (per serving):
-
Protein: 22g (from meat/beans)
-
Fiber: 6g (beans + corn)
-
Probiotics: Sour cream adds gut-friendly bacteria
Dietitian Tip: “Using whole-grain gnocchi boosts fiber even more!” — Amy Shapiro, RD
Meal Prep & Storage Hacks
✔ Make ahead: Assemble (unbaked) and refrigerate for 2 days or freeze for 1 month.
✔ Reheat: Microwave single portions or crisp in the air fryer.
✔ Leftover twist: Stuff into tortillas for taco gnocchi quesadillas!
Final Verdict: Should You Make It?
If you love easy, cheesy, and flavor-bomb dinners, this Taco Gnocchi Bake is a must-try. It’s:
🔥 Kid-approved (no picky eater complaints!)
🔥 Party-ready (double the recipe for crowds)
🔥 Endlessly adaptable (clean-out-the-fridge friendly)
Ready to upgrade taco night? Grab your skillet, preheat the oven, and let’s bake this viral-worthy dish tonight!
Ever wondered why margaritas dominate Cinco de Mayo celebrations? While this iconic drink is a staple, there’s a whole world of vibrant, flavorful beverages that can elevate your fiesta. Whether you’re hosting a party or simply want to enjoy a festive drink, we’ve got you covered with expert-backed recipes, modern twists, and must-try classics.
Let’s dive into the best Cinco de Mayo drinks—beyond the basic margarita—that will impress your guests and keep the celebration lively!
1. The Classic Margarita (With a Twist)
No Cinco de Mayo is complete without a margarita, but why stick to the ordinary?
Why It Works:
-
Balanced flavors – The perfect mix of sweet, sour, and salty.
-
Customizable – Swap tequila for mezcal for a smoky twist.
Recipe:
-
2 oz reposado tequila
-
1 oz fresh lime juice
-
½ oz triple sec
-
½ oz agave syrup
-
Salt rim (optional)
Pro Tip: Use chili salt for an extra kick!
2. Paloma: Mexico’s Most Popular Cocktail
Move over, margarita—the Paloma is Mexico’s true favorite.
Why It Works:
-
Refreshing & light – Grapefruit soda (like Jarritos or Squirt) keeps it bubbly.
-
Easy to batch – Perfect for parties.
Recipe:
-
2 oz blanco tequila
-
½ oz lime juice
-
Grapefruit soda (to top)
-
Salt rim (optional)
Upgrade It: Use fresh grapefruit juice + club soda for a less sweet version.
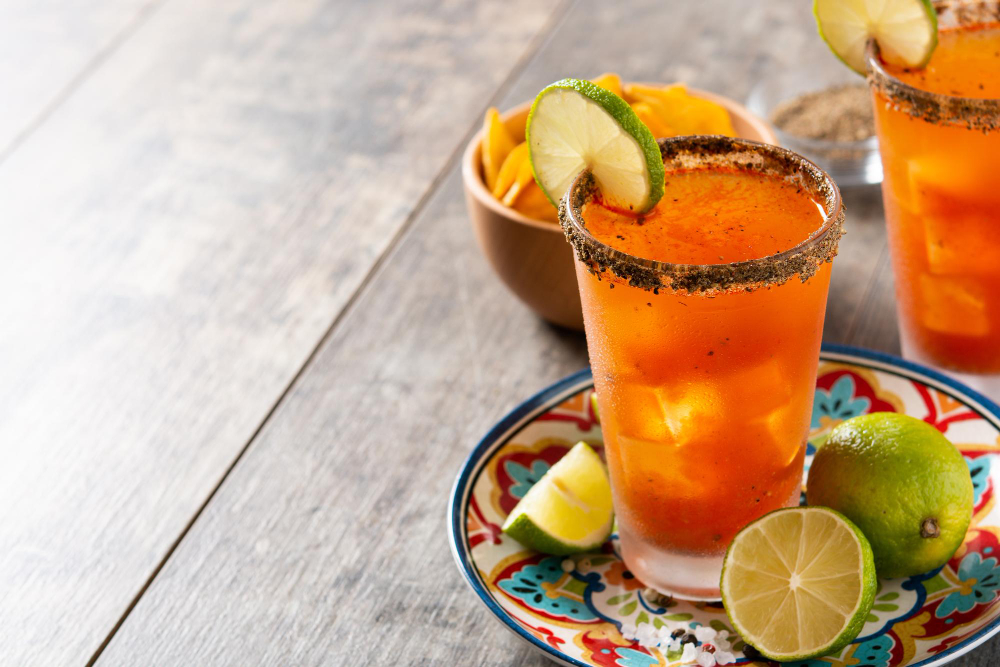
3. Michelada: The Ultimate Beer Cocktail
If you love spicy, savory drinks, the Michelada is a must-try.
Why It Works:
-
Umami-rich – Combines beer with lime, hot sauce, and spices.
-
Hangover helper – The electrolytes from the spices help recovery.
Recipe:
-
1 bottle Mexican lager (e.g., Modelo or Victoria)
-
1 oz lime juice
-
2 dashes hot sauce (Valentina or Cholula)
-
½ tsp Worcestershire sauce
-
Tajín rim
Spicy Version: Add a splash of Clamato for a Chelada.
4. Horchata RumChata Cocktail
For a sweet, creamy alternative, try this spiked horchata.
Why It Works:
-
Dessert-like – Cinnamon and vanilla flavors pair perfectly with rum.
-
Non-tequila option – Great for those who prefer something different.
Recipe:
-
1.5 oz RumChata
-
1 oz vanilla vodka
-
1 oz horchata (store-bought or homemade)
-
Cinnamon sprinkle
Frozen Version: Blend with ice for a milkshake-style treat!
5. Mezcal Mule (A Smoky Alternative)
If you love Moscow Mules, this Mexican-inspired version will blow you away.
Why It Works:
-
Mezcal’s smokiness adds depth to the classic ginger-lime combo.
-
Copper mug optional – Serve over ice for simplicity.
Recipe:
-
2 oz mezcal
-
½ oz lime juice
-
4 oz ginger beer
-
Candied ginger garnish
Extra Kick: Add a dash of chili powder to the rim.
Bonus: Non-Alcoholic Agua Fresca
Not drinking alcohol? No problem! Agua fresca is a refreshing, fruity alternative.
Why It Works:
-
Naturally sweet – Made with fresh fruit and water.
-
Kid-friendly – Perfect for all ages.
Recipe:
-
2 cups chopped watermelon (or pineapple, mango)
-
1 cup water
-
1 tbsp lime juice
-
1 tsp honey (optional)
Blend, strain, and serve over ice!
Final Thoughts: Which Drink Will You Try?
Cinco de Mayo Drinks are all about bold flavors and festive vibes. Whether you’re sipping a spicy Michelada, shaking up a mezcal mule, or keeping it classic with a margarita, these drinks will make your celebration unforgettable.
Pro Hosting Tip: Set up a DIY drink station with different rims (salt, Tajín, chili powder) and let guests customize their cocktails!
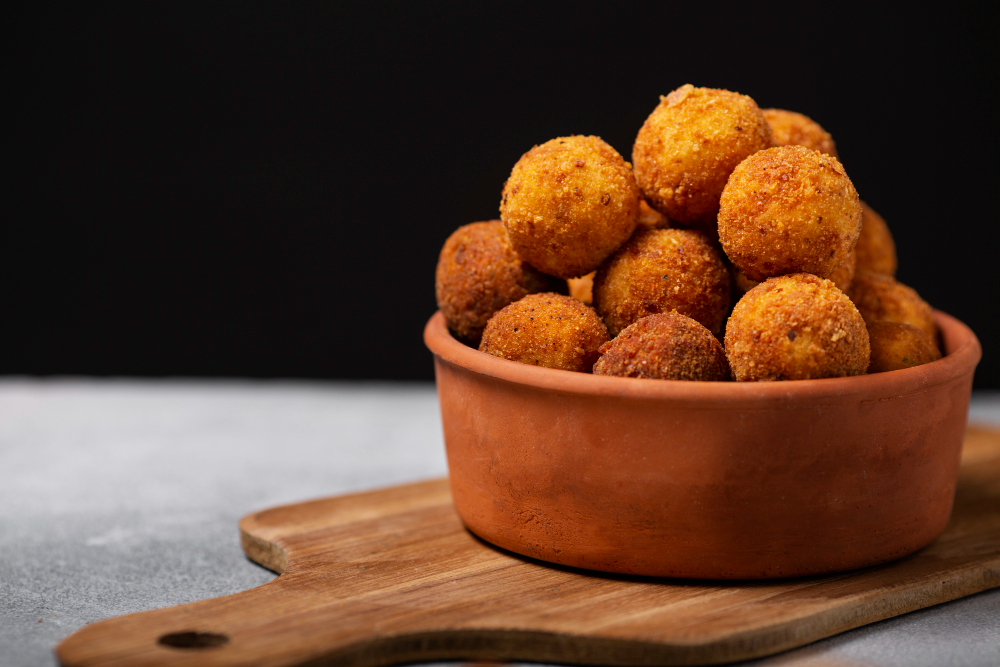
Ever crave a crispy, golden snack that’s creamy on the inside and perfectly crunchy on the outside? Potato balls are the answer! Whether you know them as croquettes, aloo balls, or papas rellenas, these bite-sized delights are a universal favorite.
In this guide, you’ll learn how to make restaurant-quality potato balls at home—crispy on the outside, fluffy inside, and packed with flavor. We’ll cover expert tips, variations, and even how to store them for later. Let’s get cooking!
Why You’ll Love This Potato Balls Recipe
✔ Easy to make – Uses simple, pantry-friendly ingredients.
✔ Versatile – Customize fillings (cheese, meat, herbs, or spices).
✔ Crowd-pleaser – Perfect for parties, snacks, or meal prep.
✔ Kid-friendly – A fun way to sneak in veggies or protein.
Ingredients You’ll Need
For the Potato Mixture:
-
4 large potatoes (Russet or Yukon Gold)
-
2 tbsp butter (or olive oil for dairy-free)
-
¼ cup milk (or plant-based milk)
-
½ tsp salt (adjust to taste)
-
¼ tsp black pepper
-
¼ tsp garlic powder (optional)
For the Filling (Optional but Delicious!):
-
½ cup shredded cheese (cheddar, mozzarella, or pepper jack)
-
¼ cup cooked bacon, ham, or ground beef
-
2 tbsp finely chopped herbs (parsley, chives, or cilantro)
For Breading & Frying:
-
1 cup breadcrumbs (panko for extra crunch)
-
½ cup all-purpose flour
-
2 eggs (beaten)
-
Oil for frying (vegetable, canola, or air-fryer option)
Step-by-Step Instructions
1. Prep the Potatoes
-
Peel, chop, and boil potatoes until fork-tender (~15 mins).
-
Drain well, then mash with butter, milk, salt, and spices until smooth. Let cool.
Pro Tip: Overcooked potatoes can get gluey—stop when just tender!
2. Shape the Potato Balls
-
Scoop ~2 tbsp of mashed potatoes, flatten slightly, and add filling (cheese, meat, etc.).
-
Roll into smooth balls (about 1.5-inch diameter).
Pro Tip: Wet hands slightly to prevent sticking.
3. Bread for Crispiness
-
Roll each ball in flour → dip in beaten egg → coat with breadcrumbs.
-
Chill for 15 mins (helps them hold shape while frying).
4. Fry to Golden Perfection
-
Heat oil to 350°F (175°C).
-
Fry in batches for 2-3 mins until deep golden brown.
-
Drain on a paper towel.
Alternative Cooking Methods:
-
Air Fryer: Spray with oil, cook at 375°F for 10-12 mins, flipping halfway.
-
Baked: Brush with oil, bake at 400°F for 20-25 mins.
5 Expert Tips for the Best Potato Balls
-
Use Starchy Potatoes – Russets or Yukon Golds hold shape better than waxy varieties.
-
Keep the Mixture Dry – Excess moisture = soggy balls. Drain potatoes well!
-
Double-Breading Trick – For extra crunch, dip in egg and breadcrumbs twice.
-
Freeze for Later – Freeze before frying, then cook straight from frozen (add 1-2 mins frying time).
-
Serve with Dipping Sauces – Try garlic aioli, spicy ketchup, or sour cream.
Creative Variations to Try
-
Loaded Potato Balls – Add bacon bits, cheddar, and green onions.
-
Spicy Version – Mix in jalapeños or chili flakes.
-
Veggie-Packed – Fold in finely chopped spinach or corn.
-
Sweet Twist – Swap salt for cinnamon, stuff with Nutella or jam.
Final Thoughts: Crispy Potato Balls Recipe
Crispy Potato Balls Recipe, creamy, and endlessly customizable—making them a foolproof snack for any occasion. Whether you fry, bake, or air-fry them, they’re guaranteed to disappear fast!
Now it’s your turn: Which filling will you try first? Cheese? Spicy beef? Or maybe a sweet surprise? Drop your favorite combo in the comments!
FAQs About Crispy Potato Balls Recipe
Can I make these ahead?
Yes! Prep and refrigerate for up to 24 hours or freeze for 3 months.
Why do my potato balls fall apart?
Potatoes may be too wet, or breading wasn’t packed tightly. Chill before frying.
Can I use sweet potatoes?
Absolutely! Adjust spices (try paprika or cumin for a savory twist).
-

 Articles3 months ago
How Many Times Can You Regrow Green Onions
-

 News11 months ago
Understanding HotLeaks: What You Need to Know
-

 Fashion8 months ago
Opals in the USA: A Gemstone Transforming the Crystal Healing Market
-

 Entertainment8 months ago
How to Use Snaptik: A Complete Guide to Download TikTok Videos
-

 Technology1 year ago
The Wonders of Oh Em Gee Blog
-

 Entertainment1 year ago
Bare it All: Unforgettable Skinny Dipping Stories Shared
-
 Health1 year ago
Can You Smoke Shrooms? Exploring the Myths and Realities
-
 Articles6 months ago
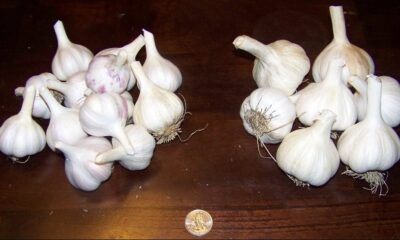
WHAT IS THE DIFFERENCE BETWEEN SEED GARLIC AND FOOD GARLIC?