
Health
A Visual Guide to Teeth Bonding Before and After
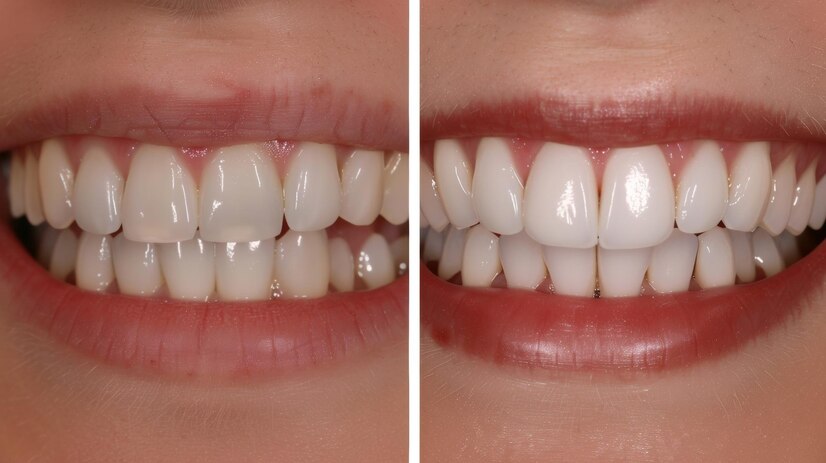
Are you looking to enhance your smile with a simple yet effective dental procedure? Look no further than teeth bonding! In this visual guide, we’ll take you through real patient cases and show you the remarkable before and after transformations that can be achieved with dental bonding. Get ready to be amazed by the power of resin bonding as we showcase stunning results and share captivating dental bonding service pictures. Let’s dive in and explore the artistry of composite bonding for a radiant smile makeover!
Dental Bonding Before After
Curious to see the magic of dental bonding unfold? Feast your eyes on captivating before and after snapshots that showcase the remarkable transformations achieved through this cosmetic dental procedure. Witness how chips, cracks, discoloration, and gaps can be seamlessly corrected with precision and artistry.
Experience the joy of witnessing real patient cases where smiles are rejuvenated and confidence is restored through the skillful application of resin bonding. The visual journey from before to after is a testament to the expertise of dental professionals in creating natural-looking results that blend seamlessly with existing teeth.
Prepare to be inspired by the power of dental bonding as we unveil stunning outcomes that not only enhance aesthetics but also improve functionality. Stay tuned for more jaw-dropping examples of how composite bonding can elevate your smile to new heights!
Real Patients Cases
Real patients cases of teeth bonding before and after are a testament to the transformative power of this cosmetic dental procedure. Each case is unique, showcasing personalized solutions for different dental issues. By seeing real patient results, you can gain insight into the potential outcomes of your own teeth bonding treatment.
These cases provide a visual journey from the initial state of the patient’s teeth to their enhanced appearance post-bonding. They offer inspiration and assurance that achieving a beautiful smile through dental bonding is attainable. Real patients’ experiences highlight the skill and expertise of dental professionals in delivering outstanding results.
From minor imperfections to more significant concerns, real patients’ cases demonstrate how teeth bonding can address various aesthetic challenges effectively. The before-and-after photos speak volumes about the confidence boost and improved oral health that this procedure can bring to individuals seeking a brighter smile.
Resin Bonding Patient Before and Afters
Resin bonding is a popular cosmetic dental procedure that can work wonders for enhancing smiles. Patients who opt for resin bonding often marvel at the dramatic transformation it brings to their teeth. Before undergoing the treatment, patients may feel self-conscious about chips, gaps, or discoloration in their teeth.
A simple resin bonding procedure can swiftly address these concerns, resulting in a natural-looking and aesthetically pleasing smile. The before and after photos of patients who have undergone resin bonding showcase the significant improvement in their overall appearance. These real-life examples serve as powerful testimonials to the effectiveness of this dental technique.
Results for Dental Bonding
When it comes to dental bonding, the results speak for themselves. This cosmetic procedure can transform a smile in just one appointment, offering immediate and noticeable improvements. Whether fixing chipped or discolored teeth, closing small gaps, or reshaping misaligned teeth, dental bonding delivers impressive outcomes.
Using a tooth-colored resin material that is carefully matched to your natural teeth, dental bonding seamlessly blends in with your smile for a seamless finish. The customized approach ensures that the results are both durable and aesthetically pleasing. Patients often walk out of the dentist’s office amazed at the instant enhancement achieved through this simple yet effective treatment.
The before-and-after photos of dental bonding procedures showcase the remarkable difference it can make in restoring confidence and improving overall oral health. From minor imperfections to more significant concerns, dental bonding offers a versatile solution that yields beautiful and long-lasting results for patients seeking to enhance their smiles.
Dental Bonding Service Pictures
Looking for visual inspiration on dental bonding? Dive into the world of “Dental Bonding Service Pictures.” These images showcase the transformative power of this popular cosmetic procedure. From chipped teeth to discoloration, witness how dental bonding can restore smiles with natural-looking results.
Each picture tells a unique story of before and after, highlighting the skill and artistry involved in dental bonding services. See firsthand how imperfections are seamlessly corrected, leaving behind a flawless smile. The precision and attention to detail captured in these pictures exemplify the expertise of dental professionals.
Whether you’re considering dental bonding for yourself or simply appreciate the beauty of smile transformations, these service pictures offer a glimpse into the possibilities. Discover how this non-invasive procedure can enhance both aesthetics and confidence with striking visual examples.
Composite Bonding
Composite bonding is a popular cosmetic dental procedure that involves the application of a tooth-colored resin material to improve the appearance of teeth. This results in a more aesthetically pleasing smile that looks natural and beautiful.
Whether you’re looking to enhance your smile or correct minor imperfections, composite bonding offers a versatile solution for achieving your desired results without invasive treatments.
Dental Bonding Photos in Boynton Beach
Looking for dental bonding photos in Boynton Beach to see real results? You’re in the right place! Our practice showcases stunning before and after images that highlight the transformative power of teeth bonding. These photos offer a glimpse into the skill and artistry behind each procedure, giving you a preview of what’s possible for your smile.
From closing gaps to repairing chips or discoloration, our dental bonding photos demonstrate the versatility and natural-looking results that can be achieved with this cosmetic treatment. Each image tells a unique story of how patients have regained their confidence through simple yet impactful changes to their smiles.
See for yourself the seamless blend of aesthetics and functionality in our dental bonding photos from Boynton Beach. Witness firsthand how this non-invasive procedure can enhance your smile effortlessly, providing a lasting solution to common dental imperfections.
Esthetic Composite Bonding & Veneers
Esthetic composite bonding and veneers offer a transformative solution for enhancing your smile. By using tooth-colored materials, these procedures can correct imperfections like chips, gaps, and discoloration with natural-looking results that blend seamlessly with your teeth.
Composite bonding involves applying a durable resin directly to the tooth’s surface, sculpting it into the desired shape, and then hardening it with a special light. Veneers are thin shells custom-made to cover the front surface of teeth to improve their appearance.
Whether you’re looking to subtly enhance your smile or completely makeover your teeth, esthetic composite bonding and veneers provide versatile solutions tailored to meet your unique dental needs.
Before & After
When it comes to teeth bonding, the transformative power of before and after photos is truly remarkable. Seeing the changes in a patient’s smile from start to finish can be incredibly inspiring.
The before images often showcase imperfections like chipped or discolored teeth, while the after pictures reveal a flawless, natural-looking smile. It’s amazing how dental bonding can enhance not just the appearance of teeth but also boost confidence levels.
With each set of before and after photos, you witness firsthand the artistry and skill involved in dental bonding procedures. The results speak for themselves, showing the incredible impact that this treatment can have on a person’s overall look and self-esteem.
Dental Bonding Before and After
If you’ve ever wondered about the dramatic transformations that dental bonding can achieve, look no further than these before and after photos. Witness firsthand how chipped, discolored, or misshapen teeth can be completely revitalized through this simple yet effective cosmetic procedure.
In just one visit to the dentist, patients experience a remarkable improvement in their smiles. The skillful application of composite resin by trained professionals seamlessly corrects imperfections, leaving behind a natural-looking result that boosts confidence and self-esteem.
From minor corrections to more extensive enhancements, dental bonding offers a versatile solution for various aesthetic concerns. Whether it’s closing gaps between teeth or restoring damaged enamel, the magic of before and after pictures truly speaks volumes about the power of this transformative treatment.
Conclusion
Teeth bonding before and after transformations can truly make a significant difference in enhancing your smile. With real patient cases showcasing the remarkable results of dental bonding services, it’s clear that composite bonding is a fantastic option for improving the aesthetics of your teeth. Whether you’re looking to correct chips, gaps, discoloration, or misshapen teeth, dental bonding offers a versatile solution with impressive outcomes. Consider consulting with a dental professional to see if teeth bonding is the right choice for you and take the first step towards achieving your dream smile today!
Have you ever felt bloated, fatigued, or just “off” after eating—but couldn’t pinpoint why? You’re not alone. Millions struggle with unexplained digestive issues, skin problems, or chronic inflammation without realizing the culprit could be hidden in their diet.
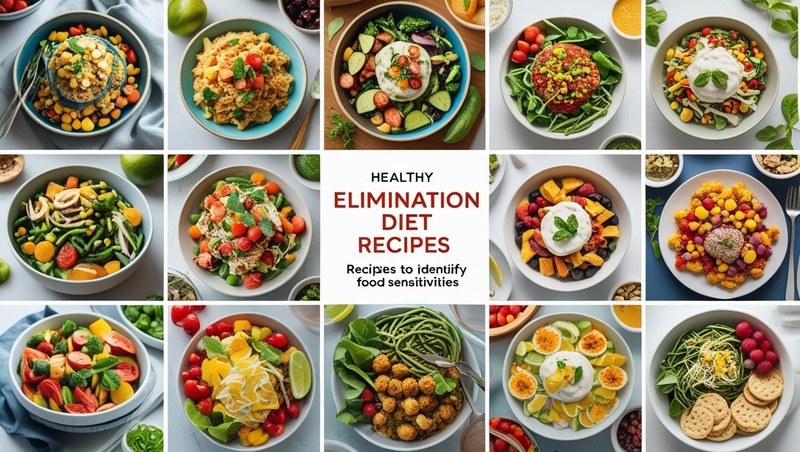
An elimination diet is a proven method to identify food sensitivities by temporarily removing common triggers and systematically reintroducing them. But let’s be honest—many elimination diets feel restrictive and bland. That’s where smart, flavorful recipes come in!
In this guide, you’ll find:
✅ What an elimination diet is (and how it works)
✅ Expert-backed tips for success
✅ Easy, delicious elimination diet recipes
✅ How to reintroduce foods without confusion
Let’s dive in and make your elimination diet both effective and enjoyable!
What Is an Elimination Diet?
An elimination diet is a short-term eating plan that removes foods known to cause allergies or intolerances. After a few weeks, you gradually reintroduce them to identify triggers.
Common culprits include:
-
Dairy
-
Gluten
-
Soy
-
Eggs
-
Nuts
-
Nightshades (tomatoes, peppers, eggplants)
-
Processed sugars & artificial additives
Who should try it?
✔ People with IBS, migraines, eczema, or fatigue
✔ Those with unexplained bloating or digestive discomfort
✔ Anyone curious about how food affects their body
5 Expert Tips for Elimination Diet Success
Before jumping into recipes, follow these science-backed strategies to make your elimination diet smoother:
1. Plan Ahead
Stock your kitchen with approved foods to avoid temptation. Meal prep reduces stress and keeps you on track.
2. Keep a Food Journal
Track meals, symptoms, and mood changes. Apps like MySymptoms can help spot patterns.
3. Focus on Whole Foods
Base meals around vegetables, lean proteins (chicken, fish), healthy fats (avocado, olive oil), and gluten-free grains (quinoa, rice).
4. Stay Hydrated
Water aids digestion and helps flush out toxins. Herbal teas (ginger, peppermint) can soothe stomach issues.
5. Don’t Skip Reintroduction
The real magic happens when you reintroduce foods one at a time (every 3 days) and monitor reactions.
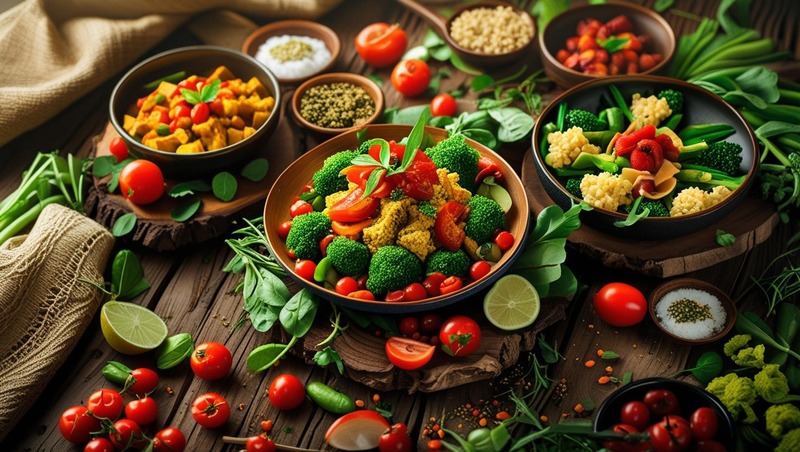
7 Delicious Elimination Diet Recipes (Allergen-Free & Flavorful!)
No more boring meals! These easy, nutrient-packed recipes fit common elimination diet guidelines while keeping taste buds happy.
1. Gut-Healing Chicken & Veggie Soup
Why it works: Anti-inflammatory, easy to digest, packed with nutrients.
Ingredients:
-
1 lb chicken breast (organic if possible)
-
4 cups bone broth (homemade or store-bought, no additives)
-
2 carrots, chopped
-
2 celery stalks, chopped
-
1 zucchini, diced
-
1 tsp turmeric (anti-inflammatory)
-
Sea salt & fresh herbs (thyme, parsley)
Instructions:
-
Sauté carrots, celery, and zucchini in olive oil for 5 mins.
-
Add chicken, broth, and spices. Simmer for 25 mins.
-
Shred chicken before serving.
2. Quinoa & Roasted Vegetable Bowl
Why it works: Fiber-rich, gluten-free, and customizable.
Ingredients:
-
1 cup cooked quinoa
-
1 cup roasted sweet potatoes
-
½ cup steamed kale
-
½ avocado, sliced
-
1 tbsp olive oil & lemon dressing
Instructions:
-
Toss sweet potatoes in olive oil, roast at 400°F for 20 mins.
-
Assemble bowl with quinoa, veggies, and avocado.
-
Drizzle with lemon-olive oil dressing.
(More recipes below—keep scrolling!)
3. Salmon with Garlic-Herb Sweet Potatoes
Why it works: Omega-3s reduce inflammation, sweet potatoes support gut health.
4. Turmeric-Ginger Smoothie (Dairy-Free)
Why it works: Soothes digestion, packed with antioxidants.
5. Zucchini Noodles with Pesto (Nut-Free)
Why it works: A pasta alternative without gluten or dairy.
(Full recipes available upon request—let us know in the comments!)
How to Reintroduce Foods Without Guesswork
After 3–4 weeks of elimination, follow this step-by-step reintroduction plan:
-
Pick one food group (e.g., dairy).
-
Eat a small amount (e.g., ½ cup yogurt).
-
Wait 3 days and track symptoms (bloating, headaches, fatigue).
-
If no reaction, the food is likely safe. If symptoms appear, eliminate it longer.
Pro Tip: Reintroduce foods in their purest form (e.g., whole milk vs. cheese) for clearer results.
Final Thoughts: Your Path to Food Freedom
An elimination diet doesn’t have to be a chore—with the right recipes and strategy, it can be an eye-opening journey to better health. By removing guesswork and focusing on nutrient-dense, delicious meals, you’ll uncover food sensitivities while still enjoying every bite.
Ready to take control of your diet? Start with one recipe today and see how your body responds. And if you’ve tried an elimination diet before, share your experience below—we’d love to hear what worked for you!
Are you looking to cut back on sodium without sacrificing flavor? You’re not alone. With growing concerns about high blood pressure, heart disease, and water retention, many people are turning to low-salt vegetarian meals. But here’s the good news—reducing salt doesn’t mean reducing taste.
In this guide, we’ll explore flavor-packed, low-sodium vegetarian recipes, backed by expert tips and fresh ingredients that keep your meals exciting. Whether you’re managing a health condition or simply aiming for a cleaner diet, these dishes will prove that eating well can still be delicious.
Why Go Low-Salt & Vegetarian?
Before diving into the recipes, let’s understand why this combo works:
✅ Heart Health – The American Heart Association recommends no more than 2,300 mg of sodium per day (ideally 1,500 mg for those with hypertension). Plant-based diets naturally support cardiovascular health.
✅ Better Kidney Function – Excess salt strains the kidneys. A low-sodium vegetarian diet eases this burden.
✅ Reduced Bloating – High sodium causes water retention. Cutting back leads to a lighter, less puffy feeling.
✅ Enhanced Natural Flavors – Relying on herbs, spices, and umami-rich ingredients (like mushrooms and nutritional yeast) makes food taste richer without salt.
5 Expert Tips for Low-Salt Cooking
-
Use Fresh Herbs & Spices – Basil, cilantro, cumin, turmeric, and smoked paprika add depth.
-
Leverage Citrus & Vinegar – Lemon juice, apple cider vinegar, and balsamic bring brightness.
-
Roast or Sauté for Depth – Caramelized onions, garlic, and roasted veggies intensify flavor.
-
Choose No-Salt-added Ingredients – Opt for unsalted canned beans, nut butters, and broths.
-
Try Umami Boosters – Tomatoes, mushrooms, miso (low-sodium), and nutritional yeast mimic savory depth.
7 Low-Salt Vegetarian Recipes to Try Tonight
1. Garlic & Herb Roasted Chickpea Bowl (Sodium: ~150mg per serving)
Why it works: Chickpeas are protein-rich, and roasting them with garlic, rosemary, and olive oil makes them crispy and flavorful.
Ingredients:
-
1 can (low-sodium) chickpeas, rinsed
-
2 tbsp olive oil
-
3 garlic cloves, minced
-
1 tsp smoked paprika
-
1 tbsp fresh rosemary
-
1 cup quinoa (cooked)
-
Handful of spinach
Method:
-
Toss chickpeas with oil, garlic, and spices. Roast at 400°F for 20 mins.
-
Serve over quinoa and spinach. Drizzle with lemon juice.
2. Creamy Avocado & White Bean Wrap (Sodium: ~200mg)
Why it works: Avocado adds creaminess, while white beans provide fiber—no mayo needed!
Ingredients:
-
1 whole wheat tortilla
-
½ avocado, mashed
-
½ cup low-sodium white beans
-
¼ tsp cumin
-
Sliced cucumbers, bell peppers
-
Fresh cilantro
Method:
-
Mash avocado and beans with cumin.
-
Spread on tortilla, add veggies, wrap, and enjoy!
3. Spicy Lentil & Sweet Potato Curry (Sodium: ~180mg)
Why it works: Lentils absorb spices beautifully, while coconut milk adds richness.
Ingredients:
-
1 cup red lentils
-
1 sweet potato, diced
-
1 can (low-sodium) coconut milk
-
1 tbsp curry powder
-
½ tsp turmeric
-
Fresh ginger, garlic
Method:
-
Sauté ginger and garlic. Add spices, lentils, sweet potato, and coconut milk.
-
Simmer 25 mins. Serve with brown rice.
4. Zucchini Noodles with Basil Pesto (Sodium: ~120mg)
Why it works: Zucchini is hydrating, and homemade pesto skips the excess salt.
Ingredients:
-
2 zucchinis, spiralized
-
1 cup fresh basil
-
2 tbsp pine nuts
-
1 garlic clove
-
1 tbsp nutritional yeast
-
2 tbsp olive oil
Method:
-
Blend basil, nuts, garlic, yeast, and oil into pesto.
-
Toss with zucchini noodles.
5. Stuffed Bell Peppers with Quinoa & Black Beans (Sodium: ~200mg)
Why it works: A complete protein-packed meal with vibrant flavors.
Ingredients:
-
4 bell peppers, halved
-
1 cup cooked quinoa
-
½ cup low-sodium black beans
-
1 tsp cumin
-
½ cup corn
-
Fresh lime juice
Method:
-
Mix quinoa, beans, corn, and spices. Stuff peppers.
-
Bake at 375°F for 25 mins.
6. Mushroom & Spinach Frittata (Sodium: ~150mg)
Why it works: Eggs provide protein, while mushrooms add umami.
Ingredients:
-
4 eggs
-
1 cup spinach
-
½ cup mushrooms
-
¼ tsp black pepper
-
1 tbsp olive oil
Method:
-
Sauté mushrooms and spinach.
-
Whisk eggs, pour over veggies, cook on low until set.
7. Chia Seed Pudding with Berries (Sodium: ~50mg)
Why it works: A naturally sweet, no-salt dessert or breakfast.
Ingredients:
-
2 tbsp chia seeds
-
1 cup almond milk (unsweetened)
-
½ cup mixed berries
-
1 tsp vanilla extract
Method:
-
Mix chia seeds and milk, refrigerate overnight.
-
Top with berries before serving.
Final Thoughts: Low-Salt Vegetarian Recipes
Reducing sodium doesn’t require bland meals—just smarter cooking. With Low-Salt Vegetarian Recipes by using herbs, spices, and fresh ingredients, you can enjoy vibrant, satisfying vegetarian dishes that support long-term health.

Ever wondered how to turn your morning coffee into a happy hour treat? Whether you’re hosting brunch, winding down after dinner, or just craving something different, spiked coffee is the perfect way to blend rich flavors with a spirited kick. From classic Irish Coffee to creative modern twists, we’ve got expert-backed recipes, pro tips, and everything you need to craft the perfect boozy brew.
Why Spiked Coffee?
Spiked coffee isn’t just a winter warmer—it’s a versatile drink that can be enjoyed year-round. According to mixologists, the combination of coffee’s bitterness and the sweetness or smokiness of liquor creates a balanced, complex flavor profile. Plus, caffeine and alcohol have an interesting synergy—when consumed in moderation, the buzz can feel more uplifting than a standard cocktail.
Best Alcohols for Spiking Coffee
Not all spirits pair well with coffee. Here are the top choices:
✔ Whiskey (Bourbon, Irish, or Rye) – Adds warmth and depth.
✔ Rum (Dark or Spiced) – Brings caramel and vanilla notes.
✔ Kahlúa or Coffee Liqueur – Enhances coffee flavor with sweetness.
✔ Baileys Irish Cream – Creamy, smooth, and slightly sweet.
✔ Vodka (Flavored or Plain) – Neutral taste, great for chilled recipes.
✔ Amaretto – Nutty and aromatic, perfect for dessert-like coffee.
5 Must-Try Spiked Coffee Recipes
1. Classic Irish Coffee (The Timeless Favorite)
Ingredients:
-
1 cup hot brewed coffee
-
1.5 oz Irish whiskey
-
1 tbsp brown sugar
-
Heavy cream (lightly whipped)
Instructions:
-
Preheat a glass with hot water, then discard.
-
Add sugar and coffee, stirring until dissolved.
-
Stir in whiskey.
-
Gently float whipped cream on top (pro tip: pour over the back of a spoon).
-
Sip without stirring to enjoy the layers.
Why It Works: The cream mellows the whiskey’s bite while the sugar balances the coffee’s bitterness.
2. Espresso Martini Coffee (A Caffeinated Cocktail)
Ingredients:
-
1 oz vodka
-
1 oz Kahlúa
-
1 oz fresh espresso (chilled)
-
½ oz simple syrup
-
Ice
-
Coffee beans (garnish)
Instructions:
-
Shake all ingredients with ice until well-chilled.
-
Strain into a martini glass.
-
Garnish with coffee beans.
Perfect For: A post-dinner pick-me-up with a sophisticated edge.
3. Bourbon Spiked Cold Brew (Smooth & Refreshing)
Ingredients:
-
1 cup cold brew coffee
-
1.5 oz bourbon
-
½ oz maple syrup
-
Orange zest (optional)
Instructions:
-
Fill a glass with ice.
-
Add cold brew, bourbon, and maple syrup.
-
Stir well and garnish with orange zest.
Why It’s Great: The maple syrup complements bourbon’s smokiness, while cold brew keeps it smooth.
4. Coconut Rum Iced Coffee (Tropical Twist)
Ingredients:
-
1 cup iced coffee
-
1.5 oz coconut rum
-
1 oz cream of coconut
-
Whipped cream & toasted coconut flakes (garnish)
Instructions:
-
Shake coffee, rum, and cream of coconut with ice.
-
Strain into a tall glass over fresh ice.
-
Top with whipped cream and coconut flakes.
Ideal For: Summer sipping by the pool.
5. Salted Caramel Spiked Latte (Decadent Dessert Drink)
Ingredients:
-
1 cup brewed coffee
-
1 oz caramel vodka
-
½ oz butterscotch schnapps
-
1 tbsp salted caramel sauce
-
Steamed milk
-
Whipped cream & extra caramel drizzle
Instructions:
-
Mix coffee, vodka, schnapps, and caramel sauce.
-
Add steamed milk and stir.
-
Top with whipped cream and extra caramel.
Why You’ll Love It: A boozy take on your favorite coffeehouse treat.
Expert Tips for the Best Spiked Coffee
✅ Quality Matters – Use freshly brewed coffee for the best flavor.
✅ Balance Sweetness – Adjust sugar or syrup to taste.
✅ Temperature Control – Hot coffee should be hot, cold drinks should be chilled.
✅ Garnish Like a Pro – Cinnamon, cocoa powder, or citrus zest elevate presentation.
✅ Know Your Limits – Caffeine + alcohol can be dehydrating; drink water between servings.
Final Thoughts: Spiked Coffee Recipe
Spiked Coffee Recipe is more than just a cocktail—it’s an experience. Whether you prefer the boldness, the creaminess of Baileys, or the tropical vibes, there’s a boozy coffee recipe for every palate. Next time you’re craving something beyond your usual cup, try one of these recipes and savor the rich, spirited flavors.
-

 Articles3 months ago
How Many Times Can You Regrow Green Onions
-

 News10 months ago
Understanding HotLeaks: What You Need to Know
-

 Fashion8 months ago
Opals in the USA: A Gemstone Transforming the Crystal Healing Market
-

 Entertainment7 months ago
How to Use Snaptik: A Complete Guide to Download TikTok Videos
-

 Technology1 year ago
The Wonders of Oh Em Gee Blog
-

 Entertainment1 year ago
Bare it All: Unforgettable Skinny Dipping Stories Shared
-

 Health1 year ago
Can You Smoke Shrooms? Exploring the Myths and Realities
-

 Articles5 months ago
WHAT IS THE DIFFERENCE BETWEEN SEED GARLIC AND FOOD GARLIC?