Connect with us

Articles

Armature Progress Pictures: Track & Showcase Your Creative Growth

Published

on

Armature Progress Pictures

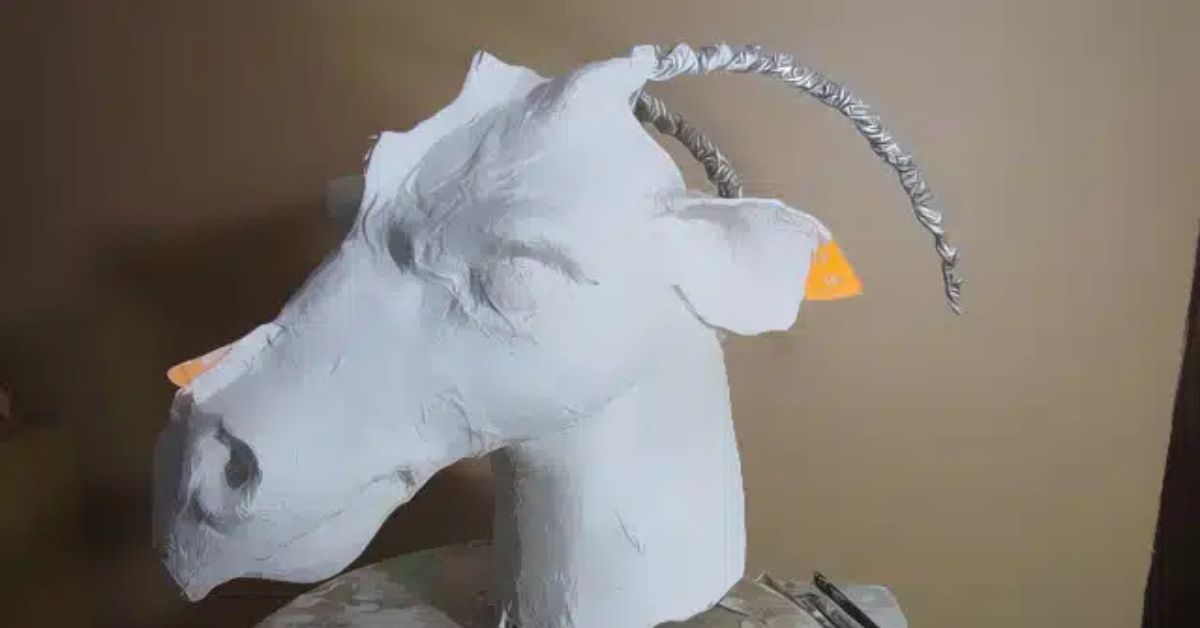
In the world of art, design, and craftsmanship, progress is everything. Whether you’re a sculptor, animator, or hobbyist, documenting your journey through armature progress pictures can be a game-changer. Not only do these images serve as a visual diary of your growth, but they also provide invaluable insights into your creative process.

This guide dives deep into the importance of armature progress pictures, offering actionable tips, tools, and strategies to help you track, analyze, and showcase your artistic evolution. Let’s get started!

Why Armature Progress Pictures Matter

Armature progress pictures are more than just snapshots of your work-in-progress. They are a powerful tool for:

  • Tracking Growth: Visual documentation helps you see how far you’ve come, boosting motivation and confidence.
  • Identifying Patterns: Spot recurring mistakes or breakthroughs in your creative process.
  • Sharing Your Journey: Build an audience by showcasing your progress on social media or portfolios.
  • Improving Skills: Analyze your techniques and refine them over time.

How to Capture Effective Armature Progress Pictures

1. Use Consistent Lighting and Angles

Consistency is key when documenting your progress. Use the same lighting setup and camera angle for each picture to ensure accurate comparisons. Natural light or a softbox setup works best for highlighting details.

2. Focus on Key Stages

Capture images at critical milestones, such as:

  • Initial sketches or wireframes.
  • Midway through the detailing process.
  • Final touches and completed work.

3. Leverage High-Quality Tools

Invest in a good camera or smartphone with a high-resolution lens. Use a tripod to avoid blurry shots and ensure stability.

4. Add Context with Timestamps and Notes

Include timestamps, descriptions, or annotations to provide context. This helps you remember specific techniques or challenges faced during each stage.

Tools and Apps for Organizing Armature Progress Pictures

1. Google Photos or iCloud

Store and organize your images in the cloud for easy access and backup.

2. Procreate or Adobe Lightroom

Edit and enhance your pictures to highlight details and improve clarity.

3. Notion or Evernote

Create a digital journal to pair your images with notes, sketches, and reflections.

4. Time-Lapse Apps

Use apps like Lapse It or Hyperlapse to create time-lapse videos of your creative process.

Showcasing Your Armature Progress Pictures

1. Build a Portfolio

Create a dedicated section in your portfolio to showcase your progress. This demonstrates your commitment to growth and improvement.

2. Share on Social Media

Platforms like Instagram, TikTok, and Pinterest are perfect for sharing armature progress pictures. Use hashtags like #ArtProgress, #CreativeJourney, and #ArmatureProgress to reach a wider audience.

3. Create Before-and-After Collages

Highlight your growth by creating side-by-side comparisons of your initial and final stages.

4. Write Blog Posts or Tutorials

Share your insights and techniques by writing about your creative process. Include your progress pictures to make your content more engaging.

Case Study: How Armature Progress Pictures Transformed One Artist’s Career

Meet Sarah, a self-taught sculptor who struggled with self-doubt. By documenting her armature progress pictures, she was able to:

  • Track her improvement over time.
  • Identify areas for refinement.
  • Build a loyal following on Instagram.

Within a year, Sarah’s progress pictures caught the attention of a gallery owner, leading to her first solo exhibition.

Comparison Chart: Traditional vs. Digital Documentation

Feature Traditional (Sketchbooks) Digital (Apps & Cloud)
Accessibility Limited to physical space Accessible anywhere
Editing Options None Extensive
Storage Capacity Limited Unlimited
Sharing Ease Difficult Easy
Cost Low Moderate to High

Tips for Maximizing the Impact of Your Armature Progress Pictures

  1. Be Consistent: Document your progress regularly to build a comprehensive visual timeline.
  2. Engage Your Audience: Ask for feedback or share behind-the-scenes stories to connect with your followers.
  3. Experiment with Formats: Try time-lapse videos, GIFs, or interactive galleries to make your progress pictures more dynamic.
  4. Celebrate Milestones: Share your achievements and reflect on your journey to stay motivated.

Conclusion: Start Documenting Your Creative Journey Today

Armature progress pictures are more than just a record of your work—they’re a testament to your dedication, creativity, and growth. By following the tips and strategies outlined in this guide, you can transform your creative process and inspire others along the way.

Continue Reading
Click to comment

Leave a Reply

Your email address will not be published. Required fields are marked *

Articles

7 Deadly Sins Envy: Transform Jealousy into Growth

Published

on

7 Deadly Sins Envy

Envy, one of the 7 deadly sins, is a powerful emotion that can consume us if left unchecked. It’s the silent thief of joy, often lurking in the shadows of our minds, whispering comparisons and fueling discontent. But what if envy could be transformed into a catalyst for growth? In this article, we’ll explore the psychology of envy, its effects on our lives, and practical strategies to overcome it.

What Is Envy?

Envy is the feeling of discontent or resentment aroused by someone else’s possessions, qualities, or luck. Unlike jealousy, which involves fear of losing something you have, envy is about wanting what someone else has. It’s a complex emotion rooted in comparison and self-doubt.

The Psychology Behind Envy

Envy stems from our innate tendency to compare ourselves to others. Social media, with its highlight reels of success and happiness, often exacerbates this feeling. According to psychologists, envy can be categorized into two types:

  1. Malicious Envy: This destructive form of envy drives us to undermine or harm the person we envy.
  2. Benign Envy: This constructive form motivates us to improve ourselves and achieve similar success.

Understanding these types is the first step toward harnessing envy for personal growth.

The Impact of Envy on Your Life

Envy doesn’t just affect your mental health; it can have far-reaching consequences on your relationships, career, and overall well-being.

1. Damages Relationships

Envy can strain friendships, romantic relationships, and even family ties. When you’re consumed by envy, it’s hard to celebrate others’ successes, leading to resentment and isolation.

2. Hinders Personal Growth

Instead of focusing on your own goals, envy keeps you fixated on what others have. This distraction can prevent you from taking meaningful steps toward your own success.

3. Erodes Self-Esteem

Constant comparison can lead to feelings of inadequacy and low self-worth. Over time, this can spiral into anxiety and depression.

How to Overcome Envy: 7 Actionable Strategies

Overcoming envy requires self-awareness, intentionality, and practice. Here are seven strategies to help you transform envy into empowerment:

1. Acknowledge Your Feelings

The first step is to recognize and accept that you’re feeling envious. Denying or suppressing these emotions only gives them more power.

2. Practice Gratitude

Shift your focus from what you lack to what you have. Keeping a gratitude journal can help you cultivate a mindset of abundance.

3. Limit Social Media Consumption

Social media is a breeding ground for envy. Set boundaries around your usage and remind yourself that what you see online is often curated and not the full picture.

4. Celebrate Others’ Success

Make a conscious effort to celebrate the achievements of others. This practice can help you reframe envy as inspiration.

5. Focus on Your Goals

Channel your energy into pursuing your own aspirations. Create a clear action plan and take small, consistent steps toward your goals.

6. Develop Self-Compassion

Be kind to yourself. Understand that everyone has their own journey, and it’s okay to progress at your own pace.

7. Seek Professional Help

If envy is significantly impacting your life, consider speaking with a therapist. They can provide tools and strategies to help you navigate these emotions.

Case Study: Transforming Envy into Empowerment

Let’s look at a real-life example of how someone overcame envy and used it as a driving force for success.

Sarah’s Story:
Sarah, a 28-year-old marketing professional, found herself constantly comparing her career progress to her peers. She felt stuck and resentful, which affected her performance and relationships. After attending a workshop on emotional intelligence, Sarah decided to take control of her envy. She started practicing gratitude, set clear career goals, and sought mentorship. Within a year, Sarah not only achieved a promotion but also felt more fulfilled and confident.

FAQs

1. Is envy always bad?

Not necessarily. While malicious envy can be harmful, benign envy can serve as a motivator for self-improvement.

2. How can I stop comparing myself to others?

Focus on your own journey, practice gratitude, and limit exposure to triggers like social media.

3. Can envy affect my physical health?

Yes, chronic envy can lead to stress, which may manifest as headaches, fatigue, or even more serious health issues.

Conclusion: Turn Envy into Your Ally

Envy, one of the 7 deadly sins, doesn’t have to control your life. By understanding its roots and implementing actionable strategies, you can transform envy into a powerful tool for personal growth. Remember, the key lies in self-awareness, gratitude, and intentional action.

Continue Reading

Articles

HOW TO GROW GARLIC FROM SEED?

Published

on

GROW GARLIC FROM SEED

HOW TO GROW GARLIC

How to Grow Garlic Using Sustainable Farming Practices:

Garlic (Allium sativum) is a member of the onion family (Alliaceae) along with onions, chives, shallots, leeks, and elephant garlic. Garlic is distinguished from other family members by its flat leaves and clove-like bulbs. Each garlic bulb contains several small scales or cloves enclosed in a white or purplish parchment-like sheath.

CULTIVARS

Garlic cultivars are classified as either hardneck or softneck.

Hardneck cultivars (Allium sativum var. ophioscorodon) produce a flower stalk (technically a scape) and are often termed “top-setting” or “bolting” cultivars. Flowers, if they are produced, usually abort. Bulbils (small bulblets) are produced on top of the scape. The flower stalks of some hardneck garlic are distinctly coiled. These types are referred to as rocambole or serpent garlic. Typically, hardneck garlic cultivars have 4 to 12 cloves surrounding the flower stalk. Because of the hard flower stalk, they are difficult to braid. Garlic Scapes are completely edible and considered a delicacy.  Watch our recipes page for delicious ways to prepare garlic scapes.

Softneck cultivars (Allium sativum var. sativum) are sometimes referred to as “artichoke” cultivars and do not produce a seed stalk. These cultivars are commonly used in California for commercial production. However, some softneck cultivars are suitable for cold climates. Softneck cultivars are generally more productive than hardnecks because all the energy goes to producing a bulb rather than a bulb and flower stalk. Bulbs have 10 to 40 cloves arranged in layers. Softneck garlic tends to have a much longer shelf life than hardneck garlic and typically can be stored for 6 to 8 months without significant deterioration. They also are easy to braid.

Elephant, porcelain, or Greathead garlic is actually a type of leek (Allium ampeloprasum). Elephant garlic is much larger than true garlic, often weighing as much as 1 pound per bulb. They also store well. The taste of elephant garlic is much milder than that of true garlic, but in cold climates, it can develop a sharp or bitter taste.

PREPARATION OF THE GARLIC BULBS/CLOVES

Open your garlic box the same day it is received! This will help prevent mold/mildew/rot, as it will allow the garlic to continue drying. Place the garlic in a cool location away from sunlight as you wait for the proper planting time.

Up to 2 days prior to planting (but not longer), “shuck” the garlic. Remove the outer husks and separate the cloves, leaving the skins on the individual cloves. Store the cloves in a cool location away from sunlight.

One helpful step to help avoid disease is to shuck your garlic away from your field/garden, so the dirt particles and shucks can not contaminate your soil. This may be an unnecessary precaution, but it’s an easy one to do. Therefore, we recommend shucking garlic away from your field/garden.

Dipping/soaking cloves: more to come here in the near future…

PLANTING

Planting Garlic: Garlic grows best in well-drained, fertile soils that are high in organic matter. Misshapen bulbs may result when garlic is grown in heavy, clay soils. Incorporating compost or well-rotted manure into heavy, clay soils can be beneficial. The optimum soil pH for garlic is between 6 and 7. Before planting, soils should be well tilled to provide a loose growing bed for bulb development. Because garlic plants do not produce true seeds, garlic is grown by planting cloves. Garlic cloves can be purchased at garden centers or from mail-order companies, through direct purchase online from growers is typically more economical.

Planting cloves from garlic purchased at the grocery store is not recommended because these are usually softneck cultivars that are mainly adapted to mild climates. Additionally, most grocery store garlic has been exposed to chemicals that postpone or prevent growth for longer shelf life.

Cloves should be planted in fall in most of the US (October to early November) or early spring (late March to early April). Spring-planted garlic will not likely achieve the same size as fall-planted garlic. Contact your local Extension Office or state Extension for information about planting times specific to your area.

Fall-planted garlic should be mulched with a 4- to 6-inch layer of weed-seed-free straw to help prevent winter injury. In early spring, move the straw to between the rows to allow the garlic foliage to emerge and moisture to evaporate from the soil. The mulch helps control weeds during the growing season.

Late spring planting results in smaller bulbs at harvest.

Plant cloves with the pointed side up, root end down. When planted upside down, misshapen bulbs often develop. Plant cloves about 1 inch deep, or contact your Extension Office for recommended depth for your climate/zone.

Hardneck (top-setting) garlic cultivars also may also be grown from the bulbils or bulblets. Plant the bulblets in early spring and allow to grow in the same area for 18 months. By the end of the first season, the bulblets will form “rounds” or unsegmented bulbs. Left undisturbed, they will form a cluster of cloves by the following summer.

SPACING

Place cloves 3 to 5 inches apart within the row. Rows should be spaced 18 to 24 inches apart.

FERTILIZING

We suggest that you contact your local agricultural extension office for recommendations specific to your growing area.

Garlic requires more fertilizer than many vegetables. Incorporate 1 to 2 pounds of an all-purpose garden fertilizer (10-10-10) per 100 square feet before planting. One month after planting apply an additional pound per 100 foot of row in a band 3 to 4 inches from the base of the plants. Avoid nitrogen applications after the first week of May because bulbing may be delayed. Soil tests should be taken before planting to determine phosphorus and potassium needs. 

If you prefer to garden naturally, try fertilizing with blood meal, bone meal, and/or fish meal.

MAINTENANCE

Water plants once per week during dry weather. Stop irrigating in late June to allow the foliage to yellow and die before harvest. Like an onion, garlic has a shallow root system. Weeds should be removed carefully to avoid disturbing or pulling up the garlic bulbs with the weeds. Mulches help control weeds and conserve soil moisture.

POTENTIAL PROBLEMS

Most garlic diseases are either soil- or set-borne and usually can be controlled with proper rotation and planting disease-free sets. Before planting, check each clove for signs of disease. Discard any infected cloves or bruised cloves because they may decay in the soil. Many garlic cultivars are susceptible to yellow tips.

The development of yellow tips early in the season (before bulbing) may drastically reduce yields. It is usually a sign of water stress, nutrient deficiency, or disease. Insects are not a major problem for garlic production, though a few destructive pests do exist.

HARVEST AND STORAGE

When is it best to harvest garlic?  In late spring/early summer, the garlic begins to change from a green onion-looking plant to forming bulbs. The greatest part of the size develops in the last month before harvest.

Spring garlic looks similar to green onions. It has not yet begun to form cloves in mid/late April in Iowa. Spring garlic can be eaten, but of course, won’t allow you to produce as large of a quantity as if it matures before harvest. Still, it is another unique way to enjoy your garlic!

Carefully dig garlic bulbs when the foliage starts to turn yellow and die, most often when half of the leaves are dying. Yellowing normally occurs between June and September (varying by climate/zone). Dry or cure the bulbs in a warm, well-ventilated, and shaded location for at least 2 to 3 weeks.

After drying, remove the foliage 1 inch above the bulbs or use the foliage to braid the bulbs together. Place the bulbs in a mesh bag or open crate and store where it is cool (32–40°F) and dry (65–70% relative humidity). Softneck types can be stored for 6 months or more, whereas hardneck types may only store for approximately 3-5 months. More about how to store garlic here.

FOR MORE INFORMATION

If you have any questions, feel free to contact us!

Additional information also is available from these Web sites, and also your state’s Extension web site:

All garlic seed for sale is supplied by our small micro-farm in Elgin Oregon – Greif’s Gourmet Garlic!

Continue Reading

Articles

Should I Kill a Black Widow Spider: Debunking the Myths

Published

on

Should I Kill a Black Widow Spider

Are you feeling a shiver down your spine at the mere mention of a “Should I Kill a Black Widow Spider”? You’re not alone. These notorious arachnids have earned quite the reputation for their venomous bite and striking appearance. But before you reach for that shoe to squash one on sight, let’s delve into the myths and facts surrounding these eight-legged creatures. Join us as we uncover whether you should really kill a Black Widow spider or if there might be a better way to handle them.

Identifying a Black Widow Spider

Black Widow spiders are easily recognizable by their shiny black bodies and distinctive red hourglass marking on the underside of their abdomen. Females are larger than males, with bodies measuring about half an inch in length. Their webs are irregular and messy, often found in dark, secluded areas like garages, sheds, or woodpiles. When identifying a Black Widow spider, remember that they prefer to hide rather than confront humans.

Keep an eye out for these telltale signs to spot a Black Widow spider lurking nearby. Familiarizing yourself with their appearance can help you take appropriate precautions if you come across one in your home or yard.

Black Widow Spider Bites

Black Widow Spider Bites can be a cause for concern due to the venom they inject when biting humans. These bites are often sharp and painful, with symptoms ranging from redness and swelling to muscle cramps and nausea. While most healthy adults may not experience severe reactions, children, the elderly, or individuals with compromised immune systems are at higher risk of complications. It’s essential to seek medical attention if bitten by a Black Widow Spider to receive proper treatment and prevent any potential complications that may arise from the venom.

Where Are Black Widows Commonly Found?

Black widow spiders are often found in dark, secluded areas such as sheds, garages, and basements. They prefer hiding spots close to the ground where they can easily build their webs and catch prey. Outdoor spaces like woodpiles, rock piles, and dense vegetation also provide ideal habitats for black widows to thrive.

In warmer climates, black widows can be commonly found in undisturbed outdoor structures or debris piles. It’s essential to remain cautious when working around these areas to avoid accidental encounters with these venomous arachnids.

How to Get Rid of Black Widow Spiders (Safely)

If you’re dealing with black widow spiders in your home, it’s essential to address the issue promptly and safely. To get rid of these potentially dangerous pests, start by decluttering and organizing your space. Seal up cracks and crevices where they may enter, and use a vacuum to remove webs and egg sacs. Be cautious when handling items in dark or secluded areas as that’s where they like to hide.

Consider using natural remedies like diatomaceous earth or essential oils known for repelling spiders. If the infestation persists, contact a professional pest control service for effective removal without putting yourself at risk.

Black Widow Prevention

Preventing black widow spiders from entering your home starts with keeping a tidy environment. Regularly clean and declutter to eliminate hiding spots. Seal cracks and crevices around doors, windows, and utility entry points to block their access. Outdoor lighting can attract insects that black widows feed on, so consider using yellow bulbs instead of white ones. Keep vegetation trimmed away from the house to reduce potential nesting sites.

Being proactive in maintaining a clean and well-sealed home can significantly reduce the chances of encountering black widow spiders indoors. Simple steps like these can create an inhospitable environment for these venomous arachnids, helping to keep you and your family safe from potential bites.

Professional Black Widow Control

When facing a black widow infestation, seeking professional help is often the best course of action. Pest control experts have the knowledge and tools to safely remove these dangerous spiders from your home. They can identify entry points, locate nests, and implement effective eradication methods tailored to your specific situation.

Professional black widow control services not only eliminate current infestations but also provide long-term prevention strategies to keep these venomous spiders at bay. By enlisting the expertise of professionals, you can ensure a thorough and safe removal process for your peace of mind.

Busting Black Widow Spider Myths

There are plenty of myths surrounding black widow spiders that can make them seem scarier than they actually are. One common myth is that their bites are deadly, but the truth is that fatalities from black widow bites are extremely rare. Another misconception is that these spiders are aggressive and will attack humans without provocation, which is not true.

Additionally, many believe that a black widow bite will result in excruciating pain, but most people only experience mild symptoms. It’s important to separate fact from fiction when it comes to these arachnids to avoid unnecessary fear or harm.

Myth: Black Widow Bites Are Deadly

Black Widow spiders have a fearsome reputation, with one common myth being that their bites are deadly. While it’s true that Black Widow venom is potent, fatal outcomes from their bites are extremely rare. Most healthy adults will experience painful symptoms but recover without serious complications.

In reality, only a small percentage of Black Widow bite cases result in severe reactions, and fatalities are even rarer. It’s crucial to seek medical attention if bitten to manage symptoms effectively and prevent any potential complications.

Myth: Black Widow Spiders Are Aggressive

One common myth about black widow spiders is that they are aggressive creatures ready to attack at any moment. However, the truth is quite different. Black widows are actually shy and reclusive by nature, preferring to stay hidden rather than confront humans.

These spiders only bite when they feel threatened or cornered, such as when someone accidentally disturbs their web or habitat. In most cases, they will retreat and try to avoid human contact altogether. So next time you spot a black widow in your home, remember that they are more likely to flee than come after you aggressively!

Myth: Bites From Black Widow Spiders Are Excruciating

One common myth about black widow spiders is that their bites are excruciatingly painful. While it’s true that the venom of a black widow can cause discomfort, not all bites result in intense pain. In fact, many people may not even realize they have been bitten until symptoms appear.

The severity of a black widow bite can vary depending on factors like the individual’s health and where the bite occurred. It’s important to seek medical attention if you suspect you’ve been bitten by a black widow spider to receive proper care and treatment.

What’s The Truth?

The truth about “Should I Kill a Black Widow Spider” is that while their bites can be harmful, they are rarely life-threatening. These spiders are shy and prefer to flee rather than attack, making them less aggressive than popularly believed.

Contrary to common misconceptions, not all Black Widow bites result in excruciating pain. In fact, many victims may only experience mild symptoms similar to a bee sting. Understanding the facts behind these creatures can help dispel unnecessary fear and encourage more humane approaches to managing their presence.

How Dangerous Are Black Widow Spiders?

Black widow spiders are known for their venomous bite, containing a neurotoxin that can be harmful to humans. While fatalities from black widow bites are rare, the symptoms can be severe and may require medical attention. It’s essential to recognize the signs of a black widow bite, such as muscle cramps, abdominal pain, and sweating.

Although most healthy adults will recover from a black widow bite with proper treatment, children and individuals with compromised immune systems may experience more severe reactions. It’s crucial to exercise caution around these spiders and seek medical help if bitten.

5 Ways You’re Inviting Black Widow Spiders Into Your Home

Black widow spiders might be lurking closer to home than you think. Cluttered spaces offer cozy hiding spots for these arachnids, so tidy up those messy corners and storage areas. Outdoor lighting can attract insects, which in turn draw black widows – consider using yellow bug lights instead.

Overgrown vegetation around your home creates a spider paradise; keep shrubs trimmed and remove debris to deter them from setting up camp. Firewood stacked against the house provides easy access for black widows – store it away from the structure to limit their entry points.

Conclusion

Should I Kill a Black Widow Spider, can be concerning due to their venomous bite, it is important to remember that they are not as dangerous as commonly believed. By understanding more about these spiders, their behavior, and how to prevent them from entering your home, you can coexist with them safely. If you encounter a black widow spider, consider the facts rather than myths before deciding whether or not to eliminate it. With proper knowledge and precautions in place, you can effectively manage any potential risks associated with black widow spiders without resorting to unnecessary harm. Remember: education and prevention are key when it comes to dealing with these misunderstood arachnids.

Continue Reading

Trending