Home Empowerment
Eco-Friendly Cleaning: Sustainable Practices for a Greener Home

As awareness of environmental issues grows, many homeowners are seeking ways to make their cleaning routines more sustainable. Traditional cleaning products and methods can have a negative impact on the environment due to the use of harsh chemicals, single-use plastics, and high water consumption. By embracing eco-friendly cleaning practices, you can reduce your environmental footprint, create a healthier home, and support sustainability. This article will explore how you can make simple yet effective changes to your cleaning routine, from using natural products to minimizing waste.
The Importance of Eco-Friendly Cleaning
Eco-friendly cleaning isn’t just a trend; it’s a conscious decision to protect our planet. Traditional cleaning products often contain harmful chemicals that can pollute waterways and contribute to air pollution. Additionally, single-use plastic containers and disposable cleaning tools add to the growing problem of waste. By switching to more sustainable practices, you can lessen your environmental impact while creating a safer home for yourself and your family.
Choosing Green Cleaning Products
One of the easiest ways to adopt eco-friendly cleaning practices is by selecting products that are safe for both your home and the environment. Look for green cleaning products with the following qualities:
1. Non-Toxic Ingredients
Check labels for plant-based ingredients and avoid products that contain harsh chemicals like ammonia, chlorine, or phthalates. Non-toxic products are not only better for the environment but also safer for indoor air quality, making them ideal for households with children, pets, or individuals with allergies.
2. Biodegradable and Recyclable Packaging
Opt for cleaning products in biodegradable packaging, or those that use minimal plastic. Some companies offer refill stations or bulk options, allowing you to reuse bottles and reduce plastic waste. Alternatively, purchase cleaning supplies in recyclable containers and ensure they’re disposed of properly.
3. Certification Labels
Look for certification labels such as EPA Safer Choice, Green Seal, or EcoLogo, which indicate that a product has been tested for environmental and health safety. These labels help you make informed choices when selecting eco-friendly products.
DIY Natural Cleaning Solutions
Making your own cleaning solutions is a simple, cost-effective, and eco-friendly way to clean your home. You can create effective cleaners with basic ingredients like vinegar, baking soda, and lemon. Here are a few recipes to get you started:
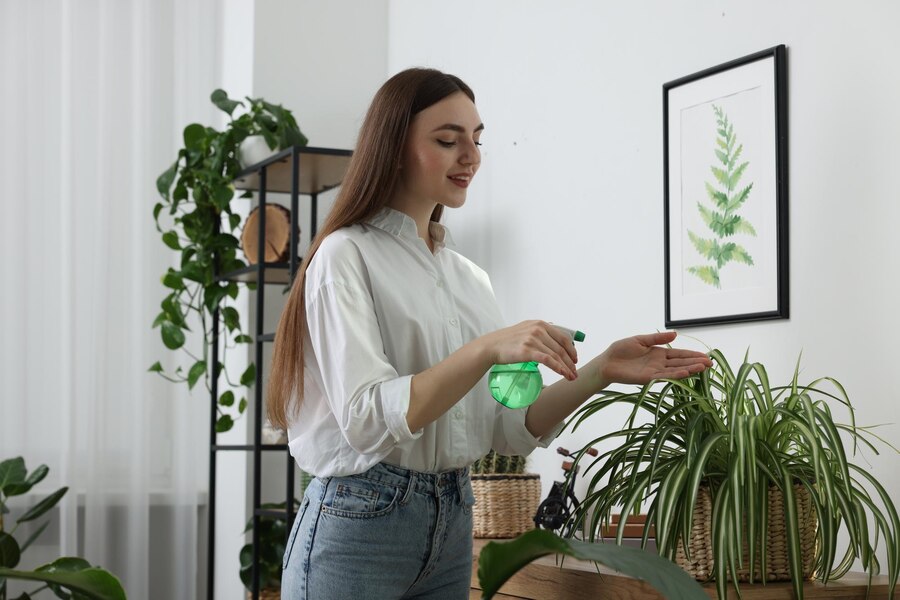
All-Purpose Cleaner
Mix equal parts of white vinegar and water in a spray bottle. Add a few drops of essential oil, such as lavender or tea tree, for a pleasant scent. This solution works well on most surfaces, but avoid using it on natural stone, as vinegar can damage its finish.
Baking Soda Scrub
Baking soda is an excellent abrasive cleaner for scrubbing sinks, bathtubs, and countertops. Sprinkle baking soda directly on the surface, scrub with a damp cloth, and rinse thoroughly. For tougher stains, mix baking soda with a small amount of water to form a paste.
Glass Cleaner
Combine one part vinegar with two parts water and a few drops of lemon juice in a spray bottle. Spray on glass surfaces, then wipe with a microfiber cloth for a streak-free shine. This solution works on mirrors, windows, and glass tabletops.
Natural Disinfectant
Hydrogen peroxide is a powerful natural disinfectant. Pour it into a spray bottle and use it on non-porous surfaces like countertops, doorknobs, and light switches. Let it sit for a few minutes before wiping to ensure effective germ-killing power.
Sustainable Cleaning Tools
The tools you use for cleaning can also impact your environmental footprint. Consider swapping single-use items with reusable or biodegradable alternatives:
1. Microfiber Cloths
Microfiber cloths are a great alternative to disposable paper towels. They’re highly absorbent, durable, and can be used repeatedly. Look for high-quality cloths that can withstand multiple washes, and avoid products that release microplastics into waterways.
2. Reusable Mop Pads
Instead of using disposable mop pads, invest in a mop with washable, reusable pads. These pads can be thrown in the laundry after each use, reducing waste and ensuring that your floors are cleaned with a fresh, sanitized pad every time.
3. Compostable Sponges and Scrubbers
Traditional sponges can contribute to plastic waste. Opt for compostable sponges made from plant-based materials, such as cellulose, and natural scrub brushes with wooden handles and plant-fiber bristles. These options are both effective and biodegradable.
Reduce Water and Energy Usage
Eco-friendly cleaning isn’t just about using green products; it also involves conserving resources. Here are some tips for reducing water and energy usage during your cleaning routine:
1. Clean with Cold Water
Using cold water for cleaning is a simple way to save energy. For most cleaning tasks, cold water is just as effective as hot water. When doing laundry, for example, cold water can still remove dirt and stains, and it also helps clothes last longer.
2. Limit Water Usage
When cleaning, be mindful of how much water you’re using. Fill a bucket for tasks like mopping rather than letting water run, and try to use minimal water for spot-cleaning surfaces. By being conscious of water consumption, you’re conserving this precious resource while still achieving effective results.
3. Air Dry Whenever Possible
After washing items like dishes or clothes, skip the dryer and allow them to air dry instead. This reduces energy consumption and extends the lifespan of fabrics. If possible, air-dry clothes outside to save even more energy.
Green Cleaning for Different Rooms in Your Home
Each room has its own set of cleaning needs, and with a few adjustments, you can apply eco-friendly cleaning methods throughout your entire home.
Kitchen
The kitchen is a high-traffic area prone to spills, stains, and odors. Use natural cleaners like baking soda and vinegar for tasks such as wiping down countertops and cleaning the inside of the refrigerator. For greasy stove tops, try a mixture of dish soap and baking soda for an effective degreaser.
Bathroom
Bathrooms require regular cleaning to prevent mold and mildew. Use a vinegar and water solution for cleaning tiles and grout, and sprinkle baking soda on the sink and tub for a gentle scrub. Choose compostable toilet brushes or bamboo alternatives to replace plastic brushes.
Living Room
For a clean living room, dust surfaces with microfiber cloths and vacuum regularly to remove pet hair and dirt. Essential oils can be added to DIY sprays for a fresh scent, and houseplants can improve air quality by naturally filtering pollutants. If you have carpets, a professional cleaning service like Sapphire Home Cleaning can remove allergens and keep your living room feeling fresh without compromising on sustainability.
Bedroom
Bedrooms should be free from harsh chemicals, as this is where we rest and recharge. Wash bedding in cold water with eco-friendly detergent, and let it air dry if possible. Avoid using chemical-laden sprays on mattresses; instead, sprinkle baking soda on the mattress and vacuum after letting it sit for an hour.
Embracing a Zero-Waste Mindset
One of the best ways to make cleaning more sustainable is by adopting a zero-waste approach. Here are a few ways to reduce waste in your cleaning routine:
- Buy in Bulk: Purchase cleaning products in bulk to minimize packaging waste. Look for refill stations or stores that offer bulk options.
- DIY When Possible: Homemade cleaning solutions can reduce the need for store-bought products and eliminate single-use packaging.
- Repurpose Containers: Instead of buying new spray bottles, reuse containers from other products. Glass bottles are a durable and eco-friendly option for homemade cleaners.
- Compost Biodegradable Items: Compost items like paper towels and biodegradable sponges to reduce waste and create nutrient-rich compost for plants.
Conclusion: Green Cleaning for a Healthier Home and Planet
Adopting eco-friendly cleaning practices doesn’t have to be complicated. By making small changes—like choosing natural products, conserving resources, and minimizing waste—you can create a cleaner, greener home. Embracing sustainable practices benefits the environment and contributes to a healthier indoor space. For homeowners who want an extra hand, professional services like Sapphire Home Cleaning can help maintain a spotless home while prioritizing environmentally-friendly solutions. Embrace these sustainable habits, and enjoy the satisfaction of a cleaner home and a cleaner planet.
Home Empowerment
How to Get Pee Smell Out of Couch: Solutions for a Fresh Home

Few household smells are as stubborn—or as embarrassing—as urine odor embedded in a couch. Whether it’s from a potty-training toddler, an elderly pet, or an unexpected accident, that lingering ammonia scent can make your living space feel unclean. The good news? With the right techniques, you can completely eliminate urine smells and restore freshness to your upholstery.
This comprehensive guide covers everything from immediate emergency response to deep-cleaning solutions for set-in odors. We’ll explore both DIY remedies and professional-grade solutions, ensuring you have options for every level of mess.
Why Proper Urine Odor Removal Matters
Ignoring urine smells doesn’t just create an unpleasant environment—it can lead to bigger problems:
- Bacterial growth: Urine breeds bacteria, which can cause health issues.
- Repeat accidents: Pets often remark the same spot if the scent remains.
- Long-term damage: Urine can degrade fabric and cushioning over time.
By acting quickly and using the right cleaning methods, you’ll protect your furniture and maintain a fresh, hygienic home.
Step-by-Step Guide to Remove Pee Smell from Couch
1. Act Fast: Blot Up Excess Liquid
Why it works: The sooner you remove urine, the less it soaks into fibers.
- Materials needed: Absorbent towels, paper towels, or a dry microfiber cloth.
- Technique:
- Press (don’t rub) firmly to soak up liquid.
- Replace towels as they become saturated.
- If the urine is already dry, skip to step 2.
2. Neutralize Odors with Vinegar Solution
Why it works: Vinegar’s acidity breaks down uric acid crystals, the main cause of lingering smells.
- Mix: 1 part white vinegar + 1 part cold water in a spray bottle.
- Application:
- Lightly mist the affected area (test on a hidden spot first).
- Let sit for 10-15 minutes.
- Blot dry with a clean cloth.
- Bonus: Add a few drops of essential oil (e.g., lavender) for a fresh scent.
3. Deep Clean with Baking Soda
Why it works: Baking soda absorbs odors and lifts remaining stains.
- Method:
- Sprinkle a generous layer over the damp area.
- For tough smells, mix baking soda with hydrogen peroxide (3%) to form a paste.
- Let sit for 6+ hours (overnight is best).
- Vacuum thoroughly.
4. Use an Enzyme Cleaner for Stubborn Stains
Why it works: Enzymes break down urine’s organic compounds, eliminating odors at the source.
- Top picks: Nature’s Miracle, Rocco & Roxie, or Simple Solution.
- How to apply:
- Follow product instructions (usually involves soaking the area).
- Allow to air-dry completely—don’t rinse!
5. Machine Wash Removable Covers (If Applicable)
- Best detergent: Use an enzyme-based or oxygen bleach formula.
- Drying: Air-dry in sunlight (UV rays help kill bacteria).
Pro Tips for Maximum Effectiveness
✅ Avoid Heat: Never use steam or hot water—it sets urine stains and odors.
✅ Blacklight Trick: Use a UV flashlight to find old, hidden urine spots.
✅ Prevent Residue: Rinse with cold water after vinegar treatment to avoid stickiness.
✅ For Leather Couches: Use a leather-safe enzymatic cleaner to avoid damage.
When to Call a Professional
If the smell persists after multiple treatments, consider:
- Professional upholstery cleaning (hot water extraction method).
- Ozone treatment (for severe, deep-set odors).
Final Thoughts
How to Get Pee Smell Out of Couch requires quick action, the right cleaners, and patience. By following these steps—especially using enzyme treatments for stubborn odors—you can restore your couch to a fresh, odor-free state.
FAQ: Your Top Questions Answered
Does vinegar discolor couch fabric?
It shouldn’t, but always test on a hidden area first.
Can I use bleach on my couch?
No! Bleach can damage fabric and react with urine, making smells worse.
How do I stop my pet from peeing on the couch again?
- Use a pet deterrent spray.
- Place a washable waterproof cover.
- Retrain with positive reinforcement.
Why does the smell come back after cleaning?
If urine reached the cushion foam, you may need a deep soak with enzyme cleaner or professional help.
Home Empowerment
How to Get Rid of German Roaches: The Ultimate Guide

German roaches (Blattella germanica) are among the most stubborn household pests. Unlike other roach species, they reproduce rapidly, hide in tight spaces, and quickly develop resistance to pesticides. If you’re dealing with an infestation, this guide will walk you through how to get rid of German roaches using proven, science-backed methods.
Why German Roaches Are So Hard to Eliminate
Before diving into solutions, it’s crucial to understand why these pests are so resilient:
✅ Rapid Reproduction – A single female can produce up to 400 offspring in her lifetime.
✅ Pesticide Resistance – They adapt quickly to chemical treatments.
✅ Nocturnal & Secretive – They hide in cracks, appliances, and electrical outlets.
Now, let’s tackle the problem systematically.
Step 1: Identify the Infestation
German roaches are small (½ inch), light brown, with two dark stripes behind their heads. Signs of infestation include:
🔍 Droppings (tiny black specks)
🔍 Egg cases (oothecae) – Small, brown, capsule-like
🔍 Musty odor – A sign of large infestations
Step 2: Sanitation – Cut Off Their Food Supply
Roaches thrive in dirty environments. To discourage them:
✔ Store food in airtight containers
✔ Clean spills immediately
✔ Take out trash daily
✔ Fix leaky pipes (roaches need water)
Step 3: Use German Roach-Specific Baits
Why baits work best:
German roaches eat dead roaches and feces, making baits highly effective. The poison spreads through the colony.
Top Bait Choices:
Product | Active Ingredient | Effectiveness |
---|---|---|
Advion Gel Bait | Indoxacarb | ★★★★★ |
Combat Max Roach Killing Gel | Hydramethylnon | ★★★★☆ |
Invict Gold Cockroach Gel | Abamectin | ★★★★★ |
How to Apply:
- Place pea-sized drops near hiding spots (under sinks, behind fridges).
- Avoid spraying insecticides—they’ll scatter roaches, worsening the problem.
Step 4: Apply Insect Growth Regulators (IGRs)
IGRs disrupt roach reproduction by preventing nymphs from maturing. Recommended brands:
✅ Gentrol Point Source (Hydroprene)
✅ NyGuard IGR Concentrate
Step 5: Seal Entry Points
Prevent re-infestation by:
🔧 Caulking cracks in walls
🔧 Installing door sweeps
🔧 Covering vents with fine mesh
Step 6: Monitor with Sticky Traps
Place sticky traps in hotspots to track remaining roaches. Brands like Harris Roach Traps work well.
Step 7: When to Call a Professional
If DIY methods fail after 4-6 weeks, consider hiring an exterminator. They use stronger treatments like:
💉 Fumigation
💉 Residual insecticide sprays
Prevention: Keep Roaches from Coming Back
🚫 Avoid cardboard storage (roaches love it)
🚫 Inspect groceries before storing
🚫 Regularly deep-clean kitchens & bathrooms
German Roach vs. Other Roaches (Comparison Chart)
Feature | German Roach | American Roach | Oriental Roach |
---|---|---|---|
Size | ½ inch | 1.5–2 inches | 1 inch |
Color | Light brown | Reddish-brown | Dark brown/black |
Preferred Habitat | Kitchens, bathrooms | Sewers, basements | Damp areas |
Reproduction Speed | Very fast | Moderate | Slow |
Final Verdict: How to Get Rid of German Roaches for Good
- Use gel baits (Advion, Invict Gold).
- Apply IGRs to stop reproduction.
- Maintain strict sanitation.
- Seal entry points.
- Monitor with traps.
Home Empowerment
Heliconia Color: Transform Your Garden with Tropical Beauty

Heliconias, often called “lobster claws” or “parrot flowers,” are the crown jewels of tropical gardens. Their bold, vibrant colors and unique shapes make them a favorite among gardeners and landscapers. But what makes heliconia color so captivating? And how can you harness their beauty to transform your outdoor space?
In this comprehensive guide, we’ll dive deep into the world of heliconias. From their origins and varieties to practical growing tips and design ideas, you’ll walk away with everything you need to know to make these tropical wonders the star of your garden.
Why Heliconia Color is a Game-Changer for Your Garden
Heliconias are more than just pretty flowers—they’re a statement. Their fiery reds, sunny yellows, and deep oranges can instantly elevate any garden or landscape. Here’s why heliconia color is so special:
- Unmatched Vibrancy: Heliconias boast some of the most intense hues in the plant kingdom.
- Tropical Appeal: They bring an exotic, vacation-like vibe to your space.
- Versatility: Whether in pots, borders, or as focal points, heliconias adapt to various garden styles.
The Science Behind Heliconia Color
Heliconias owe their stunning colors to a combination of pigments and environmental factors. The primary pigments responsible for their hues are:
- Anthocyanins: These produce red, purple, and blue shades.
- Carotenoids: Responsible for yellows and oranges.
- Chlorophyll: Adds a touch of green to the bracts and leaves.
Interestingly, heliconia color can vary depending on factors like soil pH, sunlight, and temperature. For instance, heliconias grown in slightly acidic soil often exhibit deeper reds, while those in alkaline soil may lean toward yellows.
Top Heliconia Varieties for Jaw-Dropping Color
With over 200 species, heliconias offer a rainbow of options. Here are some of the most popular varieties to consider:
Variety | Color | Height | Best For |
---|---|---|---|
Heliconia Rostrata | Red and Yellow | 6-15 ft | Backdrop or Focal Point |
Heliconia Psittacorum | Orange and Green | 3-6 ft | Borders and Containers |
Heliconia Caribaea | Deep Red and Gold | 10-20 ft | Tropical Landscapes |
Heliconia Wagneriana | Multicolored (Red, Yellow, Green) | 4-8 ft | Accent Planting |
How to Grow and Care for Heliconias: A Step-by-Step Guide
1. Choosing the Right Location
Heliconias thrive in warm, humid climates (USDA zones 10-12). They need:
- Full to Partial Sunlight: At least 6 hours of sunlight daily.
- Well-Draining Soil: Rich in organic matter.
- Space to Grow: Some varieties can reach up to 20 feet tall!
2. Planting Tips
- Dig a hole twice the size of the root ball.
- Mix compost or aged manure into the soil for added nutrients.
- Water thoroughly after planting.
3. Watering and Feeding
- Water: Keep the soil consistently moist but not waterlogged.
- Fertilizer: Use a balanced, slow-release fertilizer every 6-8 weeks during the growing season.
4. Pruning and Maintenance
- Remove dead or damaged leaves to encourage new growth.
- Divide overcrowded clumps every 2-3 years to maintain vigor.
Designing with Heliconia Color: Tips and Ideas
Heliconias are incredibly versatile in garden design. Here are some creative ways to use them:
- Tropical Oasis: Pair heliconias with palms, ferns, and orchids for a lush, jungle-like feel.
- Color Blocking: Use contrasting heliconia colors to create bold, eye-catching displays.
- Container Gardening: Grow smaller varieties like Heliconia Psittacorum in pots for patios or balconies.
- Cut Flowers: Heliconias make stunning floral arrangements that last up to two weeks.
Common Challenges and How to Overcome Them
While heliconias are relatively low-maintenance, they can face a few challenges:
- Pests: Watch out for aphids and spider mites. Use neem oil or insecticidal soap as a natural remedy.
- Fungal Diseases: Ensure proper air circulation and avoid overwatering to prevent issues like leaf spot.
- Cold Sensitivity: In cooler climates, grow heliconias in containers and bring them indoors during winter.
Heliconia Color in Action: A Case Study
Project: Tropical Resort Landscape
Location: Florida, USA
Goal: Create a vibrant, low-maintenance garden that wows guests.
Solution:
- Planted Heliconia Rostrata as a backdrop.
- Used Heliconia Psittacorum in containers near walkways.
- Added complementary plants like bird-of-paradise and bromeliads.
Result: The resort’s garden became a guest favorite, with many visitors snapping photos and asking about the plants.
Infographic: Heliconia Color Spectrum
Key Points:
- Breakdown of heliconia varieties by color.
- Tips for enhancing color through soil and sunlight.
- Ideal pairings for garden design.
Conclusion: Bring the Magic of Heliconia Color to Your Garden
Heliconias are more than just plants—they’re a celebration of color, life, and tropical beauty. By understanding their needs and experimenting with design, you can create a garden that’s not only visually stunning but also a joy to maintain.
Ready to transform your space? Start by choosing your favorite heliconia variety and follow the tips in this guide. And don’t forget to share your heliconia journey with us—tag us in your garden photos or drop a comment below!
-
Articles1 year ago
How Many Times Can You Regrow Green Onions
-
News7 months ago
Understanding HotLeaks: What You Need to Know
-
Fashion5 months ago
Opals in the USA: A Gemstone Transforming the Crystal Healing Market
-
Technology11 months ago
The Wonders of Oh Em Gee Blog
-
Entertainment11 months ago
Bare it All: Unforgettable Skinny Dipping Stories Shared
-
Health11 months ago
Can You Smoke Shrooms? Exploring the Myths and Realities
-
Articles2 months ago
WHAT IS THE DIFFERENCE BETWEEN SEED GARLIC AND FOOD GARLIC?
-
Fashion12 months ago
Make a Statement with Stunning Black Homecoming Dresses