Connect with us

Home Empowerment

Wisteria Bonsai Trees: Capturing Elegance and Tranquility

Published

on

Wisteria Bonsai Trees

Introduction

Wisteria bonsai trees are renowned for their breathtaking beauty and serene elegance, capturing the essence of traditional Japanese aesthetics in miniature form. These exquisite bonsai specimens, adorned with cascading clusters of fragrant flowers, evoke a sense of tranquility and natural grace. This article explores the characteristics of wisteria bonsai trees, cultivation techniques, and the cultural significance they hold in the art of bonsai.

Characteristics of Wisteria Bonsai Trees

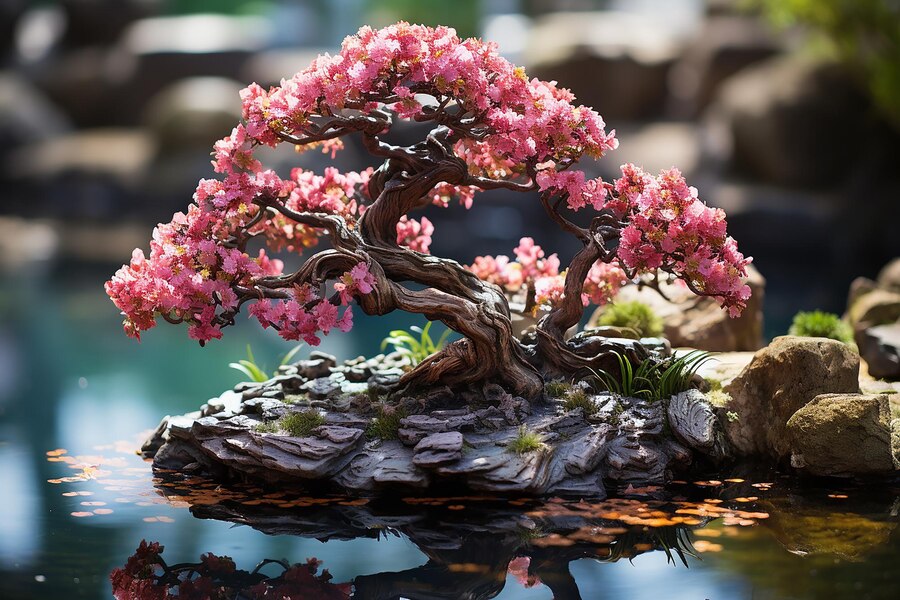
  1. Flowering Beauty: The hallmark of wisteria bonsai trees is their spectacular floral display. During the springtime, wisteria bursts into cascades of pendulous blooms in shades of lavender, pink, white, or blue, depending on the species and cultivar.
  2. Graceful Form: Wisteria bonsai trees are admired for their graceful, vine-like growth habit. The branches and stems cascade and twist elegantly, creating a sense of movement and natural flow characteristic of mature wisteria vines.
  3. Fragrance: In addition to their visual appeal, wisteria flowers emit a delicate, sweet fragrance that enhances their allure. This fragrance adds an extra dimension to the sensory experience of observing and caring for a wisteria bonsai.
  4. Seasonal Changes: Like all bonsai, wisteria trees undergo seasonal changes that reflect the rhythms of nature. In winter, the deciduous foliage drops, revealing the elegant structure of the branches. Spring brings the profusion of flowers, followed by lush green foliage in summer and potentially a second flush of blooms in autumn.

Cultivation Techniques

Cultivating and caring for wisteria bonsai trees requires patience, attention to detail, and an understanding of their specific needs:

  1. Sunlight: Wisteria bonsai thrive in full sun to partial shade. Adequate sunlight promotes healthy growth and abundant flowering. However, protection from intense afternoon sun during hot summers is beneficial to prevent leaf scorch.
  2. Watering: Wisteria bonsai trees prefer consistently moist soil during the growing season. Ensure the soil is well-draining to prevent waterlogged roots, which can lead to root rot. Adjust watering frequency based on environmental conditions and the moisture needs of the tree.
  3. Pruning and Training: Pruning is essential to maintain the compact size and elegant form of wisteria bonsai. Regular pruning of shoots, branches, and roots encourages ramification (branch development) and enhances the tree’s overall aesthetics. Training the branches with wire helps create the characteristic cascading effect of wisteria.
  4. Feeding: Fertilize wisteria bonsai trees regularly during the growing season with a balanced bonsai fertilizer. This promotes healthy growth, flowering, and overall vigor. Reduce or stop fertilization during the dormant winter months.
  5. Repotting: Repot wisteria bonsai every two to three years to refresh the soil, prevent root-bound conditions, and promote healthy root growth. Use a well-draining bonsai soil mix tailored to the specific needs of wisteria.

Cultural Significance

In Japanese culture, wisteria (known as “fuji” in Japanese) holds symbolic importance and is often featured in art, literature, and gardens:

  1. Symbol of Longevity and Beauty: Wisteria symbolizes longevity, endurance, and beauty in Japanese aesthetics. Its graceful vines and abundant flowers are celebrated in traditional tea gardens, temples, and imperial landscapes.
  2. Zen and Tranquility: Wisteria’s cascading form embodies the Zen principles of simplicity and tranquility. In bonsai form, wisteria encourages contemplation and appreciation of nature’s beauty.
  3. Festival Celebrations: In Japan, wisteria festivals (Fuji Matsuri) are held during the peak blooming season to celebrate the beauty of wisteria. Visitors admire spectacular wisteria arbors and bonsai displays, reveling in the ephemeral beauty of the blooms.

Conclusion

Wisteria bonsai trees are not merely horticultural specimens but living works of art that embody elegance, beauty, and cultural significance. Cultivating a wisteria bonsai requires dedication and skill, rewarding enthusiasts with breathtaking floral displays and a connection to centuries-old traditions of bonsai and Japanese aesthetics. Whether adorning a private garden or showcased in a bonsai exhibition, wisteria bonsai trees inspire awe and admiration, inviting contemplation of nature’s splendor and the artistry of bonsai cultivation.

Continue Reading
Click to comment

Leave a Reply

Your email address will not be published. Required fields are marked *

Home Empowerment

How to Get Pee Smell Out of Couch: Solutions for a Fresh Home

Published

on

How to Get Pee Smell Out of Couch

Few household smells are as stubborn—or as embarrassing—as urine odor embedded in a couch. Whether it’s from a potty-training toddler, an elderly pet, or an unexpected accident, that lingering ammonia scent can make your living space feel unclean. The good news? With the right techniques, you can completely eliminate urine smells and restore freshness to your upholstery.

This comprehensive guide covers everything from immediate emergency response to deep-cleaning solutions for set-in odors. We’ll explore both DIY remedies and professional-grade solutions, ensuring you have options for every level of mess.

Why Proper Urine Odor Removal Matters

Ignoring urine smells doesn’t just create an unpleasant environment—it can lead to bigger problems:

  • Bacterial growth: Urine breeds bacteria, which can cause health issues.
  • Repeat accidents: Pets often remark the same spot if the scent remains.
  • Long-term damage: Urine can degrade fabric and cushioning over time.

By acting quickly and using the right cleaning methods, you’ll protect your furniture and maintain a fresh, hygienic home.

Step-by-Step Guide to Remove Pee Smell from Couch

1. Act Fast: Blot Up Excess Liquid

Why it works: The sooner you remove urine, the less it soaks into fibers.

  • Materials needed: Absorbent towels, paper towels, or a dry microfiber cloth.
  • Technique:
    • Press (don’t rub) firmly to soak up liquid.
    • Replace towels as they become saturated.
    • If the urine is already dry, skip to step 2.

2. Neutralize Odors with Vinegar Solution

Why it works: Vinegar’s acidity breaks down uric acid crystals, the main cause of lingering smells.

  • Mix: 1 part white vinegar + 1 part cold water in a spray bottle.
  • Application:
    • Lightly mist the affected area (test on a hidden spot first).
    • Let sit for 10-15 minutes.
    • Blot dry with a clean cloth.
  • Bonus: Add a few drops of essential oil (e.g., lavender) for a fresh scent.

3. Deep Clean with Baking Soda

Why it works: Baking soda absorbs odors and lifts remaining stains.

  • Method:
    • Sprinkle a generous layer over the damp area.
    • For tough smells, mix baking soda with hydrogen peroxide (3%) to form a paste.
    • Let sit for 6+ hours (overnight is best).
    • Vacuum thoroughly.

4. Use an Enzyme Cleaner for Stubborn Stains

Why it works: Enzymes break down urine’s organic compounds, eliminating odors at the source.

  • Top picks: Nature’s Miracle, Rocco & Roxie, or Simple Solution.
  • How to apply:
    • Follow product instructions (usually involves soaking the area).
    • Allow to air-dry completely—don’t rinse!

5. Machine Wash Removable Covers (If Applicable)

  • Best detergent: Use an enzyme-based or oxygen bleach formula.
  • Drying: Air-dry in sunlight (UV rays help kill bacteria).

Pro Tips for Maximum Effectiveness

✅ Avoid Heat: Never use steam or hot water—it sets urine stains and odors.
✅ Blacklight Trick: Use a UV flashlight to find old, hidden urine spots.
✅ Prevent Residue: Rinse with cold water after vinegar treatment to avoid stickiness.
✅ For Leather Couches: Use a leather-safe enzymatic cleaner to avoid damage.

When to Call a Professional

If the smell persists after multiple treatments, consider:

  • Professional upholstery cleaning (hot water extraction method).
  • Ozone treatment (for severe, deep-set odors).

Final Thoughts

How to Get Pee Smell Out of Couch requires quick action, the right cleaners, and patience. By following these steps—especially using enzyme treatments for stubborn odors—you can restore your couch to a fresh, odor-free state.

FAQ: Your Top Questions Answered

Does vinegar discolor couch fabric?

It shouldn’t, but always test on a hidden area first.

Can I use bleach on my couch?

No! Bleach can damage fabric and react with urine, making smells worse.

How do I stop my pet from peeing on the couch again?

  • Use a pet deterrent spray.
  • Place a washable waterproof cover.
  • Retrain with positive reinforcement.

Why does the smell come back after cleaning?

If urine reached the cushion foam, you may need a deep soak with enzyme cleaner or professional help.


Continue Reading

Home Empowerment

How to Get Rid of German Roaches: The Ultimate Guide

Published

on

How to Get Rid of German Roaches

German roaches (Blattella germanica) are among the most stubborn household pests. Unlike other roach species, they reproduce rapidly, hide in tight spaces, and quickly develop resistance to pesticides. If you’re dealing with an infestation, this guide will walk you through how to get rid of German roaches using proven, science-backed methods.

Why German Roaches Are So Hard to Eliminate

Before diving into solutions, it’s crucial to understand why these pests are so resilient:

✅ Rapid Reproduction – A single female can produce up to 400 offspring in her lifetime.
✅ Pesticide Resistance – They adapt quickly to chemical treatments.
✅ Nocturnal & Secretive – They hide in cracks, appliances, and electrical outlets.

Now, let’s tackle the problem systematically.

Step 1: Identify the Infestation

German roaches are small (½ inch), light brown, with two dark stripes behind their heads. Signs of infestation include:

🔍 Droppings (tiny black specks)
🔍 Egg cases (oothecae) – Small, brown, capsule-like
🔍 Musty odor – A sign of large infestations

Step 2: Sanitation – Cut Off Their Food Supply

Roaches thrive in dirty environments. To discourage them:

✔ Store food in airtight containers
✔ Clean spills immediately
✔ Take out trash daily
✔ Fix leaky pipes (roaches need water)

Step 3: Use German Roach-Specific Baits

Why baits work best:
German roaches eat dead roaches and feces, making baits highly effective. The poison spreads through the colony.

Top Bait Choices:

Product Active Ingredient Effectiveness
Advion Gel Bait Indoxacarb ★★★★★
Combat Max Roach Killing Gel Hydramethylnon ★★★★☆
Invict Gold Cockroach Gel Abamectin ★★★★★

How to Apply:

  1. Place pea-sized drops near hiding spots (under sinks, behind fridges).
  2. Avoid spraying insecticides—they’ll scatter roaches, worsening the problem.

Step 4: Apply Insect Growth Regulators (IGRs)

IGRs disrupt roach reproduction by preventing nymphs from maturing. Recommended brands:

✅ Gentrol Point Source (Hydroprene)
✅ NyGuard IGR Concentrate

Step 5: Seal Entry Points

Prevent re-infestation by:

🔧 Caulking cracks in walls
🔧 Installing door sweeps
🔧 Covering vents with fine mesh

Step 6: Monitor with Sticky Traps

Place sticky traps in hotspots to track remaining roaches. Brands like Harris Roach Traps work well.

Step 7: When to Call a Professional

If DIY methods fail after 4-6 weeks, consider hiring an exterminator. They use stronger treatments like:

💉 Fumigation
💉 Residual insecticide sprays

Prevention: Keep Roaches from Coming Back

🚫 Avoid cardboard storage (roaches love it)
🚫 Inspect groceries before storing
🚫 Regularly deep-clean kitchens & bathrooms

German Roach vs. Other Roaches (Comparison Chart)

Feature German Roach American Roach Oriental Roach
Size ½ inch 1.5–2 inches 1 inch
Color Light brown Reddish-brown Dark brown/black
Preferred Habitat Kitchens, bathrooms Sewers, basements Damp areas
Reproduction Speed Very fast Moderate Slow

Final Verdict: How to Get Rid of German Roaches for Good

  1. Use gel baits (Advion, Invict Gold).
  2. Apply IGRs to stop reproduction.
  3. Maintain strict sanitation.
  4. Seal entry points.
  5. Monitor with traps.
Continue Reading

Home Empowerment

Heliconia Color: Transform Your Garden with Tropical Beauty

Published

on

Heliconia Color

Heliconias, often called “lobster claws” or “parrot flowers,” are the crown jewels of tropical gardens. Their bold, vibrant colors and unique shapes make them a favorite among gardeners and landscapers. But what makes heliconia color so captivating? And how can you harness their beauty to transform your outdoor space?

In this comprehensive guide, we’ll dive deep into the world of heliconias. From their origins and varieties to practical growing tips and design ideas, you’ll walk away with everything you need to know to make these tropical wonders the star of your garden.

Why Heliconia Color is a Game-Changer for Your Garden

Heliconias are more than just pretty flowers—they’re a statement. Their fiery reds, sunny yellows, and deep oranges can instantly elevate any garden or landscape. Here’s why heliconia color is so special:

  • Unmatched Vibrancy: Heliconias boast some of the most intense hues in the plant kingdom.
  • Tropical Appeal: They bring an exotic, vacation-like vibe to your space.
  • Versatility: Whether in pots, borders, or as focal points, heliconias adapt to various garden styles.

The Science Behind Heliconia Color

Heliconias owe their stunning colors to a combination of pigments and environmental factors. The primary pigments responsible for their hues are:

  1. Anthocyanins: These produce red, purple, and blue shades.
  2. Carotenoids: Responsible for yellows and oranges.
  3. Chlorophyll: Adds a touch of green to the bracts and leaves.

Interestingly, heliconia color can vary depending on factors like soil pH, sunlight, and temperature. For instance, heliconias grown in slightly acidic soil often exhibit deeper reds, while those in alkaline soil may lean toward yellows.

Top Heliconia Varieties for Jaw-Dropping Color

With over 200 species, heliconias offer a rainbow of options. Here are some of the most popular varieties to consider:

Variety Color Height Best For
Heliconia Rostrata Red and Yellow 6-15 ft Backdrop or Focal Point
Heliconia Psittacorum Orange and Green 3-6 ft Borders and Containers
Heliconia Caribaea Deep Red and Gold 10-20 ft Tropical Landscapes
Heliconia Wagneriana Multicolored (Red, Yellow, Green) 4-8 ft Accent Planting

How to Grow and Care for Heliconias: A Step-by-Step Guide

1. Choosing the Right Location

Heliconias thrive in warm, humid climates (USDA zones 10-12). They need:

  • Full to Partial Sunlight: At least 6 hours of sunlight daily.
  • Well-Draining Soil: Rich in organic matter.
  • Space to Grow: Some varieties can reach up to 20 feet tall!

2. Planting Tips

  • Dig a hole twice the size of the root ball.
  • Mix compost or aged manure into the soil for added nutrients.
  • Water thoroughly after planting.

3. Watering and Feeding

  • Water: Keep the soil consistently moist but not waterlogged.
  • Fertilizer: Use a balanced, slow-release fertilizer every 6-8 weeks during the growing season.

4. Pruning and Maintenance

  • Remove dead or damaged leaves to encourage new growth.
  • Divide overcrowded clumps every 2-3 years to maintain vigor.

Designing with Heliconia Color: Tips and Ideas

Heliconias are incredibly versatile in garden design. Here are some creative ways to use them:

  • Tropical Oasis: Pair heliconias with palms, ferns, and orchids for a lush, jungle-like feel.
  • Color Blocking: Use contrasting heliconia colors to create bold, eye-catching displays.
  • Container Gardening: Grow smaller varieties like Heliconia Psittacorum in pots for patios or balconies.
  • Cut Flowers: Heliconias make stunning floral arrangements that last up to two weeks.

Common Challenges and How to Overcome Them

While heliconias are relatively low-maintenance, they can face a few challenges:

  • Pests: Watch out for aphids and spider mites. Use neem oil or insecticidal soap as a natural remedy.
  • Fungal Diseases: Ensure proper air circulation and avoid overwatering to prevent issues like leaf spot.
  • Cold Sensitivity: In cooler climates, grow heliconias in containers and bring them indoors during winter.

Heliconia Color in Action: A Case Study

Project: Tropical Resort Landscape
Location: Florida, USA
Goal: Create a vibrant, low-maintenance garden that wows guests.

Solution:

  • Planted Heliconia Rostrata as a backdrop.
  • Used Heliconia Psittacorum in containers near walkways.
  • Added complementary plants like bird-of-paradise and bromeliads.

Result: The resort’s garden became a guest favorite, with many visitors snapping photos and asking about the plants.

Infographic: Heliconia Color Spectrum

Key Points:

  • Breakdown of heliconia varieties by color.
  • Tips for enhancing color through soil and sunlight.
  • Ideal pairings for garden design.

Conclusion: Bring the Magic of Heliconia Color to Your Garden

Heliconias are more than just plants—they’re a celebration of color, life, and tropical beauty. By understanding their needs and experimenting with design, you can create a garden that’s not only visually stunning but also a joy to maintain.

Ready to transform your space? Start by choosing your favorite heliconia variety and follow the tips in this guide. And don’t forget to share your heliconia journey with us—tag us in your garden photos or drop a comment below!

Continue Reading

Trending