Home Empowerment
Window Cleaning 101: Enhancing Curb Appeal and Extending Window Lifespan

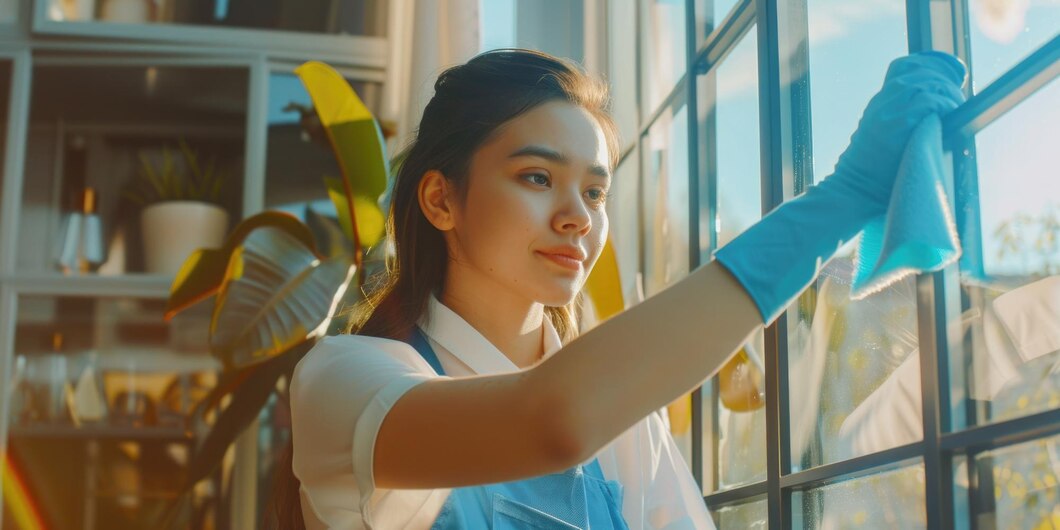
Clean windows are more than just a visual delight—they play a crucial role in enhancing your home’s curb appeal and extending the lifespan of the windows themselves. Over time, dirt, dust, and other environmental contaminants can accumulate on windows, diminishing their clarity and compromising their structural integrity. Regular window cleaning is not just about aesthetics; it’s about maintaining the functionality and longevity of your windows.
In this article, we’ll explore the importance of regular window cleaning, delve into the common challenges homeowners face, and provide practical tips for keeping your windows in pristine condition.
The Role of Clean Windows in Home Aesthetics and Value
Windows are one of the first things people notice about a home, and their condition can significantly impact the overall appearance of your property.
1. Boosting Curb Appeal:
- First Impressions: The cleanliness of your windows can set the tone for how your entire home is perceived. Sparkling clean windows create a welcoming atmosphere, allowing natural light to flood into your home and brighten both the interior and exterior. This not only enhances the aesthetic appeal but also makes your home appear well-maintained and cared for.
- A Unified Look: Clean windows complement the overall appearance of your home, making other exterior features like landscaping, siding, and roofing stand out. Conversely, dirty or streaked windows can detract from these elements, creating a disjointed or neglected look. Regular cleaning ensures that your windows contribute to a cohesive and polished exterior.
2. Preserving Property Value:
- Maintenance and Upkeep: Well-maintained windows are a key factor in preserving the value of your property. Potential buyers are likely to notice the condition of the windows when evaluating a home, and dirty or damaged windows can be a red flag. Keeping your windows clean and in good repair signals that the home has been well-cared for, potentially increasing its market value.
- Longevity of Windows: Regular cleaning is crucial for extending the lifespan of your windows. Dirt, grime, and environmental pollutants can wear down the glass and window frames over time, leading to scratches, etching, and other damage. By removing these contaminants regularly, you help protect the windows from premature aging and the need for costly replacements.
The Challenges of Window Cleaning
Cleaning windows may seem straightforward, but it comes with its own set of challenges. Understanding these challenges can help you avoid common pitfalls and achieve a streak-free shine.
1. Dealing with Hard-to-Reach Windows:
- Safety Concerns: One of the biggest challenges in window cleaning is accessing high or hard-to-reach windows, particularly on multi-story homes. Using ladders can be dangerous, especially if the ground is uneven or the windows are difficult to access. To mitigate these risks, consider using telescoping window cleaning tools or hiring a professional service with the proper equipment to clean these areas safely.
- Effective Tools: When cleaning high windows, it’s essential to use the right tools. A telescoping squeegee or brush allows you to reach these windows without the need for a ladder. Additionally, using an extension pole with a microfiber cloth attached can help you clean difficult spots while keeping both feet on the ground.
2. Achieving a Streak-Free Finish:
- The Right Cleaning Solution: One of the most common complaints about window cleaning is the appearance of streaks after the job is done. This often results from using the wrong cleaning solution or technique. A simple mixture of water and a few drops of dish soap can be effective for most windows. For a streak-free finish, rinse with a solution of water and white vinegar, and dry the glass using a clean, lint-free microfiber cloth.
- Weather Considerations: The weather can play a significant role in how well your windows turn out after cleaning. On hot, sunny days, the cleaning solution can dry too quickly, leading to streaks and spots. To avoid this, try cleaning your windows on a cloudy day or in the early morning or late afternoon when the sun is not directly on the windows.
Practical Tips for Maintaining Clean Windows
Maintaining clean windows doesn’t have to be a daunting task. With a few simple strategies, you can keep your windows looking great year-round.
1. Establish a Regular Cleaning Schedule:
- Seasonal Cleaning: For most homes, cleaning windows twice a year—in the spring and fall—is sufficient to keep them looking their best. Spring cleaning removes the dirt and grime accumulated over the winter, while fall cleaning prepares the windows for the colder months ahead. In areas with high levels of pollution, dust, or pollen, you may need to clean your windows more frequently.
- Spot Cleaning: In addition to your regular cleaning schedule, consider spot cleaning high-traffic areas, such as windows near entryways or those that tend to get dirty faster due to weather exposure. Spot cleaning these windows every few weeks can help maintain their appearance between full cleanings.
2. Use the Right Tools and Techniques:
- Microfiber Cloths: Microfiber cloths are excellent for cleaning windows because they are highly absorbent and don’t leave lint behind. Use one cloth to wash the window and another to dry it, ensuring a streak-free finish. Avoid using paper towels, as they can leave behind lint and cause streaks.
- Squeegees: A squeegee is a must-have tool for cleaning large windows. Start at the top of the window and pull the squeegee straight down in a single, smooth motion. Wipe the squeegee blade with a cloth between each pass to remove excess water and prevent streaking. For the best results, use a squeegee with a rubber blade that’s in good condition—worn or nicked blades can cause streaks.
3. Protecting Windows from Future Dirt:
- Screens and Storm Windows: If your windows have screens or storm windows, make sure to clean these as well. Dirty screens can transfer grime to the windows when it rains, and clogged screens can reduce airflow, leading to condensation and mildew. Clean the screens with a mild soap and water solution, rinse thoroughly, and allow them to dry before reinstalling.
- Water Repellent Solutions: Consider applying a water-repellent solution to the exterior of your windows. These products create a barrier that helps water bead up and roll off the glass, reducing the amount of dirt and grime that sticks to the surface. This can extend the time between cleanings and keep your windows looking cleaner for longer.
The Role of Professional Window Cleaning Services
While DIY window cleaning can be effective for many homeowners, there are times when hiring a professional service is the best option.
1. Expertise and Equipment:
- Tackling Tough Jobs: Professional window cleaners have the experience and tools needed to handle tough jobs, such as removing hard water stains, paint splatters, or other stubborn residues. They also have access to commercial-grade cleaning solutions and equipment that can achieve better results than what’s available to most homeowners.
- Reaching High and Dangerous Areas: For homes with hard-to-reach windows, professional services provide a safer and more efficient option. They are trained to work at heights and have the necessary safety equipment to clean windows on upper floors. This not only ensures a thorough clean but also reduces the risk of injury.
2. Time and Convenience:
- Saving Time: Cleaning all the windows in your home can be a time-consuming task, especially if you have a large property or multiple stories. Hiring a professional service saves you time and effort, allowing you to focus on other important tasks or simply enjoy your clean windows without the hassle.
- Scheduled Maintenance: Many professional window cleaning services like Slon Exterior Care offer scheduled maintenance plans, where they come out at regular intervals to clean your windows. This ensures that your windows remain clean year-round without you having to remember to schedule appointments.
Conclusion: The Long-Term Benefits of Regular Window Cleaning
Regular window cleaning is about more than just keeping your home looking good—it’s about protecting your investment and ensuring the longevity of your windows. Clean windows enhance curb appeal, increase property value, and contribute to a brighter, more welcoming home environment.
By establishing a regular cleaning schedule, using the right tools and techniques, and considering professional services when needed, you can keep your windows in top condition. Whether you’re cleaning them yourself or hiring professionals, the key is consistency. Clean windows not only look great but also function better, providing clear views, improved energy efficiency, and a longer lifespan.
Make window cleaning a priority in your home maintenance routine, and enjoy the benefits of a clearer, brighter, and more beautiful living space.
Home Empowerment
How to Get Pee Smell Out of Couch: Solutions for a Fresh Home

Few household smells are as stubborn—or as embarrassing—as urine odor embedded in a couch. Whether it’s from a potty-training toddler, an elderly pet, or an unexpected accident, that lingering ammonia scent can make your living space feel unclean. The good news? With the right techniques, you can completely eliminate urine smells and restore freshness to your upholstery.
This comprehensive guide covers everything from immediate emergency response to deep-cleaning solutions for set-in odors. We’ll explore both DIY remedies and professional-grade solutions, ensuring you have options for every level of mess.
Why Proper Urine Odor Removal Matters
Ignoring urine smells doesn’t just create an unpleasant environment—it can lead to bigger problems:
- Bacterial growth: Urine breeds bacteria, which can cause health issues.
- Repeat accidents: Pets often remark the same spot if the scent remains.
- Long-term damage: Urine can degrade fabric and cushioning over time.
By acting quickly and using the right cleaning methods, you’ll protect your furniture and maintain a fresh, hygienic home.
Step-by-Step Guide to Remove Pee Smell from Couch
1. Act Fast: Blot Up Excess Liquid
Why it works: The sooner you remove urine, the less it soaks into fibers.
- Materials needed: Absorbent towels, paper towels, or a dry microfiber cloth.
- Technique:
- Press (don’t rub) firmly to soak up liquid.
- Replace towels as they become saturated.
- If the urine is already dry, skip to step 2.
2. Neutralize Odors with Vinegar Solution
Why it works: Vinegar’s acidity breaks down uric acid crystals, the main cause of lingering smells.
- Mix: 1 part white vinegar + 1 part cold water in a spray bottle.
- Application:
- Lightly mist the affected area (test on a hidden spot first).
- Let sit for 10-15 minutes.
- Blot dry with a clean cloth.
- Bonus: Add a few drops of essential oil (e.g., lavender) for a fresh scent.
3. Deep Clean with Baking Soda
Why it works: Baking soda absorbs odors and lifts remaining stains.
- Method:
- Sprinkle a generous layer over the damp area.
- For tough smells, mix baking soda with hydrogen peroxide (3%) to form a paste.
- Let sit for 6+ hours (overnight is best).
- Vacuum thoroughly.
4. Use an Enzyme Cleaner for Stubborn Stains
Why it works: Enzymes break down urine’s organic compounds, eliminating odors at the source.
- Top picks: Nature’s Miracle, Rocco & Roxie, or Simple Solution.
- How to apply:
- Follow product instructions (usually involves soaking the area).
- Allow to air-dry completely—don’t rinse!
5. Machine Wash Removable Covers (If Applicable)
- Best detergent: Use an enzyme-based or oxygen bleach formula.
- Drying: Air-dry in sunlight (UV rays help kill bacteria).
Pro Tips for Maximum Effectiveness
✅ Avoid Heat: Never use steam or hot water—it sets urine stains and odors.
✅ Blacklight Trick: Use a UV flashlight to find old, hidden urine spots.
✅ Prevent Residue: Rinse with cold water after vinegar treatment to avoid stickiness.
✅ For Leather Couches: Use a leather-safe enzymatic cleaner to avoid damage.
When to Call a Professional
If the smell persists after multiple treatments, consider:
- Professional upholstery cleaning (hot water extraction method).
- Ozone treatment (for severe, deep-set odors).
Final Thoughts
How to Get Pee Smell Out of Couch requires quick action, the right cleaners, and patience. By following these steps—especially using enzyme treatments for stubborn odors—you can restore your couch to a fresh, odor-free state.
FAQ: Your Top Questions Answered
Does vinegar discolor couch fabric?
It shouldn’t, but always test on a hidden area first.
Can I use bleach on my couch?
No! Bleach can damage fabric and react with urine, making smells worse.
How do I stop my pet from peeing on the couch again?
- Use a pet deterrent spray.
- Place a washable waterproof cover.
- Retrain with positive reinforcement.
Why does the smell come back after cleaning?
If urine reached the cushion foam, you may need a deep soak with enzyme cleaner or professional help.
Home Empowerment
How to Get Rid of German Roaches: The Ultimate Guide

German roaches (Blattella germanica) are among the most stubborn household pests. Unlike other roach species, they reproduce rapidly, hide in tight spaces, and quickly develop resistance to pesticides. If you’re dealing with an infestation, this guide will walk you through how to get rid of German roaches using proven, science-backed methods.
Why German Roaches Are So Hard to Eliminate
Before diving into solutions, it’s crucial to understand why these pests are so resilient:
✅ Rapid Reproduction – A single female can produce up to 400 offspring in her lifetime.
✅ Pesticide Resistance – They adapt quickly to chemical treatments.
✅ Nocturnal & Secretive – They hide in cracks, appliances, and electrical outlets.
Now, let’s tackle the problem systematically.
Step 1: Identify the Infestation
German roaches are small (½ inch), light brown, with two dark stripes behind their heads. Signs of infestation include:
🔍 Droppings (tiny black specks)
🔍 Egg cases (oothecae) – Small, brown, capsule-like
🔍 Musty odor – A sign of large infestations
Step 2: Sanitation – Cut Off Their Food Supply
Roaches thrive in dirty environments. To discourage them:
✔ Store food in airtight containers
✔ Clean spills immediately
✔ Take out trash daily
✔ Fix leaky pipes (roaches need water)
Step 3: Use German Roach-Specific Baits
Why baits work best:
German roaches eat dead roaches and feces, making baits highly effective. The poison spreads through the colony.
Top Bait Choices:
Product | Active Ingredient | Effectiveness |
---|---|---|
Advion Gel Bait | Indoxacarb | ★★★★★ |
Combat Max Roach Killing Gel | Hydramethylnon | ★★★★☆ |
Invict Gold Cockroach Gel | Abamectin | ★★★★★ |
How to Apply:
- Place pea-sized drops near hiding spots (under sinks, behind fridges).
- Avoid spraying insecticides—they’ll scatter roaches, worsening the problem.
Step 4: Apply Insect Growth Regulators (IGRs)
IGRs disrupt roach reproduction by preventing nymphs from maturing. Recommended brands:
✅ Gentrol Point Source (Hydroprene)
✅ NyGuard IGR Concentrate
Step 5: Seal Entry Points
Prevent re-infestation by:
🔧 Caulking cracks in walls
🔧 Installing door sweeps
🔧 Covering vents with fine mesh
Step 6: Monitor with Sticky Traps
Place sticky traps in hotspots to track remaining roaches. Brands like Harris Roach Traps work well.
Step 7: When to Call a Professional
If DIY methods fail after 4-6 weeks, consider hiring an exterminator. They use stronger treatments like:
💉 Fumigation
💉 Residual insecticide sprays
Prevention: Keep Roaches from Coming Back
🚫 Avoid cardboard storage (roaches love it)
🚫 Inspect groceries before storing
🚫 Regularly deep-clean kitchens & bathrooms
German Roach vs. Other Roaches (Comparison Chart)
Feature | German Roach | American Roach | Oriental Roach |
---|---|---|---|
Size | ½ inch | 1.5–2 inches | 1 inch |
Color | Light brown | Reddish-brown | Dark brown/black |
Preferred Habitat | Kitchens, bathrooms | Sewers, basements | Damp areas |
Reproduction Speed | Very fast | Moderate | Slow |
Final Verdict: How to Get Rid of German Roaches for Good
- Use gel baits (Advion, Invict Gold).
- Apply IGRs to stop reproduction.
- Maintain strict sanitation.
- Seal entry points.
- Monitor with traps.
Home Empowerment
Heliconia Color: Transform Your Garden with Tropical Beauty

Heliconias, often called “lobster claws” or “parrot flowers,” are the crown jewels of tropical gardens. Their bold, vibrant colors and unique shapes make them a favorite among gardeners and landscapers. But what makes heliconia color so captivating? And how can you harness their beauty to transform your outdoor space?
In this comprehensive guide, we’ll dive deep into the world of heliconias. From their origins and varieties to practical growing tips and design ideas, you’ll walk away with everything you need to know to make these tropical wonders the star of your garden.
Why Heliconia Color is a Game-Changer for Your Garden
Heliconias are more than just pretty flowers—they’re a statement. Their fiery reds, sunny yellows, and deep oranges can instantly elevate any garden or landscape. Here’s why heliconia color is so special:
- Unmatched Vibrancy: Heliconias boast some of the most intense hues in the plant kingdom.
- Tropical Appeal: They bring an exotic, vacation-like vibe to your space.
- Versatility: Whether in pots, borders, or as focal points, heliconias adapt to various garden styles.
The Science Behind Heliconia Color
Heliconias owe their stunning colors to a combination of pigments and environmental factors. The primary pigments responsible for their hues are:
- Anthocyanins: These produce red, purple, and blue shades.
- Carotenoids: Responsible for yellows and oranges.
- Chlorophyll: Adds a touch of green to the bracts and leaves.
Interestingly, heliconia color can vary depending on factors like soil pH, sunlight, and temperature. For instance, heliconias grown in slightly acidic soil often exhibit deeper reds, while those in alkaline soil may lean toward yellows.
Top Heliconia Varieties for Jaw-Dropping Color
With over 200 species, heliconias offer a rainbow of options. Here are some of the most popular varieties to consider:
Variety | Color | Height | Best For |
---|---|---|---|
Heliconia Rostrata | Red and Yellow | 6-15 ft | Backdrop or Focal Point |
Heliconia Psittacorum | Orange and Green | 3-6 ft | Borders and Containers |
Heliconia Caribaea | Deep Red and Gold | 10-20 ft | Tropical Landscapes |
Heliconia Wagneriana | Multicolored (Red, Yellow, Green) | 4-8 ft | Accent Planting |
How to Grow and Care for Heliconias: A Step-by-Step Guide
1. Choosing the Right Location
Heliconias thrive in warm, humid climates (USDA zones 10-12). They need:
- Full to Partial Sunlight: At least 6 hours of sunlight daily.
- Well-Draining Soil: Rich in organic matter.
- Space to Grow: Some varieties can reach up to 20 feet tall!
2. Planting Tips
- Dig a hole twice the size of the root ball.
- Mix compost or aged manure into the soil for added nutrients.
- Water thoroughly after planting.
3. Watering and Feeding
- Water: Keep the soil consistently moist but not waterlogged.
- Fertilizer: Use a balanced, slow-release fertilizer every 6-8 weeks during the growing season.
4. Pruning and Maintenance
- Remove dead or damaged leaves to encourage new growth.
- Divide overcrowded clumps every 2-3 years to maintain vigor.
Designing with Heliconia Color: Tips and Ideas
Heliconias are incredibly versatile in garden design. Here are some creative ways to use them:
- Tropical Oasis: Pair heliconias with palms, ferns, and orchids for a lush, jungle-like feel.
- Color Blocking: Use contrasting heliconia colors to create bold, eye-catching displays.
- Container Gardening: Grow smaller varieties like Heliconia Psittacorum in pots for patios or balconies.
- Cut Flowers: Heliconias make stunning floral arrangements that last up to two weeks.
Common Challenges and How to Overcome Them
While heliconias are relatively low-maintenance, they can face a few challenges:
- Pests: Watch out for aphids and spider mites. Use neem oil or insecticidal soap as a natural remedy.
- Fungal Diseases: Ensure proper air circulation and avoid overwatering to prevent issues like leaf spot.
- Cold Sensitivity: In cooler climates, grow heliconias in containers and bring them indoors during winter.
Heliconia Color in Action: A Case Study
Project: Tropical Resort Landscape
Location: Florida, USA
Goal: Create a vibrant, low-maintenance garden that wows guests.
Solution:
- Planted Heliconia Rostrata as a backdrop.
- Used Heliconia Psittacorum in containers near walkways.
- Added complementary plants like bird-of-paradise and bromeliads.
Result: The resort’s garden became a guest favorite, with many visitors snapping photos and asking about the plants.
Infographic: Heliconia Color Spectrum
Key Points:
- Breakdown of heliconia varieties by color.
- Tips for enhancing color through soil and sunlight.
- Ideal pairings for garden design.
Conclusion: Bring the Magic of Heliconia Color to Your Garden
Heliconias are more than just plants—they’re a celebration of color, life, and tropical beauty. By understanding their needs and experimenting with design, you can create a garden that’s not only visually stunning but also a joy to maintain.
Ready to transform your space? Start by choosing your favorite heliconia variety and follow the tips in this guide. And don’t forget to share your heliconia journey with us—tag us in your garden photos or drop a comment below!
-
Articles1 year ago
How Many Times Can You Regrow Green Onions
-
News7 months ago
Understanding HotLeaks: What You Need to Know
-
Fashion5 months ago
Opals in the USA: A Gemstone Transforming the Crystal Healing Market
-
Technology11 months ago
The Wonders of Oh Em Gee Blog
-
Entertainment11 months ago
Bare it All: Unforgettable Skinny Dipping Stories Shared
-
Health11 months ago
Can You Smoke Shrooms? Exploring the Myths and Realities
-
Articles2 months ago
WHAT IS THE DIFFERENCE BETWEEN SEED GARLIC AND FOOD GARLIC?
-
Fashion12 months ago
Make a Statement with Stunning Black Homecoming Dresses