Connect with us

Technology

Why Would an Electrical Breaker Fail? Top Causes & Fixes

Published

on

Why Would an Electrical Breaker Fail

Electrical breakers are the unsung heroes of your home’s electrical system, protecting your circuits from overloads and short circuits. But what happens when they fail? A failing breaker can lead to power outages, safety hazards, and even electrical fires. So, why would an electrical breaker fail? In this comprehensive guide, we’ll explore the top reasons behind breaker failure, how to diagnose the issue, and what you can do to fix or prevent it.

1. Overloaded Circuits

One of the most common reasons for breaker failure is an overloaded circuit. This happens when too many devices or appliances draw power from the same circuit, exceeding its capacity.

Signs of an Overloaded Circuit:

  • Frequent tripping of the breaker.
  • Warmth or burning smell from outlets.
  • Flickering lights or dimming when appliances are in use.

How to Fix It:

  • Unplug some devices and redistribute the load across multiple circuits.
  • Consider upgrading your electrical panel to handle higher loads.

2. Short Circuits

A short circuit occurs when a hot wire comes into contact with a neutral wire, causing a surge of current that trips the breaker.

Signs of a Short Circuit:

  • A burning smell or visible scorch marks near outlets.
  • Sparks or popping sounds when plugging in devices.

How to Fix It:

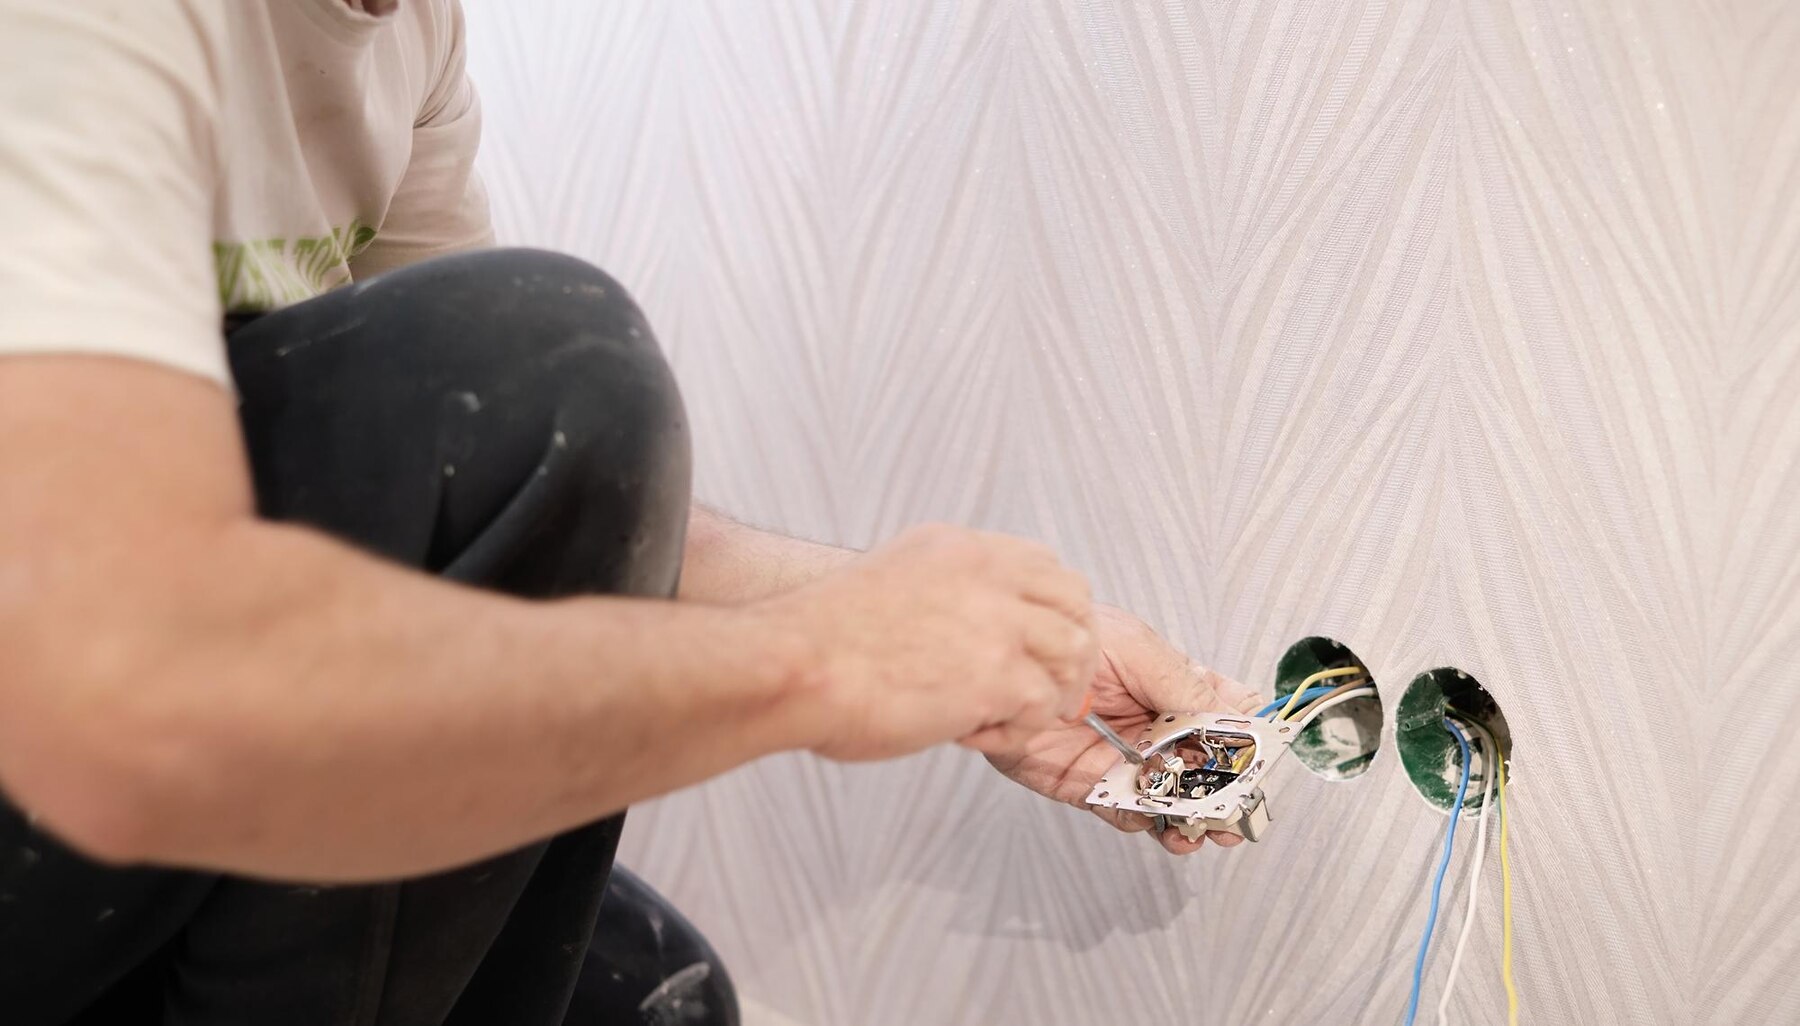
  • Turn off the power and inspect the wiring for damage.
  • Replace damaged wires or outlets.
  • Call a licensed electrician if you’re unsure.

3. Ground Faults

Similar to a short circuit, a ground fault happens when a hot wire touches a ground wire or metal box. This can cause the breaker to trip or fail.

Signs of a Ground Fault:

  • Frequent tripping of GFCI outlets.
  • Shocks or tingles when touching appliances.

How to Fix It:

  • Test GFCI outlets with a circuit tester.
  • Replace faulty outlets or wiring.

4. Aging Breakers

Like any other component, electrical breakers wear out over time. An old breaker may fail to trip during an overload, posing a serious safety risk.

Signs of an Aging Breaker:

  • Breaker feels hot to the touch.
  • Visible signs of wear, such as cracks or discoloration.

How to Fix It:

  • Replace the breaker with a new one of the same amperage.
  • Schedule regular inspections to ensure your breakers are in good condition.

5. Loose or Corroded Connections

Loose or corroded wires can cause arcing, which generates heat and may lead to breaker failure.

Signs of Loose Connections:

  • Intermittent power outages.
  • Buzzing or crackling sounds from the breaker panel.

How to Fix It:

  • Tighten any loose connections in the breaker panel.
  • Clean or replace corroded wires.

6. Faulty Appliances

Sometimes, the problem isn’t with the breaker itself but with a faulty appliance that’s drawing too much power or causing a short circuit.

Signs of a Faulty Appliance:

  • Breaker trips only when a specific appliance is in use.
  • Appliance shows signs of damage or malfunction.

How to Fix It:

  • Unplug the appliance and have it inspected or repaired.
  • Replace the appliance if necessary.

7. Improper Installation

If a breaker wasn’t installed correctly, it may fail prematurely or not function as intended.

Signs of Improper Installation:

  • Breaker trips immediately after being reset.
  • Breaker doesn’t stay in the “on” position.

How to Fix It:

  • Consult a licensed electrician to reinstall or replace the breaker.

Comparison Chart: Common Causes of Breaker Failure

Cause Signs Solution
Overloaded Circuit Frequent tripping, warm outlets Redistribute load, upgrade panel
Short Circuit Burning smell, sparks Inspect and replace damaged wiring
Ground Fault GFCI trips, shocks Test and replace faulty outlets
Aging Breaker Hot breaker, visible wear Replace with a new breaker
Loose Connections Intermittent outages, buzzing sounds Tighten or clean connections
Faulty Appliance Trips with specific appliance Inspect or replace appliance
Improper Installation Breaker won’t stay on Reinstall or replace breaker

Preventive Measures to Avoid Breaker Failure

  1. Regular Inspections: Schedule annual inspections by a licensed electrician.
  2. Upgrade Your Panel: If your home has an outdated panel, consider upgrading to a modern one.
  3. Use Surge Protectors: Protect your devices and circuits from power surges.
  4. Avoid Overloading Circuits: Distribute high-power appliances across multiple circuits.
  5. Replace Old Breakers: If your breakers are over 10 years old, consider replacing them.

When to Call a Professional

While some breaker issues can be resolved with DIY fixes, others require the expertise of a licensed electrician. If you notice any of the following, call a professional immediately:

  • Persistent tripping despite troubleshooting.
  • Burning smells or visible damage to the breaker panel.
  • Frequent power outages or flickering lights.

Conclusion: Why Would an Electrical Breaker Fail

Understanding Why Would an Electrical Breaker Fail is the first step toward maintaining a safe and efficient electrical system. By identifying the common causes—such as overloaded circuits, short circuits, and aging breakers—you can take proactive steps to prevent failures and protect your home.

Continue Reading
Click to comment

Leave a Reply

Your email address will not be published. Required fields are marked *

Technology

Photeeq Photo Ideas: Creative Strategies for Stunning Shots

Published

on

Photeeq Photo Ideas

Ever struggled to come up with fresh, eye-catching photo ideas? Whether you’re a budding photographer, a social media enthusiast, or just someone who loves capturing moments, finding unique photo concepts can be challenging. That’s where Photeeq photo ideas come in—helping you unlock creativity and take your photography to the next level.

In this guide, we’ll explore practical, expert-backed strategies to inspire your next photoshoot. From composition tricks to trending themes, you’ll discover actionable tips to make your images stand out.

Why Unique Photo Ideas Matter

In today’s visually driven world, standing out is key. Whether for Instagram, a portfolio, or personal memories, compelling photos:

  • Grab attention instantly

  • Tell a story more effectively

  • Boost engagement on social media

  • Enhance professional credibility

Let’s dive into proven Photeeq-inspired ideas to elevate your shots.

1. Play with Perspectives

Shooting from unusual angles can transform an ordinary scene into something extraordinary. Try these:

  • Bird’s-eye view: Capture flat lays (food, books, accessories) from directly above.

  • Worm’s-eye view: Shoot upwards for dramatic landscapes or towering architecture.

  • Dutch tilt: Tilt your camera slightly for a dynamic, edgy effect.

Example: A simple coffee cup becomes artsy when shot from above with steam rising and a notebook beside it.

2. Experiment with Lighting

Lighting can make or break a photo. Here’s how to use it creatively:

  • Golden hour magic: Shoot during sunrise/sunset for warm, soft glows.

  • Silhouettes: Position your subject against a bright background for striking outlines.

  • Artificial light play: Use fairy lights, neon signs, or candles for moody effects.

Pro tip: Diffused light (through curtains or softboxes) reduces harsh shadows for flattering portraits.

3. Incorporate Motion Blur

Adding movement creates energy and depth:

  • Panning shots: Follow a moving subject (cyclist, car) with a slower shutter speed.

  • Light trails: Capture car headlights at night with long exposure.

  • Water motion: Use a tripod to blur flowing rivers or waterfalls.

Example: A dancer mid-twirl with slight motion blur conveys elegance and motion.

4. Use Reflections Creatively

Reflections add symmetry and intrigue:

  • Puddles: After rain, shoot upside-down cityscapes in water droplets.

  • Mirrors: Frame a subject within a mirror for a surreal effect.

  • Sunglasses: Capture reflections in lenses for a cool, unexpected twist.

5. Focus on Textures & Patterns

Close-ups of textures make visually captivating shots:

  • Nature: Bark, leaves, sand dunes.

  • Urban: Brick walls, rusted metal, cobblestones.

  • Everyday objects: Fabric weaves, food textures (melting chocolate, frothy coffee).

Pro tip: Black-and-white editing enhances texture contrast.

6. Try Themed Photoshoots

A cohesive theme makes your photos more memorable:

  • Color-themed: All-blue or monochrome compositions.

  • Seasonal: Autumn leaves, snowy landscapes, spring blossoms.

  • Conceptual: “Floating objects” (using hidden supports) or “miniature worlds.”

Example: A “vintage bookshelf” theme with old books, a cup of tea, and warm lighting.

7. Candid & Emotional Shots

Authentic moments often outshine posed ones:

  • Laughter: Capture genuine smiles during conversations.

  • Street photography: Document raw, unfiltered urban life.

  • Pet antics: Animals in action make heartwarming shots.

8. Minimalist Photography

“Less is more” works wonders:

  • Negative space: Isolate a single subject against a clean background.

  • Single-color dominance: A red apple on a white table.

  • Simple silhouettes: A lone tree against a sunset.

9. Creative Editing Techniques

Post-processing can elevate your photos:

  • Selective color: Keep one color vibrant while desaturating the rest.

  • Double exposure: Blend portraits with landscapes for an artistic effect.

  • Vintage filters: Add grain and faded tones for nostalgia.

Tool suggestion: Lightroom presets or Snapseed for mobile edits.

10. Interactive & Fun Concepts

Engage your audience with participatory ideas:

  • “Follow the arrow”: Use props to lead the viewer’s eye.

  • “Holding the sun”: Play with perspective to “hold” the sun or moon.

  • Shadow play: Use shadows to create interesting shapes.

Final Thoughts: Keep Experimenting!

The best Photeeq photo ideas come from curiosity and experimentation. Don’t be afraid to:
✔ Break composition rules occasionally
✔ Test new gear (lens filters, tripods)
✔ Revisit old shots with fresh editing styles

Continue Reading

Technology

Understanding the c0765 0x4750 and c0750 0x4765 Code

Published

on

c0765 0x4750 and c0750 0x4765 Code

Introduction

Have you ever encountered the enigmatic c0765 0x4750 and c0750 0x4765 codes while working on a project? These cryptic combinations of numbers and letters can seem like a puzzling riddle at first glance. But fear not, as we are here to unravel the mystery behind these codes in this comprehensive guide. Get ready to dive into the world of error code deciphering and gain a deeper understanding of what lies beneath these perplexing symbols. Let’s embark on this journey together to demystify the secrets of the c0765 0x4750 and c0750 0x4765 code!

Understanding the Structure

When it comes to decoding error codes like c0765 0x4750 and c0750 0x4765, understanding the structure is key. These alphanumeric combinations may seem perplexing at first glance, but they follow a specific format that holds valuable information.

The structure of these codes typically consists of a prefix (such as ‘c’ or ‘0x’), followed by a series of numbers and letters. Each component plays a crucial role in identifying the nature of the error and its location within the system.

By dissecting the code piece by piece, developers can unravel its meaning and gain insights into what went wrong. This process requires attention to detail and an analytical mindset to connect the dots effectively.

In essence, comprehending the structure of error codes is akin to deciphering a cryptic message – it takes patience, logic, and persistence. With practice and experience, unraveling these intricate patterns becomes second nature for seasoned professionals in the field.

Possible Interpretations

When faced with the mysterious c0765 0x4750 and c0750 0x4765 codes, it’s natural to wonder about their possible interpretations. Could they signify a specific error in the system, or perhaps a communication breakdown between components? These codes might hold the key to unlocking hidden issues within the codebase.

One interpretation could point towards a voltage irregularity, prompting further investigation into electrical connections or sensor malfunctions. Another angle to consider is a software glitch impacting critical functions of the vehicle. Perhaps these codes are indicating an impending failure that needs prompt attention.

Delving deeper into their meanings requires dissecting each digit and character meticulously for clues. Each combination could reveal insights into complex systems at play within modern vehicles. As we unravel these enigmatic messages, new possibilities and solutions may emerge to address underlying issues effectively.

Deciphering the Context

Deciphering the context behind error codes like c0765 0x4750 and c0750 0x4765 code requires a keen eye for detail and a knack for problem-solving. It’s like unraveling a complex puzzle where each piece of information holds significance. Understanding the specific circumstances that led to these codes being triggered is crucial in finding the root cause of the issue.

Context can vary greatly depending on the system in which these error codes appear. It could be related to hardware malfunctions, software glitches, or even environmental factors affecting the device. By delving deeper into the context surrounding these codes, programmers can gain valuable insights that pave the way for effective troubleshooting strategies.

Decoding the context is akin to following breadcrumbs – each clue leading closer to a solution. It often involves examining logs, analyzing data flow, and considering recent changes made to the system. The ability to contextualize error codes not only facilitates quicker problem resolution but also enhances overall code management practices.

In essence, deciphering context is an art form that demands patience, precision, and ingenuity from developers seeking to crack the code mystery once and for all.

Troubleshooting and Solutions

When encountering the c0765 0x4750 and c0750 0x4765 code, troubleshooting can be a daunting task. One common solution is to check for any recent updates or changes in the code that might have triggered the error. It’s essential to review the entire code carefully to identify any syntax errors or missing elements.

Another approach is to debug the code step by step using tools like breakpoints or console logs to pinpoint where the issue arises. Additionally, testing different scenarios can help uncover specific conditions that trigger the error.

Collaborating with colleagues or seeking advice from online forums can provide fresh perspectives and potential solutions you might not have considered. Remember, persistence and patience are key when troubleshooting complex error codes – don’t be afraid to experiment with various approaches until you find a resolution.

Best Practices in Code Management

When it comes to managing code effectively, there are some best practices that can make a significant difference in the development process.

Maintaining clear and organized documentation is key. This includes detailed comments within the code itself as well as external documents outlining the purpose and functionality of each component.

Version control is another crucial aspect of code management. By using tools like Git, developers can track changes, collaborate seamlessly with team members, and revert back to previous versions if needed.

Regular code reviews are essential for ensuring quality and consistency across projects. Peer feedback not only helps catch errors but also promotes knowledge sharing and improvement.

Additionally, following coding standards and conventions contributes to readability and maintainability. Consistent formatting makes it easier for multiple developers to work on the same codebase without confusion or errors.

Automated testing should be integrated into the development workflow to identify bugs early on and ensure that new code doesn’t break existing functionalities.

Real-World Applications

Have you ever wondered how the cryptic c0765 0x4750 and c0750 0x4765 code play out in real-life scenarios? Well, let’s dive into some practical applications where these error codes could surface. Imagine you’re working on a cutting-edge autonomous vehicle project, and suddenly, one of the sensors triggers a c0765 0x4750 code – this could indicate an issue with the steering control system.

In another context, picture yourself managing a network infrastructure for a large corporation when a server starts throwing the c0750 0x4765 error – signaling potential connectivity problems that need immediate attention. These examples highlight how understanding and addressing these codes promptly can make or break critical systems in various industries.

From automotive engineering to IT support, being well-versed in decoding these error messages is essential for ensuring smooth operations across different fields.

The Evolution of Error Codes

Error codes have come a long way since the early days of computing. Initially, they were cryptic messages that left users scratching their heads in confusion. As technology advanced, error codes evolved to become more descriptive and user-friendly.

In the past, deciphering an error code was like cracking a secret code. But today, with advancements in programming languages and diagnostic tools, understanding error codes has become much more accessible. Developers now have access to detailed documentation that provides insights into what each code means and how to troubleshoot it effectively.

The evolution of error codes reflects the continuous improvement in software development practices. By learning from past mistakes and refining error messaging systems, developers can create more robust and user-friendly applications that minimize downtime and enhance user experience.

Conclusion

As technology continues to advance, error codes like c0765 0x4750 and c0750 0x4765 Code play a crucial role in the world of programming. Understanding these codes not only helps developers troubleshoot issues efficiently but also enhances overall code management practices.

By deciphering the structure, context, and possible interpretations of these error codes, programmers can navigate through challenges more effectively. Through troubleshooting techniques and best practices in code management, developers can streamline their processes and improve software quality.

Real-world applications demonstrate how these error codes impact various industries and highlight the importance of staying updated with evolving technologies. As we witness the evolution of error code systems, it becomes evident that continuous learning is key to mastering coding languages and ensuring optimal performance.

Embracing the complexity of error codes such as c0765 0x4750 and c0750 0x4765 opens up a realm of possibilities for innovation and problem-solving in the digital age. By delving deeper into these mysteries, developers pave the way for smoother operations and innovative solutions in an ever-changing technological landscape.

Continue Reading

Technology

Kurt Vise Adapter Plate: Easy Steps to Install and Use

Published

on

Kurt Vise Adapter Plate

When working with CNC machines, being precise and flexible is key. That’s where the Kurt Vise Adapter Plate comes into play. This important accessory makes sure your CNC machine can handle many different tasks easily and accurately. Have you ever had trouble with mounting issues or found that your machine vise doesn’t fit? If so then the Kurt Vise Adapter Plate might be just what you need. In this post we’ll look at how installing a Kurt Vise Adapter Plate can make your CNC operations better and more flexible.

Kurt Vise Adapter Plates: What Are They?

Kurt Vise Adapter Plates are made to connect your CNC machine to the vise you need to use. These plates help create a perfect fit allowing different vises to be mounted on machines that might not have matched up before. The Kurt Vise comes in various sizes and styles ensuring there’s a perfect match for any machine and vise combination.

Step-by-Step Installation of Your Kurt Vise Adapter Plate

Installing a Kurt Vise Adapter Plate is simple. Here’s how you can do it:

Step 1: Choose the Right Adapter Plate

Start by choosing the adapter plate that fits your CNC machine and your vise model. Getting this right is key to a smooth installation and operation.

Step 2: Gather Needed Tools

You will need basic tools like wrenches and screws. You might also need a torque wrench depending on what your CNC machine manufacturer suggests.

Step 3: Line Up the Adapter Plate

Place the adapter plate on the CNC machine table and line it up with the mounting holes. This step is important for the stability of your vise during use.

Step 4: Attach the Plate

Use the screws that came with your adapter plate to attach the plate to the CNC machine. Make sure each screw is tightened to the setting the manufacturer recommends. This helps prevent any movement during use.

Step 5: Put On the Vise

Once the adapter plate is secure, put your Kurt Vise onto the adapter plate. Check all connections for any looseness.

Step 6: Calibrate

After mounting the vise you should calibrate your setup. This makes sure your machine works accurately and your pieces are made precisely.

Benefits of Upgrading to a Kurt Vise Setup

With your Kurt Vise and adapter plate in place you’ll see several benefits right away:

  • More Compatibility: You can now use a wider range of vises which lets you work on more types of projects.
  • Better Precision: The firm mounting reduces shaking and movement leading to cleaner cuts.
  • Faster Work: You spend less time making adjustments which means more time for actual machining.

Real-Life Applications: How a Kurt Vise Adapter Plate Can Help

Imagine you need to make many small parts with high accuracy. With the Kurt Vise Adapter Plate you can quickly switch between different vises suited for each part. This cuts down setup time and boosts your output. Choose Pin Vise Machinable Jaws by 5th Axis to improve the efficiency of your CNC machine’s operations.

Streamline Your Workflow

With a Kurt Vise Adapter Plate setting up for a new project becomes much quicker and simpler. You no longer have to wrestle with mismatched components or spend hours troubleshooting fit issues. This ease of configuration means you can move from one job to another with minimal downtime. It’s all about making your workflow as smooth and uninterrupted as possible which in turn can lead to higher productivity and reduced stress in the workshop.

Enhance Safety and Stability

Another significant advantage of integrating a Kurt Vise Adapter Plate into your setup is the added safety and stability it provides. By ensuring a secure and proper fit between your CNC machine and the vise the adapter plate minimizes the risk of accidents caused by loose or shifting components. This means you can operate your machine with confidence knowing that everything is securely locked in place. Safety is paramount in any machining environment and the adapter plate helps reinforce this.

Cost-Effective Upgrade

Investing in a Kurt Vise Adapter Plate is a cost-effective way to enhance your CNC machinery without the need for expensive upgrades or new machines. By adapting your existing equipment to work more efficiently and handle a wider range of tasks you save money in the long run. Instead of purchasing new machines for different jobs you can utilize the flexibility that the adapter plate offers making your current setup more versatile and capable of meeting diverse machining needs.

By adopting the Kurt Vise Adapter Plate you not only optimize your machining operations but also gain the ability to adapt quickly to new challenges and opportunities in the manufacturing field. It’s a smart move for any machinist looking to stay competitive and efficient in today’s fast-paced market. So why wait? Elevate your CNC machining game with the Kurt Vise Adapter Plate today and experience a smoother, safer and more cost-effective manufacturing process.

Final Thoughts: Upgrade Today!

Installing a Kurt Vise Adapter Plate is about more than just making your CNC machine better; it’s about improving your whole machining process. Why settle for less when you can make your operations better and take on more types of work? If you want more precision and efficiency the Kurt Vise Adapter Plate is a great choice.

Continue Reading

Trending