Connect with us

Home Empowerment

Why Paver Sealing and Concrete Staining Are Essential for Long-Lasting Surfaces

Published

on

Paver Sealing and Concrete Staining

When it comes to outdoor spaces, the appearance and durability of pavers and concrete surfaces play a crucial role in the overall aesthetic and functionality of your property. Whether it’s a driveway, patio, walkway, or pool deck, these surfaces are constantly exposed to the elements, leading to wear and tear over time. Paver sealing and concrete staining are two essential treatments that not only enhance the look of these surfaces but also protect them from damage, ensuring they remain in top condition for years to come.

In this article, we’ll explore why paver sealing and concrete staining are vital for maintaining and prolonging the life of your outdoor surfaces, highlighting the benefits of these treatments and what to expect from the process.

The Importance of Paver Sealing

Pavers are a popular choice for outdoor surfaces due to their versatility, durability, and aesthetic appeal. However, like all materials exposed to the elements, pavers can become worn, stained, and even damaged over time. Paver sealing services offer a protective treatment that helps preserve the integrity and appearance of these surfaces, extending their lifespan and maintaining their beauty.

1. Protecting Against the Elements:

  • UV Radiation: Constant exposure to the sun’s UV rays can cause pavers to fade and lose their vibrant color. Over time, this can make your outdoor space look dull and aged. Paver sealing creates a protective barrier that shields the surface from UV radiation, helping to retain its original color and vibrancy.
  • Water Damage: Pavers are porous, which means they can absorb water from rain, snow, or irrigation systems. This water can seep into the pavers, leading to issues like efflorescence (a white, powdery substance on the surface), cracking, and even the growth of mold or mildew. Sealing pavers prevents water from penetrating the surface, reducing the risk of water damage and helping to maintain the structural integrity of the pavers.

2. Enhancing Durability:

  • Resistance to Stains and Spills: Outdoor surfaces are often subject to spills from food, drinks, oil, and other substances. These spills can leave unsightly stains on pavers, detracting from their appearance. Paver sealing makes the surface less porous, making it easier to clean and more resistant to staining. This treatment is particularly beneficial for high-traffic areas like patios and driveways.
  • Prevention of Weed Growth: Weeds and grass can grow in the joints between pavers, disrupting the surface and creating an uneven appearance. Sealing the pavers helps stabilize the joint sand, reducing the likelihood of weed growth. This not only improves the look of the surface but also reduces the need for frequent maintenance.

3. Maintaining Aesthetic Appeal:

  • Color Enhancement: Paver sealing can enhance the natural color of the pavers, giving them a richer, more vibrant appearance. This is particularly beneficial for older pavers that have started to fade. Some sealants even offer a wet-look finish, which can make the pavers appear more polished and attractive.
  • Gloss and Finish Options: Sealing pavers also allows you to choose from different finish options, including matte, semi-gloss, and high-gloss. The right finish can add a touch of elegance to your outdoor space, making it look more refined and well-maintained.

The Role of Concrete Staining

Concrete staining is another important treatment for outdoor surfaces, particularly for those made of plain or decorative concrete. This process not only enhances the appearance of the concrete but also provides a layer of protection against environmental factors.

1. Aesthetic Transformation:

  • Custom Colors and Designs: Concrete staining allows for a wide range of color options and designs, transforming a plain concrete surface into something visually striking. Whether you prefer a natural, earthy tone or a bold, vibrant color, staining can be customized to match your style and the overall aesthetic of your property. This versatility makes concrete staining an excellent choice for enhancing patios, walkways, and pool decks.
  • Mimicking Natural Materials: Stained concrete can be designed to mimic the appearance of more expensive materials, such as marble, stone, or wood. This makes it an affordable alternative for homeowners who want the look of these materials without the high cost. The staining process can create intricate patterns and textures, adding depth and dimension to your outdoor space.

2. Protection and Longevity:

  • Resistance to Wear and Tear: Concrete surfaces are subject to a lot of wear and tear, especially in high-traffic areas. Staining helps to strengthen the surface, making it more resistant to abrasion, chipping, and cracking. This not only extends the life of the concrete but also reduces the need for frequent repairs.
  • UV and Weather Resistance: Like pavers, concrete can be damaged by prolonged exposure to UV rays and harsh weather conditions. Staining provides a protective layer that shields the concrete from the sun, preventing fading and deterioration. It also helps the surface repel water, reducing the risk of water-related damage such as cracking or erosion.

3. Low Maintenance and Easy Upkeep:

  • Sealed and Stain-Resistant Surface: Once the concrete is stained, it is typically sealed to enhance its durability and make it easier to clean. The sealed surface resists stains from spills, dirt, and debris, making it easier to maintain. Regular sweeping and occasional washing with a mild detergent are usually sufficient to keep the surface looking its best.
  • Cost-Effective Maintenance: Compared to other decorative flooring options, stained concrete requires minimal maintenance and is highly cost-effective over time. The initial investment in staining and sealing is offset by the reduced need for repairs and replacements, making it a smart long-term choice for outdoor surfaces.

The Process of Paver Sealing and Concrete Staining

Understanding the process involved in paver sealing and concrete staining can help you appreciate the value of these treatments and what to expect when you hire professionals to do the job.

1. Surface Preparation:

  • Thorough Cleaning: The first step in both paver sealing and concrete staining is to thoroughly clean the surface. This involves removing dirt, debris, stains, and any existing sealant or coatings. Power washing is often used to ensure the surface is as clean as possible, providing a solid foundation for the sealing or staining process.
  • Repairing Any Damage: Before applying the sealant or stain, any cracks, chips, or other damage should be repaired. This ensures that the surface is smooth and even, allowing the sealant or stain to adhere properly. For pavers, this may involve re-leveling or replacing individual pavers as needed.

2. Application of Sealant or Stain:

  • Choosing the Right Products: The choice of sealant or stain is crucial to achieving the desired results. There are various types of sealants available, including water-based, solvent-based, and acrylic sealants, each with its own set of benefits. Similarly, concrete stains come in a range of colors and formulations, from acid-based stains that create a natural, variegated look to water-based stains that offer a broader color palette.
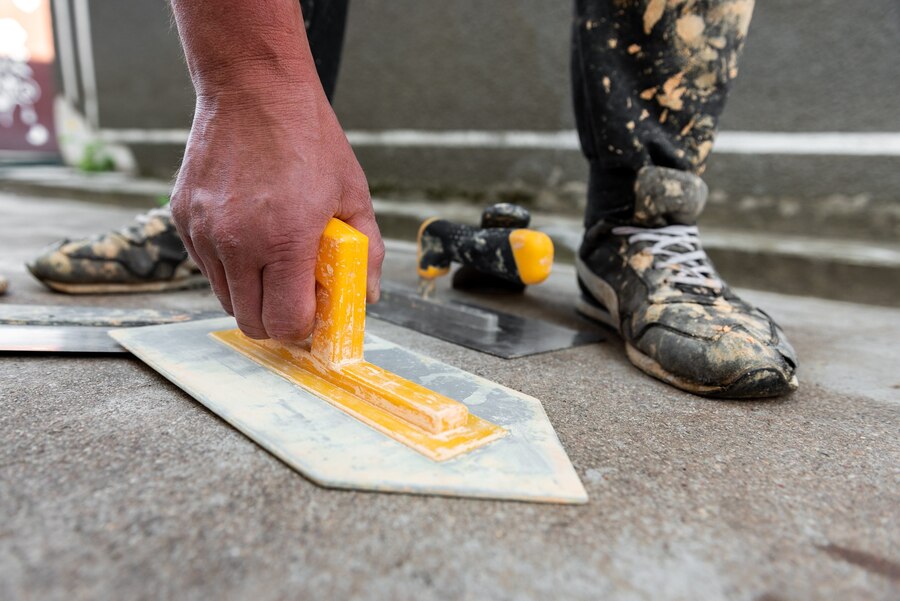
  • Expert Application: Applying the sealant or stain requires skill and precision. Professionals use specialized tools and techniques to ensure an even application, avoiding streaks, bubbles, or other imperfections. For pavers, the sealant is carefully applied to cover the entire surface, including the joints. For concrete, the stain is applied in thin, even layers, with each layer allowed to dry before the next is added.

3. Curing and Final Touches:

  • Allowing for Proper Curing: After the sealant or stain is applied, the surface needs time to cure. This curing process can take anywhere from 24 hours to several days, depending on the products used and the weather conditions. During this time, the surface should be protected from foot traffic, water, and other potential sources of damage.
  • Adding a Protective Topcoat: For additional protection and enhanced durability, a topcoat may be applied over the sealed or stained surface. This topcoat acts as a final barrier against wear and tear, extending the life of the treatment and ensuring the surface remains in pristine condition for years to come.

Conclusion

Paver sealing and concrete staining are essential treatments for maintaining the beauty and durability of your outdoor surfaces. These processes not only enhance the appearance of pavers and concrete but also protect them from the elements, wear, and damage. By investing in these treatments, you can ensure that your driveways, patios, walkways, and other outdoor spaces remain functional, attractive, and long-lasting.

Continue Reading
Click to comment

Leave a Reply

Your email address will not be published. Required fields are marked *

Home Empowerment

How to Get Pee Smell Out of Couch: Solutions for a Fresh Home

Published

on

How to Get Pee Smell Out of Couch

Few household smells are as stubborn—or as embarrassing—as urine odor embedded in a couch. Whether it’s from a potty-training toddler, an elderly pet, or an unexpected accident, that lingering ammonia scent can make your living space feel unclean. The good news? With the right techniques, you can completely eliminate urine smells and restore freshness to your upholstery.

This comprehensive guide covers everything from immediate emergency response to deep-cleaning solutions for set-in odors. We’ll explore both DIY remedies and professional-grade solutions, ensuring you have options for every level of mess.

Why Proper Urine Odor Removal Matters

Ignoring urine smells doesn’t just create an unpleasant environment—it can lead to bigger problems:

  • Bacterial growth: Urine breeds bacteria, which can cause health issues.
  • Repeat accidents: Pets often remark the same spot if the scent remains.
  • Long-term damage: Urine can degrade fabric and cushioning over time.

By acting quickly and using the right cleaning methods, you’ll protect your furniture and maintain a fresh, hygienic home.

Step-by-Step Guide to Remove Pee Smell from Couch

1. Act Fast: Blot Up Excess Liquid

Why it works: The sooner you remove urine, the less it soaks into fibers.

  • Materials needed: Absorbent towels, paper towels, or a dry microfiber cloth.
  • Technique:
    • Press (don’t rub) firmly to soak up liquid.
    • Replace towels as they become saturated.
    • If the urine is already dry, skip to step 2.

2. Neutralize Odors with Vinegar Solution

Why it works: Vinegar’s acidity breaks down uric acid crystals, the main cause of lingering smells.

  • Mix: 1 part white vinegar + 1 part cold water in a spray bottle.
  • Application:
    • Lightly mist the affected area (test on a hidden spot first).
    • Let sit for 10-15 minutes.
    • Blot dry with a clean cloth.
  • Bonus: Add a few drops of essential oil (e.g., lavender) for a fresh scent.

3. Deep Clean with Baking Soda

Why it works: Baking soda absorbs odors and lifts remaining stains.

  • Method:
    • Sprinkle a generous layer over the damp area.
    • For tough smells, mix baking soda with hydrogen peroxide (3%) to form a paste.
    • Let sit for 6+ hours (overnight is best).
    • Vacuum thoroughly.

4. Use an Enzyme Cleaner for Stubborn Stains

Why it works: Enzymes break down urine’s organic compounds, eliminating odors at the source.

  • Top picks: Nature’s Miracle, Rocco & Roxie, or Simple Solution.
  • How to apply:
    • Follow product instructions (usually involves soaking the area).
    • Allow to air-dry completely—don’t rinse!

5. Machine Wash Removable Covers (If Applicable)

  • Best detergent: Use an enzyme-based or oxygen bleach formula.
  • Drying: Air-dry in sunlight (UV rays help kill bacteria).

Pro Tips for Maximum Effectiveness

✅ Avoid Heat: Never use steam or hot water—it sets urine stains and odors.
✅ Blacklight Trick: Use a UV flashlight to find old, hidden urine spots.
✅ Prevent Residue: Rinse with cold water after vinegar treatment to avoid stickiness.
✅ For Leather Couches: Use a leather-safe enzymatic cleaner to avoid damage.

When to Call a Professional

If the smell persists after multiple treatments, consider:

  • Professional upholstery cleaning (hot water extraction method).
  • Ozone treatment (for severe, deep-set odors).

Final Thoughts

How to Get Pee Smell Out of Couch requires quick action, the right cleaners, and patience. By following these steps—especially using enzyme treatments for stubborn odors—you can restore your couch to a fresh, odor-free state.

FAQ: Your Top Questions Answered

Does vinegar discolor couch fabric?

It shouldn’t, but always test on a hidden area first.

Can I use bleach on my couch?

No! Bleach can damage fabric and react with urine, making smells worse.

How do I stop my pet from peeing on the couch again?

  • Use a pet deterrent spray.
  • Place a washable waterproof cover.
  • Retrain with positive reinforcement.

Why does the smell come back after cleaning?

If urine reached the cushion foam, you may need a deep soak with enzyme cleaner or professional help.


Continue Reading

Home Empowerment

How to Get Rid of German Roaches: The Ultimate Guide

Published

on

How to Get Rid of German Roaches

German roaches (Blattella germanica) are among the most stubborn household pests. Unlike other roach species, they reproduce rapidly, hide in tight spaces, and quickly develop resistance to pesticides. If you’re dealing with an infestation, this guide will walk you through how to get rid of German roaches using proven, science-backed methods.

Why German Roaches Are So Hard to Eliminate

Before diving into solutions, it’s crucial to understand why these pests are so resilient:

✅ Rapid Reproduction – A single female can produce up to 400 offspring in her lifetime.
✅ Pesticide Resistance – They adapt quickly to chemical treatments.
✅ Nocturnal & Secretive – They hide in cracks, appliances, and electrical outlets.

Now, let’s tackle the problem systematically.

Step 1: Identify the Infestation

German roaches are small (½ inch), light brown, with two dark stripes behind their heads. Signs of infestation include:

🔍 Droppings (tiny black specks)
🔍 Egg cases (oothecae) – Small, brown, capsule-like
🔍 Musty odor – A sign of large infestations

Step 2: Sanitation – Cut Off Their Food Supply

Roaches thrive in dirty environments. To discourage them:

✔ Store food in airtight containers
✔ Clean spills immediately
✔ Take out trash daily
✔ Fix leaky pipes (roaches need water)

Step 3: Use German Roach-Specific Baits

Why baits work best:
German roaches eat dead roaches and feces, making baits highly effective. The poison spreads through the colony.

Top Bait Choices:

Product Active Ingredient Effectiveness
Advion Gel Bait Indoxacarb ★★★★★
Combat Max Roach Killing Gel Hydramethylnon ★★★★☆
Invict Gold Cockroach Gel Abamectin ★★★★★

How to Apply:

  1. Place pea-sized drops near hiding spots (under sinks, behind fridges).
  2. Avoid spraying insecticides—they’ll scatter roaches, worsening the problem.

Step 4: Apply Insect Growth Regulators (IGRs)

IGRs disrupt roach reproduction by preventing nymphs from maturing. Recommended brands:

✅ Gentrol Point Source (Hydroprene)
✅ NyGuard IGR Concentrate

Step 5: Seal Entry Points

Prevent re-infestation by:

🔧 Caulking cracks in walls
🔧 Installing door sweeps
🔧 Covering vents with fine mesh

Step 6: Monitor with Sticky Traps

Place sticky traps in hotspots to track remaining roaches. Brands like Harris Roach Traps work well.

Step 7: When to Call a Professional

If DIY methods fail after 4-6 weeks, consider hiring an exterminator. They use stronger treatments like:

💉 Fumigation
💉 Residual insecticide sprays

Prevention: Keep Roaches from Coming Back

🚫 Avoid cardboard storage (roaches love it)
🚫 Inspect groceries before storing
🚫 Regularly deep-clean kitchens & bathrooms

German Roach vs. Other Roaches (Comparison Chart)

Feature German Roach American Roach Oriental Roach
Size ½ inch 1.5–2 inches 1 inch
Color Light brown Reddish-brown Dark brown/black
Preferred Habitat Kitchens, bathrooms Sewers, basements Damp areas
Reproduction Speed Very fast Moderate Slow

Final Verdict: How to Get Rid of German Roaches for Good

  1. Use gel baits (Advion, Invict Gold).
  2. Apply IGRs to stop reproduction.
  3. Maintain strict sanitation.
  4. Seal entry points.
  5. Monitor with traps.
Continue Reading

Home Empowerment

Heliconia Color: Transform Your Garden with Tropical Beauty

Published

on

Heliconia Color

Heliconias, often called “lobster claws” or “parrot flowers,” are the crown jewels of tropical gardens. Their bold, vibrant colors and unique shapes make them a favorite among gardeners and landscapers. But what makes heliconia color so captivating? And how can you harness their beauty to transform your outdoor space?

In this comprehensive guide, we’ll dive deep into the world of heliconias. From their origins and varieties to practical growing tips and design ideas, you’ll walk away with everything you need to know to make these tropical wonders the star of your garden.

Why Heliconia Color is a Game-Changer for Your Garden

Heliconias are more than just pretty flowers—they’re a statement. Their fiery reds, sunny yellows, and deep oranges can instantly elevate any garden or landscape. Here’s why heliconia color is so special:

  • Unmatched Vibrancy: Heliconias boast some of the most intense hues in the plant kingdom.
  • Tropical Appeal: They bring an exotic, vacation-like vibe to your space.
  • Versatility: Whether in pots, borders, or as focal points, heliconias adapt to various garden styles.

The Science Behind Heliconia Color

Heliconias owe their stunning colors to a combination of pigments and environmental factors. The primary pigments responsible for their hues are:

  1. Anthocyanins: These produce red, purple, and blue shades.
  2. Carotenoids: Responsible for yellows and oranges.
  3. Chlorophyll: Adds a touch of green to the bracts and leaves.

Interestingly, heliconia color can vary depending on factors like soil pH, sunlight, and temperature. For instance, heliconias grown in slightly acidic soil often exhibit deeper reds, while those in alkaline soil may lean toward yellows.

Top Heliconia Varieties for Jaw-Dropping Color

With over 200 species, heliconias offer a rainbow of options. Here are some of the most popular varieties to consider:

Variety Color Height Best For
Heliconia Rostrata Red and Yellow 6-15 ft Backdrop or Focal Point
Heliconia Psittacorum Orange and Green 3-6 ft Borders and Containers
Heliconia Caribaea Deep Red and Gold 10-20 ft Tropical Landscapes
Heliconia Wagneriana Multicolored (Red, Yellow, Green) 4-8 ft Accent Planting

How to Grow and Care for Heliconias: A Step-by-Step Guide

1. Choosing the Right Location

Heliconias thrive in warm, humid climates (USDA zones 10-12). They need:

  • Full to Partial Sunlight: At least 6 hours of sunlight daily.
  • Well-Draining Soil: Rich in organic matter.
  • Space to Grow: Some varieties can reach up to 20 feet tall!

2. Planting Tips

  • Dig a hole twice the size of the root ball.
  • Mix compost or aged manure into the soil for added nutrients.
  • Water thoroughly after planting.

3. Watering and Feeding

  • Water: Keep the soil consistently moist but not waterlogged.
  • Fertilizer: Use a balanced, slow-release fertilizer every 6-8 weeks during the growing season.

4. Pruning and Maintenance

  • Remove dead or damaged leaves to encourage new growth.
  • Divide overcrowded clumps every 2-3 years to maintain vigor.

Designing with Heliconia Color: Tips and Ideas

Heliconias are incredibly versatile in garden design. Here are some creative ways to use them:

  • Tropical Oasis: Pair heliconias with palms, ferns, and orchids for a lush, jungle-like feel.
  • Color Blocking: Use contrasting heliconia colors to create bold, eye-catching displays.
  • Container Gardening: Grow smaller varieties like Heliconia Psittacorum in pots for patios or balconies.
  • Cut Flowers: Heliconias make stunning floral arrangements that last up to two weeks.

Common Challenges and How to Overcome Them

While heliconias are relatively low-maintenance, they can face a few challenges:

  • Pests: Watch out for aphids and spider mites. Use neem oil or insecticidal soap as a natural remedy.
  • Fungal Diseases: Ensure proper air circulation and avoid overwatering to prevent issues like leaf spot.
  • Cold Sensitivity: In cooler climates, grow heliconias in containers and bring them indoors during winter.

Heliconia Color in Action: A Case Study

Project: Tropical Resort Landscape
Location: Florida, USA
Goal: Create a vibrant, low-maintenance garden that wows guests.

Solution:

  • Planted Heliconia Rostrata as a backdrop.
  • Used Heliconia Psittacorum in containers near walkways.
  • Added complementary plants like bird-of-paradise and bromeliads.

Result: The resort’s garden became a guest favorite, with many visitors snapping photos and asking about the plants.

Infographic: Heliconia Color Spectrum

Key Points:

  • Breakdown of heliconia varieties by color.
  • Tips for enhancing color through soil and sunlight.
  • Ideal pairings for garden design.

Conclusion: Bring the Magic of Heliconia Color to Your Garden

Heliconias are more than just plants—they’re a celebration of color, life, and tropical beauty. By understanding their needs and experimenting with design, you can create a garden that’s not only visually stunning but also a joy to maintain.

Ready to transform your space? Start by choosing your favorite heliconia variety and follow the tips in this guide. And don’t forget to share your heliconia journey with us—tag us in your garden photos or drop a comment below!

Continue Reading

Trending