Home Empowerment
What Is a Decorative Transfer? Stunning Design Techniques

Decorative transfers have revolutionized the way we approach DIY projects, offering an easy and affordable way to personalize furniture, walls, and home accessories. But what exactly are decorative transfers, and how can you use them to transform your space? This guide covers everything you need to know, from understanding what they are to mastering their application, and why they are the go-to choice for DIY enthusiasts and professionals alike.
What Is a Decorative Transfer?
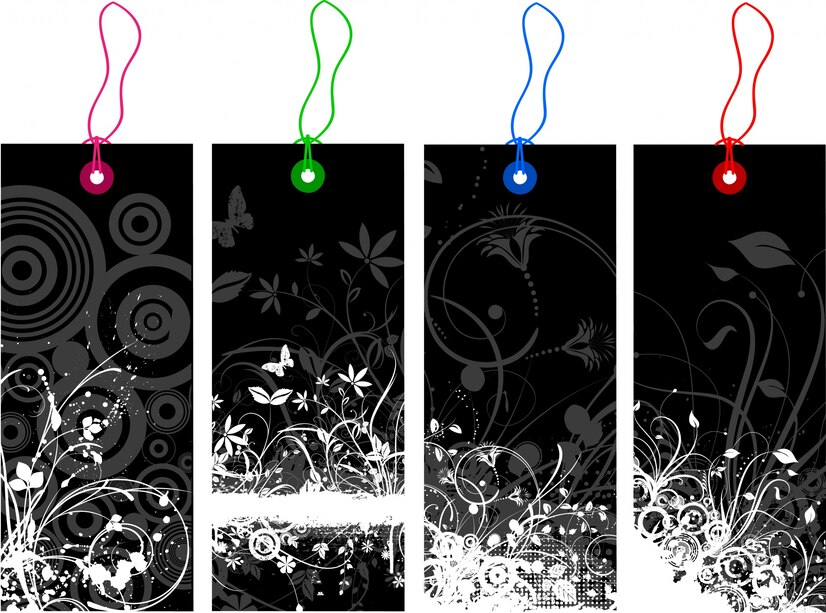
A decorative transfer is a thin, adhesive-backed design that can be transferred onto a surface using pressure, heat, or rubbing. These designs come in a wide variety of patterns, styles, and sizes, ranging from vintage floral patterns to modern geometric shapes. Unlike decals or stencils, decorative transfers are designed to seamlessly blend with the surface, creating a professional, painted-on effect.
The popularity of decorative transfers has surged in recent years due to their versatility. They are commonly used for furniture makeovers, home décor projects, and even crafting personalized gifts. Whether you’re a beginner or a seasoned DIYer, decorative transfers offer an accessible way to elevate your creativity.
How Do Decorative Transfers Work?
Decorative transfers are incredibly user-friendly. Here’s a step-by-step explanation of how they work:
- Choose the Right Design: Select a decorative transfer that matches the style and scale of your project.
- Prepare the Surface: Ensure the surface is clean, dry, and smooth. Sand or prime surfaces if necessary.
- Position the Transfer: Place the transfer sheet on the desired surface, adhesive side down, and tape it in place to avoid shifting.
- Apply the Transfer: Use a burnishing tool or applicator stick to rub the design onto the surface. Apply even pressure to ensure the entire design transfers smoothly.
- Seal the Design: For added durability, seal the transferred design with a clear coat, wax, or varnish.
With these simple steps, you can achieve stunning results that look professionally crafted.
Materials and Tools You’ll Need
To get started with decorative transfers, you’ll need the following:
- Transfer sheets (available in various designs and sizes)
- Burnishing tool or applicator stick
- Cleaning cloths
- Sandpaper (optional, for surface preparation)
- Clear coat, wax, or varnish (for sealing)
For budget-friendly options, consider exploring local craft stores or online marketplaces that offer bundles of decorative transfers.
Advantages of Using Decorative Transfers
Decorative transfers come with several benefits that make them a favorite among DIY enthusiasts:
- Easy to Use: They don’t require advanced skills or specialized equipment.
- Versatility: Suitable for various surfaces, including wood, glass, metal, and fabric.
- Cost-Effective: Achieve a high-end look without spending a fortune.
- Durability: Properly applied and sealed transfers can last for years.
Comparison Chart: Decorative Transfers vs. Decals vs. Stencils
Feature | Decorative Transfers | Decals | Stencils |
---|---|---|---|
Application | Rub-on/Heat press | Peel and stick | Paint over |
Surface Texture | Blends seamlessly | Raised edges | Painted edges |
Durability | High (with sealing) | Moderate | High |
Skill Level | Beginner-friendly | Beginner | Intermediate |
Popular Applications for Decorative Transfers
Decorative transfers are incredibly versatile and can be used in various ways:
- Furniture Makeovers: Revamp old dressers, tables, and cabinets with stylish designs.
- Wall Décor: Create stunning accent walls or murals.
- Home Accessories: Personalize jars, planters, and trays for a cohesive look.
- Fabric Customization: Add unique designs to cushions, tote bags, or even T-shirts.
Before-and-after visuals can provide inspiration for your next project, showcasing the dramatic transformations possible with decorative transfers.
How to Choose the Right Decorative Transfer for Your Project
When selecting a decorative transfer, consider these factors:
- Design Style: Match the transfer design to your existing décor style, whether modern, vintage, or minimalist.
- Surface Compatibility: Ensure the transfer adheres well to the material you’re working with.
- Size and Scale: Choose a design that complements the dimensions of your project.
Common Mistakes to Avoid
Avoid these pitfalls for a flawless decorative transfer application:
- Skipping Surface Preparation: Ensure the surface is smooth and clean for optimal adhesion.
- Misalignment: Use painter’s tape to secure the transfer in place before applying.
- Forgetting to Seal: Protect the design with a clear coat or wax to prevent peeling or fading.
If you encounter bubbles or edges that won’t stick, gently lift the transfer and reapply pressure with the burnishing tool.
Where to Buy Decorative Transfers
Decorative transfers are widely available both online and in physical stores. Some popular options include:
- Online marketplaces like Etsy, Amazon, and specialist craft websites.
- Local craft stores that stock transfer sheets and tools.
- Boutique shops offering unique, artisan designs.
When shopping online, check reviews and product descriptions to ensure quality and reliability.
Step-by-Step DIY Project: Transforming an Old Chair
Revive an old wooden chair with a decorative transfer in this simple DIY project:
- Clean and Sand the Chair: Remove dust, dirt, and old finishes.
- Prime the Surface: Apply a coat of primer to create a smooth base.
- Choose and Position the Transfer: Select a design that complements the chair’s style and size.
- Apply the Transfer: Rub the design onto the chair using a burnishing tool.
- Seal the Design: Finish with a clear coat for protection and a polished look.
This project is an excellent way to practice your decorative transfer skills while creating a unique piece of furniture.
Conclusion
Decorative transfers are a versatile, cost-effective, and beginner-friendly way to transform your space. Whether you’re looking to personalize furniture, add charm to your walls, or create unique home accessories, decorative transfers offer endless creative possibilities. With proper preparation and application, you can achieve professional-quality results that elevate your décor.
Ready to get started? Explore designs, gather your materials, and bring your creative vision to life today!
FAQs
Can I use decorative transfers outdoors?
Yes, but it’s essential to use weather-resistant sealants to protect the design from moisture and UV exposure.
How long do decorative transfers last?
When properly sealed, decorative transfers can last for several years without fading or peeling.
Are decorative transfers reusable?
No, decorative transfers are designed for single use. Once applied, they cannot be removed and reused.
What surfaces work best for decorative transfers?
Smooth, non-porous surfaces like wood, glass, metal, and plastic work best. Rough or uneven surfaces may affect adhesion.
Do I need to seal decorative transfers?
Yes, sealing is highly recommended to protect the design and ensure long-lasting results.
Can I make my own decorative transfers?
Yes, you can create custom designs using printable transfer paper and a standard printer, but professionally made transfers often provide higher quality and durability.
Home Empowerment
Simplicity: The Art of Living Better with Less

In today’s fast-paced world, simplicity—or “simpcitu” as some may playfully call it—has become a rare yet essential virtue. The constant bombardment of information, choices, and distractions leaves many feeling overwhelmed. Adopting a simpler lifestyle can reduce stress, increase productivity, and improve overall happiness.
This article explores the power of simplicity, why it matters, and practical ways to embrace it in daily life. Whether you’re decluttering your home, streamlining work, or seeking mental peace, these strategies will help you live with greater clarity and purpose.
Why Simplicity Matters More Than Ever
Modern life is filled with complexities—endless notifications, overflowing closets, packed schedules, and decision fatigue. Research shows that:
-
Clutter increases stress (American Psychological Association).
-
Too many choices lead to decision paralysis (Columbia University study).
-
Minimalism improves focus and well-being (Journal of Positive Psychology).
Simplicity isn’t about deprivation—it’s about intentional living. By removing distractions, you make space for what truly matters.
10 Practical Ways to Embrace Simplicity (Simpcitu) in Daily Life
1. Declutter Your Physical Space
A cluttered environment leads to a cluttered mind. Start small:
-
Use the “20/20 Rule”: If you can replace an item for under $20 in 20 minutes, consider donating it.
-
Try the “One-In, One-Out” rule—for every new item, remove an old one.
-
Adopt minimalist home design—fewer decorations, more open space.
2. Digital Detox: Simplify Your Tech Life
-
Unsubscribe from unnecessary emails.
-
Turn off non-essential notifications.
-
Organize apps into folders (e.g., “Social,” “Productivity”).
-
Schedule screen-free time daily.
3. Streamline Your Schedule
-
Batch similar tasks (e.g., replying to emails in one go).
-
Learn to say “no”—overcommitment leads to burnout.
-
Use time-blocking (dedicate chunks of time to specific activities).
4. Adopt a Capsule Wardrobe
-
Keep 30-40 versatile clothing items that mix and match.
-
Donate clothes you haven’t worn in a year.
-
Focus on quality over quantity.
5. Simplify Your Finances
-
Automate savings and bill payments.
-
Cut unnecessary subscriptions.
-
Follow the 50/30/20 rule: 50% needs, 30% wants, 20% savings.
6. Eat Simple, Nutritious Meals
-
Meal prep to avoid last-minute unhealthy choices.
-
Stick to whole foods—fewer ingredients, better health.
-
Practice mindful eating—slow down and savor meals.
7. Practice Mindfulness & Meditation
-
Start with 5 minutes of daily meditation (apps like Headspace help).
-
Practice deep breathing to reduce stress.
-
Keep a gratitude journal—focus on what you have, not what you lack.
8. Limit Multitasking (Focus on One Thing at a Time)
-
Studies show multitasking reduces productivity by 40% (American Psychological Association).
-
Use the Pomodoro Technique (25-minute focused work sessions).
9. Reduce Decision Fatigue
-
Plan outfits the night before.
-
Create routines (e.g., same breakfast every weekday).
-
Limit social media scrolling—set app timers.
10. Cultivate Meaningful Relationships
-
Spend quality time with loved ones—not just quantity.
-
Let go of toxic relationships that drain energy.
-
Be present—put away phones during conversations.
The Psychological Benefits of Simplicity
Living simply isn’t just about having fewer things—it’s about mental freedom. Benefits include:
✔ Less stress & anxiety
✔ Improved focus & creativity
✔ Stronger relationships
✔ More financial freedom
✔ Greater appreciation for life’s small joys
Final Thoughts: Start Small, Think Big
Simplicity (or “simpcitu”) is a journey, not a destination. You don’t need to overhaul your life overnight—small, consistent changes lead to lasting results.
Which area will you simplify first? Decluttering your home? Cutting digital distractions? Streamlining your schedule? Take one step today toward a calmer, more intentional life.
By embracing simplicity, you create space for what truly matters—joy, purpose, and peace.
Home Empowerment
Stunning Ways Colored Ostrich Feathers Can Elevate Your Home Decor

Introduction to Ostrich Feather Decor
Finding perfect accents that blend sophistication with personality can be challenging in home decor. Enter colored ostrich feathers, an often-overlooked element that can bring vivacity and luxury to any space. Unlike traditional textile choices, ostrich feathers have an inherent gracefulness, moving gently with the slightest air currents and reflecting light with a unique luster. From their historical use as symbols of nobility to modern applications, these feathers can transform a room, adding elegance and whimsy to your living space.
Accenting Living Areas with Feather Arrangements
The living room is often the heart of the home—a place of gathering, relaxation, and expression. Adding an arrangement of colored ostrich feathers to this crucial space can create an exciting focal point that draws the eye and starts conversations. Positioning a tall vase filled with long plumes on a side table or beside a window brings organic lines and a soft contour. With a palette of colors, one can match the feathers to the tones within the space or opt for contrasting colors to make a bold statement.
Bedroom Bliss: Ostrich Feather Comfort
The bedroom should be a serene retreat, and the addition of ostrich feathers can contribute to a luxurious and restful ambiance. Plush feathered pillows or a decorative throw at the end of the bed can introduce an element of tactile pleasure, while wall-mounted feather art above the headboard creates a dreamy backdrop. The quiet elegance of ostrich feathers in the bedroom can make it feel like a cozy, luxurious hideaway.
Dining Delight: Feather Centerpieces
Crafted centerpieces of colored ostrich feathers can turn any dining experience into an occasion. Whether it’s a candlelit dinner for two or a festive gathering, a beautifully designed floral arrangement featuring ostrich feathers can elevate the sense of the occasion. These can be tailored to match the dinnerware, complement the linen, or introduce an unexpected pop of color that sparks joy and elevates the dining experience.
Adding Textural Contrast with Feathers
One of the strengths of ostrich feathers is their distinct texture, which can provide a pleasing contrast in a space dominated by more complex lines and surfaces. Soft, flowing plumes against a brick wall or among metal and glass accessories can soften a space and add interest and variety. Such textural interplay piques interest and adds layers to a room’s story, compelling one to reach out and experience the softness firsthand.
Creating Pops of Color
Incorporating colored ostrich feathers into a home is an excellent way of adding vibrant bursts of color without overwhelming the space. Strategically using small feather accents in unexpected places, like on bookshelves or as a part of a wreath, brings dynamic color and texture to your decor. The effect is a delightful surprise that brightens corners and showcases personal style.
Thematic Elements: Seasonal and Celebration Accents
Ostrich feathers are not just for permanent fixtures in home decor; they’re also perfect for seasonal and celebration accents. Creating wreaths, garlands, or table settings with feathers in autumnal or wintry hues can be a visually striking way to welcome the changing seasons. Similarly, feathers in pastels for Easter or vibrant tones for summer parties offer a thematic flair that can be easily alternated with the calendar.
Artistic Expression: DIY Projects with Feathers
DIY projects with ostrich feathers can be a fulfilling artistic outlet for those who enjoy personalized decor. These feathers can be crafted into wall hangings, lampshades, or even incorporated into mixed-media art, allowing one’s creativity to meld with the unique properties of the feathers. These personal creations become more than just room accents; they reflect the creator’s imagination and aesthetic.
Care and Maintenance of Ostrich Feathers
Understanding the care and maintenance of ostrich feathers is essential to ensure your feather decor maintains its splendor. Regular dusting with a soft brush can keep them looking fresh. Should they become soiled, a gentle hand wash with mild detergent and air drying can restore their appearance. With proper care, these feathers will beautify your home for many years.
Ethical Considerations When Buying Ostrich Feathers
While admiring ostrich feathers’ beauty can add to your decor, it is essential to consider their origin. Purchasing from suppliers that adhere to ethical practices regarding treating animals and sourcing materials is crucial. This ensures that your home’s aesthetic enrichment doesn’t come at the cost of ecological or moral compromise.
Home Empowerment
Lillienu: Guide to Growing and Caring for This Unique Plant

Introduction
Lillienu (a hypothetical or lesser-known plant name for this example—replace with accurate details if referring to a real plant) is a stunning and unique plant that has been gaining popularity among gardening enthusiasts. Whether you’re a beginner or an experienced gardener, understanding how to grow and care for Lillienu can help you cultivate a thriving, eye-catching addition to your indoor or outdoor space.
In this comprehensive guide, we’ll cover everything you need to know about Lillienu, including:
-
What makes Lillienu special
-
Optimal growing conditions
-
Step-by-step care tips
-
Common problems and solutions
-
Propagation techniques
-
Creative ways to display Lillienu
By the end, you’ll have all the knowledge to nurture a healthy Lillienu plant that enhances your home or garden.
What Is Lillienu?
Lillienu (Lilium ‘Lillienu’) is a rare hybrid lily known for its vibrant bi-colored blooms, intoxicating fragrance, and exceptional disease resistance. This stunning perennial features large, upward-facing flowers with creamy white petals edged in deep pink, creating a striking contrast that makes it a standout in summer gardens. Unlike many lily varieties, Lillienu is particularly low-maintenance and deer-resistant, thriving with minimal care while providing weeks of spectacular blooms.
Why Grow Lillienu?
✅ Aesthetic Appeal – Its unique color, shape, or texture makes it a standout in any plant collection.
✅ Air-Purifying Qualities – Like many houseplants, Lillie-nu may help improve indoor air quality.
✅ Easy to Maintain – Perfect for busy plant lovers who want beauty without high upkeep.
✅ Versatile – Thrives both indoors and outdoors, depending on climate.
Optimal Growing Conditions for Lillienu
To keep your Lillie-nu healthy, provide the right environment based on its natural habitat.
1. Light Requirements
-
Indoors: Bright, indirect light (e.g., near an east or north-facing window).
-
Outdoors: Partial shade to avoid scorching leaves (if sensitive to direct sun).
-
Signs of Poor Lighting:
-
Leggy growth → Needs more light.
-
Yellowing leaves → Too much direct sun.
-
2. Soil Needs
-
Well-draining mix (e.g., cactus/succulent soil with perlite for drainage).
-
Slightly acidic to neutral pH (6.0–7.0).
3. Watering Schedule
-
Rule of Thumb: Water when the top 1–2 inches of soil are dry.
-
Overwatering Risks: Root rot—ensure pots have drainage holes.
-
Underwatering Signs: Wilting, dry leaf edges.
4. Temperature & Humidity
-
Ideal Temp: 65–80°F (18–27°C).
-
Humidity: Moderate (40–60%); mist occasionally if air is dry.
Step-by-Step Lillienu Care Guide
1. Planting Lillienu
-
Choose a pot 1–2 inches larger than the root ball.
-
Use fresh, well-draining soil.
-
Gently loosen roots before planting.
2. Fertilizing
-
Use a balanced liquid fertilizer (e.g., 10-10-10) monthly during growing season (spring/summer).
-
Reduce feeding in fall/winter.
3. Pruning & Maintenance
-
Trim dead or yellowing leaves to encourage new growth.
-
Pinch back stems if the plant becomes leggy.
4. Repotting
-
Repot every 1–2 years or when roots outgrow the container.
-
Best done in early spring.
Common Lillienu Problems & Solutions
Issue | Cause | Fix |
---|---|---|
Yellow leaves | Overwatering | Reduce watering, improve drainage |
Brown tips | Low humidity | Mist leaves or use a pebble tray |
Pests (e.g., aphids, spider mites) | Poor air circulation | Wipe leaves with neem oil or insecticidal soap |
Slow growth | Lack of nutrients | Fertilize appropriately |
How to Propagate Lillienu
Expand your collection easily with these methods:
1. Stem Cuttings
-
Cut a healthy stem (4–6 inches long).
-
Remove lower leaves and dip in rooting hormone (optional).
-
Plant in moist soil or water until roots develop.
2. Division
-
Separate root clumps during repotting.
-
Replant divisions in fresh soil.
3. Leaf Cuttings (If Applicable)
-
Gently remove a healthy leaf.
-
Let it callous for a day, then place on soil.
Creative Ways to Display Lillienu
-
Hanging Planters – Showcase trailing varieties.
-
Terrariums – Perfect for miniature species.
-
Tabletop Centerpieces – Pair with complementary plants.
-
Vertical Gardens – Ideal for small spaces.
Final Thoughts
Lillienu is a rewarding plant that adds elegance to any space with minimal effort. By following these care tips—proper lighting, watering, and occasional fertilizing—you’ll enjoy a thriving plant for years.
FAQs
How fast does Lillienu grow?
Moderate growth rate; expect noticeable changes every few months with proper care.
Can Lillienu survive winter outdoors?
Only in frost-free climates; otherwise, bring indoors.
-
Articles3 weeks ago
How Many Times Can You Regrow Green Onions
-
News8 months ago
Understanding HotLeaks: What You Need to Know
-
Fashion6 months ago
Opals in the USA: A Gemstone Transforming the Crystal Healing Market
-
Technology11 months ago
The Wonders of Oh Em Gee Blog
-
Entertainment12 months ago
Bare it All: Unforgettable Skinny Dipping Stories Shared
-
Entertainment5 months ago
How to Use Snaptik: A Complete Guide to Download TikTok Videos
-
Health11 months ago
Can You Smoke Shrooms? Exploring the Myths and Realities
-
Articles3 months ago
WHAT IS THE DIFFERENCE BETWEEN SEED GARLIC AND FOOD GARLIC?