Connect with us

Technology

Top FPV Drone Picks on MEPSKING: Unleashing Power with Emax Drones

Published

on

FPV Drone

Are you ready to take your FPV (First-Person View) drone experience to the next level? If so, then you’ve come to the right place! At MEPSKING, we offer a wide range of FPV drones, but when it comes to power, precision, and reliability, one brand stands above the rest—Emax drones. Whether you’re a beginner just entering the FPV world or an experienced pilot looking for the best gear, Emax drones have something to offer for everyone.

In this blog, we’ll take you on a journey through some of the top FPV drone picks available on MEPSKING, specifically focusing on Emax drones. We’ll dive into what makes these drones special, how they cater to different skill levels, and why they should be your go-to choice when you’re looking to unleash the true power of FPV flying.

Why Emax Drones?

Emax is renowned in the drone industry for producing high-performance drones that combine cutting-edge technology with user-friendly features. Their drones are known for their durability, innovative design, and ability to deliver stunning aerial shots—whether you’re zipping through a forest at high speeds or hovering for a cinematic shot.

At MEPSKING, we pride ourselves on offering top-quality products, and Emax drones are among the best in the FPV drone category. These drones are perfect for FPV enthusiasts who want to experience fast, immersive flights without sacrificing control and stability.

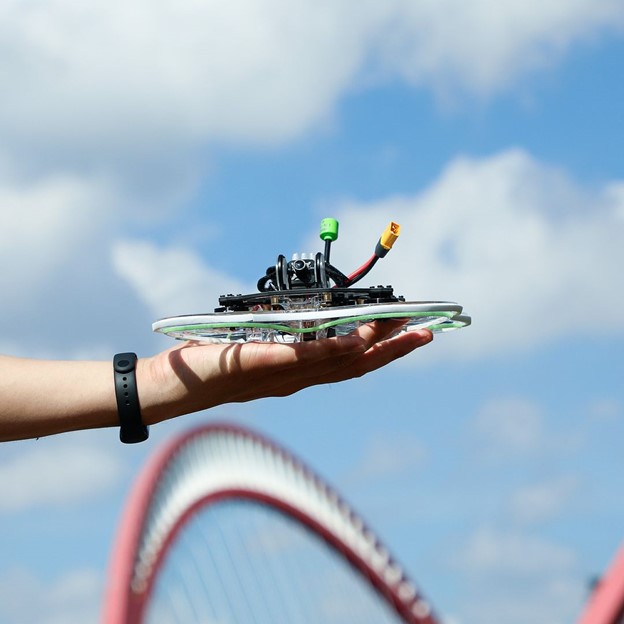
Emax Tinyhawk 2 FPV Drone: A Perfect Starter Drone

If you’re new to the FPV scene, the Emax Tinyhawk 2 is the ideal starting point. This drone is perfect for beginners but still packs enough punch to keep more experienced pilots entertained. It’s compact, lightweight, and extremely agile, making it perfect for both indoor and outdoor flying.

The Tinyhawk 2 features an upgraded camera for crystal-clear video transmission, making it easier for beginners to learn how to navigate and control their drone through FPV goggles. Its durable frame is designed to withstand minor crashes, so you won’t have to worry too much about damaging it as you learn.

Some key features of the Emax Tinyhawk 2 include:

  • Weight: Lightweight design, perfect for indoor use.
  • Camera: High-quality FPV camera with clear video transmission.
  • Performance: 75mm brushless motors for smooth, stable flights.
  • Durability: Impact-resistant frame for crash protection.

Overall, the Emax Tinyhawk 2 is a fantastic choice for anyone who is just getting started in the world of FPV drones.

Emax Babyhawk II HD: Power and Performance in a Compact Package

Looking for something a bit more powerful but still manageable in size? The Emax Babyhawk II HD is the next step up from the Tinyhawk series. This drone is designed for those who want a mix of compact design and serious performance. It’s small enough to fly indoors but powerful enough to perform aggressive maneuvers in outdoor settings.

The Babyhawk II HD features high-definition video capabilities, allowing you to capture crisp, clear footage during your flights. Plus, its durable carbon fiber frame is built to last, giving you peace of mind even during more intense flying sessions.

Some key features of the Emax Babyhawk II HD include:

  • HD Video: High-definition video transmission for crystal-clear visuals.
  • Power: 3-inch propellers powered by brushless motors for agile and responsive flying.
  • Frame: Durable carbon fiber frame that’s built to last.
  • Flight Control: Advanced flight controller for precise handling and control.

If you’re ready to take your FPV flying to the next level, the Emax Babyhawk II HD is a solid choice that balances power, size, and performance.

Emax Hawk Pro: The Ultimate FPV Racing Drone

For the true FPV racing enthusiast, nothing beats the Emax Hawk Pro. This drone is built for speed and agility, making it one of the best options for competitive FPV racing. The Hawk Pro is designed to provide superior handling and lightning-fast response times, allowing you to zip through even the most challenging race tracks with ease.

The Hawk Pro comes equipped with a powerful brushless motor setup, along with top-of-the-line electronics that ensure optimal performance. Its lightweight design further enhances its speed and agility, making it one of the top picks for FPV racers who demand the best.

Some key features of the Emax Hawk Pro include:

  • Speed: Powerful motors and a lightweight frame for maximum speed.
  • Durability: Designed to withstand crashes, ensuring longevity during intense races.
  • Customization: Customizable parts and components, allow you to fine-tune the drone to your preferences.
  • Performance: Top-tier performance, perfect for serious FPV racing enthusiasts.

The Emax Hawk Pro is an FPV racing beast, designed for those who are serious about their drone racing and are looking for a drone that can keep up with their skills.

Emax EZ Pilot: A Fun and Easy Entry into FPV

For beginners who want a truly easy and fun experience, the Emax EZ Pilot is a fantastic option. This drone was designed with new pilots in mind, featuring intuitive controls and a beginner-friendly flight mode that helps you learn the ropes without feeling overwhelmed. It’s small, easy to fly, and perfect for kids or anyone just starting with FPV drones.

Some key features of the Emax EZ Pilot include:

  • Ease of Use: Simple controls make it easy for beginners to fly.
  • Safety: Includes beginner flight modes and crash protection.
  • Fun: Great for learning FPV flying without the frustration of complicated controls.

The Emax EZ Pilot is a great choice for anyone looking for an enjoyable, hassle-free introduction to FPV flying.

Why Choose MEPSKING for Your FPV Drone Purchase?

At MEPSKING, we offer a curated selection of top-quality FPV drones, including the impressive lineup of Emax drones. We understand that whether you’re a beginner or a pro, finding the right FPV drone is essential for maximizing your flying experience. That’s why we only carry trusted brands like Emax, ensuring that you get the best quality and performance for your money.

Here’s why MEPSKING should be your go-to platform for purchasing FPV drones:

  • Trusted Brands: We carry only the best and most reliable brands like Emax, ensuring top-tier performance.
  • Wide Selection: Whether you’re a beginner or a seasoned pro, MEPSKING has a drone that suits your needs.
  • Customer Support: Our dedicated customer service team is here to help you with any questions or issues.
  • Competitive Prices: We offer competitive pricing without compromising on quality.
  • Fast Shipping: Get your drone delivered quickly and efficiently, so you can start flying as soon as possible.

FAQs About Emax Drones

1. What makes Emax drones ideal for beginners?

Emax drones like the Tinyhawk 2 and EZ Pilot are designed with beginner-friendly features such as crash protection, easy-to-use controls, and stable flight performance, making them ideal for those just starting in FPV flying.

2. Can I race with Emax drones?

Yes, Emax offers racing drones like the Hawk Pro, which are specifically designed for competitive FPV racing. These drones are built for speed, agility, and durability, making them a popular choice among FPV racers.

3. Do Emax drones come with FPV goggles?

Some Emax drone packages include FPV goggles, but it depends on the model and package. Check the product details on MEPSKING to see if your chosen drone comes with goggles or if they need to be purchased separately.

4. How durable are Emax drones?

Emax drones are known for their durability, especially models like the Tinyhawk 2 and Hawk Pro, which feature impact-resistant frames designed to handle crashes and rough landings.

5. Can I upgrade or customize my Emax drone?

Yes, Emax drones are highly customizable. You can upgrade parts like the motors, propellers, and flight controllers to fine-tune your drone’s performance to your liking.

Conclusion

If you’re in the market for a high-performance FPV drone, Emax drones available on MEPSKING are the way to go. From beginner-friendly models like the Tinyhawk 2 to racing beasts like the Hawk Pro, Emax offers something for every level of FPV enthusiast. With their reputation for quality, durability, and innovation, Emax drones are a solid investment for anyone serious about FPV flying.

At MEPSKING, we’re committed to providing you with the best drones on the market, and Emax drones are no exception. So, what are you waiting for? Unleash the power of FPV flying with an Emax drone today!


By the way, if you’re looking to grab one of these incredible drones, be sure to check out our selection of Emax drones on MEPSKING for the best deals and fast shipping!

Continue Reading
Click to comment

Leave a Reply

Your email address will not be published. Required fields are marked *

Technology

Photeeq Photo Ideas: Creative Strategies for Stunning Shots

Published

on

Photeeq Photo Ideas

Ever struggled to come up with fresh, eye-catching photo ideas? Whether you’re a budding photographer, a social media enthusiast, or just someone who loves capturing moments, finding unique photo concepts can be challenging. That’s where Photeeq photo ideas come in—helping you unlock creativity and take your photography to the next level.

In this guide, we’ll explore practical, expert-backed strategies to inspire your next photoshoot. From composition tricks to trending themes, you’ll discover actionable tips to make your images stand out.

Why Unique Photo Ideas Matter

In today’s visually driven world, standing out is key. Whether for Instagram, a portfolio, or personal memories, compelling photos:

  • Grab attention instantly

  • Tell a story more effectively

  • Boost engagement on social media

  • Enhance professional credibility

Let’s dive into proven Photeeq-inspired ideas to elevate your shots.

1. Play with Perspectives

Shooting from unusual angles can transform an ordinary scene into something extraordinary. Try these:

  • Bird’s-eye view: Capture flat lays (food, books, accessories) from directly above.

  • Worm’s-eye view: Shoot upwards for dramatic landscapes or towering architecture.

  • Dutch tilt: Tilt your camera slightly for a dynamic, edgy effect.

Example: A simple coffee cup becomes artsy when shot from above with steam rising and a notebook beside it.

2. Experiment with Lighting

Lighting can make or break a photo. Here’s how to use it creatively:

  • Golden hour magic: Shoot during sunrise/sunset for warm, soft glows.

  • Silhouettes: Position your subject against a bright background for striking outlines.

  • Artificial light play: Use fairy lights, neon signs, or candles for moody effects.

Pro tip: Diffused light (through curtains or softboxes) reduces harsh shadows for flattering portraits.

3. Incorporate Motion Blur

Adding movement creates energy and depth:

  • Panning shots: Follow a moving subject (cyclist, car) with a slower shutter speed.

  • Light trails: Capture car headlights at night with long exposure.

  • Water motion: Use a tripod to blur flowing rivers or waterfalls.

Example: A dancer mid-twirl with slight motion blur conveys elegance and motion.

4. Use Reflections Creatively

Reflections add symmetry and intrigue:

  • Puddles: After rain, shoot upside-down cityscapes in water droplets.

  • Mirrors: Frame a subject within a mirror for a surreal effect.

  • Sunglasses: Capture reflections in lenses for a cool, unexpected twist.

5. Focus on Textures & Patterns

Close-ups of textures make visually captivating shots:

  • Nature: Bark, leaves, sand dunes.

  • Urban: Brick walls, rusted metal, cobblestones.

  • Everyday objects: Fabric weaves, food textures (melting chocolate, frothy coffee).

Pro tip: Black-and-white editing enhances texture contrast.

6. Try Themed Photoshoots

A cohesive theme makes your photos more memorable:

  • Color-themed: All-blue or monochrome compositions.

  • Seasonal: Autumn leaves, snowy landscapes, spring blossoms.

  • Conceptual: “Floating objects” (using hidden supports) or “miniature worlds.”

Example: A “vintage bookshelf” theme with old books, a cup of tea, and warm lighting.

7. Candid & Emotional Shots

Authentic moments often outshine posed ones:

  • Laughter: Capture genuine smiles during conversations.

  • Street photography: Document raw, unfiltered urban life.

  • Pet antics: Animals in action make heartwarming shots.

8. Minimalist Photography

“Less is more” works wonders:

  • Negative space: Isolate a single subject against a clean background.

  • Single-color dominance: A red apple on a white table.

  • Simple silhouettes: A lone tree against a sunset.

9. Creative Editing Techniques

Post-processing can elevate your photos:

  • Selective color: Keep one color vibrant while desaturating the rest.

  • Double exposure: Blend portraits with landscapes for an artistic effect.

  • Vintage filters: Add grain and faded tones for nostalgia.

Tool suggestion: Lightroom presets or Snapseed for mobile edits.

10. Interactive & Fun Concepts

Engage your audience with participatory ideas:

  • “Follow the arrow”: Use props to lead the viewer’s eye.

  • “Holding the sun”: Play with perspective to “hold” the sun or moon.

  • Shadow play: Use shadows to create interesting shapes.

Final Thoughts: Keep Experimenting!

The best Photeeq photo ideas come from curiosity and experimentation. Don’t be afraid to:
✔ Break composition rules occasionally
✔ Test new gear (lens filters, tripods)
✔ Revisit old shots with fresh editing styles

Continue Reading

Technology

Understanding the c0765 0x4750 and c0750 0x4765 Code

Published

on

c0765 0x4750 and c0750 0x4765 Code

Introduction

Have you ever encountered the enigmatic c0765 0x4750 and c0750 0x4765 codes while working on a project? These cryptic combinations of numbers and letters can seem like a puzzling riddle at first glance. But fear not, as we are here to unravel the mystery behind these codes in this comprehensive guide. Get ready to dive into the world of error code deciphering and gain a deeper understanding of what lies beneath these perplexing symbols. Let’s embark on this journey together to demystify the secrets of the c0765 0x4750 and c0750 0x4765 code!

Understanding the Structure

When it comes to decoding error codes like c0765 0x4750 and c0750 0x4765, understanding the structure is key. These alphanumeric combinations may seem perplexing at first glance, but they follow a specific format that holds valuable information.

The structure of these codes typically consists of a prefix (such as ‘c’ or ‘0x’), followed by a series of numbers and letters. Each component plays a crucial role in identifying the nature of the error and its location within the system.

By dissecting the code piece by piece, developers can unravel its meaning and gain insights into what went wrong. This process requires attention to detail and an analytical mindset to connect the dots effectively.

In essence, comprehending the structure of error codes is akin to deciphering a cryptic message – it takes patience, logic, and persistence. With practice and experience, unraveling these intricate patterns becomes second nature for seasoned professionals in the field.

Possible Interpretations

When faced with the mysterious c0765 0x4750 and c0750 0x4765 codes, it’s natural to wonder about their possible interpretations. Could they signify a specific error in the system, or perhaps a communication breakdown between components? These codes might hold the key to unlocking hidden issues within the codebase.

One interpretation could point towards a voltage irregularity, prompting further investigation into electrical connections or sensor malfunctions. Another angle to consider is a software glitch impacting critical functions of the vehicle. Perhaps these codes are indicating an impending failure that needs prompt attention.

Delving deeper into their meanings requires dissecting each digit and character meticulously for clues. Each combination could reveal insights into complex systems at play within modern vehicles. As we unravel these enigmatic messages, new possibilities and solutions may emerge to address underlying issues effectively.

Deciphering the Context

Deciphering the context behind error codes like c0765 0x4750 and c0750 0x4765 code requires a keen eye for detail and a knack for problem-solving. It’s like unraveling a complex puzzle where each piece of information holds significance. Understanding the specific circumstances that led to these codes being triggered is crucial in finding the root cause of the issue.

Context can vary greatly depending on the system in which these error codes appear. It could be related to hardware malfunctions, software glitches, or even environmental factors affecting the device. By delving deeper into the context surrounding these codes, programmers can gain valuable insights that pave the way for effective troubleshooting strategies.

Decoding the context is akin to following breadcrumbs – each clue leading closer to a solution. It often involves examining logs, analyzing data flow, and considering recent changes made to the system. The ability to contextualize error codes not only facilitates quicker problem resolution but also enhances overall code management practices.

In essence, deciphering context is an art form that demands patience, precision, and ingenuity from developers seeking to crack the code mystery once and for all.

Troubleshooting and Solutions

When encountering the c0765 0x4750 and c0750 0x4765 code, troubleshooting can be a daunting task. One common solution is to check for any recent updates or changes in the code that might have triggered the error. It’s essential to review the entire code carefully to identify any syntax errors or missing elements.

Another approach is to debug the code step by step using tools like breakpoints or console logs to pinpoint where the issue arises. Additionally, testing different scenarios can help uncover specific conditions that trigger the error.

Collaborating with colleagues or seeking advice from online forums can provide fresh perspectives and potential solutions you might not have considered. Remember, persistence and patience are key when troubleshooting complex error codes – don’t be afraid to experiment with various approaches until you find a resolution.

Best Practices in Code Management

When it comes to managing code effectively, there are some best practices that can make a significant difference in the development process.

Maintaining clear and organized documentation is key. This includes detailed comments within the code itself as well as external documents outlining the purpose and functionality of each component.

Version control is another crucial aspect of code management. By using tools like Git, developers can track changes, collaborate seamlessly with team members, and revert back to previous versions if needed.

Regular code reviews are essential for ensuring quality and consistency across projects. Peer feedback not only helps catch errors but also promotes knowledge sharing and improvement.

Additionally, following coding standards and conventions contributes to readability and maintainability. Consistent formatting makes it easier for multiple developers to work on the same codebase without confusion or errors.

Automated testing should be integrated into the development workflow to identify bugs early on and ensure that new code doesn’t break existing functionalities.

Real-World Applications

Have you ever wondered how the cryptic c0765 0x4750 and c0750 0x4765 code play out in real-life scenarios? Well, let’s dive into some practical applications where these error codes could surface. Imagine you’re working on a cutting-edge autonomous vehicle project, and suddenly, one of the sensors triggers a c0765 0x4750 code – this could indicate an issue with the steering control system.

In another context, picture yourself managing a network infrastructure for a large corporation when a server starts throwing the c0750 0x4765 error – signaling potential connectivity problems that need immediate attention. These examples highlight how understanding and addressing these codes promptly can make or break critical systems in various industries.

From automotive engineering to IT support, being well-versed in decoding these error messages is essential for ensuring smooth operations across different fields.

The Evolution of Error Codes

Error codes have come a long way since the early days of computing. Initially, they were cryptic messages that left users scratching their heads in confusion. As technology advanced, error codes evolved to become more descriptive and user-friendly.

In the past, deciphering an error code was like cracking a secret code. But today, with advancements in programming languages and diagnostic tools, understanding error codes has become much more accessible. Developers now have access to detailed documentation that provides insights into what each code means and how to troubleshoot it effectively.

The evolution of error codes reflects the continuous improvement in software development practices. By learning from past mistakes and refining error messaging systems, developers can create more robust and user-friendly applications that minimize downtime and enhance user experience.

Conclusion

As technology continues to advance, error codes like c0765 0x4750 and c0750 0x4765 Code play a crucial role in the world of programming. Understanding these codes not only helps developers troubleshoot issues efficiently but also enhances overall code management practices.

By deciphering the structure, context, and possible interpretations of these error codes, programmers can navigate through challenges more effectively. Through troubleshooting techniques and best practices in code management, developers can streamline their processes and improve software quality.

Real-world applications demonstrate how these error codes impact various industries and highlight the importance of staying updated with evolving technologies. As we witness the evolution of error code systems, it becomes evident that continuous learning is key to mastering coding languages and ensuring optimal performance.

Embracing the complexity of error codes such as c0765 0x4750 and c0750 0x4765 opens up a realm of possibilities for innovation and problem-solving in the digital age. By delving deeper into these mysteries, developers pave the way for smoother operations and innovative solutions in an ever-changing technological landscape.

Continue Reading

Technology

Kurt Vise Adapter Plate: Easy Steps to Install and Use

Published

on

Kurt Vise Adapter Plate

When working with CNC machines, being precise and flexible is key. That’s where the Kurt Vise Adapter Plate comes into play. This important accessory makes sure your CNC machine can handle many different tasks easily and accurately. Have you ever had trouble with mounting issues or found that your machine vise doesn’t fit? If so then the Kurt Vise Adapter Plate might be just what you need. In this post we’ll look at how installing a Kurt Vise Adapter Plate can make your CNC operations better and more flexible.

Kurt Vise Adapter Plates: What Are They?

Kurt Vise Adapter Plates are made to connect your CNC machine to the vise you need to use. These plates help create a perfect fit allowing different vises to be mounted on machines that might not have matched up before. The Kurt Vise comes in various sizes and styles ensuring there’s a perfect match for any machine and vise combination.

Step-by-Step Installation of Your Kurt Vise Adapter Plate

Installing a Kurt Vise Adapter Plate is simple. Here’s how you can do it:

Step 1: Choose the Right Adapter Plate

Start by choosing the adapter plate that fits your CNC machine and your vise model. Getting this right is key to a smooth installation and operation.

Step 2: Gather Needed Tools

You will need basic tools like wrenches and screws. You might also need a torque wrench depending on what your CNC machine manufacturer suggests.

Step 3: Line Up the Adapter Plate

Place the adapter plate on the CNC machine table and line it up with the mounting holes. This step is important for the stability of your vise during use.

Step 4: Attach the Plate

Use the screws that came with your adapter plate to attach the plate to the CNC machine. Make sure each screw is tightened to the setting the manufacturer recommends. This helps prevent any movement during use.

Step 5: Put On the Vise

Once the adapter plate is secure, put your Kurt Vise onto the adapter plate. Check all connections for any looseness.

Step 6: Calibrate

After mounting the vise you should calibrate your setup. This makes sure your machine works accurately and your pieces are made precisely.

Benefits of Upgrading to a Kurt Vise Setup

With your Kurt Vise and adapter plate in place you’ll see several benefits right away:

  • More Compatibility: You can now use a wider range of vises which lets you work on more types of projects.
  • Better Precision: The firm mounting reduces shaking and movement leading to cleaner cuts.
  • Faster Work: You spend less time making adjustments which means more time for actual machining.

Real-Life Applications: How a Kurt Vise Adapter Plate Can Help

Imagine you need to make many small parts with high accuracy. With the Kurt Vise Adapter Plate you can quickly switch between different vises suited for each part. This cuts down setup time and boosts your output. Choose Pin Vise Machinable Jaws by 5th Axis to improve the efficiency of your CNC machine’s operations.

Streamline Your Workflow

With a Kurt Vise Adapter Plate setting up for a new project becomes much quicker and simpler. You no longer have to wrestle with mismatched components or spend hours troubleshooting fit issues. This ease of configuration means you can move from one job to another with minimal downtime. It’s all about making your workflow as smooth and uninterrupted as possible which in turn can lead to higher productivity and reduced stress in the workshop.

Enhance Safety and Stability

Another significant advantage of integrating a Kurt Vise Adapter Plate into your setup is the added safety and stability it provides. By ensuring a secure and proper fit between your CNC machine and the vise the adapter plate minimizes the risk of accidents caused by loose or shifting components. This means you can operate your machine with confidence knowing that everything is securely locked in place. Safety is paramount in any machining environment and the adapter plate helps reinforce this.

Cost-Effective Upgrade

Investing in a Kurt Vise Adapter Plate is a cost-effective way to enhance your CNC machinery without the need for expensive upgrades or new machines. By adapting your existing equipment to work more efficiently and handle a wider range of tasks you save money in the long run. Instead of purchasing new machines for different jobs you can utilize the flexibility that the adapter plate offers making your current setup more versatile and capable of meeting diverse machining needs.

By adopting the Kurt Vise Adapter Plate you not only optimize your machining operations but also gain the ability to adapt quickly to new challenges and opportunities in the manufacturing field. It’s a smart move for any machinist looking to stay competitive and efficient in today’s fast-paced market. So why wait? Elevate your CNC machining game with the Kurt Vise Adapter Plate today and experience a smoother, safer and more cost-effective manufacturing process.

Final Thoughts: Upgrade Today!

Installing a Kurt Vise Adapter Plate is about more than just making your CNC machine better; it’s about improving your whole machining process. Why settle for less when you can make your operations better and take on more types of work? If you want more precision and efficiency the Kurt Vise Adapter Plate is a great choice.

Continue Reading

Trending