Connect with us

Health

The Ultimate Guide to Choosing Protein Bars

Published

on

Protein Bars

In recent years, protein bars have surged in popularity, becoming a go-to snack for many. Whether you’re a fitness enthusiast looking to fuel your workouts, a busy professional needing a quick meal replacement, or simply someone who wants a nutritious snack, protein bars are a convenient option. But with so many choices out there, how do you know which one to pick? This guide will help you navigate the world of protein bars, focusing on the benefits, what to look for, and even gluten-free options for those with dietary restrictions.

What Are Protein Bars?

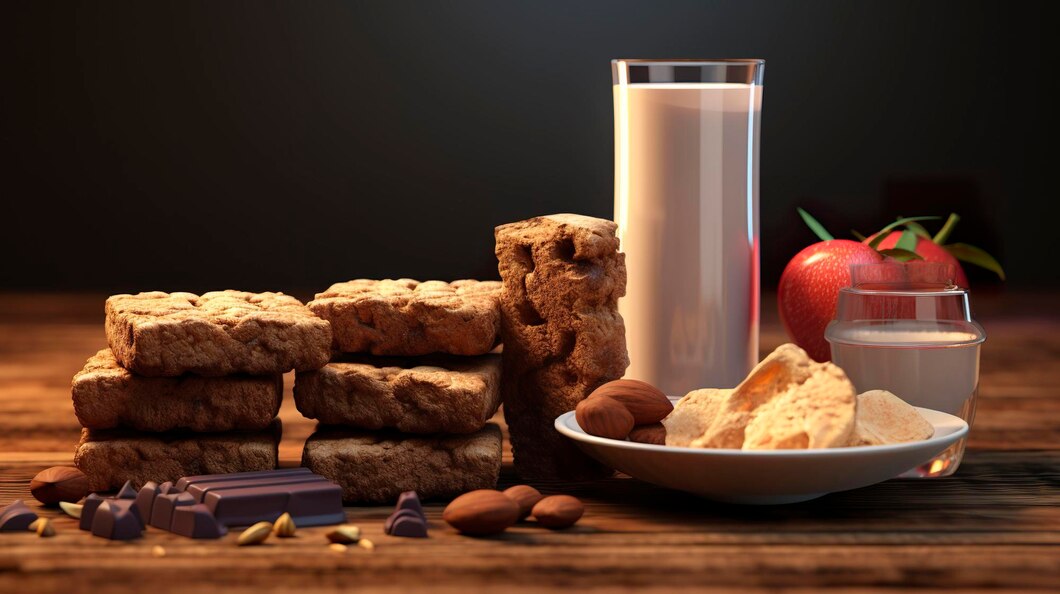
Protein bars are compact snacks designed to provide a quick source of protein, carbs, and fats. Originally developed for athletes, they have now become mainstream, catering to anyone who needs a quick, on-the-go snack. The primary ingredient in most protein bars is a protein source, which can range from whey and casein (both derived from milk) to plant-based proteins like pea, soy, and rice.

Benefits of Protein Bars

So, why are protein bars so popular? Here are a few reasons:

  1. Convenience

One of the main reasons people reach for protein bars is convenience. They are portable, easy to store, and don’t require any preparation. You can throw one in your bag and have it ready whenever hunger strikes.

  • Nutritional Boost

Protein bars are designed to offer a balanced mix of macronutrients—proteins, fats, and carbohydrates. This makes them an excellent choice for a quick energy boost or post-workout recovery. The protein helps in muscle repair and growth, while the carbs replenish glycogen stores.

  • Variety

With countless flavors and types available, there’s a protein bar for everyone. Whether you’re craving something sweet, savory, or even gluten-free, the market has got you covered.

What to Look for in a Protein Bar

Not all protein bars are created equal. Some are essentially glorified candy bars loaded with sugar and artificial ingredients, while others are genuinely nutritious. Here’s what you should consider when choosing a protein bar:

  1. Protein Content

Since protein is the star ingredient, you want to make sure you’re getting enough of it. A good protein bar should have at least 10 grams of protein. If you’re using it as a meal replacement or post-workout snack, aim for 20 grams or more.

  • Sugar Levels

Be mindful of the sugar content. Some bars can have more sugar than a can of soda! Ideally, a protein bar should have no more than 5-10 grams of sugar. Look for bars sweetened with natural alternatives like stevia or monk fruit instead of high-fructose corn syrup or artificial sweeteners.

  • Calorie Count

Depending on your goals, the calorie content of a protein bar can either be a pro or a con. If you’re looking for a meal replacement, you’ll want something around 300 calories or more. For a snack, aim for 150-250 calories.

  • Ingredients

Less is more. Opt for bars with a short ingredient list that includes whole foods like nuts, seeds, oats, and natural sweeteners. Avoid those with a laundry list of unrecognizable ingredients, especially if they sound like they belong in a chemistry lab.

Gluten-Free Protein Bars

For those with gluten intolerance or celiac disease, finding the right protein bar can be a bit trickier. Many protein bars contain ingredients like wheat, barley, or rye, which can be harmful to those avoiding gluten. Fortunately, the market for gluten-free protein bars has expanded significantly. Here’s what to keep in mind:

  1. Certified Gluten-Free: Look for bars that have a gluten-free certification. This ensures that the bar meets strict standards for gluten content, typically less than 20 parts per million.
  2. Avoid Cross-Contamination: Even if a bar is made with gluten-free ingredients, it could be processed in a facility that handles gluten. If you’re highly sensitive to gluten, this is something to watch out for.
  3. Check the Labels: Always read the ingredient list carefully. Even if a bar claims to be gluten-free, there might be hidden sources of gluten like malt or barley malt.

When to Eat Protein Bars

Timing can play a significant role in how effective a protein bar is for your needs. Here are some common scenarios:

  1. Pre-Workout: If you need a quick boost before hitting the gym, a protein bar with a good mix of carbs and protein can provide the energy and amino acids needed to fuel your workout.
  2. Post-Workout: After exercising, especially after strength training, your muscles need protein to repair and grow. A protein bar with a higher protein content and moderate carbs is ideal for this purpose.
  3. Meal Replacement: On busy days, a protein bar can serve as a convenient meal replacement. Look for bars with a higher calorie count, substantial protein, and fiber to keep you full.
  4. Snack: For a mid-day pick-me-up or to curb cravings, a lower-calorie protein bar can be a healthier alternative to chips or candy.

Homemade Protein Bars

If you’re not satisfied with store-bought options or want to control exactly what goes into your snack, making your own protein bars is easier than you might think. Here’s a simple recipe:

Ingredients:

  • 2 cups rolled oats
  • 1 cup protein powder of your choice
  • 1/2 cup nut butter (like almond or peanut butter)
  • 1/4 cup honey or maple syrup
  • 1/2 cup milk or dairy-free alternative
  • Optional mix-ins: chocolate chips, dried fruit, nuts, seeds

Instructions:

  1. In a large bowl, mix the oats and protein powder.
  2. In a microwave-safe bowl, heat the nut butter and honey for about 30 seconds, or until warm and easy to stir.
  3. Add the warm nut butter mixture to the oats and protein powder, then pour in the milk. Mix until well combined. If the mixture is too dry, add more milk, one tablespoon at a time.
  4. Stir in any optional mix-ins.
  5. Press the mixture firmly into a lined baking dish and refrigerate for at least an hour.
  6. Once set, cut into bars and enjoy!

Conclusion

Protein bars can be a fantastic addition to your diet, whether you’re looking for a quick snack, a meal replacement, or a post-workout recovery option. By understanding what to look for and considering your dietary needs, such as opting for gluten-free protein bars if necessary, you can make informed choices that align with your health goals. Remember, while protein bars are convenient, they should complement a balanced diet rather than replace whole foods entirely. Happy snacking!

Continue Reading
Click to comment

Leave a Reply

Your email address will not be published. Required fields are marked *

Health

Delicious Low-Salt Vegetarian Recipes for a Healthier You

Published

on

Low-Salt Vegetarian Recipes

Are you looking to cut back on sodium without sacrificing flavor? You’re not alone. With growing concerns about high blood pressure, heart disease, and water retention, many people are turning to low-salt vegetarian meals. But here’s the good news—reducing salt doesn’t mean reducing taste.

In this guide, we’ll explore flavor-packed, low-sodium vegetarian recipes, backed by expert tips and fresh ingredients that keep your meals exciting. Whether you’re managing a health condition or simply aiming for a cleaner diet, these dishes will prove that eating well can still be delicious.

Why Go Low-Salt & Vegetarian?

Before diving into the recipes, let’s understand why this combo works:

✅ Heart Health – The American Heart Association recommends no more than 2,300 mg of sodium per day (ideally 1,500 mg for those with hypertension). Plant-based diets naturally support cardiovascular health.

✅ Better Kidney Function – Excess salt strains the kidneys. A low-sodium vegetarian diet eases this burden.

✅ Reduced Bloating – High sodium causes water retention. Cutting back leads to a lighter, less puffy feeling.

✅ Enhanced Natural Flavors – Relying on herbs, spices, and umami-rich ingredients (like mushrooms and nutritional yeast) makes food taste richer without salt.

5 Expert Tips for Low-Salt Cooking

  1. Use Fresh Herbs & Spices – Basil, cilantro, cumin, turmeric, and smoked paprika add depth.

  2. Leverage Citrus & Vinegar – Lemon juice, apple cider vinegar, and balsamic bring brightness.

  3. Roast or Sauté for Depth – Caramelized onions, garlic, and roasted veggies intensify flavor.

  4. Choose No-Salt-added Ingredients – Opt for unsalted canned beans, nut butters, and broths.

  5. Try Umami Boosters – Tomatoes, mushrooms, miso (low-sodium), and nutritional yeast mimic savory depth.

7 Low-Salt Vegetarian Recipes to Try Tonight

1. Garlic & Herb Roasted Chickpea Bowl (Sodium: ~150mg per serving)

Why it works: Chickpeas are protein-rich, and roasting them with garlic, rosemary, and olive oil makes them crispy and flavorful.

Ingredients:

  • 1 can (low-sodium) chickpeas, rinsed

  • 2 tbsp olive oil

  • 3 garlic cloves, minced

  • 1 tsp smoked paprika

  • 1 tbsp fresh rosemary

  • 1 cup quinoa (cooked)

  • Handful of spinach

Method:

  1. Toss chickpeas with oil, garlic, and spices. Roast at 400°F for 20 mins.

  2. Serve over quinoa and spinach. Drizzle with lemon juice.

2. Creamy Avocado & White Bean Wrap (Sodium: ~200mg)

Why it works: Avocado adds creaminess, while white beans provide fiber—no mayo needed!

Ingredients:

  • 1 whole wheat tortilla

  • ½ avocado, mashed

  • ½ cup low-sodium white beans

  • ¼ tsp cumin

  • Sliced cucumbers, bell peppers

  • Fresh cilantro

Method:

  1. Mash avocado and beans with cumin.

  2. Spread on tortilla, add veggies, wrap, and enjoy!

3. Spicy Lentil & Sweet Potato Curry (Sodium: ~180mg)

Why it works: Lentils absorb spices beautifully, while coconut milk adds richness.

Ingredients:

  • 1 cup red lentils

  • 1 sweet potato, diced

  • 1 can (low-sodium) coconut milk

  • 1 tbsp curry powder

  • ½ tsp turmeric

  • Fresh ginger, garlic

Method:

  1. Sauté ginger and garlic. Add spices, lentils, sweet potato, and coconut milk.

  2. Simmer 25 mins. Serve with brown rice.

4. Zucchini Noodles with Basil Pesto (Sodium: ~120mg)

Why it works: Zucchini is hydrating, and homemade pesto skips the excess salt.

Ingredients:

  • 2 zucchinis, spiralized

  • 1 cup fresh basil

  • 2 tbsp pine nuts

  • 1 garlic clove

  • 1 tbsp nutritional yeast

  • 2 tbsp olive oil

Method:

  1. Blend basil, nuts, garlic, yeast, and oil into pesto.

  2. Toss with zucchini noodles.

5. Stuffed Bell Peppers with Quinoa & Black Beans (Sodium: ~200mg)

Why it works: A complete protein-packed meal with vibrant flavors.

Ingredients:

  • 4 bell peppers, halved

  • 1 cup cooked quinoa

  • ½ cup low-sodium black beans

  • 1 tsp cumin

  • ½ cup corn

  • Fresh lime juice

Method:

  1. Mix quinoa, beans, corn, and spices. Stuff peppers.

  2. Bake at 375°F for 25 mins.

6. Mushroom & Spinach Frittata (Sodium: ~150mg)

Why it works: Eggs provide protein, while mushrooms add umami.

Ingredients:

  • 4 eggs

  • 1 cup spinach

  • ½ cup mushrooms

  • ¼ tsp black pepper

  • 1 tbsp olive oil

Method:

  1. Sauté mushrooms and spinach.

  2. Whisk eggs, pour over veggies, cook on low until set.

7. Chia Seed Pudding with Berries (Sodium: ~50mg)

Why it works: A naturally sweet, no-salt dessert or breakfast.

Ingredients:

  • 2 tbsp chia seeds

  • 1 cup almond milk (unsweetened)

  • ½ cup mixed berries

  • 1 tsp vanilla extract

Method:

  1. Mix chia seeds and milk, refrigerate overnight.

  2. Top with berries before serving.

Final Thoughts: Low-Salt Vegetarian Recipes

Reducing sodium doesn’t require bland meals—just smarter cooking. With Low-Salt Vegetarian Recipes by using herbs, spices, and fresh ingredients, you can enjoy vibrant, satisfying vegetarian dishes that support long-term health.

Continue Reading

Health

Spiked Coffee Recipe: Elevate Your Brew with a Boozy Twist

Published

on

Spiked Coffee Recipe

Ever wondered how to turn your morning coffee into a happy hour treat? Whether you’re hosting brunch, winding down after dinner, or just craving something different, spiked coffee is the perfect way to blend rich flavors with a spirited kick. From classic Irish Coffee to creative modern twists, we’ve got expert-backed recipes, pro tips, and everything you need to craft the perfect boozy brew.

Why Spiked Coffee?

Spiked coffee isn’t just a winter warmer—it’s a versatile drink that can be enjoyed year-round. According to mixologists, the combination of coffee’s bitterness and the sweetness or smokiness of liquor creates a balanced, complex flavor profile. Plus, caffeine and alcohol have an interesting synergy—when consumed in moderation, the buzz can feel more uplifting than a standard cocktail.

Best Alcohols for Spiking Coffee

Not all spirits pair well with coffee. Here are the top choices:

✔ Whiskey (Bourbon, Irish, or Rye) – Adds warmth and depth.
✔ Rum (Dark or Spiced) – Brings caramel and vanilla notes.
✔ Kahlúa or Coffee Liqueur – Enhances coffee flavor with sweetness.
✔ Baileys Irish Cream – Creamy, smooth, and slightly sweet.
✔ Vodka (Flavored or Plain) – Neutral taste, great for chilled recipes.
✔ Amaretto – Nutty and aromatic, perfect for dessert-like coffee.

5 Must-Try Spiked Coffee Recipes

1. Classic Irish Coffee (The Timeless Favorite)

Ingredients:

  • 1 cup hot brewed coffee

  • 1.5 oz Irish whiskey

  • 1 tbsp brown sugar

  • Heavy cream (lightly whipped)

Instructions:

  1. Preheat a glass with hot water, then discard.

  2. Add sugar and coffee, stirring until dissolved.

  3. Stir in whiskey.

  4. Gently float whipped cream on top (pro tip: pour over the back of a spoon).

  5. Sip without stirring to enjoy the layers.

Why It Works: The cream mellows the whiskey’s bite while the sugar balances the coffee’s bitterness.

2. Espresso Martini Coffee (A Caffeinated Cocktail)

Ingredients:

  • 1 oz vodka

  • 1 oz Kahlúa

  • 1 oz fresh espresso (chilled)

  • ½ oz simple syrup

  • Ice

  • Coffee beans (garnish)

Instructions:

  1. Shake all ingredients with ice until well-chilled.

  2. Strain into a martini glass.

  3. Garnish with coffee beans.

Perfect For: A post-dinner pick-me-up with a sophisticated edge.

3. Bourbon Spiked Cold Brew (Smooth & Refreshing)

Ingredients:

  • 1 cup cold brew coffee

  • 1.5 oz bourbon

  • ½ oz maple syrup

  • Orange zest (optional)

Instructions:

  1. Fill a glass with ice.

  2. Add cold brew, bourbon, and maple syrup.

  3. Stir well and garnish with orange zest.

Why It’s Great: The maple syrup complements bourbon’s smokiness, while cold brew keeps it smooth.

4. Coconut Rum Iced Coffee (Tropical Twist)

Ingredients:

  • 1 cup iced coffee

  • 1.5 oz coconut rum

  • 1 oz cream of coconut

  • Whipped cream & toasted coconut flakes (garnish)

Instructions:

  1. Shake coffee, rum, and cream of coconut with ice.

  2. Strain into a tall glass over fresh ice.

  3. Top with whipped cream and coconut flakes.

Ideal For: Summer sipping by the pool.

5. Salted Caramel Spiked Latte (Decadent Dessert Drink)

Ingredients:

  • 1 cup brewed coffee

  • 1 oz caramel vodka

  • ½ oz butterscotch schnapps

  • 1 tbsp salted caramel sauce

  • Steamed milk

  • Whipped cream & extra caramel drizzle

Instructions:

  1. Mix coffee, vodka, schnapps, and caramel sauce.

  2. Add steamed milk and stir.

  3. Top with whipped cream and extra caramel.

Why You’ll Love It: A boozy take on your favorite coffeehouse treat.

Expert Tips for the Best Spiked Coffee

✅ Quality Matters – Use freshly brewed coffee for the best flavor.
✅ Balance Sweetness – Adjust sugar or syrup to taste.
✅ Temperature Control – Hot coffee should be hot, cold drinks should be chilled.
✅ Garnish Like a Pro – Cinnamon, cocoa powder, or citrus zest elevate presentation.
✅ Know Your Limits – Caffeine + alcohol can be dehydrating; drink water between servings.

Final Thoughts: Spiked Coffee Recipe

Spiked Coffee Recipe is more than just a cocktail—it’s an experience. Whether you prefer the boldness, the creaminess of Baileys, or the tropical vibes, there’s a boozy coffee recipe for every palate. Next time you’re craving something beyond your usual cup, try one of these recipes and savor the rich, spirited flavors.

Continue Reading

Health

Apple Cider Vinegar Tonic: A Powerhouse Elixir for Health?

Published

on

Apple Cider Vinegar Tonic

Could a simple kitchen staple be the secret to better digestion, weight loss, and glowing skin?

Apple cider vinegar (ACV) has been a folk remedy for centuries, but modern science is now catching up to its potential benefits. From detox tonics to immune-boosting shots, ACV is making waves in the wellness world. But does it live up to the hype?

In this deep dive, we’ll explore:
✅ The science-backed benefits of apple cider vinegar tonic
✅ How to make it (plus delicious variations)
✅ Potential side effects and who should avoid it
✅ Real-world success stories from ACV enthusiasts

Let’s separate fact from fad and uncover whether this tangy tonic deserves a spot in your daily routine.

What Is Apple Cider Vinegar Tonic?

Apple cider vinegar tonic is a diluted mixture of ACV, water, and often additional ingredients like honey, lemon, or spices. Unlike straight ACV (which can damage tooth enamel and irritate the throat), a tonic makes it safer and more palatable.

Why the “Mother” Matters

Raw, unfiltered ACV contains the “mother”—a cloudy substance rich in probiotics, enzymes, and acetic acid. This is where most of the health benefits come from. Always opt for organic, unpasteurized ACV with the mother for maximum potency.

6 Science-Backed Benefits of Apple Cider Vinegar Tonic

1. Supports Healthy Digestion

ACV’s acetic acid may boost stomach acid production, aiding digestion and reducing bloating. A 2016 study in Journal of Clinical Gastroenterology found that ACV helps with gastric emptying, which can prevent acid reflux.

Pro Tip: Sip 1 tbsp ACV in water before meals to kickstart digestion.

2. May Aid Weight Loss

Several studies suggest ACV can promote satiety and reduce calorie intake. A 2018 study in Journal of Functional Foods found that participants who consumed ACV daily lost more weight than those who didn’t.

How it works: Acetic acid may suppress fat storage and curb sugar cravings.

3. Balances Blood Sugar Levels

Research in Diabetes Care (2004) showed that ACV improves insulin sensitivity by 19-34% after high-carb meals. This makes it a potential ally for diabetics and prediabetics.

Best Time to Drink: Before or with meals to blunt blood sugar spikes.

4. Boosts Immunity

The antimicrobial properties of ACV (thanks to acetic acid) may help fight pathogens. Some people use it as a natural sore throat remedy or immune tonic during cold season.

Try This: Mix ACV with honey, ginger, and warm water for a soothing immune shot.

5. Enhances Skin Health

Diluted ACV can act as a natural toner, balancing skin pH and reducing acne. Its antibacterial properties may also help with eczema and dandruff.

Caution: Always dilute (1 part ACV to 3 parts water) to avoid irritation.

6. Detoxifies the Body

While the liver does most of the detox work, ACV may support liver function by promoting circulation and lymphatic drainage. Some detox regimens include ACV as a morning cleanse.

How to Make the Perfect Apple Cider Vinegar Tonic

Basic Recipe

  • 1-2 tbsp raw apple cider vinegar (with mother)

  • 8 oz warm or cold water

  • Optional: 1 tsp honey, lemon juice, cinnamon, or cayenne

Instructions:

  1. Mix ACV and water.

  2. Add optional flavor boosters.

  3. Drink once daily (best in the morning or before meals).

5 Delicious Variations

  1. Metabolism Booster: ACV + lemon + cayenne

  2. Gut-Healing Tonic: ACV + ginger + turmeric

  3. Immune Shot: ACV + honey + cinnamon

  4. Hydrating Electrolyte Drink: ACV + coconut water + sea salt

  5. Bedtime Relaxation Tonic: ACV + chamomile tea + raw honey

Potential Side Effects & Who Should Avoid It

While ACV is generally safe, overuse can cause:

  • Tooth enamel erosion (always dilute and rinse mouth after)

  • Throat irritation (never drink undiluted)

  • Low potassium levels (avoid if on diuretics)

  • Digestive upset (start with 1 tsp and increase gradually)

Who Should Skip It?

  • People with acid reflux (can worsen symptoms in some)

  • Those with sensitive stomachs or ulcers

  • Anyone on diabetes meds (consult a doctor first)

Real-World Success Stories

✔ Sarah, 34: “ACV tonic helped me lose 12 lbs in 3 months by curbing my sugar cravings.”
✔ Mark, 42: “My fasting blood sugar dropped 20 points after adding ACV before meals.”
✔ Lisa, 28: “My skin cleared up within weeks of using ACV as a toner.”

Final Verdict: Should You Try It?

Apple cider vinegar tonic isn’t a magic cure-all, but research and anecdotal evidence suggest it can be a powerful addition to a healthy lifestyle.

Key Takeaways:
🔹 Start small (1 tsp in water) and increase gradually.
🔹 Always dilute to protect teeth and throat.
🔹 Pair with a balanced diet for best results.

Continue Reading

Trending