Connect with us

Food And Drinks

Spice Up Your Party with These Tasty Mexican Candy Shot Recipes

Published

on

Mexican Candy Shot Recipes

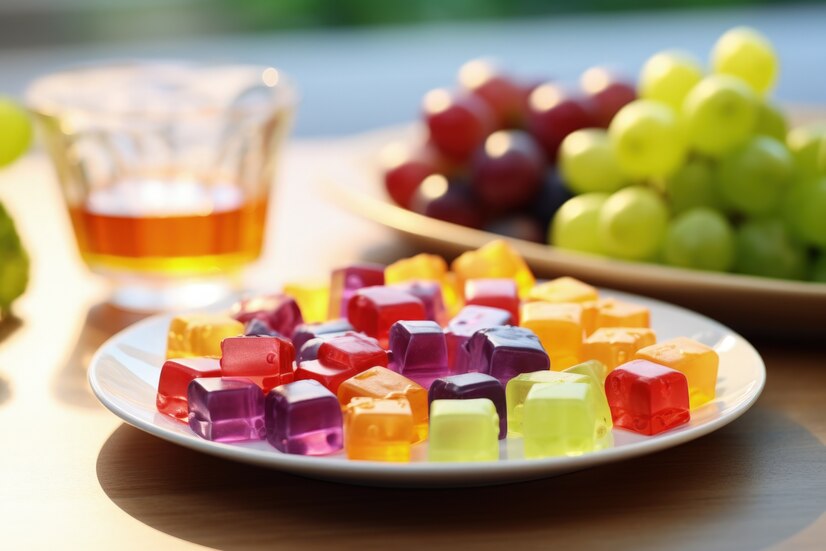
Get ready to add a spicy twist to your next party with these mouthwatering Mexican candy shot recipes! If you want to surprise your guests with unique and flavorful drinks, look no further. These tequila-infused shots are not only delicious but also fun to make. Let’s dive into the world of Mexican-inspired cocktails that will elevate any gathering from ordinary to extraordinary.

Ingredients & Equipment Needed

To get your Mexican Candy Shot Recipes started, you’ll need a few key ingredients and tools. First up, grab some high-quality tequila – the star of these tasty shots. Opt for a smooth silver or reposado tequila to complement the sweet and spicy flavors of the candy.

Next on the list is hot sauce – choose one with a kick to add that fiery punch to your shots. Other essential ingredients include lime juice, chamoy sauce, Tajin seasoning, and of course, your favorite Mexican candies like tamarind balls or chili lollipops.

As for equipment, make sure you have shot glasses ready for serving up these flavorful concoctions. Don’t forget cocktail shakers or mixing glasses to blend all the ingredients together perfectly. With everything prepped and in place, you’re well on your way to creating unforgettable Mexican Candy Shots!

Best Tequila and Hot Sauce to Use

When it comes to Mexican Candy Shot Recipes, choosing the right tequila can make all the difference. Opt for a high-quality blanco or reposado tequila for a smooth and balanced flavor profile. Look for brands like Patron, Espolon, or Don Julio for an authentic taste that complements the spicy kick of the hot sauce.

For that extra fiery punch in your Mexican Candy Shot Recipes, selecting the perfect hot sauce is key. Consider using popular options such as Cholula, Tapatio, or Valentina for their bold flavors and moderate heat levels. Experiment with different hot sauces to find your preferred level of spiciness.

Balancing the sweetness of the candy with the heat from both the tequila and hot sauce is essential when crafting these tantalizing shots. The combination of a quality tequila and flavorful hot sauce will elevate your party drinks to a whole new level of excitement!

Step-by-Step Directions for Making Mexican Candy Shots

Ready to spice up your party with some delicious Mexican candy shots? Let’s dive into the step-by-step process of crafting these tasty treats.

First, gather your ingredients: tequila, hot sauce, lime juice, and a selection of Mexican candies for garnish. You’ll also need shot glasses and a cocktail shaker to mix everything together.

To make the shots, start by rimming each glass with lime juice before dipping it in crushed candy. Next, combine tequila, hot sauce, and lime juice in the shaker with ice. Shake well and strain into the prepared glasses. Garnish with more candy if desired – ¡salud!

Tips for Making Perfect Shots

Hosting a party and want to impress your guests with the perfect Mexican candy shots? Here are some tips to ensure your shots turn out amazing! First, make sure to chill all ingredients and equipment beforehand. Cold tequila and hot sauce will enhance the flavors of the shots.

When layering the ingredients in shot glasses, pour slowly over a spoon to create distinct layers for that visually appealing look. And lastly, don’t forget presentation matters! Garnish your shots with chili powder rims or small slices of lime for that extra touch. With these tips, you’ll be ready to wow your friends at your next fiesta!

Serving Suggestions and Pairings

When it comes to serving Mexican candy shots, presentation is key. Pair these zesty and sweet concoctions with a side of fresh lime wedges for an extra burst of citrus flavor. The acidity from the lime cuts through the richness of the candies and tequila, creating a harmonious balance on your palate.

For a fun twist, consider offering small bowls of chili powder or Tajin seasoning alongside your shot glasses. Guests can rim their glasses with these spicy toppings for an added kick that complements the heat from the hot sauce in the shots perfectly. This interactive element adds a playful touch to your party spread.

To complete the experience, serve Mexican candy shots alongside traditional Mexican snacks like chips and salsa or guacamole. The combination of savory and spicy flavors will enhance the overall fiesta atmosphere and keep your guests coming back for more!

Variations and Recipe Tips

Looking to add a twist to your Mexican candy shots? Get creative with these variations and recipe tips!

Try experimenting with different flavored tequilas like mango or pineapple for a unique taste. You can also play around with the level of heat by adjusting the amount of hot sauce used – from mild to extra spicy, tailor it to your preference.

For an extra kick, consider rimming the shot glasses with Tajin seasoning or chili powder before pouring in the mixture. Don’t be afraid to mix things up and make these candy shots your own masterpiece!

Advance Preparation Techniques & Recommendations

To ensure your Mexican candy shots are a hit at your party, consider some advance preparation techniques and recommendations. One key tip is to chill the tequila in advance so that it’s perfectly cold when you mix it with the other ingredients. You can also pre-cut any garnishes like lime wedges or chili powder rims for quick assembly.

Another helpful suggestion is to make a large batch of the Mexican candy shot mixture ahead of time and keep it refrigerated until you’re ready to serve. This way, you can spend more time enjoying the party with your guests instead of mixing drinks all night long.

Conclusion

After exploring these tantalizing Mexican candy shot recipes, your party is sure to be a hit with guests craving something sweet and spicy. With the perfect balance of flavors and a fun twist on traditional shots, these recipes will elevate any gathering into a fiesta to remember.

Experiment with different variations and make them your own by adding unique twists or adjusting the spice levels to suit your taste preferences. The possibilities are endless when it comes to creating memorable cocktails that pack a flavorful punch.

So gather your friends, stock up on tequila and hot sauce, and get ready to spice up your next celebration with these delicious Mexican candy shots that are guaranteed to impress even the most discerning partygoers!

FAQs

Can I make these Mexican candy shots without tequila?
While tequila is the traditional base for Mexican candy shots, you can experiment with other spirits like vodka or rum to create unique variations.

How long do these shots last once prepared?
Mexican candy shots are best enjoyed fresh, but you can prepare them a few hours in advance and store them in the refrigerator. Just be sure to stir before serving!

Are there non-alcoholic versions of Mexican candy shots?
Yes! You can easily adapt these recipes by substituting the alcohol with flavored syrups or juices for a delicious non-alcoholic alternative.

Can I customize the level of spiciness in these shots?

Absolutely! Adjust the amount of hot sauce or chili powder according to your preference for heat. Remember, it’s all about finding the perfect balance between sweet and spicy flavors.

These FAQs should help address any lingering questions you may have about making and enjoying Mexican candy shots at your next party. Get creative, have fun, and impress your guests with these tasty treats! Cheers!

Continue Reading
Click to comment

Leave a Reply

Your email address will not be published. Required fields are marked *

Food And Drinks

Oven Roasted Peppers and Onions: A Simple, Flavorful Side Dish

Published

on

Oven Roasted Peppers and Onions

Have you ever opened your fridge to find a lonely bell pepper and half an onion, wondering how to turn them into something delicious? Oven-roasted peppers and onions are the answer—a versatile, healthy, and easy-to-make dish that elevates any meal.

Whether you’re meal prepping, adding flavor to sandwiches, or serving a vibrant side dish, roasted peppers and onions deliver sweet, caramelized goodness with minimal effort. In this guide, you’ll learn:

  • The best peppers and onions for roasting

  • Step-by-step roasting techniques

  • Flavor-boosting seasoning ideas

  • Creative ways to use them in meals

Why Roast Peppers and Onions?

Roasting transforms these humble vegetables into tender, sweet, and smoky delights. The high heat caramelizes their natural sugars, deepening their flavor. Plus, it’s hands-off cooking—just chop, season, and let the oven do the work.

Benefits of Oven Roasting:

✅ Enhanced Flavor – Caramelization brings out natural sweetness.
✅ Meal Prep Friendly – Stores well for 4–5 days.
✅ Versatile – Great in tacos, pasta, omelets, and more.
✅ Nutritious – Rich in vitamins C, A, and antioxidants.

Choosing the Best Peppers and Onions

Best Peppers for Roasting:

  • Bell Peppers – Red, yellow, or orange (sweeter than green).

  • Poblano Peppers – Mild heat, great for fajitas.

  • Banana Peppers – Slightly tangy, perfect for sandwiches.

Best Onions for Roasting:

  • Yellow Onions – Balanced sweetness and sharpness.

  • Red Onions – Mild, slightly peppery, and colorful.

  • Sweet Onions (Vidalia, Walla Walla) – Extra caramelization.

Pro Tip: Mix colors for visual appeal and varied flavor!

How to Roast Peppers and Onions (Step-by-Step)

Ingredients:

  • 2 bell peppers (any color), sliced

  • 1 large onion, sliced

  • 2 tbsp olive oil

  • 1 tsp salt

  • ½ tsp black pepper

  • Optional: 1 tsp garlic powder, smoked paprika, or dried herbs

Instructions:

  1. Prep the Veggies – Slice peppers and onions into even strips (about ¼-inch thick).

  2. Season – Toss with olive oil, salt, pepper, and any extra spices.

  3. Roast – Spread on a parchment-lined baking sheet in a single layer.

  4. Bake – At 400°F (200°C) for 20–25 minutes, stirring halfway, until edges char slightly.

Pro Tip: For extra caramelization, broil for 2–3 minutes at the end.

5 Flavor Variations to Try

Switch up the taste with these seasoning blends:

  1. Italian Style – Olive oil, garlic, oregano, and balsamic glaze.

  2. Mexican Fiesta – Cumin, chili powder, and lime juice.

  3. Mediterranean – Lemon zest, thyme, and a sprinkle of feta.

  4. Smoky BBQ – Paprika, brown sugar, and a dash of cayenne.

  5. Simple & Herby – Fresh rosemary, garlic, and sea salt.

How to Use Roasted Peppers and Onions

These veggies are meal-prep gold! Here’s how to enjoy them:

1. Sandwich & Wrap Enhancer

  • Philly Cheesesteak – Pile onto toasted rolls with melted provolone.

  • Veggie Wraps – Add hummus and spinach for a quick lunch.

2. Protein Pairing

  • Chicken or Steak Fajitas – Serve with warm tortillas and guacamole.

  • Egg Dishes – Fold into omelets or scrambled eggs.

3. Pasta & Grain Bowls

  • Quinoa Salad – Toss with chickpeas and lemon dressing.

  • Pasta Primavera – Mix with penne and Parmesan.

4. Pizza & Flatbread Topper

  • Gourmet Pizza – Layer on pizza dough with goat cheese.

5. Freezer-Friendly Prep

  • Store in airtight containers for up to 5 days or freeze for 3 months.

Common Mistakes to Avoid

🚫 Overcrowding the Pan – Leads to steaming instead of roasting.
🚫 Uneven Cutting – Causes some pieces to burn while others stay raw.
🚫 Skipping the Oil – Helps with caramelization and prevents sticking.

Final Thoughts: A Staple for Easy, Flavorful Meals

Oven-roasted peppers and onions are a game-changer for busy cooks. With just a few ingredients and minimal prep, you can add depth to countless dishes. Whether you’re topping a burger, stuffing a quesadilla, or mixing into a grain bowl, this versatile combo saves time and boosts flavor.

Continue Reading

Food And Drinks

Fish and Shellfish-Free Meal Plan: Delicious, Nutritious

Published

on

Fish and Shellfish-Free Meal Plan

Ever struggled to find satisfying meals without fish or shellfish? Whether due to allergies, dietary preferences, or sustainability concerns, avoiding seafood doesn’t mean sacrificing flavor or nutrition. This comprehensive guide provides a practical, Fish and Shellfish-Free Meal Plan packed with delicious alternatives—so you never feel like you’re missing out.

Why Choose a Fish and Shellfish-Free Diet?

People eliminate seafood from their diets for various reasons:

  • Allergies: Fish and shellfish are among the top 9 food allergens, causing severe reactions in some individuals.

  • Vegetarian/Vegan Lifestyles: Many plant-based eaters avoid seafood for ethical or health reasons.

  • Environmental Concerns: Overfishing and unsustainable practices lead some to reduce seafood consumption.

  • Taste Preferences: Some simply don’t enjoy the taste or texture of fish and shellfish.

Whatever your reason, a well-planned fish-free diet can be just as nutritious—if not more so—than one that includes seafood.

Key Nutrients to Replace (And How to Do It)

Fish and shellfish are rich in omega-3s, protein, iodine, and vitamin D. Here’s how to replace them effectively:

1. Omega-3 Fatty Acids

  • Best Alternatives: Flaxseeds, chia seeds, walnuts, hemp seeds, algae oil (a direct vegan DHA/EPA source).

  • Pro Tip: Grind flaxseeds for better absorption.

2. High-Quality Protein

  • Best Alternatives: Lentils, chickpeas, tofu, tempeh, quinoa, edamame, lean poultry (if not vegan).

  • Pro Tip: Combine grains (rice) and legumes (beans) for complete protein.

3. Iodine (Essential for Thyroid Health)

  • Best Alternatives: Iodized salt, seaweed (nori, kelp), dairy (if consumed), fortified plant milks.

4. Vitamin D

  • Best Alternatives: Fortified cereals, plant milks, mushrooms (exposed to sunlight), supplements.

7-Day Fish & Shellfish-Free Meal Plan

Day 1

  • Breakfast: Chia pudding with almond milk, berries, and walnuts.

  • Lunch: Quinoa bowl with roasted chickpeas, avocado, and tahini dressing.

  • Dinner: Lentil curry with coconut milk and brown rice.

  • Snack: Hummus with carrot sticks.

Day 2

  • Breakfast: Tofu scramble with spinach and turmeric.

  • Lunch: Black bean tacos with avocado and salsa.

  • Dinner: Stir-fried tempeh with broccoli and sesame sauce.

  • Snack: Handful of almonds.

*(Continue with 5 more days of varied, nutrient-dense meals—ensuring diversity in proteins, healthy fats, and fiber.)*

Smart Swaps for Seafood Dishes

Craving sushi or fish tacos? Try these clever substitutes:

  • “Tuna” Salad: Mashed chickpeas + nori flakes + vegan mayo.

  • Vegan Sushi: Use marinated tofu, avocado, or mango instead of fish.

  • “Crab” Cakes: Shredded hearts of palm + Old Bay seasoning.

Eating Out & Travel Tips

  • At Restaurants: Opt for Mediterranean, Indian, or plant-based menus (naturally seafood-light).

  • Travel Hack: Pack portable snacks like roasted chickpeas or nut butter packets.

Final Thoughts: Fish and Shellfish-Free Meal Plan

Eliminating seafood doesn’t mean sacrificing nutrition or flavor. With smart swaps and a balanced, plant-forward approach, you can enjoy a vibrant, satisfying diet while meeting all your nutritional needs.

Continue Reading

Food And Drinks

Salmon vs Chicken Protein: Which Is Better for Your Diet?

Published

on

Salmon vs Chicken Protein

When it comes to high-quality protein sources, salmon and chicken are two of the most popular choices. But which one is better for muscle growth, weight loss, and overall health? If you’ve ever stood in the grocery store wondering whether to grab a salmon fillet or a pack of chicken breasts, this guide will break down the key differences, benefits, and best uses for each.

Nutritional Showdown: Salmon vs Chicken

Before picking a winner, let’s compare their nutritional profiles per 100g (cooked, skinless/boneless):

Nutrient Salmon (Wild) Chicken Breast
Calories 182 kcal 165 kcal
Protein 25 g 31 g
Fat 8 g 3.6 g
Omega-3s 2.3 g 0.1 g
Vitamin D 14.2 mcg 0.1 mcg
B12 3.2 mcg 0.3 mcg
Selenium 46 mcg 27 mcg

Key Takeaways:

  • Chicken wins on pure protein content (31g vs. 25g).

  • Salmon provides more healthy fats, especially omega-3s, crucial for heart and brain health.

  • Salmon is richer in vitamins D and B12, which support immunity and energy.

Health Benefits: Which One Packs a Bigger Punch?

✅ Salmon: The Heart-Healthy Superfood

  • Rich in omega-3 fatty acids (EPA & DHA), which reduce inflammation and lower heart disease risk.

  • Boosts brain function and may help prevent cognitive decline.

  • High in antioxidants (astaxanthin), which fights oxidative stress.

✅ Chicken: The Lean Muscle Builder

  • Lower in calories and fat, making it ideal for fat loss.

  • More protein per gram, supporting muscle repair and growth.

  • Versatile and budget-friendly, easy to incorporate into any diet.

Practical Considerations: When to Choose Each

🔹 Choose Salmon If You…

  • Want to improve heart health or reduce inflammation.

  • Need more healthy fats (great for keto or low-carb diets).

  • Are deficient in vitamin D or B12.

🔹 Choose Chicken If You…

  • Are cutting calories for weight loss.

  • Need a high-protein, low-fat option for muscle gain.

  • Prefer a cheaper, more accessible protein source.

Cooking & Meal Prep Tips

🍗 Best Ways to Cook Chicken

  • Grilled or baked chicken breast (marinate to keep it juicy).

  • Slow-cooked shredded chicken for meal prep.

  • Air-fried chicken tenders (healthier than fried).

🐟 Best Ways to Cook Salmon

  • Pan-seared with olive oil for crispy skin.

  • Baked with lemon and herbs for a simple, flavorful dish.

  • Smoked or grilled for a richer taste.

Which Is Better for Weight Loss?

Both can fit into a weight-loss diet, but:

  • Chicken is lower in calories, making portion control easier.

  • Salmon’s healthy fats keep you fuller longer, reducing cravings.

Pro Tip: Rotate both to get the best of both worlds—lean protein from chicken and omega-3s from salmon.

Final Verdict: Salmon or Chicken?

The answer depends on your goals:

  • For muscle gain & fat loss → Chicken (higher protein, lower fat).

  • For heart & brain health → Salmon (omega-3s, vitamins).

Best Strategy? Incorporate both into your diet for balanced nutrition.

Key Action Steps:

✔ Meal prep both to avoid food boredom.
✔ Pair salmon with veggies for a nutrient-dense meal.
✔ Use chicken in high-protein salads or stir-fries.

Conclusion: Salmon vs Chicken Protein

Instead of choosing between Salmon vs Chicken Protein, why not enjoy both? Each offers unique benefits that can enhance your diet. Whether you’re building muscle, losing weight, or just eating healthier, alternating between these two protein powerhouses ensures you get a wide range of nutrients.

Continue Reading

Trending