Table of Contents
- What Is Dermaplaning?
- Benefits of Dermaplaning
- How Dermaplaning Works
- Preparation and Aftercare
- Suitable Skin Types
- Dermaplaning vs. Other Exfoliation Methods
- Finding a Qualified Professional
What Is Dermaplaning?
Dermaplaning is a noninvasive skincare procedure that uses a sterilized surgical scalpel to gently remove tiny vellus hairs, sometimes known as “peach fuzz,” and dead skin cells from the skin’s surface. This well-liked process aims to show off a smoother, brighter face devoid of the drabness that frequently results from accumulated dead skin.
Unlike other treatments that rely on chemicals or abrasive materials, dermaplaning physically exfoliates the skin, making it suitable for various skin types. The immediate results are one of the key reasons for its popularity. People often leave the treatment with visibly brighter and clearer skin, ready to take on the world.
If you want to experience the benefits of this treatment, searching for dermaplaning near me can help you find a qualified professional in your area, ensuring you receive the best possible care and results.
Benefits of Dermaplaning
Dermaplaning offers more than just superficial benefits. People who get dermaplaning treatments often notice significant skin texture and tone improvements. The removal of dead skin cells plays a crucial role in these benefits since they can clog pores and result in a dull complexion.
Additionally, the appearance of fine lines and minor breakouts is often diminished, giving the skin a healthier, more youthful glow. Moreover, dermaplaning enhances the efficacy of topical skincare products. By eliminating the layer of dead skin, products can penetrate more profoundly and more effectively into the skin. This increased absorption can maximize the benefits of serums and moisturizers, improving skincare routine.
Another notable benefit is that dermaplaning can help create a smoother canvas for makeup application. Eliminating fine hairs and dead skin cells produces makeup that is applied more evenly and lasts longer. Both makeup artists and beauty fans, therefore, believe it.
How Dermaplaning Works
Dermaplaning demands meticulous attention to detail. Throughout a session, a highly proficient practitioner carefully eliminates the outermost layers of dead skin cells and tiny hairs using a sterile blade positioned at a 45-degree angle. This method exfoliates the skin and promotes cellular turnover, enhancing skin texture and clarity.
To provide complete skin regeneration, sessions typically take 30 to 45 minutes and are sometimes combined with other cosmetic treatments. The process begins with thoroughly cleansing the skin to eliminate dirt or oils that could interfere with the blade’s effectiveness. After preparing the skin, the practitioner initiates the exfoliation process, carefully treating delicate areas with precision.
After the treatment, a soothing serum or mask is often applied to calm the skin and provide immediate hydration. The entire experience is designed to be relaxing and pampering, making it a popular choice for those seeking a luxurious skincare treatment.
Preparation and Aftercare
Preparation for dermaplaning is minimal but essential to achieve optimal results. Before the treatment, it’s recommended to cleanse the face thoroughly and avoid using exfoliants or retinoids, which can make the skin more sensitive. It’s also wise to inform your esthetician of recent skin treatments or conditions that might affect your skin’s sensitivity.
Following specific aftercare steps after the session is essential to preserve the results and safeguard the skin. Here are some indispensable aftercare tips:
- Avoid direct sunlight and apply broad-spectrum sunscreen to protect against UV damage.
- Refrain from harsh skincare products, such as exfoliants or retinoids, for a few days post-treatment.
- Remember to moisturize frequently to maintain the skin’s hydration and smoothness.
- Avoid hot showers, saunas, and strenuous exercise for at least 24 hours to prevent irritation.
Following these aftercare tips can prolong the benefits of dermaplaning and allow you to enjoy a radiant, refreshed complexion.
Suitable Skin Types
Dermaplaning is a flexible procedure that can be advantageous for various skin types, specifically for those aiming to attain a glowing complexion without relying on chemicals or harsh treatments. It benefits dry or uneven skin, as eliminating dead cells can boost moisture and silkiness.
However, those with active acne or susceptible skin should consult a dermatologist before treatment. While dermaplaning is generally safe, certain skin conditions may require alternative exfoliation methods to avoid irritation or adverse reactions. Speaking with a skincare specialist may be beneficial to assess if dermaplaning is appropriate for your skin requirements. Additionally, it is essential to highlight that dermaplaning is safe for pregnant or nursing women who may need to steer clear of chemical treatments. The gentle, physical exfoliation offered by derma-planing provides an effective, safe alternative for expectant mothers.
Dermaplaning vs. Other Exfoliation Methods
Various exfoliation techniques, such as chemical peels and microdermabrasion, are available. While each method has unique benefits, dermaplaning stands out due to its simplicity and immediate results. Due to its mechanical nature, dermaplaning is an excellent choice for those with sensitive skin. In contrast, acids are used in chemical peels to exfoliate the skin.
It also differs from microdermabrasion, which eliminates dead skin cells by using abrasive surfaces. Despite its potential effectiveness, microdermabrasion may not be appropriate for all skin types, especially for people with extremely sensitive or damaged skin. Dermaplaning is a more moderate option that nevertheless produces impressive results.
Understanding the differences between these exfoliation methods allows you to decide which treatment best aligns with your skincare goals and preferences. Remember, the best approach to exfoliation is one that considers your unique skin type and conditions, ensuring optimal results without compromising skin health.
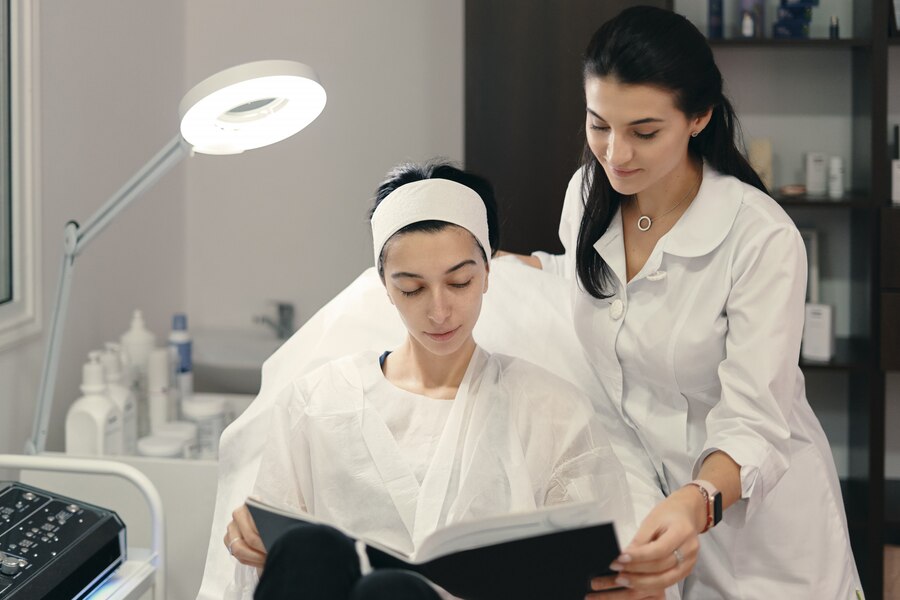
Finding a Qualified Professional
It’s imperative to seek out a certified and experienced practitioner for dermaplaning. A skilled professional will ensure the procedure is performed safely and effectively. Researching reviews, asking for recommendations, and verifying credentials are essential to finding the right provider.
Consider arranging a consultation to discuss your concerns and skincare objectives when choosing a professional. This first meeting might give you important information about the practitioner’s style and experience level, enabling you to make an informed decision.
Additionally, look for providers who stay updated with the latest skincare trends and techniques. Continuous education and training indicate that the practitioner is committed to offering the most effective and safe treatments.


