Connect with us

Food And Drinks

Prenatal Lab & Quiche Recipes: The Meals for Expecting Moms

Published

on

Prenatal Lab & Quiche Recipes

Introduction

Pregnancy is a time when nutrition matters more than ever. But between cravings, morning sickness, and fatigue, preparing healthy meals can feel overwhelming. What if you could whip up a delicious, nutrient-packed dish that supports your prenatal health—without spending hours in the kitchen? Enter: quiche!

This article explores how prenatal lab insights can guide your diet and shares easy, protein-rich quiche recipes perfect for expecting moms. Whether you’re battling nausea or just need quick, wholesome meals, these strategies and recipes will keep you and your baby nourished.

Why Prenatal Nutrition Matters

Before diving into recipes, let’s look at why prenatal nutrition is crucial.

Key Nutrients for Pregnancy

According to the American College of Obstetricians and Gynecologists (ACOG), pregnant women need:
✅ Folic Acid – Prevents neural tube defects.
✅ Iron – Supports increased blood volume.
✅ Calcium & Vitamin D – Strengthen bones.
✅ Protein – Essential for fetal growth.
✅ Omega-3s – Aid brain development.

prenatal lab test can identify deficiencies, helping tailor your diet. Now, how does quiche fit in?

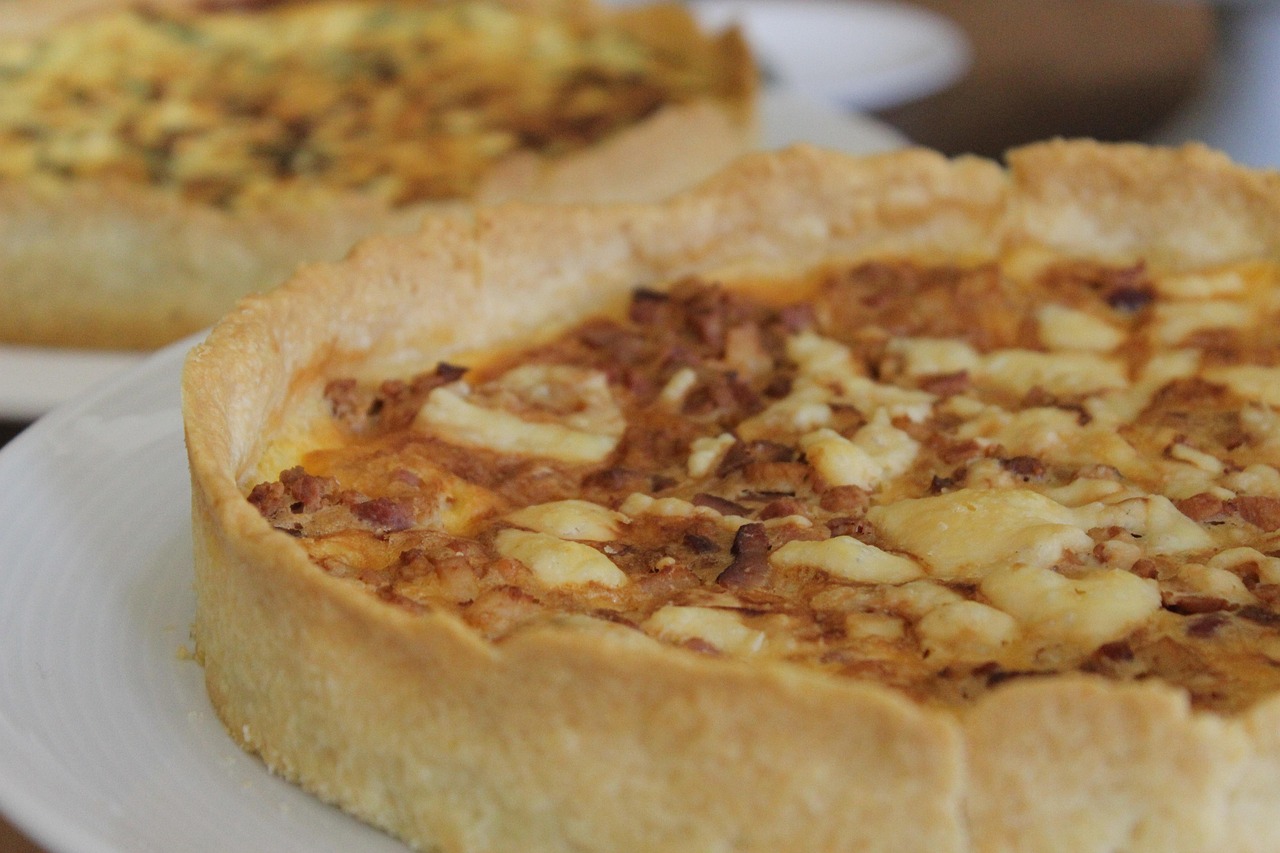
Quiche: The Perfect Prenatal Meal

Quiche is a protein-rich, veggie-loaded dish that’s easy to customize. Here’s why it’s great for pregnancy:
✔ High in protein (eggs + cheese = muscle and tissue support).
✔ Packed with veggies (fiber + vitamins).
✔ Easy to batch-cook (freeze slices for quick meals).
✔ Gentle on the stomach (soft texture helps with nausea).

3 Prenatal Lab-Approved Quiche Recipes

1. Spinach & Feta Quiche (Iron & Folate Boost)

Ingredients:

  • 1 pre-made pie crust (or gluten-free alternative)

  • 6 eggs

  • 1 cup fresh spinach (high in folate)

  • ½ cup feta cheese (calcium + protein)

  • ¼ cup milk (or almond milk)

  • 1 tsp olive oil

  • Salt & pepper to taste

Instructions:

  1. Preheat oven to 375°F (190°C).

  2. Sauté spinach in olive oil until wilted.

  3. Whisk eggs, milk, salt, and pepper.

  4. Layer spinach and feta in the crust, pour egg mixture over.

  5. Bake for 35-40 minutes until set.

Why It Works: Spinach provides iron and folate, while eggs offer choline, vital for brain development.

2. Broccoli & Cheddar Quiche (Calcium & Fiber)

Ingredients:

  • 1 pie crust

  • 6 eggs

  • 1 cup steamed broccoli (fiber + vitamin C)

  • ½ cup shredded cheddar (calcium)

  • ¼ cup Greek yogurt (extra protein)

  • ½ tsp garlic powder

Instructions:

  1. Preheat oven to 375°F.

  2. Whisk eggs, yogurt, and spices.

  3. Mix in broccoli and cheese, pour into crust.

  4. Bake for 35-40 minutes.

Prenatal Perk: Broccoli aids digestion, while Greek yogurt adds probiotics for gut health.

3. Salmon & Asparagus Quiche (Omega-3s + Vitamin D)

Ingredients:

  • 1 pie crust

  • 6 eggs

  • ½ cup cooked salmon (omega-3s)

  • ½ cup chopped asparagus (vitamin K)

  • ¼ cup cream cheese (healthy fats)

  • 1 tbsp fresh dill

Instructions:

  1. Preheat oven to 375°F.

  2. Flake salmon and mix with asparagus.

  3. Whisk eggs, cream cheese, and dill.

  4. Combine all ingredients, pour into crust.

  5. Bake for 35-40 minutes.

Lab-Backed Benefit: Salmon is rich in DHA, crucial for baby’s brain development.

Prenatal Meal Prep Tips

✔ Freeze individual slices for quick meals.
✔ Use whole-grain crusts for extra fiber.
✔ Add flaxseeds for an omega-3 boost.
✔ Pair with a side salad for added nutrients.

Conclusion: Nourish Yourself & Your Baby with Every Bite

Pregnancy nutrition doesn’t have to be complicated. By combining prenatal lab insights with easy, delicious quiche recipes, you can ensure you’re getting the right nutrients—even on busy days.

Which quiche will you try first? Share your favorites in the comments!

Continue Reading
Click to comment

Leave a Reply

Your email address will not be published. Required fields are marked *

Food And Drinks

Apple Peanut Butter Smoothie: Delicious & Nutritious Powerhouse

Published

on

Apple Peanut Butter Smoothie

Ever crave a creamy, satisfying smoothie that fuels your day without the sugar crash? Look no further than the apple peanut butter smoothie—a perfect blend of sweet, tangy, and nutty flavors packed with protein, fiber, and vitamins. Whether you need a quick breakfast, post-workout recovery, or a healthy snack, this smoothie delivers.

In this guide, we’ll break down:
✔ Why this smoothie is a nutritional winner
✔ Step-by-step recipes (with variations)
✔ Expert-backed health benefits
✔ Pro tips for the best texture & flavor

Let’s blend up something amazing!

Why the Apple Peanut Butter Smoothie Rocks

This smoothie isn’t just tasty—it’s a well-balanced meal in a glass. Here’s why nutritionists and fitness enthusiasts love it:

1. Nutrient-Packed Ingredients

  • Apples: Rich in fiber (for digestion) and antioxidants (for immunity).

  • Peanut Butter: Provides plant-based protein and healthy fats to keep you full.

  • Greek Yogurt/Milk: Adds creaminess + probiotics (gut health) or calcium.

  • Optional Boosters: Chia seeds (omega-3s), cinnamon (blood sugar control), or oats (sustained energy).

2. Quick & Customizable

Ready in 5 minutes, this smoothie works for:

  • Breakfast on-the-go

  • Post-workout recovery

  • Kid-friendly snacks (swap peanut butter for almond butter if needed)

3. Balanced Macros

A typical serving contains:

  • Calories: 300–400 (adjustable)

  • Protein: 10–15g

  • Fiber: 5–7g

Classic Apple Peanut Butter Smoothie Recipe

Ingredients (Serves 1)

  • 1 medium apple (cored, chopped; Honeycrisp or Fuji for sweetness)

  • 1 tbsp natural peanut butter (no added sugar)

  • ½ cup Greek yogurt (or dairy-free alternative)

  • ½ cup milk (dairy, almond, or oat)

  • ½ tsp cinnamon (optional)

  • 1 tsp honey or maple syrup (optional, if extra sweetness is needed)

  • ½ cup ice cubes (for thickness)

Instructions

  1. Blend the base: Add apple, peanut butter, yogurt, and milk.

  2. Season: Toss in cinnamon or sweetener if using.

  3. Adjust texture: Blend, then add ice until creamy.

  4. Serve immediately (best fresh!).

Pro Tip: Freeze apple chunks beforehand for a frostier texture!

5 Delicious Variations to Try

1. Protein-Packed Version

  • Add 1 scoop vanilla protein powder or 1 tbsp hemp seeds.

  • Great for post-gym recovery.

2. Green Power Smoothie

  • Toss in 1 cup spinach (you won’t taste it!).

  • Bonus: Extra iron & vitamins.

3. Oatmeal Cookie Twist

  • Add ¼ cup rolled oats + a dash of nutmeg.

  • Tastes like dessert but keeps you full for hours.

4. Vegan/Dairy-Free

  • Use almond milk + coconut yogurt.

  • Swap peanut butter for sunflower seed butter (nut-free).

5. Chocolate Lover’s Blend

  • Add 1 tbsp cocoa powder or dark chocolate chips.

  • Kid-approved and antioxidant-rich.

Expert-Backed Health Benefits

1. Supports Heart Health

  • Peanut butter’s monounsaturated fats help lower bad cholesterol (American Heart Association).

  • Apples contain quercetin, a flavonoid linked to reduced blood pressure.

2. Aids Digestion

  • Soluble fiber in apples promotes gut health.

  • Yogurt’s probiotics enhance microbiome balance.

3. Boosts Energy & Satiety

  • The protein-fat-fiber combo prevents mid-morning crashes (Harvard Health).

4. Great for Weight Management

  • Studies show nut butters curb overeating by stabilizing blood sugar (Journal of Nutrition).

Common Mistakes to Avoid

❌ Using sugary peanut butter → Opt for natural, unsweetened versions.
❌ Skipping protein → Without it, you’ll feel hungry sooner.
❌ Over-blending → Can make the smoothie watery.
❌ Not adjusting liquid → Too much milk = thin smoothie.

Final Thoughts: Blend, Sip, Enjoy!

The apple peanut butter smoothie is a versatile, nutrient-dense option that fits into any diet. Whether you need a quick breakfastpost-workout refuel, or healthy dessert alternative, this smoothie delivers flavor and function.

Try it today and taste the difference! Got a favorite twist? Share yours in the comments.

Continue Reading

Food And Drinks

Hot House Cucumbers: Growing Crisp, Flavorful Cucumbers

Published

on

Hot House Cucumbers

Have you ever bitten into a store-bought cucumber only to find it bland and watery? If so, you’re not alone. Many commercially grown cucumbers lack the crisp texture and fresh flavor of homegrown varieties. But what if you could grow juicy, sweet, and crunchy cucumbers all year—regardless of the weather outside?

Enter hot house cucumbers (also known as greenhouse cucumbers). These controlled-environment wonders allow gardeners to enjoy a steady supply of high-quality cucumbers, free from pests and unpredictable weather.

In this guide, you’ll discover:
✔ What makes hot house cucumbers different from traditional varieties
✔ Step-by-step growing techniques for maximum yield
✔ Common mistakes to avoid (and how to fix them)
✔ Expert-backed tips for pest control and disease prevention

What Are Hot House Cucumbers?

Hot house cucumbers are specifically bred for greenhouse or indoor growing. Unlike field cucumbers, which rely on pollinators, most greenhouse varieties are parthenocarpic—meaning they produce fruit without pollination. This makes them ideal for enclosed spaces.

Key Benefits of Growing Hot House Cucumbers

✅ Year-round production (no seasonal limitations)
✅ Higher yields in a smaller space
✅ Fewer pests and diseases (controlled environment)
✅ Consistent flavor and texture (no bitter or misshapen fruits)

Popular varieties include:

  • European cucumbers (long, seedless, thin skin)

  • Mini cucumbers (small, sweet, perfect for snacking)

  • Burpless varieties (easier to digest, less bitterness)

How to Grow Hot House Cucumbers: A Step-by-Step Guide

1. Choosing the Right Greenhouse Setup

Hot house cucumbers thrive in:

  • Temperature: 75–85°F (24–29°C) during the day, 60–70°F (16–21°C) at night

  • Humidity: 60–70% (use a hygrometer to monitor)

  • Light: 12–14 hours of bright light daily (supplement with LED grow lights if needed)

Pro Tip: Install trellises or vertical supports—cucumbers grow best when vines climb, saving space and improving air circulation.

2. Selecting the Best Soil and Containers

  • Soil: Use a well-draining, nutrient-rich mix (pH 6.0–6.5).

  • Containers: Opt for 5-gallon pots or grow bags with drainage holes.

Avoid garden soil—it can introduce pests and diseases.

3. Planting Seeds or Seedlings

  • Seeds: Sow ½ inch deep, 2–3 seeds per pot. Thin to the strongest seedling.

  • Transplants: If starting indoors, transplant after 3–4 weeks when true leaves appear.

Spacing: Allow 18–24 inches between plants for proper airflow.

4. Watering and Fertilizing for Optimal Growth

  • Watering: Keep soil consistently moist (not soggy). Drip irrigation works best.

  • Fertilizer: Use a balanced liquid fertilizer (10-10-10) every 2 weeks.

Warning: Overwatering leads to root rot, while underwatering causes bitter fruits.

5. Pollination (If Needed)

Most hot house cucumbers don’t require pollination, but if growing a non-parthenocarpic variety:

  • Hand-pollinate using a small brush.

  • Gently transfer pollen from male to female flowers.

6. Pruning and Training for Higher Yields

  • Remove lower leaves to improve airflow.

  • Pinch off side shoots (laterals) to focus energy on fruit production.

  • Train vines upward using soft ties.

Common Problems & Solutions

Issue Cause Fix
Yellow leaves Nutrient deficiency, overwatering Adjust fertilizer, check drainage
Bitter cucumbers Stress (heat, water fluctuations) Maintain consistent watering
Powdery mildew High humidity, poor airflow Apply neem oil, increase ventilation
Aphids/Whiteflies Pest infestation Introduce ladybugs or use insecticidal soap

Harvesting & Storing Hot House Cucumbers

  • When to Harvest: Pick when 6–8 inches long (or desired size) before they turn yellow.

  • How to Harvest: Use clean scissors to avoid damaging the vine.

  • Storage: Keep in the crisper drawer (up to 10 days). For longer storage, pickle or ferment.

Pro Tip: Harvest every 2–3 days to encourage more fruiting.

Final Thoughts: Why Hot House Cucumbers Are Worth the Effort

Growing cucumbers in a controlled environment eliminates many of the challenges of outdoor gardening. With the right setup, you can enjoy:
🌱 Fresher, tastier cucumbers than store-bought
🌱 A continuous harvest regardless of the season
🌱 Fewer pests and diseases compared to outdoor crops

Whether you’re a beginner gardener or a seasoned pro, hot house cucumbers offer a reliable, high-yield crop with minimal fuss.

Continue Reading

Food And Drinks

Mango con Chamoy: The Ultimate Sweet-Spicy Treat Guide

Published

on

Mango con Chamoy

Ever crave a snack that’s sweet, tangy, spicy, and refreshing all at once? If so, mango con chamoy might just be your new obsession. This beloved Mexican street food combines ripe mangoes with chamoy—a savory, spicy, and slightly sour sauce—for a flavor explosion that’s hard to resist.

In this guide, we’ll break down everything you need to know about mango con chamoy, from its origins to how you can make it at home. Plus, we’ll share expert tips, variations, and serving ideas to take your snacking game to the next level.

What Is Mango con Chamoy?

Mango con chamoy is a popular Mexican snack made with fresh mango slices or chunks drizzled (or dipped) in chamoy—a condiment made from pickled fruit, chili peppers, lime, and salt. It’s often served with extra chili powder, Tajín (a chili-lime seasoning), and sometimes even a splash of lime juice for extra zing.

Why People Love It

  • Perfect flavor balance – Sweet mango + spicy, salty chamoy = an addictive combo.

  • Refreshing & satisfying – Great for hot days or when you want a healthy-ish snack.

  • Customizable heat level – Adjust the spice to your liking.

The Origins of Chamoy & Its Role in Mexican Cuisine

Chamoy traces its roots to Asian umeboshi (pickled plum) sauce, which was adapted in Mexico using local ingredients like apricots, mangos, or plums. Over time, it evolved into the tangy, spicy sauce we know today.

How It’s Used in Mexican Food:

  • Fruit snacks (mango, watermelon, pineapple)

  • Rim for drinks (Micheladas, mangonadas)

  • Candy coating (gummies, lollipops)

  • Dipping sauce for chips or veggies

How to Make Mango con Chamoy at Home

Ingredients You’ll Need

  • 1 ripe mango (Ataulfo or Kent varieties work best)

  • 2–3 tbsp chamoy sauce (store-bought or homemade)

  • 1 tsp Tajín or chili powder

  • Fresh lime juice (optional)

  • Optional toppings:

    • Chopped cucumber

    • Jicama sticks

    • Tamarind candy

Step-by-Step Instructions

  1. Prep the Mango

    • Peel and slice the mango into cubes, sticks, or wedges.

    • Pro tip: Keep the seed to nibble on—it’s extra juicy!

  2. Drizzle with Chamoy

    • Lightly coat the mango with chamoy (don’t drown it).

  3. Add Tajín & Lime

    • Sprinkle Tajín or chili powder for extra kick.

    • Squeeze fresh lime juice if you love tanginess.

  4. Serve & Enjoy!

    • Eat immediately for the best texture.

5 Creative Ways to Enjoy Mango con Chamoy

  1. Mangonada (Mango Chamoy Smoothie)

    • Blend mango, chamoy, lime, and ice for a slushie-style drink.

  2. Chamoy Mango Popsicles

    • Freeze mango puree with chamoy swirls for a spicy-sweet treat.

  3. Chamoy Mango Salsa

    • Mix diced mango, chamoy, red onion, and cilantro for a killer dip.

  4. Chamoy Mango Margarita

    • Rim your glass with Tajín and add chamoy to your mango marg mix.

  5. Chamoy Mango Salad

    • Toss mango, cucumber, jicama, and chamoy for a refreshing side.

Where to Buy the Best Chamoy

If you’re not making chamoy from scratch, here are some top-rated store-bought options:

  • Lucas Chamoy (Classic Mexican brand)

  • Tajín Chamoy Sauce (Smooth and balanced)

  • Dulmex Chamoy (Great for dipping)

Pro Tip: Check Mexican grocery stores or the international aisle at supermarkets.

Expert Tips for the Perfect Mango con Chamoy

✅ Pick the right mango – Ataulfo (Honey mango) is sweeter, while Kent is firmer.
✅ Adjust spice levels – Start with less chamoy and add more as needed.
✅ Keep it cold – Serve chilled for maximum refreshment.
✅ Experiment with textures – Try frozen mango for a sorbet-like treat.

Why Mango con Chamoy Is More Than Just a Snack

This dish isn’t just tasty—it’s a cultural experience. From street vendors in Mexico to trendy food trucks in the U.S., mango con chamoy has become a global sensation. It’s also:

  • A great source of vitamins (Mango = vitamin C & fiber)

  • Low-calorie compared to processed snacks

  • A fun way to introduce new flavors to kids (mild versions work too!)

Final Thoughts: Should You Try Mango con Chamoy?

Absolutely! Whether you’re a spice lover or just looking for a unique snack, mango con chamoy delivers bold flavors in every bite. Plus, it’s easy to make at home and endlessly customizable.

Ready to give it a try? Grab a mango, some chamoy, and get ready for your new favorite treat!

Continue Reading

Trending