Technology
Plumb Bob: Your Ultimate Guide to Precision and Alignment

The plumb bob, a simple yet ingenious tool, has been a cornerstone of construction, carpentry, and surveying for centuries. Its ability to provide a true vertical reference makes it indispensable for ensuring precision and accuracy in various projects. Whether you’re a DIY enthusiast or a seasoned professional, mastering the plumb bob can elevate your work to new heights. In this comprehensive guide, we’ll explore the history, uses, and techniques of the plumb bob, along with practical tips and modern applications.
What is a Plumb Bob?
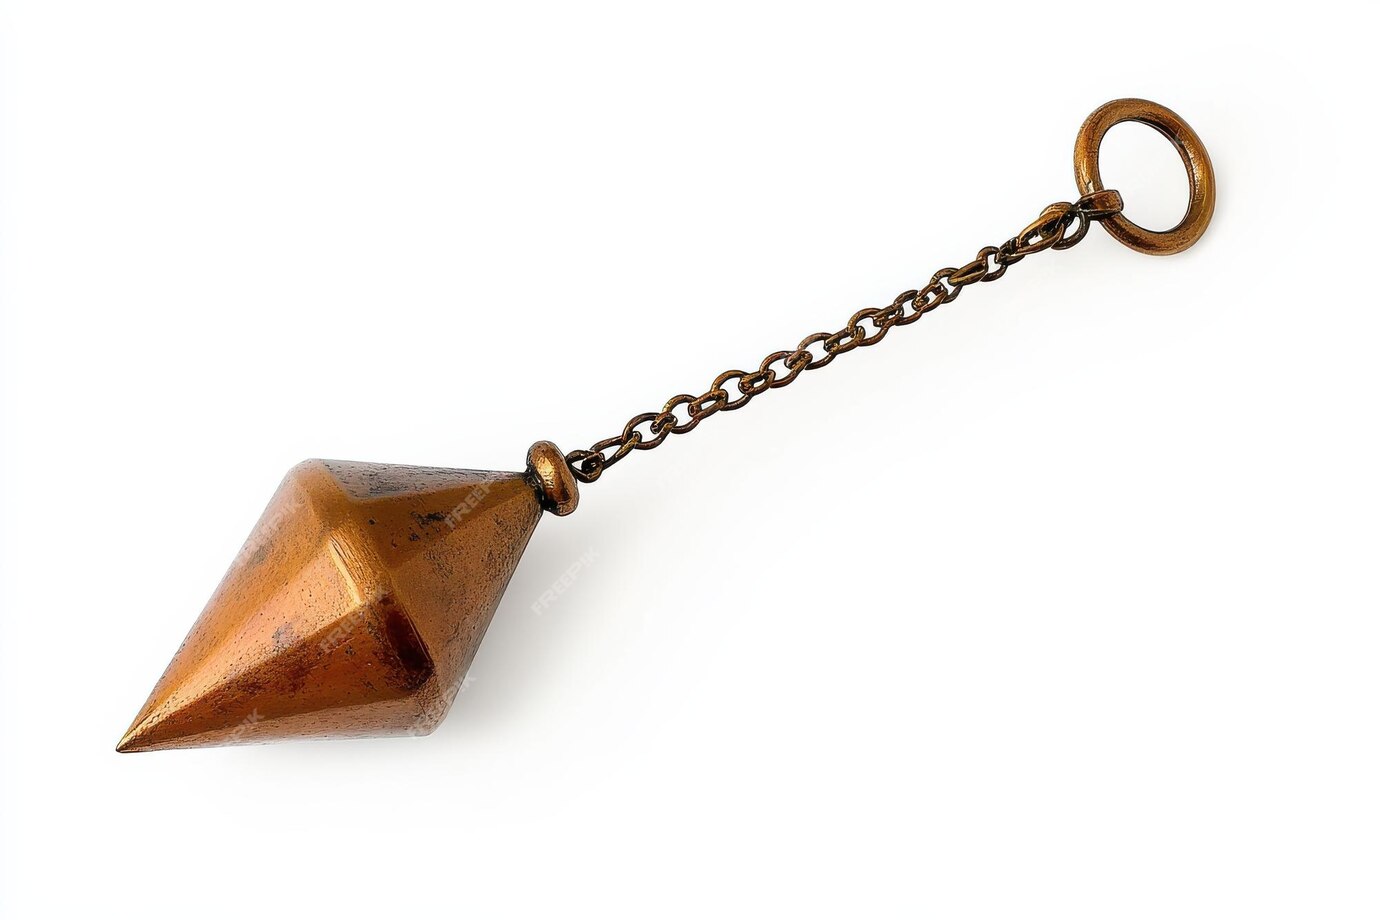
A plumb bob is a weighted object, typically made of metal, that is suspended from a string or line. When allowed to hang freely, it points directly towards the Earth’s center of gravity, providing a precise vertical reference known as a plumb line. This simple yet effective tool has been used since ancient times to ensure structures are perfectly aligned and level.
The History of the Plumb Bob
The plumb bob’s origins can be traced back to ancient Egypt, where it was used in the construction of the pyramids. The Egyptians recognized the importance of vertical alignment in creating stable and enduring structures. Over time, the plumb bob spread to other civilizations, including the Greeks and Romans, who used it in their architectural endeavors.
In the Middle Ages, the plumbbob became an essential tool for masons and builders, who relied on it to construct cathedrals and castles with remarkable precision. Today, the plumbbob remains a vital tool in construction, carpentry, and surveying, proving that sometimes the simplest tools are the most effective.
How Does a Plumb Bob Work?
The plumbbob operates on the principle of gravity. When suspended from a fixed point, the weight of the plumbbob causes the string to align itself with the Earth’s gravitational pull, creating a perfectly vertical line. This vertical reference can then be used to ensure that walls, posts, and other structures are aligned correctly.
Components of a Plumb Bob
- Weight: The weighted end of the plumbbob, usually made of brass or steel, ensures that the tool hangs straight and true.
- String or Line: The string, often made of nylon or cotton, connects the weight to the fixed point and allows the plumbbob to hang freely.
- Point or Tip: The pointed end of the plumbbob helps to mark the exact vertical reference point on the surface below.
Practical Uses of a Plumb Bob
The plumb bob’s versatility makes it a valuable tool in various fields. Here are some of its most common applications:
1. Construction and Carpentry
In construction, the plumbbob is used to ensure that walls, door frames, and other structural elements are perfectly vertical. Carpenters use it to align studs, posts, and beams, ensuring that the structure is stable and level.
2. Surveying and Land Measurement
Surveyors use the plumbbob to establish vertical reference points when mapping land and setting boundaries. It helps in creating accurate topographical maps and ensuring that property lines are correctly marked.
3. Masonry and Stonework
Masons rely on the plumbbob to align bricks, stones, and blocks when building walls, chimneys, and other structures. It ensures that the masonry work is straight and true, preventing issues such as leaning or bulging walls.
4. DIY Projects and Home Improvement
For DIY enthusiasts, the plumbbob is a handy tool for tasks such as hanging pictures, installing shelves, and aligning tiles. It provides a quick and accurate way to ensure that everything is perfectly vertical.
How to Use a Plumb Bob: Step-by-Step Guide
Using a plumbbob is straightforward, but it requires attention to detail to achieve accurate results. Follow these steps to use a plumbbob effectively:
Step 1: Choose the Right Plumb Bob
Select a plumbbob that is appropriate for your project. Consider the weight and length of the string, as well as the material of the plumbbob. For most tasks, a brass or steel plumbbob with a nylon string is ideal.
Step 2: Secure the Plumb Bob
Attach the plumbbob to a fixed point, such as a nail or hook, ensuring that it can hang freely without any obstructions. The string should be long enough to reach the surface you’re working on.
Step 3: Allow the Plumb Bob to Stabilize
Let the plumbbob hang freely until it comes to a complete stop. Avoid any drafts or movements that could cause the plumbbob to sway.
Step 4: Mark the Vertical Reference
Once the plumbbob has stabilized, use a pencil or marker to mark the point directly below the tip of the plumbbob. This mark represents the true vertical reference.
Step 5: Align Your Work
Use the marked reference point to align your work, whether it’s a wall, post, or shelf. Ensure that your structure is perfectly vertical by comparing it to the plumb line.
Tips for Using a Plumb Bob Effectively
- Check for Obstructions: Ensure that there are no obstacles or drafts that could affect the plumb bob’s alignment.
- Use a Stable Surface: Work on a stable and level surface to prevent any inaccuracies.
- Double-Check Your Work: Always verify your alignment by checking multiple points along the plumb line.
- Maintain Your Plumb Bob: Keep your plumbbob clean and free from damage to ensure accurate results.
Modern Applications of the Plumb Bob
While the plumbbob is a traditional tool, it continues to find relevance in modern applications. Here are some ways it is used today:
1. Laser Plumb Bobs
Modern technology has given rise to laser plumbbobs, which use laser beams to project a vertical line. These tools offer greater precision and are easier to use in tight spaces or over long distances.
2. Digital Levels and Apps
Digital levels and smartphone apps have incorporated the principles of the plumbbob, providing users with accurate vertical references without the need for a physical tool. These digital solutions are convenient and versatile, making them popular among DIY enthusiasts and professionals alike.
3. Architectural Design
Architects and designers use the plumbbob to ensure that their designs are perfectly aligned and balanced. It helps in creating aesthetically pleasing and structurally sound buildings.
Plumb Bob vs. Spirit Level: A Comparison
While both the plumbbob and spirit level are used to ensure vertical and horizontal alignment, they serve different purposes. Here’s a comparison of the two tools:
Feature | Plumb Bob | Spirit Level |
---|---|---|
Purpose | Provides a true vertical reference | Measures both vertical and horizontal alignment |
Ease of Use | Requires careful handling | Easy to use and read |
Portability | Compact and lightweight | Bulkier and less portable |
Accuracy | Highly accurate for vertical lines | Accurate for both vertical and horizontal lines |
Applications | Construction, surveying, masonry | General construction, DIY projects |
Conclusion: Mastering the Plumb Bob for Precision and Accuracy
The plumb bob is a timeless tool that continues to play a crucial role in ensuring precision and accuracy in various fields. Its simplicity and effectiveness make it a valuable asset for both professionals and DIY enthusiasts. By understanding its history, uses, and techniques, you can master the plumbbob and elevate your projects to new levels of excellence.
Whether you’re building a wall, aligning a shelf, or mapping land, the plumbbob provides a reliable and accurate vertical reference. Embrace this ancient tool and discover the satisfaction of achieving perfect alignment in your work.
Technology
Photeeq Photo Ideas: Creative Strategies for Stunning Shots

Ever struggled to come up with fresh, eye-catching photo ideas? Whether you’re a budding photographer, a social media enthusiast, or just someone who loves capturing moments, finding unique photo concepts can be challenging. That’s where Photeeq photo ideas come in—helping you unlock creativity and take your photography to the next level.
In this guide, we’ll explore practical, expert-backed strategies to inspire your next photoshoot. From composition tricks to trending themes, you’ll discover actionable tips to make your images stand out.
Why Unique Photo Ideas Matter
In today’s visually driven world, standing out is key. Whether for Instagram, a portfolio, or personal memories, compelling photos:
-
Grab attention instantly
-
Tell a story more effectively
-
Boost engagement on social media
-
Enhance professional credibility
Let’s dive into proven Photeeq-inspired ideas to elevate your shots.
1. Play with Perspectives
Shooting from unusual angles can transform an ordinary scene into something extraordinary. Try these:
-
Bird’s-eye view: Capture flat lays (food, books, accessories) from directly above.
-
Worm’s-eye view: Shoot upwards for dramatic landscapes or towering architecture.
-
Dutch tilt: Tilt your camera slightly for a dynamic, edgy effect.
Example: A simple coffee cup becomes artsy when shot from above with steam rising and a notebook beside it.
2. Experiment with Lighting
Lighting can make or break a photo. Here’s how to use it creatively:
-
Golden hour magic: Shoot during sunrise/sunset for warm, soft glows.
-
Silhouettes: Position your subject against a bright background for striking outlines.
-
Artificial light play: Use fairy lights, neon signs, or candles for moody effects.
Pro tip: Diffused light (through curtains or softboxes) reduces harsh shadows for flattering portraits.
3. Incorporate Motion Blur
Adding movement creates energy and depth:
-
Panning shots: Follow a moving subject (cyclist, car) with a slower shutter speed.
-
Light trails: Capture car headlights at night with long exposure.
-
Water motion: Use a tripod to blur flowing rivers or waterfalls.
Example: A dancer mid-twirl with slight motion blur conveys elegance and motion.
4. Use Reflections Creatively
Reflections add symmetry and intrigue:
-
Puddles: After rain, shoot upside-down cityscapes in water droplets.
-
Mirrors: Frame a subject within a mirror for a surreal effect.
-
Sunglasses: Capture reflections in lenses for a cool, unexpected twist.
5. Focus on Textures & Patterns
Close-ups of textures make visually captivating shots:
-
Nature: Bark, leaves, sand dunes.
-
Urban: Brick walls, rusted metal, cobblestones.
-
Everyday objects: Fabric weaves, food textures (melting chocolate, frothy coffee).
Pro tip: Black-and-white editing enhances texture contrast.
6. Try Themed Photoshoots
A cohesive theme makes your photos more memorable:
-
Color-themed: All-blue or monochrome compositions.
-
Seasonal: Autumn leaves, snowy landscapes, spring blossoms.
-
Conceptual: “Floating objects” (using hidden supports) or “miniature worlds.”
Example: A “vintage bookshelf” theme with old books, a cup of tea, and warm lighting.
7. Candid & Emotional Shots
Authentic moments often outshine posed ones:
-
Laughter: Capture genuine smiles during conversations.
-
Street photography: Document raw, unfiltered urban life.
-
Pet antics: Animals in action make heartwarming shots.
8. Minimalist Photography
“Less is more” works wonders:
-
Negative space: Isolate a single subject against a clean background.
-
Single-color dominance: A red apple on a white table.
-
Simple silhouettes: A lone tree against a sunset.
9. Creative Editing Techniques
Post-processing can elevate your photos:
-
Selective color: Keep one color vibrant while desaturating the rest.
-
Double exposure: Blend portraits with landscapes for an artistic effect.
-
Vintage filters: Add grain and faded tones for nostalgia.
Tool suggestion: Lightroom presets or Snapseed for mobile edits.
10. Interactive & Fun Concepts
Engage your audience with participatory ideas:
-
“Follow the arrow”: Use props to lead the viewer’s eye.
-
“Holding the sun”: Play with perspective to “hold” the sun or moon.
-
Shadow play: Use shadows to create interesting shapes.
Final Thoughts: Keep Experimenting!
The best Photeeq photo ideas come from curiosity and experimentation. Don’t be afraid to:
✔ Break composition rules occasionally
✔ Test new gear (lens filters, tripods)
✔ Revisit old shots with fresh editing styles
Technology
Understanding the c0765 0x4750 and c0750 0x4765 Code

Introduction
Have you ever encountered the enigmatic c0765 0x4750 and c0750 0x4765 codes while working on a project? These cryptic combinations of numbers and letters can seem like a puzzling riddle at first glance. But fear not, as we are here to unravel the mystery behind these codes in this comprehensive guide. Get ready to dive into the world of error code deciphering and gain a deeper understanding of what lies beneath these perplexing symbols. Let’s embark on this journey together to demystify the secrets of the c0765 0x4750 and c0750 0x4765 code!
Understanding the Structure
When it comes to decoding error codes like c0765 0x4750 and c0750 0x4765, understanding the structure is key. These alphanumeric combinations may seem perplexing at first glance, but they follow a specific format that holds valuable information.
The structure of these codes typically consists of a prefix (such as ‘c’ or ‘0x’), followed by a series of numbers and letters. Each component plays a crucial role in identifying the nature of the error and its location within the system.
By dissecting the code piece by piece, developers can unravel its meaning and gain insights into what went wrong. This process requires attention to detail and an analytical mindset to connect the dots effectively.
In essence, comprehending the structure of error codes is akin to deciphering a cryptic message – it takes patience, logic, and persistence. With practice and experience, unraveling these intricate patterns becomes second nature for seasoned professionals in the field.
Possible Interpretations
When faced with the mysterious c0765 0x4750 and c0750 0x4765 codes, it’s natural to wonder about their possible interpretations. Could they signify a specific error in the system, or perhaps a communication breakdown between components? These codes might hold the key to unlocking hidden issues within the codebase.
One interpretation could point towards a voltage irregularity, prompting further investigation into electrical connections or sensor malfunctions. Another angle to consider is a software glitch impacting critical functions of the vehicle. Perhaps these codes are indicating an impending failure that needs prompt attention.
Delving deeper into their meanings requires dissecting each digit and character meticulously for clues. Each combination could reveal insights into complex systems at play within modern vehicles. As we unravel these enigmatic messages, new possibilities and solutions may emerge to address underlying issues effectively.
Deciphering the Context
Deciphering the context behind error codes like c0765 0x4750 and c0750 0x4765 code requires a keen eye for detail and a knack for problem-solving. It’s like unraveling a complex puzzle where each piece of information holds significance. Understanding the specific circumstances that led to these codes being triggered is crucial in finding the root cause of the issue.
Context can vary greatly depending on the system in which these error codes appear. It could be related to hardware malfunctions, software glitches, or even environmental factors affecting the device. By delving deeper into the context surrounding these codes, programmers can gain valuable insights that pave the way for effective troubleshooting strategies.
Decoding the context is akin to following breadcrumbs – each clue leading closer to a solution. It often involves examining logs, analyzing data flow, and considering recent changes made to the system. The ability to contextualize error codes not only facilitates quicker problem resolution but also enhances overall code management practices.
In essence, deciphering context is an art form that demands patience, precision, and ingenuity from developers seeking to crack the code mystery once and for all.
Troubleshooting and Solutions
When encountering the c0765 0x4750 and c0750 0x4765 code, troubleshooting can be a daunting task. One common solution is to check for any recent updates or changes in the code that might have triggered the error. It’s essential to review the entire code carefully to identify any syntax errors or missing elements.
Another approach is to debug the code step by step using tools like breakpoints or console logs to pinpoint where the issue arises. Additionally, testing different scenarios can help uncover specific conditions that trigger the error.
Collaborating with colleagues or seeking advice from online forums can provide fresh perspectives and potential solutions you might not have considered. Remember, persistence and patience are key when troubleshooting complex error codes – don’t be afraid to experiment with various approaches until you find a resolution.
Best Practices in Code Management
When it comes to managing code effectively, there are some best practices that can make a significant difference in the development process.
Maintaining clear and organized documentation is key. This includes detailed comments within the code itself as well as external documents outlining the purpose and functionality of each component.
Version control is another crucial aspect of code management. By using tools like Git, developers can track changes, collaborate seamlessly with team members, and revert back to previous versions if needed.
Regular code reviews are essential for ensuring quality and consistency across projects. Peer feedback not only helps catch errors but also promotes knowledge sharing and improvement.
Additionally, following coding standards and conventions contributes to readability and maintainability. Consistent formatting makes it easier for multiple developers to work on the same codebase without confusion or errors.
Automated testing should be integrated into the development workflow to identify bugs early on and ensure that new code doesn’t break existing functionalities.
Real-World Applications
Have you ever wondered how the cryptic c0765 0x4750 and c0750 0x4765 code play out in real-life scenarios? Well, let’s dive into some practical applications where these error codes could surface. Imagine you’re working on a cutting-edge autonomous vehicle project, and suddenly, one of the sensors triggers a c0765 0x4750 code – this could indicate an issue with the steering control system.
In another context, picture yourself managing a network infrastructure for a large corporation when a server starts throwing the c0750 0x4765 error – signaling potential connectivity problems that need immediate attention. These examples highlight how understanding and addressing these codes promptly can make or break critical systems in various industries.
From automotive engineering to IT support, being well-versed in decoding these error messages is essential for ensuring smooth operations across different fields.
The Evolution of Error Codes
Error codes have come a long way since the early days of computing. Initially, they were cryptic messages that left users scratching their heads in confusion. As technology advanced, error codes evolved to become more descriptive and user-friendly.
In the past, deciphering an error code was like cracking a secret code. But today, with advancements in programming languages and diagnostic tools, understanding error codes has become much more accessible. Developers now have access to detailed documentation that provides insights into what each code means and how to troubleshoot it effectively.
The evolution of error codes reflects the continuous improvement in software development practices. By learning from past mistakes and refining error messaging systems, developers can create more robust and user-friendly applications that minimize downtime and enhance user experience.
Conclusion
As technology continues to advance, error codes like c0765 0x4750 and c0750 0x4765 Code play a crucial role in the world of programming. Understanding these codes not only helps developers troubleshoot issues efficiently but also enhances overall code management practices.
By deciphering the structure, context, and possible interpretations of these error codes, programmers can navigate through challenges more effectively. Through troubleshooting techniques and best practices in code management, developers can streamline their processes and improve software quality.
Real-world applications demonstrate how these error codes impact various industries and highlight the importance of staying updated with evolving technologies. As we witness the evolution of error code systems, it becomes evident that continuous learning is key to mastering coding languages and ensuring optimal performance.
Embracing the complexity of error codes such as c0765 0x4750 and c0750 0x4765 opens up a realm of possibilities for innovation and problem-solving in the digital age. By delving deeper into these mysteries, developers pave the way for smoother operations and innovative solutions in an ever-changing technological landscape.
Technology
Kurt Vise Adapter Plate: Easy Steps to Install and Use

When working with CNC machines, being precise and flexible is key. That’s where the Kurt Vise Adapter Plate comes into play. This important accessory makes sure your CNC machine can handle many different tasks easily and accurately. Have you ever had trouble with mounting issues or found that your machine vise doesn’t fit? If so then the Kurt Vise Adapter Plate might be just what you need. In this post we’ll look at how installing a Kurt Vise Adapter Plate can make your CNC operations better and more flexible.
Kurt Vise Adapter Plates: What Are They?
Kurt Vise Adapter Plates are made to connect your CNC machine to the vise you need to use. These plates help create a perfect fit allowing different vises to be mounted on machines that might not have matched up before. The Kurt Vise comes in various sizes and styles ensuring there’s a perfect match for any machine and vise combination.
Step-by-Step Installation of Your Kurt Vise Adapter Plate
Installing a Kurt Vise Adapter Plate is simple. Here’s how you can do it:
Step 1: Choose the Right Adapter Plate
Start by choosing the adapter plate that fits your CNC machine and your vise model. Getting this right is key to a smooth installation and operation.
Step 2: Gather Needed Tools
You will need basic tools like wrenches and screws. You might also need a torque wrench depending on what your CNC machine manufacturer suggests.
Step 3: Line Up the Adapter Plate
Place the adapter plate on the CNC machine table and line it up with the mounting holes. This step is important for the stability of your vise during use.
Step 4: Attach the Plate
Use the screws that came with your adapter plate to attach the plate to the CNC machine. Make sure each screw is tightened to the setting the manufacturer recommends. This helps prevent any movement during use.
Step 5: Put On the Vise
Once the adapter plate is secure, put your Kurt Vise onto the adapter plate. Check all connections for any looseness.
Step 6: Calibrate
After mounting the vise you should calibrate your setup. This makes sure your machine works accurately and your pieces are made precisely.
Benefits of Upgrading to a Kurt Vise Setup
With your Kurt Vise and adapter plate in place you’ll see several benefits right away:
- More Compatibility: You can now use a wider range of vises which lets you work on more types of projects.
- Better Precision: The firm mounting reduces shaking and movement leading to cleaner cuts.
- Faster Work: You spend less time making adjustments which means more time for actual machining.
Real-Life Applications: How a Kurt Vise Adapter Plate Can Help
Imagine you need to make many small parts with high accuracy. With the Kurt Vise Adapter Plate you can quickly switch between different vises suited for each part. This cuts down setup time and boosts your output. Choose Pin Vise Machinable Jaws by 5th Axis to improve the efficiency of your CNC machine’s operations.
Streamline Your Workflow
With a Kurt Vise Adapter Plate setting up for a new project becomes much quicker and simpler. You no longer have to wrestle with mismatched components or spend hours troubleshooting fit issues. This ease of configuration means you can move from one job to another with minimal downtime. It’s all about making your workflow as smooth and uninterrupted as possible which in turn can lead to higher productivity and reduced stress in the workshop.
Enhance Safety and Stability
Another significant advantage of integrating a Kurt Vise Adapter Plate into your setup is the added safety and stability it provides. By ensuring a secure and proper fit between your CNC machine and the vise the adapter plate minimizes the risk of accidents caused by loose or shifting components. This means you can operate your machine with confidence knowing that everything is securely locked in place. Safety is paramount in any machining environment and the adapter plate helps reinforce this.
Cost-Effective Upgrade
Investing in a Kurt Vise Adapter Plate is a cost-effective way to enhance your CNC machinery without the need for expensive upgrades or new machines. By adapting your existing equipment to work more efficiently and handle a wider range of tasks you save money in the long run. Instead of purchasing new machines for different jobs you can utilize the flexibility that the adapter plate offers making your current setup more versatile and capable of meeting diverse machining needs.
By adopting the Kurt Vise Adapter Plate you not only optimize your machining operations but also gain the ability to adapt quickly to new challenges and opportunities in the manufacturing field. It’s a smart move for any machinist looking to stay competitive and efficient in today’s fast-paced market. So why wait? Elevate your CNC machining game with the Kurt Vise Adapter Plate today and experience a smoother, safer and more cost-effective manufacturing process.
Final Thoughts: Upgrade Today!
Installing a Kurt Vise Adapter Plate is about more than just making your CNC machine better; it’s about improving your whole machining process. Why settle for less when you can make your operations better and take on more types of work? If you want more precision and efficiency the Kurt Vise Adapter Plate is a great choice.
-
Articles2 months ago
How Many Times Can You Regrow Green Onions
-
News9 months ago
Understanding HotLeaks: What You Need to Know
-
Fashion7 months ago
Opals in the USA: A Gemstone Transforming the Crystal Healing Market
-
Technology1 year ago
The Wonders of Oh Em Gee Blog
-
Entertainment6 months ago
How to Use Snaptik: A Complete Guide to Download TikTok Videos
-
Entertainment1 year ago
Bare it All: Unforgettable Skinny Dipping Stories Shared
-
Health1 year ago
Can You Smoke Shrooms? Exploring the Myths and Realities
-
Articles4 months ago
WHAT IS THE DIFFERENCE BETWEEN SEED GARLIC AND FOOD GARLIC?