Technology
MacBook 12in M7: A Comprehensive Guide to Apple’s Compact Powerhouse

The MacBook 12in M7 is a prime example of Apple’s dedication to innovation, combining portability with remarkable performance in a slim and elegant design. Even though Apple discontinued this model, it remains popular among those who value lightweight devices without compromising on capability. In this detailed guide, we will explore the features, performance, and user experience that make the MacBook 12in M7 a standout device for its size. Whether you’re a student, professional, or someone who simply appreciates an efficient laptop for everyday tasks, this compact yet powerful device offers a lot to admire.
Design and Build Quality
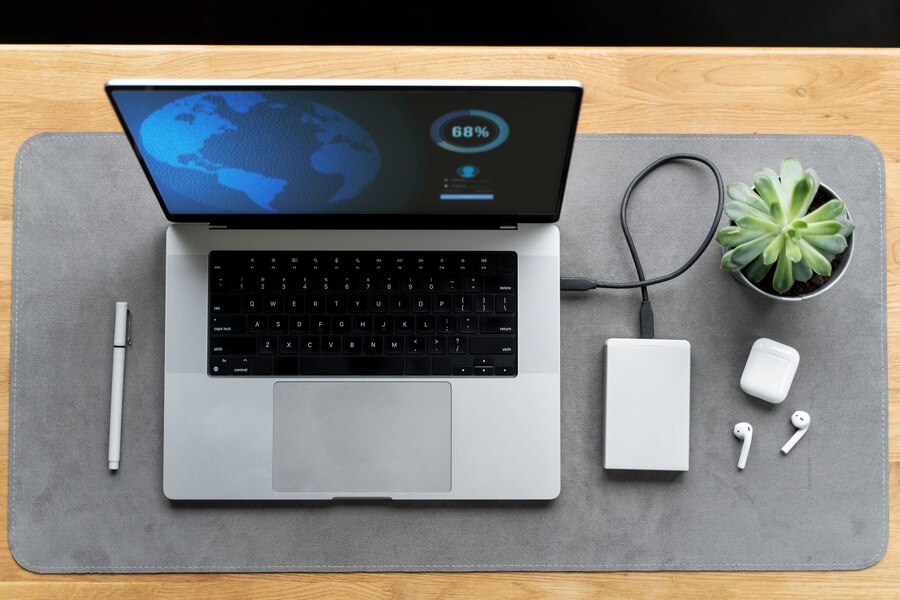
The MacBook 12in M7 is a beautifully crafted machine, showcasing Apple’s signature minimalist design. At just 2 pounds (0.92 kg) and 13.1 mm thin, it is one of the lightest and slimmest laptops ever created by Apple. Its portability makes it ideal for users who are always on the go, whether you’re commuting, traveling for business, or simply moving between rooms in your home or office.
Constructed from a single block of aluminum, the MacBook 12in M7 feels premium and sturdy despite its small size. Available in four distinct colors—Silver, Space Gray, Gold, and Rose Gold—this MacBook allows users to add a personal touch to their device. The MacBook 12in M7 also features a fanless design, which makes it silent during operation, further enhancing the user experience.
Retina Display
One of the standout features of the MacBook 12in M7 is its 12-inch Retina display. With a resolution of 2304 x 1440 pixels, the display offers stunning clarity, making it perfect for tasks that demand attention to detail, such as photo editing, video watching, or web design. Apple’s Retina technology delivers crisp images and text, while the color accuracy and brightness are among the best in its class.
The thin bezels surrounding the display contribute to a more immersive viewing experience, making the MacBook 12in M7 appear even sleeker. The display’s P3 wide color gamut ensures that colors appear vibrant and lifelike, which is particularly useful for professionals in creative fields. Whether you’re watching a movie, editing photos, or simply browsing the web, the display on the MacBook 12in M7 delivers an exceptional visual experience.
Performance: Powered by the Intel Core m7 Processor
At the heart of the MacBook 12in M7 lies the Intel Core m7 processor, which is the most powerful configuration available for this model. The m7 is a dual-core processor that offers a clock speed of 1.3 GHz, with Turbo Boost up to 3.1 GHz, ensuring that this compact machine can handle a wide range of tasks efficiently.
The Intel Core m7 processor provides sufficient power for daily activities such as web browsing, document creation, streaming videos, and light photo editing. It can even handle more demanding tasks like coding, video editing, or multitasking with multiple applications open at once, although it’s not designed for heavy gaming or 3D rendering. Paired with 8GB of RAM, the MacBook 12in M7 provides a smooth and responsive user experience, even when handling several tasks simultaneously.
While the fanless design of the MacBook 12in M7 contributes to its silent operation, it also limits its ability to handle sustained, high-performance tasks without generating some heat. This makes it ideal for everyday use but less suited for power users who require constant heavy lifting in terms of performance.
Storage and Memory
The MacBook 12in M7 comes equipped with 8GB of LPDDR3 RAM, which is more than adequate for a laptop of this size and intended usage. This memory setup allows for efficient multitasking and smooth transitions between applications, ensuring that the laptop remains responsive even when several programs are running simultaneously.
In terms of storage, the MacBook 12in M7 offers a 512GB SSD, which provides both ample space for files, applications, and media, as well as rapid read and write speeds. The SSD storage significantly improves the overall speed of the laptop, making boot times quick and ensuring that applications load without delay. While some users may find 512GB limiting, especially for those with large media libraries or extensive project files, external storage options can easily be paired with the MacBook via its USB-C port.
Keyboard and Trackpad Experience
Apple has been known for setting standards when it comes to laptop keyboards and trackpads, and the MacBook 12in M7 is no exception. It features Apple’s second-generation butterfly mechanism keyboard, which was designed to offer a responsive typing experience while keeping the laptop’s profile slim. Although the butterfly keyboard design has received mixed feedback, many users appreciate its shallower key travel and responsive feel.
The Force Touch trackpad is another highlight of the MacBook 12in M7. This trackpad doesn’t physically click; instead, it uses haptic feedback to simulate the sensation of a click, providing users with an accurate and consistent feel no matter where they press on the trackpad. This feature is particularly useful for gestures and multi-touch input, allowing for a seamless and intuitive experience when navigating the macOS interface.
Battery Life
One of the main advantages of the MacBook 12in M7 is its impressive battery life. Apple claims that the MacBook 12in M7 can deliver up to 10 hours of web browsing or 11 hours of iTunes movie playback on a single charge. In real-world usage, the battery life holds up well, making this MacBook a reliable companion for a full day of work or travel without needing to constantly search for a charger.
The energy efficiency of the Intel Core m7 processor, combined with macOS’s power management features, ensures that the MacBook 12in M7 remains efficient in its power consumption, extending battery life even when multiple applications are running.
Connectivity and Ports
The MacBook 12in M7 features a minimalistic approach to ports, with just one USB-C port and a 3.5mm headphone jack. While the inclusion of only a single USB-C port has been a point of contention for some users, it reinforces the MacBook’s sleek and minimalist design. The USB-C port supports charging, data transfer, and video output, making it versatile, though users may need adapters to connect multiple peripherals.
For those who require multiple connections, a USB-C hub or adapter is a must-have accessory. While the single-port design might not be ideal for everyone, it reflects Apple’s vision of moving towards a wireless, clutter-free future, relying more on cloud storage, wireless headphones, and wireless peripherals.
macOS and Software Experience
The MacBook 12in M7 runs macOS, Apple’s proprietary operating system known for its smooth performance, user-friendly interface, and excellent integration with the Apple ecosystem. If you’re already using other Apple devices like the iPhone, iPad, or Apple Watch, you’ll appreciate the seamless integration features such as Handoff, Continuity, and AirDrop, which allow you to work across devices effortlessly.
macOS is also known for its stability and security, making it a great choice for users who value privacy and reliability. Regular updates from Apple ensure that your MacBook 12in M7 remains up-to-date with the latest security patches and new features.
Pre-installed apps like Safari, Mail, Notes, and Photos provide a complete suite of tools to get started right out of the box. Additionally, the Mac App Store offers a wide range of applications designed to enhance productivity, creativity, and entertainment. Whether you’re using the MacBook for work, study, or leisure, macOS provides a versatile and efficient operating system that makes the most of the hardware.
Who Is the MacBook 12in M7 For?
The MacBook 12in M7 is perfect for users who prioritize portability, design, and battery life over raw power. It’s an ideal choice for students, professionals who frequently travel, and anyone who needs a reliable laptop for daily tasks such as web browsing, writing, presentations, and media consumption.
However, if you’re a power user who needs a laptop for more intensive tasks like 3D rendering, heavy video editing, or gaming, the MacBook 12in M7 might not be the best fit. In these cases, a more powerful model like the MacBook Pro would be a better choice.
Conclusion
The MacBook 12in M7 may no longer be part of Apple’s active lineup, but its compact size, sleek design, and efficient performance make it a worthwhile option for many users. Its combination of portability, excellent display, decent processing power, and impressive battery life has made it a popular choice among students, professionals, and everyday users. While its single USB-C port and butterfly keyboard may not appeal to everyone, the overall experience it offers remains satisfying for those seeking a lightweight, efficient, and beautifully designed laptop.
For those who value mobility and are looking for a machine that can handle daily computing tasks with ease, the MacBook 12inM7 remains a strong contender, even in today’s competitive market of laptops.
Technology
ecvh0 dforce master how to: Unlock Its Benefits

Introduction
Struggling with ecvh0 dforce master setup? You’re not alone. Many users find its configuration tricky, but mastering it unlocks powerful automation and efficiency. This guide breaks down the process into simple steps, helping you harness its full potential quickly.
Why It Matters
Properly setting up ecvh0 dforce master ensures smoother workflows, reduces errors, and maximizes productivity. Whether for personal projects or enterprise use, mastering this tool can save hours of manual work.
Step-by-Step Guide
1. Install & Configure
- Download the latest ecvh0 dforce master package from the official site.
- Follow the installation wizard, ensuring all dependencies are met.
2. Set Up Permissions
- Assign appropriate user roles (admin, editor, viewer).
- Configure access controls to prevent unauthorized changes.
3. Integrate with Your System
- Connect ecvh0 dforcemaster to your existing tools via API.
- Test the connection to ensure seamless data flow.
4. Automate Key Tasks
- Use built-in templates or create custom automation rules.
- Schedule recurring tasks to minimize manual input.
5. Monitor & Optimize
- Track performance metrics in the dashboard.
- Adjust settings for better speed and efficiency.
Pro Tip
Use keyboard shortcuts to navigate ecvh0 dforcemaster faster. Press
Ctrl + K
(Windows) orCmd + K
(Mac) to open the command palette for quick actions.
Conclusion
Mastering ecvh0 dforce master simplifies complex tasks and boosts efficiency. By following these steps, you’ll optimize your workflow and get the most out of this powerful tool.
FAQ
Is ecvh0 dforcemaster free?
It offers a free tier with limited features; advanced options require a subscription.
Can I use it offline?
Some features work offline, but full functionality requires an internet connection.
How secure is ecvh0 dforcemaster?
It uses encryption and role-based access for security. For best practices, check our security guide.
Technology
How to Disassemble a Sony KV-27S42 CRT TV: Complete Guide

Introduction
The Sony KV-27S42 is a classic CRT television, and while it’s no longer in production, many enthusiasts still repair, modify, or salvage these sets. However, disassembling a CRT TV requires caution—high-voltage components and delicate electronics mean one wrong move could be dangerous.
This guide will walk you through the full disassembly process of the KV-27S42, covering:
✔ Safety precautions (CRT discharge, avoiding shocks)
✔ Tool requirements (what you’ll need)
✔ Step-by-step teardown (removing the case, tube, and boards)
✔ Salvaging useful parts (what to keep or discard)
✔ Reassembly tips (if needed)
Whether you’re repairing, modding, or recycling, this guide ensures you do it safely and efficiently.
Why Disassemble a KV-27S42?
Before diving in, it’s worth understanding why you might need to take apart this TV:
🔹 Repairs – Fixing power supply issues, bad capacitors, or video problems.
🔹 Modifications – RGB or component video mods for retro gaming.
🔹 Salvage – Reusing the CRT, speakers, or other parts for projects.
🔹 Safe Disposal – CRTs contain hazardous materials (lead, phosphors) and must be recycled properly.
Warning:
⚠ CRTs hold high voltage even when unplugged – improper handling can result in severe electric shock.
⚠ The tube is heavy and fragile – dropping it can cause implosion or injury.
Tools & Safety Gear You’ll Need
Before starting, gather these essentials:
Essential Tools
✔ Screwdrivers (Phillips & flathead)
✔ CRT discharge tool (or insulated screwdriver + wire)
✔ Needle-nose pliers (for small connectors)
✔ Anti-static wrist strap (optional but recommended)
Safety Precautions
✔ Work in a dry, well-lit area
✔ Discharge the CRT before touching anything
✔ Wear gloves & safety glasses (glass shards are sharp)
✔ Keep pets/kids away (CRTs are dangerous when mishandled)
Step-by-Step Disassembly Guide
Step 1: Unplug & Discharge the CRT
- Unplug the TV and wait at least 30 minutes for capacitors to discharge.
- Locate the anode cap (the large rubber suction cup on the CRT).
- Discharge the CRT:
- Use a CRT discharge tool (best option).
- Alternative: Clip one end of a wire to the TV’s metal frame and carefully slide a flathead screwdriver under the anode cap until you hear/see a small spark.
Step 2: Remove the Rear Cover
- Flip the TV face-down on a soft surface (blanket/towel).
- Remove all rear screws (some may be hidden under stickers).
- Gently pry the back cover off—plastic tabs may hold it in place.
Step 3: Disconnect Internal Cables
- Take photos of all connections before unplugging anything.
- Unplug:
- Deflection yoke (two large plugs near the tube neck)
- Anode cap (already discharged, but still be careful)
- Speaker wires & control board connectors
Step 4: Remove the CRT Tube
- Unscrew the 4 CRT mounting brackets (they hold the tube to the frame).
- Carefully lift the tube out – it’s extremely heavy (get help if needed).
- Set it face-down on a soft surface to avoid scratches.
Step 5: Extract Circuit Boards & Other Components
- Mainboard – Remove screws and gently lift it out.
- Power supply – Disconnect all wires before removing.
- Speakers & tuner – Useful for retro projects if salvaging.
Pro Tips for Safe Disassembly
🔧 Label every wire and screw (masking tape + marker) to avoid confusion later.
🔧 Use a magnetic tray to keep screws organized.
🔧 If keeping the CRT, store it upright to avoid stress on the glass.
What Can You Salvage?
If you’re parting out the TV, these components are useful:
✅ CRT tube – Great for arcade builds or replacements.
✅ Speakers – Decent quality for DIY audio projects.
✅ Power supply & mainboard – Useful for electronics tinkering.
✅ Control knobs & buttons – Handy for retro mods.
How to Dispose of a CRT Safely
CRTs contain leaded glass and toxic phosphors, so never throw them in the trash. Instead:
♻ Check local e-waste recycling centers (many accept CRTs for free).
♻ Contact electronics repair shops – Some may take old TVs.
♻ Look for CRT buyback programs (some collectors pay for working tubes).
Conclusion: How to Disassemble a Sony KV-27S42 CRT TV
How to Disassemble a Sony KV-27S42 CRT TV, requires patience and safety awareness, but it’s a rewarding project for retro tech enthusiasts. Whether you’re fixing, modding, or salvaging, following this guide ensures a smooth process.
FAQ About How to Disassemble a Sony KV-27S42 CRT TV
1. Can I get shocked if the TV has been unplugged for days?
Yes! CRTs can hold charge for weeks. Always discharge before working.
2. How heavy is the KV-27S42 CRT?
Around 50-60 lbs (23-27 kg)—lift carefully or get help.
3. Can I reuse the CRT in another TV?
Possibly, but tube swaps require matching specs (size, impedance, etc.).
4. What if I break the CRT?
The glass is under vacuum—if it cracks, it can implode. Wear safety gear!
5. Is it worth repairing a KV-27S42?
If you love CRTs, yes! These Sonys have great picture quality for retro gaming.
Technology
How Much Does Window Tinting Cost? Save Money, Boost Comfort

Introduction
Window tinting costs can vary widely, leaving many car owners unsure about fair pricing. Whether you want UV protection, privacy, or heat reduction, understanding the factors that influence cost helps you budget wisely. This guide breaks down pricing, so you get the best value without surprises.
Why It Matters
Window tinting isn’t just about style—it blocks harmful UV rays, reduces glare, and keeps your car cooler. But overpaying or choosing cheap options can lead to poor quality. Knowing the average costs ensures you invest in a tint that lasts and performs well.
Step-by-Step Guide to Window Tinting Costs
1. Understand the Pricing Factors
- Film Quality: Basic dyed film starts at 50–150, while premium ceramic tints run 200–800.
- Vehicle Size: Smaller cars cost less (100–300) vs. SUVs (200–600).
- Number of Windows: Full-car tinting costs more than just side windows.
2. Compare Film Types
- Dyed Film (50–150): Affordable but fades faster.
- Carbon Film (150–350): Better heat rejection, matte finish.
- Ceramic Film (200–800): Top-tier heat/UV protection, no signal interference.
3. Factor in Labor Costs
Professional installation adds 50–200, depending on complexity. DIY kits (20–100) are cheaper but risk bubbles/peeling.
4. Check Local Market Prices
Urban areas often charge more. Get 3+ quotes to avoid overpaying.
5. Consider Legal Limits
Some states restrict tint darkness (e.g., California bans <70% VLT on front windows). Non-compliant tints may require costly removal.
Pro Tip
“Ask for a warranty! Reputable shops offer 5–10-year guarantees against peeling or fading—saving you long-term costs.”
Conclusion: How Much Does Window Tinting Cost
Window tinting cost 50–800+, depending on film type, vehicle size, and labor. Investing in ceramic film or a trusted installer ensures durability and performance. Always check local laws and compare quotes to make a smart choice.
FAQ: How Much Does Window Tinting Cost
1. Is tinting worth the cost?
Yes—it reduces skin-damaging UV rays by 99% and lowers AC use, saving fuel.
2. How long does tint last?
High-quality tints last 10+ years; cheap ones fade in 2–3 years.
3. Can I tint my windshield?
Most states only allow a clear or light tint strip. Check your local laws.
4. Does tint affect visibility?
Not if you choose the right VLT (%)—go for 35% or higher for safety.
-
Articles1 year ago
How Many Times Can You Regrow Green Onions
-
News7 months ago
Understanding HotLeaks: What You Need to Know
-
Fashion5 months ago
Opals in the USA: A Gemstone Transforming the Crystal Healing Market
-
Technology11 months ago
The Wonders of Oh Em Gee Blog
-
Entertainment11 months ago
Bare it All: Unforgettable Skinny Dipping Stories Shared
-
Health11 months ago
Can You Smoke Shrooms? Exploring the Myths and Realities
-
Articles2 months ago
WHAT IS THE DIFFERENCE BETWEEN SEED GARLIC AND FOOD GARLIC?
-
Fashion12 months ago
Make a Statement with Stunning Black Homecoming Dresses