Connect with us

Food And Drinks

Low-Salt Breakfast Ideas: Heart-Healthy Ways to Start Your Day

Published

on

Low-Salt Breakfast Ideas

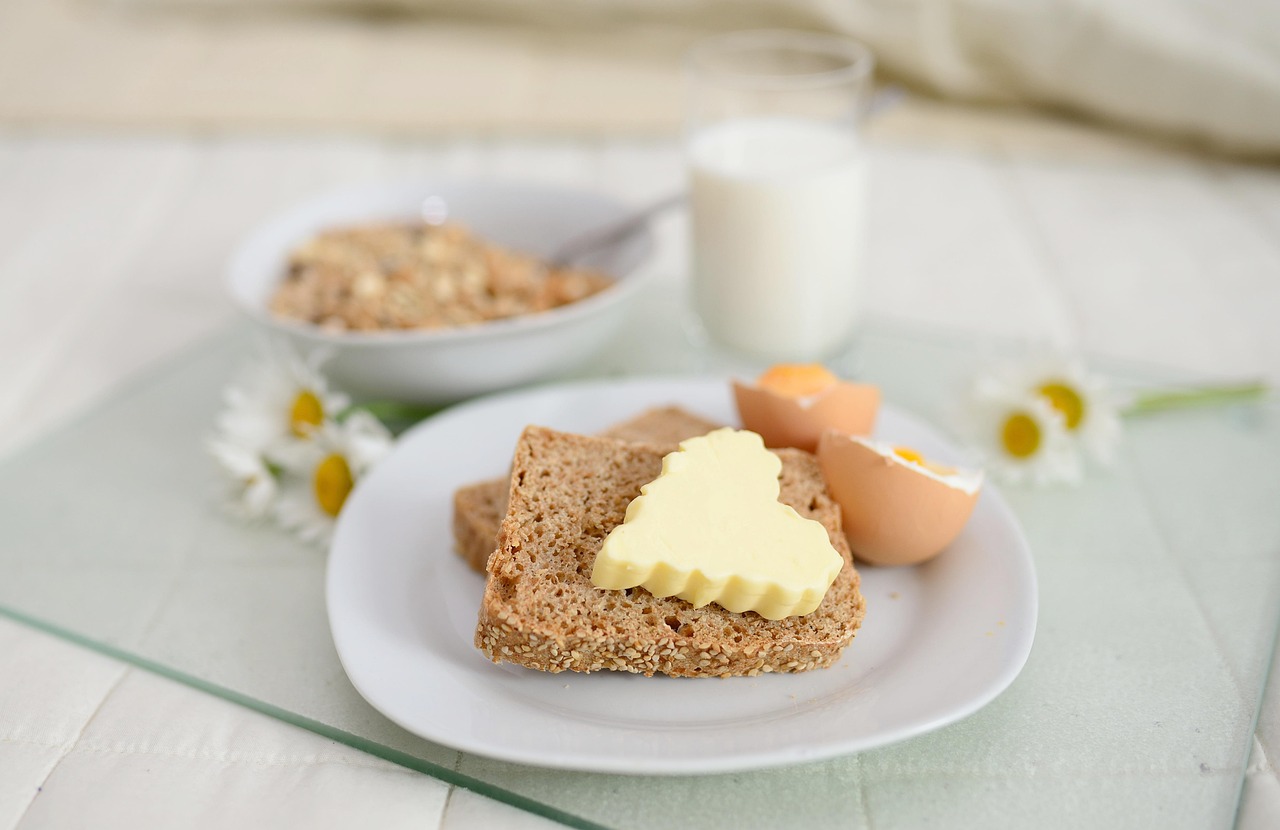
Do you often feel bloated or sluggish after breakfast? You might be consuming too much salt without even realizing it. Many classic breakfast foods—like bacon, sausages, cereals, and even bread—are loaded with sodium, which can contribute to high blood pressure and other health issues.

The good news? A low-salt breakfast doesn’t have to be bland or boring. With the right ingredients and creative recipes, you can enjoy flavorful, satisfying meals that support your heart health.

In this guide, we’ll explore:
✔ Why reducing salt at breakfast matters
✔ Simple low-salt breakfast swaps
✔ Quick & delicious recipe ideas
✔ Expert-backed tips for long-term success

Why Choose a Low-Salt Breakfast?

The American Heart Association recommends no more than 2,300 mg of sodium per day (ideally 1,500 mg for those with hypertension). Yet, the average American consumes over 3,400 mg daily—with breakfast often being a major culprit.

Excess sodium can lead to:

  • High blood pressure

  • Increased risk of heart disease and stroke

  • Water retention and bloating

  • Kidney strain

By opting for low-salt breakfasts, you can:
✅ Boost energy levels (less post-meal sluggishness)
✅ Improve heart health
✅ Reduce bloating
✅ Enhance natural flavors (less reliance on salt)

Easy Low-Salt Breakfast Swaps

Instead of reaching for high-sodium staples, try these simple swaps:

High-Salt Breakfast Low-Salt Alternative
Processed cereals Oatmeal with fresh fruit
Bacon or sausage Turkey bacon or homemade chicken sausage
White toast Whole-grain toast with avocado
Flavored yogurt Plain Greek yogurt + berries
Store-bought muffins Homemade banana oat muffins

10 Delicious Low-Salt Breakfast Ideas

1. Creamy Avocado & Egg Toast

  • Ingredients: Whole-grain toast, mashed avocado, poached egg, black pepper, chili flakes.

  • Why it works: Avocado adds healthy fats and creaminess without salt.

2. Greek Yogurt Parfait

  • Ingredients: Plain Greek yogurt, mixed berries, chia seeds, drizzle of honey.

  • Pro tip: Choose unsweetened yogurt to avoid hidden sodium.

3. Veggie Omelet with Fresh Herbs

  • Ingredients: Eggs, spinach, tomatoes, mushrooms, basil, turmeric.

  • Flavor boost: Use garlic powder, lemon zest, or smoked paprika instead of salt.

4. Overnight Oats with Almond Butter

  • Ingredients: Rolled oats, unsweetened almond milk, almond butter, sliced banana.

  • Make it savory: Add flaxseeds, cucumber, and a dash of lemon.

5. Chia Pudding with Coconut & Mango

  • Ingredients: Chia seeds, coconut milk, diced mango, shredded coconut.

  • Bonus: High in fiber and omega-3s.

6. Sweet Potato & Black Bean Breakfast Bowl

  • Ingredients: Roasted sweet potato, black beans, salsa, cilantro, lime.

  • Great for meal prep: Cook sweet potatoes in advance.

7. Low-Sodium Smoothie Bowl

  • Ingredients: Frozen banana, spinach, almond milk, peanut butter, granola (unsalted).

  • Blend & top with: Fresh kiwi, pumpkin seeds, or coconut flakes.

8. Homemade Granola (No Added Salt)

  • Ingredients: Rolled oats, nuts, cinnamon, maple syrup, dried cranberries.

  • Bake at 300°F for 20-25 minutes for a crunchy texture.

9. Quinoa Breakfast Bowl

  • Ingredients: Cooked quinoa, almond milk, walnuts, cinnamon, diced apple.

  • Protein-packed: Quinoa contains all nine essential amino acids.

10. Egg Muffins with Spinach & Bell Peppers

  • Ingredients: Eggs, diced veggies, black pepper, oregano.

  • Perfect for on-the-go: Bake in a muffin tin and refrigerate for up to 4 days.

Expert Tips for a Low-Salt Lifestyle

  1. Read Labels Carefully – Many “healthy” foods (like cottage cheese or canned beans) contain hidden sodium. Opt for “no salt added” versions.

  2. Use Herbs & Spices – Garlic, rosemary, cumin, and lemon juice add depth without salt.

  3. Batch Cook – Prepare low-salt breakfasts in advance to avoid last-minute high-sodium choices.

  4. Rinse Canned Foods – If using canned beans or veggies, rinse them to remove excess salt.

  5. Choose Fresh Over Processed – Fresh fruits, vegetables, and lean proteins are naturally low in sodium.

Final Thoughts: Small Changes, Big Impact

Reducing salt at breakfast doesn’t mean sacrificing flavor. With these easy swaps and recipes, you can enjoy delicious, heart-healthy meals that keep you energized all morning.

Start small: Pick one or two low-salt breakfast ideas to try this week. Over time, your taste buds will adjust, and you’ll notice the natural flavors of food more than ever.

Continue Reading
Click to comment

Leave a Reply

Your email address will not be published. Required fields are marked *

Food And Drinks

Creamy Steak Fettuccine: The Ultimate Comfort Food Recipe

Published

on

Creamy Steak Fettuccine

Craving a restaurant-quality pasta dish at home? Learn how to make creamy steak fettuccine—a rich, indulgent meal that’s easier than you think!

Few dishes deliver the luxurious satisfaction of creamy steak fettuccine. Tender slices of steak, silky pasta, and a velvety sauce come together in a dish that feels gourmet yet is simple enough for a weeknight dinner.

But how do you achieve that perfect balance of flavor and texture? What’s the best cut of steak? And how can you prevent your sauce from breaking?

In this guide, we’ll break down everything you need to know—from expert cooking tips to step-by-step instructions—so you can make the best creamy steak fettuccine every time.

Why Creamy Steak Fettuccine is a Must-Try

Before diving into the recipe, let’s talk about why this dish is worth mastering:

✅ Restaurant-Worthy at Home – Skip the overpriced Italian eatery and enjoy a high-end meal in your kitchen.
✅ Customizable – Swap ingredients based on preference (try mushrooms, spinach, or sun-dried tomatoes).
✅ Impressive Yet Simple – With a few key techniques, you’ll wow guests or just treat yourself.

The Best Steak for Fettuccine

Not all steaks are created equal when it comes to pasta. You want a cut that’s:
✔ Tender – No one likes chewy meat in pasta.
✔ Flavorful – Well-marbled steaks add richness.
✔ Quick-Cooking – Thin cuts work best for fast searing.

Top Choices:

  • Ribeye – Juicy, marbled, and full of flavor.

  • Sirloin – Leaner but still tender.

  • Filet Mignon – Ultra-soft but pricier.

  • Flank or Skirt Steak – Budget-friendly; slice thinly against the grain.

Pro Tip: Let the steak rest at room temperature for 20-30 minutes before cooking for even doneness.

How to Cook the Perfect Steak for Pasta

A perfectly seared steak makes all the difference. Follow these steps:

  1. Season Generously – Salt and pepper are musts; add garlic powder or smoked paprika for extra depth.

  2. Sear on High Heat – Use a cast-iron skillet or stainless-steel pan for a golden crust.

  3. Rest Before Slicing – Let the steak sit for 5-10 minutes to retain juices.

  4. Slice Against the Grain – This ensures tenderness in every bite.

Common Mistake: Overcooking the steak—medium-rare to medium is ideal for pasta dishes.

Crafting the Perfect Creamy Sauce

The sauce is where magic happens. A great creamy fettuccine sauce should be:

  • Rich but not heavy

  • Smooth (no curdling!)

  • Packed with umami flavor

Key Ingredients:

  • Heavy cream (for thickness)

  • Parmesan cheese (freshly grated melts better)

  • Garlic & shallots (for depth)

  • Butter & olive oil (for richness)

  • Pasta water (helps emulsify the sauce)

How to Prevent a Broken Sauce:

  • Avoid boiling the cream—simmer gently.

  • Toss pasta in the sauce immediately after draining.

  • Add starchy pasta water to help bind everything.

Step-by-Step Creamy Steak Fettuccine Recipe

Ingredients:

  • 8 oz fettuccine pasta

  • 1 lb ribeye or sirloin steak

  • 1 cup heavy cream

  • ½ cup grated Parmesan

  • 3 cloves garlic (minced)

  • 2 tbsp butter

  • 1 tbsp olive oil

  • Salt & pepper to taste

  • Fresh parsley (for garnish)

Instructions:

  1. Cook the Pasta – Boil fettuccine in salted water until al dente. Reserve ½ cup pasta water.

  2. Sear the Steak – Heat oil in a skillet over high heat. Cook steak 3-4 minutes per side for medium-rare. Rest, then slice thinly.

  3. Make the Sauce – In the same pan, melt butter, sauté garlic, then add cream and Parmesan. Simmer until thickened.

  4. Combine Everything – Toss pasta in the sauce, adding pasta water as needed. Fold in steak slices.

  5. Garnish & Serve – Top with parsley, extra Parmesan, and cracked black pepper.

Elevate Your Dish: Pro Tips & Variations

Want to take it up a notch? Try these tweaks:

🔥 Add Mushrooms – Sautéed creminis add earthy flavor.
🌶 Kick of Heat – Red pepper flakes or a dash of hot sauce.
🍷 Deglaze with Wine – White wine adds acidity and depth.
🧀 Extra Cheesy – Stir in a spoonful of mascarpone for ultra-creaminess.

What to Serve with Creamy Steak Fettuccine

Round out your meal with:

  • Garlic bread (for soaking up sauce)

  • Crisp salad (balances the richness)

  • Roasted asparagus (adds a fresh crunch)

Final Thoughts: A Dish Worth Mastering

Creamy steak fettuccine is more than just pasta—it’s a restaurant-quality experience you can easily recreate at home. With the right steak, a foolproof sauce, and a few chef-approved tricks, you’ll have a dish that’s both impressive and comforting.

So, next time you’re craving something indulgent, skip the takeout and whip up this decadent, creamy steak fettuccine instead. Your taste buds (and anyone lucky enough to join you) will thank you!

Continue Reading

Food And Drinks

How to Make Soft Serve Ice Cream: A Step-by-Step Guide

Published

on

How to Make Soft Serve Ice Cream

Ever wondered how your favorite ice cream shops get that perfect swirl of creamy, dreamy soft serve? Unlike traditional hard ice cream, soft serve is all about smooth texture, light consistency, and that irresistible melt-in-your-mouth quality. The good news? You don’t need a fancy machine or professional training to make it at home.

In this guide, we’ll break down the science, ingredients, and techniques to help you craft restaurant-quality soft serve ice cream in your own kitchen. Whether you’re prepping for a summer party or just satisfying a late-night craving, these expert-backed tips will ensure success.

What Makes Soft Serve Different?

Soft serve isn’t just under-churned ice cream—it’s a science. The key differences include:

  • Higher air content (overrun): Soft serve contains 30–60% air, making it lighter.

  • Lower butterfat (3–6%): Less fat than regular ice cream (10–18%) keeps it soft.

  • Served at a warmer temperature (-4°C to 0°C): Prevents it from freezing solid.

  • Emulsifiers & stabilizers: Ingredients like guar gum prevent ice crystals.

Now, let’s dive into how to make it at home—with or without a machine.

Ingredients You’ll Need

For authentic soft serve, stick to this base recipe (scalable for larger batches):

Classic Vanilla Soft Serve (Makes ~4 servings)

  • 2 cups heavy cream (or half-and-half for a lighter version)

  • 1 cup whole milk

  • ¾ cup granulated sugar

  • 1 tbsp corn syrup or honey (for smoothness)

  • 1 tbsp vanilla extract

  • ¼ tsp xanthan gum or guar gum (optional, improves texture)

  • Pinch of salt

Pro Tip: For chocolate soft serve, add ¼ cup cocoa powder. For fruit-flavored, blend in ½ cup pureed strawberries or mango.

Equipment Options

You don’t need a commercial soft serve machine, but here are your options:

  1. Stand Mixer or Hand Mixer (with a chilled bowl)

  2. Ice Cream Maker (with a freezing canister)

  3. Blender or Food Processor (for a quick fix)

  4. Commercial Soft Serve Machine (if you’re serious about consistency)

Step-by-Step Instructions

Step 1: Mix the Base

  1. Whisk milk, sugar, corn syrup, and salt until dissolved.

  2. Add heavy cream, vanilla, and xanthan gum (if using). Blend well.

  3. Chill the mixture for at least 4 hours (overnight is best).

Why chilling matters: Cold base = smaller ice crystals = smoother texture.

Step 2: Churn It Right

  • With an ice cream maker:

    • Pour the mix into the machine and churn 15–20 mins until thick.

    • Serve immediately for the softest texture.

  • Without a machine:

    • Freeze the mix in a shallow container, stirring every 30 mins for 3–4 hours.

    • Once slushy, blend in a food processor before serving.

Step 3: Serve Like a Pro

  • Use a piping bag with a star tip for that classic swirl.

  • For McDonald’s-style cones, dip the cone in chocolate shell first.

  • Top with sprinkles, caramel, or fresh fruit for extra flair.

Troubleshooting Common Issues

Problem Solution
Too icy Add more fat (cream) or a stabilizer (xanthan gum).
Not creamy enough Churn longer or increase sugar/corn syrup.
Melts too fast Serve colder (-6°C) or reduce sugar slightly.
Too hard Let it sit at room temp for 2–3 mins before serving.

Pro Tips from Ice Cream Experts

✔ Use ultra-pasteurized dairy for a smoother melt.
✔ Pre-chill your machine’s bowl for faster freezing.
✔ Experiment with mix-ins (cookie crumbs, Nutella swirls).
✔ For vegan soft serve, swap dairy for coconut milk + banana.

Final Scoop: Why Homemade Soft Serve Wins

Store-bought soft serve can’t beat the freshness and customization of homemade. With this guide, you’ve got everything needed to whip up silky, dreamy soft serve anytime.

Ready to impress your friends with your own ice cream stand? Grab your ingredients, fire up that machine, and start swirling!

Continue Reading

Food And Drinks

Easy Halloween Drinks to Spook Up Party (Kid-Friendly & Fun!)

Published

on

Easy Halloween Drinks

Halloween is all about creepy costumes, eerie decorations, and—most importantly—spooktacular drinks! But who has time for complicated recipes when you’re busy perfecting your zombie makeup or untangling fake cobwebs?

Whether you’re hosting a haunted bash or just want a fun treat for the kids, we’ve got easy Halloween drinks that are quick, delicious, and Instagram-worthy. From blood-red punches to ghoulish smoothies, these recipes require minimal effort for maximum fright-night delight.

Why These Halloween Drinks Are a Must-Try

Before we dive into the recipes, here’s why these drinks will be the life (or death?) of your party:

✅ Super simple – No fancy ingredients or skills needed.
✅ Budget-friendly – Most ingredients are pantry staples.
✅ Kid-approved – Fun, festive, and safe for little monsters.
✅ Visually spooky – Perfect for that eerie Halloween vibe.

Now, let’s brew up some magic!

1. Witches’ Brew Punch

Perfect for: A cauldron-worthy centerpiece.

Ingredients:

  • 2 cups green apple juice

  • 1 cup lemon-lime soda

  • 1 cup pineapple juice

  • Gummy worms & dry ice (optional, for extra creep factor)

How to Make It:

  1. Mix all liquids in a punch bowl.

  2. Add gummy worms for a “wiggly” effect.

  3. For a smoky look, add a small piece of food-safe dry ice (handle with gloves!).

Pro Tip: Freeze berries in ice cubes for “eyeball” surprises!

2. Poison Apple Cider

Perfect for: A cozy yet creepy sip.

Ingredients:

  • 2 cups apple cider

  • 1 tsp caramel syrup

  • Whipped cream & green food coloring (for the “poison” effect)

How to Make It:

  1. Warm cider and stir in caramel.

  2. Top with green-tinted whipped cream.

3. Eyeball Punch

Perfect for: Grossing out your guests (in a fun way).

Ingredients:

  • 2 cups white grape juice

  • 1 cup lemon soda

  • Lychees stuffed with blueberries (as “eyeballs”)

How to Make It:

  1. Mix juice and soda in a bowl.

  2. Add lychee “eyeballs” for a floating surprise.

4. Candy Corn Milkshake

Perfect for: A sweet, colorful treat.

Ingredients:

  • Vanilla ice cream

  • Orange soda

  • Whipped cream & candy corn

How to Make It:

  1. Blend ice cream and soda until smooth.

  2. Top with whipped cream and candy corn.

5. Ghostly White Hot Chocolate

Perfect for: A cozy, spooky sip.

Ingredients:

  • White chocolate chips

  • Milk

  • Marshmallow ghosts (draw faces with edible marker)

How to Make It:

  1. Melt chocolate into warm milk.

  2. Top with marshmallow ghosts.

6. Bloody Shirley Temple

Perfect for: A playful, gory look.

Ingredients:

  • Lemon-lime soda

  • Grenadine

How to Make It:

  1. Fill a glass with soda.

  2. Slowly pour grenadine to create a “blood” effect.

7. Spiderweb Hot Chocolate

Perfect for: A creepy-cute twist on a classic.

Ingredients:

  • Hot chocolate

  • Chocolate syrup

  • Marshmallow fluff

How to Make It:

  1. Make hot cocoa as usual.

  2. Drizzle chocolate syrup in a web pattern.

  3. Add a dollop of marshmallow fluff for spiders.

Final Tricks for the Best Halloween Drinks

  • Presentation matters: Use skull cups, test tubes, or mason jars for extra spookiness.

  • Prep ahead: Batch drinks in pitchers for easy serving.

  • Label creatively: Call drinks “Witch’s Potion” or “Monster Mash Smoothie” for fun.

Conclusion

No Halloween party is complete without creepy, delicious drinks. These easy Halloween drinks are perfect for kids, families, and anyone who loves a festive (but fuss-free) celebration.

Now, tell us—which one will you try first? Drop your favorite in the comments, and don’t forget to share your spooky creations with us!

Continue Reading

Trending