Connect with us

Home Decor

Lighten Up Your Life: Create a Bright and Beautiful Home with New Windows and Siding

Published

on

Windows and Siding

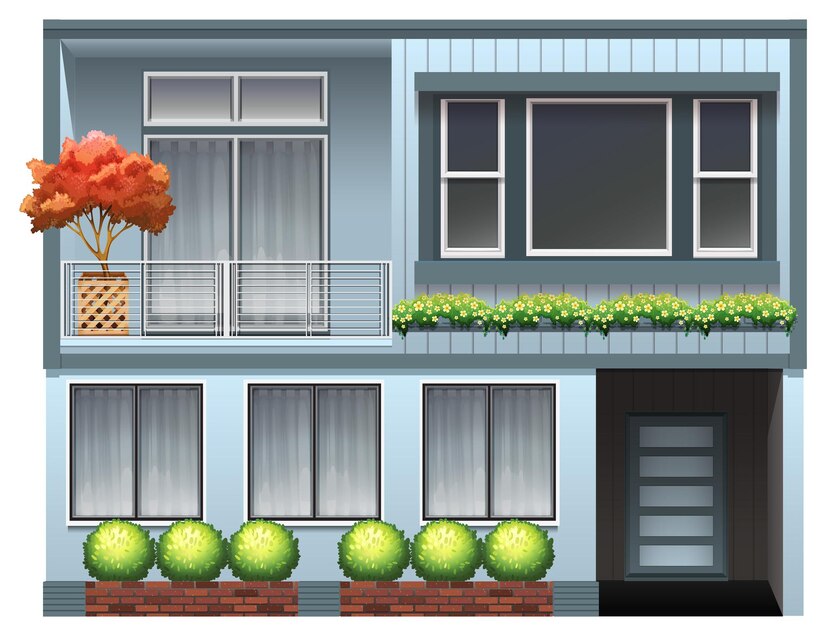
Home renovation efforts may be thrilling and satisfying since they give living areas a modern, energizing makeover. Among all the components that can be replaced, siding and windows are particularly important because they significantly impact a home’s appearance and functionality. Upgrading to modern windows and siding can do wonders for your home; it can improve the overall aesthetic, increase energy efficiency, enhance the value of your property, and provide better protection against harsh weather conditions.

Key Takeaways:

  • The impact of new windows and siding on both functionality and aesthetics of your home.
  • Energy efficiency considerations and benefits from upgraded exteriors.
  • The importance of professional installation and the selection process for finding a reputable contractor.
  • Pre-renovation preparations and maintenance advice post-upgrade to ensure longevity.

Table of Contents:

  1. The Benefits of New Windows and Siding
  2. Improving Home Energy Efficiency
  3. Choosing Materials for Longevity and Style
  4. Preparing for a Window and Siding Upgrade
  5. Maintenance Tips for Windows and Siding
  6. Finding a Reputable Contractor for Installation

The Benefits of New Windows and Siding

Renovating a home’s exterior by installing new windows and siding can drastically enhance its visual appeal while bolstering its structural integrity. This is not simply a cosmetic upgrade; the enhancements increase property protection, potentially deterring burglaries and minimizing damage during adverse weather conditions. Opting for high-quality products from established providers, such as a Window Outlet and Siding, can lead to a remarkable amalgamation of practicality and elegance, significantly uplifting a household’s ambiance and safeguarding its inhabitants.

Improving Home Energy Efficiency

Now more than ever, homeowners prioritize energy efficiency in their renovation projects. Well-insulated windows and robust siding can be a formidable barrier against environmental elements, cultivating an interior climate far less reliant on heating and air conditioning systems. The ecological impact is just as massive as the possible savings on energy expenses. Evaluating energy-efficient options in collaboration with industry specialists, such as those detailed by the U.S. Department of Energy, empowers homeowners to select windows and siding that contribute to a greener planet while maintaining domestic comfort and reducing overall expenses.

Choosing Materials for Longevity and Style

Longevity and aesthetic appeal are two paramount considerations when selecting materials for your window and siding upgrades. Each material comes with its specific set of benefits. For instance, composite materials resist rot and insects, while wood offers a natural and inviting look but demands more maintenance. Alternatively, modern vinyl and metal sidings offer extended durability with minimal upkeep. The proper selection can lead to a façade that remains impressive and resilient for years, warding off the frequently harsh outdoor elements without forfeiting the desired look.

Preparing for a Window and Siding Upgrade

The renovation process starts long before the physical work begins. Homeowners can facilitate a smooth transition by decluttering the work area and safeguarding personal possessions and property features near the renovation zone. Addressing landscaping concerns and defining clear access paths to prevent disruptions is also prudent. Clear communication with your contractor regarding schedules and daily routines will help minimize the impact on your family’s daily life during the upgrade.

Maintenance Tips for Windows and Siding

Maintenance is the cornerstone of preserving the newfound beauty and efficiency of your window and siding investment. Regular cleansings and inspections to detect early signs of wear or damage significantly prolong the life and appearance of your home’s exterior. This notion is particularly true for materials like wood that require more frequent maintenance to maintain their allure. Your home’s siding can be protected and maintained for years with professional upkeep advice from sources like This Old House, boosting the long-term value of your investment. 

Finding a Reputable Contractor for Installation

The success of any restoration project may depend on your choice of contractor. A credible contractor will carry the necessary licenses, have positive customer testimonials, and offer a transparent bid with warranties and timelines. They should provide an extensive portfolio of their previous work, allowing homeowners to assess their fit for the project. It’s a well-advised strategy to browse local contractors, engage in in-depth discussions, and perhaps even visit ongoing job sites to see their work’s quality and professionalism firsthand.

Continue Reading
Click to comment

Leave a Reply

Your email address will not be published. Required fields are marked *

Home Decor

Maximizing Small Spaces: Creative Interior Design Tips for Any Home

Published

on

Small Spaces

Introduction to Small Space Design

Designing for small spaces can be both challenging and rewarding. With thoughtful planning and creativity, even the tiniest rooms can be transformed into functional and stylish areas. From choosing an interior design for bathroom St Louis to living room arrangements, these tips can help you make the most of any space. Clever design solutions can ensure your home feels comfortable and spacious even if you have limited square footage.

The principles of small-space design revolve around maximizing your home’s usability and aesthetic appeal. By leveraging multipurpose furniture and innovative storage solutions, you can create a living area that suits your needs without feeling cramped. Here are some expert tips to help you achieve a well-designed small space, focusing on practical techniques and unique ideas to improve your homework.

Choosing Multi-Functional Furniture

One of the critical strategies for small space design is selecting multi-functional furniture. Pieces like sofa beds, extendable dining tables, and storage ottomans serve multiple purposes, allowing you to make the most of every square foot. Multipurpose furniture is practical and can add a layer of sophistication to your home. For example, a sofa bed can be a comfortable seating area during the day and transform into a cozy bed for guests at night. Similarly, an extendable dining table can accommodate a dinner party or be compacted for everyday use.

Top Multi-Functional Furniture Ideas:

  • Sofa Beds: Perfect for studio apartments or guest rooms, combining seating and a bed in one. Look for designs that also offer under-seat storage for added functionality.
  • Extendable Dining Tables: Great for small dining areas, allowing you to adjust the size based on your needs. Modern designs often include built-in storage for tableware, maximizing the utility of your dining space.
  • Storage Ottomans: These can be used as footrests, coffee tables, or extra seating while hiding clutter. Some ottomans also come with flip-top trays, making them versatile for serving drinks or snacks.

Utilizing Vertical Space

When floor space is limited, think vertically. Use tall bookshelves, wall-mounted shelves, and hanging planters to keep your floor clear and add visual interest to your room. Vertical storage solutions help to create defined areas without consuming valuable floor space. For example, a tall bookshelf can delineate a living area from a dining space in an open-concept setting while providing ample storage for books and decorative items.

Vertical gardening is another creative option for those who love plants but lack traditional garden space. Installing wall planters or vertical gardens allows you to bring greenery into your home, enhancing aesthetics and air quality.

Maximizing Natural Light

Natural light can make any space feel larger and more inviting. Keep window treatments light and airy, and position mirrors to reflect light throughout the room. Heavy drapes can make a room feel closed off, so opt for sheer curtains or blinds that allow ample light in. Natural light brightens a space and has numerous health benefits, including boosting mood and productivity.

Tips for Enhancing Natural Light:

  • Light Window Treatments: Use sheer fabrics that let in light while providing privacy. Light-colored window treatments can enhance the brightness, making the room feel more open and airy.
  • Mirrors: Place mirrors opposite windows to reflect light and create the illusion of a larger space. Even small mirrors strategically placed can amplify natural light and add depth to a room.
  • Open Layout: Arrange furniture to allow light to flow freely. Avoid placing large, bulky furniture near windows that could block natural light.

Effective Color Schemes for Small Spaces

Light colors make spaces feel more extensive and more open. Consider a palette of soft neutrals or pastels to enhance the airy feel of your room. Adding pops of one or two bright colors can add life without overwhelming the space. Neutral color schemes also provide a versatile backdrop for various decorating styles, allowing you to easily change accent colors and accessories.

Color Scheme Ideas:

  • Neutral Palette: Shades of white, beige, and taupe create a calm and expansive feel. These colors reflect light, making the room appear more spacious and serene.
  • Pastels: Light blues, greens, and pinks add a touch of color without overpowering the room. Pastels can also evoke a sense of tranquility and softness, perfect for creating a relaxing atmosphere.
  • Accent Colors: Incorporate bold accents in small doses, such as throw pillows or artwork. Bright cushions, rugs, or vases in vibrant hues can inject personality and contrast into a light, neutral backdrop.

Using Mirrors to Create Illusions of Space

Mirrors are a fantastic tool in small-space design. Placing a large mirror opposite a window can double the natural light in a room. Smaller mirrors can also be used to reflect light and add depth. Strategically placing mirrors can significantly impact the perception of the room’s size and brightness. Use mirrored furniture or accessories to add a subtle reflective quality throughout the room.

Besides reflecting light, mirrors can also function as statement pieces, adding elegance and visual interest to your decor. Mirrored backsplashes in kitchens or mirrored tiles in bathrooms can also enhance the sense of spaciousness and luxury.

Smart Organization and Storage Solutions

Clutter can quickly make a small space feel cramped. Invest in intelligent solutions like under-bed storage boxes, wall hooks, and modular shelving units. Keeping your space organized will make it feel more extensive and more functional. Effective organization transforms a chaotic area into a serene and efficient living environment, allowing you to enjoy your space more fully.

Effective Storage Solutions:

  • Under-Bed Storage: Use the space beneath your bed for seasonal clothes or extra linens. Rolling storage bins or vacuum-sealed bags can help you maximize this often overlooked area.
  • Wall Hooks are perfect for hanging coats, bags, or keys to keep them off the floor. They can also be decorative, adding charm and character to entryways or bathrooms.
  • Modular Shelving: These customizable shelves can be adjusted to fit your changing storage needs. They can adapt to different room layouts and storage requirements, whether wall-mounted or free-standing.

Adding Your Personal Touch

Finally, remember not to add personal touches that make your space uniquely yours. These elements can bring warmth and personality to your small space through artwork, textiles, or treasured keepsakes. Personalized decor makes your home feel inviting and reflective of your style. Displaying meaningful items enhances the visual appeal and connects to your space, making it feel like home.

Personal Touch Ideas:

  • Artwork: Displaying favorite pieces can add character and tone to the room. Consider a gallery wall to showcase a collection of photos, prints, or paintings that tell a story.
  • Textiles: To incorporate color and texture, use throw blankets, rugs, and cushions. Changing textiles seasonally can refresh a room’s look without much effort or expense.
  • Keepsakes: Decorate with sentimental-valued items to create a heartfelt and personalized space. Family heirlooms, travel souvenirs, or DIY creations can add unique touches that resonate with your history and experiences.
Continue Reading

Home Decor

Porcelain Countertops: The Ultimate Guide

Published

on

Porcelain Countertops

Porcelain countertops have emerged as a popular choice among homeowners and designers alike, offering a blend of beauty, durability, and versatility. Whether you’re renovating your kitchen or designing a new space, porcelain countertops are worth considering for their unique qualities and benefits. This comprehensive guide explores everything you need to know about porcelain countertops, from their characteristics and advantages to maintenance tips and design inspirations.

What are Porcelain Countertops?

Porcelain countertops are made from a mixture of clay, minerals, and natural pigments that are compressed and fired at extremely high temperatures. This manufacturing process results in a dense, non-porous material that is resistant to heat, stains, scratches, and UV rays. Porcelain countertops mimic the look of natural stone, such as marble or granite, while offering superior performance and durability.

Advantages of Porcelain Countertops

  1. Durability: Porcelain countertops are highly durable and resistant to chipping, scratching, and cracking, making them suitable for high-traffic areas like kitchens.
  2. Stain Resistance: The non-porous surface of porcelain countertops makes them resistant to stains from liquids like wine, coffee, and oils, ensuring easy cleanup and maintenance.
  3. Heat Resistance: Unlike some natural stones, porcelain countertops can withstand high temperatures without damage or discoloration, making them ideal for cooking areas.
  4. Design Versatility: Porcelain countertops come in a wide range of colors, patterns, and finishes, allowing you to achieve various aesthetic effects from classic to contemporary.
  5. Hygienic: The non-porous nature of porcelain countertops prevents the growth of bacteria and mold, enhancing kitchen cleanliness and food safety.

Choosing Porcelain Countertops: Considerations

  1. Color and Finish: Decide on the color and finish that best complements your kitchen or bathroom design. Matte finishes offer a contemporary look, while polished finishes reflect light for a luxurious appearance.
  2. Edge Profiles: Choose from various edge profiles, such as straight, beveled, or bullnose, to enhance the aesthetic appeal of your countertops.
  3. Thickness: Porcelain countertop typically come in standard thicknesses ranging from 6mm to 12mm. Thicker slabs provide a more substantial feel and can support larger spans without additional support.
  4. Cost: Consider your budget and compare the cost of porcelain countertop with other materials like granite or quartz. While porcelain can be more affordable than natural stone, prices may vary based on design, thickness, and installation.

Maintenance Tips for Porcelain Countertops

  1. Daily Cleaning: Wipe countertops with a soft cloth or sponge and mild soap to remove dirt and spills. Avoid abrasive cleaners or scouring pads that can scratch the surface.
  2. Stain Removal: For stubborn stains, use a mixture of baking soda and water or a gentle household cleaner recommended for porcelain surfaces. Rinse thoroughly with water and dry with a clean cloth.
  3. Avoid Heat Damage: While porcelain is heat-resistant, use trivets or hot pads to protect the surface from direct contact with hot pans or pots.
  4. Sealing (if applicable): Some porcelain countertop may require sealing to enhance stain resistance. Follow manufacturer recommendations for sealing products and frequency.

Design Inspirations with Porcelain Countertops

  1. Marble Effect: Achieve the timeless elegance of marble with porcelain countertop that mimic Carrara or Calacatta marble veining and patterns.
  2. Concrete Look: Opt for industrial chic with porcelain countertop that replicate the look and texture of concrete, offering a modern and minimalist appeal.
  3. Wood Grain: Bring warmth and texture to your kitchen with porcelain countertop featuring realistic wood grain patterns in various shades from light oak to deep walnut.
  4. Bold Colors: Make a statement with bold-colored porcelain countertop in shades like navy blue, emerald green, or deep red, adding personality and vibrancy to your space.

Conclusion

Porcelain countertops combine aesthetic appeal with practicality, making them an excellent choice for modern kitchens and bathrooms. Their durability, resistance to stains and heat, and versatility in design allow homeowners to create stylish and functional spaces. Whether you prefer the classic look of marble or the contemporary appeal of concrete, porcelain countertop offer a wide range of options to suit your taste and lifestyle.

FAQs

1. Are porcelain countertops more durable than granite or quartz?

Porcelain countertop are highly durable and resistant to scratches, stains, and heat, comparable to granite and quartz.

2. Can porcelain countertop be installed outdoors?

Yes, porcelain countertop can be installed outdoors due to their resistance to UV rays, frost, and temperature fluctuations.

3. How do I repair chips or scratches on porcelain countertop?

Minor chips or scratches can be repaired using porcelain repair kits available from hardware stores. Follow the manufacturer’s instructions for best results.

4. Are porcelain countertop easy to clean?

Yes, porcelain countertop are easy to clean with mild soap and water. Avoid harsh chemicals or abrasive cleaners to maintain their finish.

5. Are there eco-friendly options for porcelain countertop?

Some manufacturers offer eco-friendly porcelain countertop made from recycled materials or using sustainable production practices.

Continue Reading

Home Decor

Bathroom Wallpaper: A Guide to Choosing and Installing

Published

on

Bathroom Wallpaper

Introduction to Bathroom Wallpaper

Bathroom wallpaper offers a versatile and stylish solution to transform your bathroom into a sophisticated retreat. This article explores the benefits of using wallpaper in bathrooms, popular styles and designs, installation tips, and maintenance guidelines to help you achieve a stunning and functional space.

Benefits of Using Wallpaper in Bathrooms

Aesthetic Appeal

Wallpaper adds depth, texture, and personality to bathroom walls, making it a popular choice for homeowners looking to enhance their interior design. With a vast array of patterns, colors, and finishes available, you can create a customized look that complements your bathroom decor and reflects your personal style.

Versatility

Unlike traditional wall paint, wallpaper offers endless design possibilities. Whether you prefer classic floral patterns, contemporary geometric designs, or textured finishes like grasscloth or metallics, there’s a wallpaper style to suit every taste and theme, from modern minimalism to vintage charm.

Popular Styles and Designs

Floral Prints

Floral wallpaper designs bring a touch of nature and elegance to bathrooms. Choose from delicate blooms in soft pastels for a serene ambiance or bold, oversized florals to make a statement in smaller powder rooms.

Geometric Patterns

Geometric wallpapers offer a modern and structured look, ideal for creating visual interest and depth in larger bathrooms. Opt for symmetrical patterns or abstract designs in monochromatic tones or vibrant hues for a dynamic effect.

Installation Tips

Preparation

Before installing bathroom wallpaper, ensure the walls are clean, dry, and smooth. Remove any existing wallpaper or residue and repair imperfections with filler. Prime the walls with a suitable primer to create a smooth surface for the wallpaper adhesive.

Application

Measure and cut wallpaper panels according to your wall dimensions, allowing extra length for adjustments and pattern matching. Apply wallpaper adhesive evenly to the back of each panel and carefully position it on the wall, smoothing out air bubbles and wrinkles with a wallpaper smoother or sponge.

Finishing Touches

Trim excess wallpaper at ceiling and baseboard edges using a sharp utility knife and straightedge. Wipe away excess adhesive with a damp sponge and allow the wallpaper to dry completely before enjoying your newly transformed bathroom space.

Maintenance and Care

Durability

High-quality bathroom wallpapers are designed to withstand moisture and humidity levels typical in bathroom environments. Opt for vinyl or washable wallpapers that are easy to clean and maintain. Regular dusting and occasional gentle cleaning with a mild soap solution will keep your wallpaper looking fresh and vibrant.

Avoiding Damage

To prevent damage to wallpaper, avoid excessive moisture exposure directly on the wallpaper seams. Ventilate the bathroom during and after hot showers to reduce humidity levels and maintain the integrity of the wallpaper adhesive over time.

Conclusion

Bathroom wallpaper offers a practical and stylish way to enhance your bathroom decor with minimal effort. Whether you’re looking to create a serene spa-like retreat or inject personality into a small powder room, choosing the right wallpaper can make a significant impact on your overall interior design scheme.


FAQs

Can I use regular wallpaper in bathrooms?
It’s recommended to use wallpaper specifically designed for bathrooms, such as vinyl or washable wallpapers, as they are more resistant to moisture and humidity.

  1. How do I remove bathroom wallpaper?
    • To remove bathroom wallpaper, score the surface with a wallpaper perforating tool, apply wallpaper remover solution, and gently peel away the wallpaper from the wall. Follow with cleaning the wall surface thoroughly.
  2. What should I do if my bathroom wallpaper starts to peel?
    • If wallpaper begins to peel, carefully reapply wallpaper adhesive to the affected area and smooth out the wallpaper with a wallpaper smoother. Allow sufficient drying time before using the bathroom again.
  3. Can wallpaper be installed over existing wallpaper?
    • It’s generally not recommended to install new wallpaper directly over existing wallpaper. Remove the old wallpaper first to ensure a smooth and even surface for the new wallpaper installation.
  4. Is wallpaper a good choice for small bathrooms?
    • Yes, wallpaper can visually expand a small bathroom by adding depth and interest to the walls. Opt for light colors and subtle patterns to create a sense of openness and brightness.
Continue Reading

Trending