Connect with us

Home Empowerment

How to Prepare Your Home for Installation by a Solar Power Installation Company?

Published

on

Solar Power Installation Company

Preparing your home for solar power installation is a crucial step that can significantly influence the project’s overall success. By taking the necessary steps ahead of time, you can ensure a smooth installation process, maximize efficiency, and ultimately enjoy the benefits of solar energy sooner. We will explore the essential steps to prepare your home for solar installation, including assessing your property, understanding energy needs, clearing the installation area, and scheduling a professional consultation. Understanding and implementing these steps can optimize your transition to solar energy and enhance your home’s energy efficiency.

Assess Your Property for Solar Suitability

Before you contact a solar power installation company, it’s essential to assess whether your property is suitable for solar panels. Factors like roof orientation, shading, and the overall structural integrity of your roof play a significant role in determining how effective solar panels will be for your home. Ideally, solar panels perform best on south-facing roofs, which receive maximum sunlight throughout the day. If your roof has significant obstructions, such as trees or tall buildings, consider trimming or removing these obstacles to improve sun exposure.

You should also evaluate the condition of your roof. If your roof is nearing the end of its lifespan or requires repairs, it may be prudent to address these issues before installing solar panels. Not only does this save you from the hassle of removing and reinstalling the solar panels later, but it also prevents potential damage to your solar system. Additionally, exploring options like ground-mounted solar panels or community solar programs might be viable alternatives if your home is unsuitable for a rooftop installation.

Understand Your Energy Needs

Understanding your current and future energy needs is vital to preparing your home for solar power installation. Review your past utility bills to identify your average monthly energy consumption. This data will help you gauge how much solar energy you need to generate to offset your electricity usage. Remember that your energy consumption may change over time, especially if you plan to expand your home, add energy-intensive appliances, or invest in electric vehicles.

Once you have a clear picture of your energy needs, you can discuss this information with https://northvalleysolarpower.com/location/antioch-ca/. They will conduct an energy audit to determine your household’s optimal solar panel system size and configuration. This critical step ensures you invest in a solar power system tailored to your specific requirements, thereby maximizing energy efficiency and potential cost savings. Moreover, understanding your energy needs will allow you to explore solar battery options that enable you to store excess energy generated during the day for use during nighttime or cloudy days.

Clear the Installation Area

Preparing your home for solar installation involves more than just technical considerations; it also requires practical steps to ensure a smooth installation process. One essential action is to clear the installation area around your roof and any nearby structures. This means removing any debris, furniture, or obstructions that may hinder the installation team’s access to your roof.

If your solar panels are installed on a ground-mounted system, ensure that the designated area is free of landscaping, furniture, or any other potential obstructions. Informing your neighbors about the upcoming installation can also be beneficial, as it prepares them for any noise or activity during installation. This proactive approach facilitates the installation team’s work and helps maintain good relationships with your neighbors. A clear installation area ensures that the professionals can work efficiently and safely, reducing the time needed to complete the project and minimizing disruptions to your daily routine.

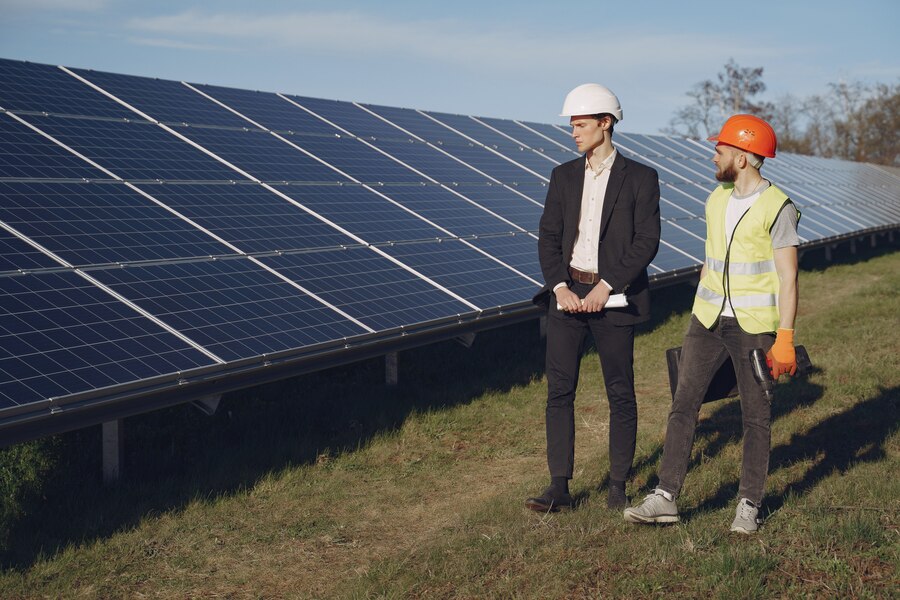
Schedule a Professional Consultation

One of the most important steps in preparing for solar power installation is to schedule a professional consultation with the installation company. This consultation allows for a thorough assessment of your home and discussions about your energy needs, budget, and any concerns you may have about the installation process. A reputable solar power installation company will typically conduct an in-depth site evaluation, examining your roof’s condition, the orientation of your property, and any potential shading issues that may affect solar panel performance.

During this consultation, the installation team will present you with various system options, including different types of solar panels, inverters, and mounting solutions. They can also explain financing options, including potential tax credits, rebates, or leasing arrangements. Understanding the different payment options available can help you make an informed decision that best suits your financial situation. Moreover, scheduling this consultation early allows you to establish a timeline for the installation process, ensuring everything is in place when the installation team arrives.

Preparing your home for solar power installation involves a comprehensive approach that includes assessing your property, understanding your energy needs, clearing the installation area, scheduling professional consultations, reviewing local regulations, and preparing for the installation day. By taking these steps, you can facilitate a smooth transition to solar energy, ensuring that you maximize the benefits of your investment while minimizing disruptions. A well-prepared home enhances the solar installation process’s efficiency and contributes to your long-term energy savings and environmental sustainability. Embrace the opportunity to harness solar power and contribute to a greener future by ensuring your home is ready for installation.

Continue Reading
Click to comment

Leave a Reply

Your email address will not be published. Required fields are marked *

Home Empowerment

Simplicity: The Art of Living Better with Less

Published

on

Simplicity

In today’s fast-paced world, simplicity—or “simpcitu” as some may playfully call it—has become a rare yet essential virtue. The constant bombardment of information, choices, and distractions leaves many feeling overwhelmed. Adopting a simpler lifestyle can reduce stress, increase productivity, and improve overall happiness.

This article explores the power of simplicity, why it matters, and practical ways to embrace it in daily life. Whether you’re decluttering your home, streamlining work, or seeking mental peace, these strategies will help you live with greater clarity and purpose.

Why Simplicity Matters More Than Ever

Modern life is filled with complexities—endless notifications, overflowing closets, packed schedules, and decision fatigue. Research shows that:

  • Clutter increases stress (American Psychological Association).

  • Too many choices lead to decision paralysis (Columbia University study).

  • Minimalism improves focus and well-being (Journal of Positive Psychology).

Simplicity isn’t about deprivation—it’s about intentional living. By removing distractions, you make space for what truly matters.

10 Practical Ways to Embrace Simplicity (Simpcitu) in Daily Life

1. Declutter Your Physical Space

A cluttered environment leads to a cluttered mind. Start small:

  • Use the “20/20 Rule”: If you can replace an item for under $20 in 20 minutes, consider donating it.

  • Try the “One-In, One-Out” rule—for every new item, remove an old one.

  • Adopt minimalist home design—fewer decorations, more open space.

2. Digital Detox: Simplify Your Tech Life

  • Unsubscribe from unnecessary emails.

  • Turn off non-essential notifications.

  • Organize apps into folders (e.g., “Social,” “Productivity”).

  • Schedule screen-free time daily.

3. Streamline Your Schedule

  • Batch similar tasks (e.g., replying to emails in one go).

  • Learn to say “no”—overcommitment leads to burnout.

  • Use time-blocking (dedicate chunks of time to specific activities).

4. Adopt a Capsule Wardrobe

  • Keep 30-40 versatile clothing items that mix and match.

  • Donate clothes you haven’t worn in a year.

  • Focus on quality over quantity.

5. Simplify Your Finances

  • Automate savings and bill payments.

  • Cut unnecessary subscriptions.

  • Follow the 50/30/20 rule: 50% needs, 30% wants, 20% savings.

6. Eat Simple, Nutritious Meals

  • Meal prep to avoid last-minute unhealthy choices.

  • Stick to whole foods—fewer ingredients, better health.

  • Practice mindful eating—slow down and savor meals.

7. Practice Mindfulness & Meditation

  • Start with 5 minutes of daily meditation (apps like Headspace help).

  • Practice deep breathing to reduce stress.

  • Keep a gratitude journal—focus on what you have, not what you lack.

8. Limit Multitasking (Focus on One Thing at a Time)

  • Studies show multitasking reduces productivity by 40% (American Psychological Association).

  • Use the Pomodoro Technique (25-minute focused work sessions).

9. Reduce Decision Fatigue

  • Plan outfits the night before.

  • Create routines (e.g., same breakfast every weekday).

  • Limit social media scrolling—set app timers.

10. Cultivate Meaningful Relationships

  • Spend quality time with loved ones—not just quantity.

  • Let go of toxic relationships that drain energy.

  • Be present—put away phones during conversations.

The Psychological Benefits of Simplicity

Living simply isn’t just about having fewer things—it’s about mental freedom. Benefits include:
✔ Less stress & anxiety
✔ Improved focus & creativity
✔ Stronger relationships
✔ More financial freedom
✔ Greater appreciation for life’s small joys

Final Thoughts: Start Small, Think Big

Simplicity (or “simpcitu”) is a journey, not a destination. You don’t need to overhaul your life overnight—small, consistent changes lead to lasting results.

Which area will you simplify first? Decluttering your home? Cutting digital distractions? Streamlining your schedule? Take one step today toward a calmer, more intentional life.

By embracing simplicity, you create space for what truly matters—joy, purpose, and peace.

Continue Reading

Home Empowerment

Stunning Ways Colored Ostrich Feathers Can Elevate Your Home Decor

Published

on

Colored Ostrich

Introduction to Ostrich Feather Decor

Finding perfect accents that blend sophistication with personality can be challenging in home decor. Enter colored ostrich feathers, an often-overlooked element that can bring vivacity and luxury to any space. Unlike traditional textile choices, ostrich feathers have an inherent gracefulness, moving gently with the slightest air currents and reflecting light with a unique luster. From their historical use as symbols of nobility to modern applications, these feathers can transform a room, adding elegance and whimsy to your living space.

Accenting Living Areas with Feather Arrangements

The living room is often the heart of the home—a place of gathering, relaxation, and expression. Adding an arrangement of colored ostrich feathers to this crucial space can create an exciting focal point that draws the eye and starts conversations. Positioning a tall vase filled with long plumes on a side table or beside a window brings organic lines and a soft contour. With a palette of colors, one can match the feathers to the tones within the space or opt for contrasting colors to make a bold statement.

Bedroom Bliss: Ostrich Feather Comfort

The bedroom should be a serene retreat, and the addition of ostrich feathers can contribute to a luxurious and restful ambiance. Plush feathered pillows or a decorative throw at the end of the bed can introduce an element of tactile pleasure, while wall-mounted feather art above the headboard creates a dreamy backdrop. The quiet elegance of ostrich feathers in the bedroom can make it feel like a cozy, luxurious hideaway.

Dining Delight: Feather Centerpieces

Crafted centerpieces of colored ostrich feathers can turn any dining experience into an occasion. Whether it’s a candlelit dinner for two or a festive gathering, a beautifully designed floral arrangement featuring ostrich feathers can elevate the sense of the occasion. These can be tailored to match the dinnerware, complement the linen, or introduce an unexpected pop of color that sparks joy and elevates the dining experience.

Adding Textural Contrast with Feathers

One of the strengths of ostrich feathers is their distinct texture, which can provide a pleasing contrast in a space dominated by more complex lines and surfaces. Soft, flowing plumes against a brick wall or among metal and glass accessories can soften a space and add interest and variety. Such textural interplay piques interest and adds layers to a room’s story, compelling one to reach out and experience the softness firsthand.

Creating Pops of Color

Incorporating colored ostrich feathers into a home is an excellent way of adding vibrant bursts of color without overwhelming the space. Strategically using small feather accents in unexpected places, like on bookshelves or as a part of a wreath, brings dynamic color and texture to your decor. The effect is a delightful surprise that brightens corners and showcases personal style.

Thematic Elements: Seasonal and Celebration Accents

Ostrich feathers are not just for permanent fixtures in home decor; they’re also perfect for seasonal and celebration accents. Creating wreaths, garlands, or table settings with feathers in autumnal or wintry hues can be a visually striking way to welcome the changing seasons. Similarly, feathers in pastels for Easter or vibrant tones for summer parties offer a thematic flair that can be easily alternated with the calendar.

Artistic Expression: DIY Projects with Feathers

DIY projects with ostrich feathers can be a fulfilling artistic outlet for those who enjoy personalized decor. These feathers can be crafted into wall hangings, lampshades, or even incorporated into mixed-media art, allowing one’s creativity to meld with the unique properties of the feathers. These personal creations become more than just room accents; they reflect the creator’s imagination and aesthetic.

Care and Maintenance of Ostrich Feathers

Understanding the care and maintenance of ostrich feathers is essential to ensure your feather decor maintains its splendor. Regular dusting with a soft brush can keep them looking fresh. Should they become soiled, a gentle hand wash with mild detergent and air drying can restore their appearance. With proper care, these feathers will beautify your home for many years.

Ethical Considerations When Buying Ostrich Feathers

While admiring ostrich feathers’ beauty can add to your decor, it is essential to consider their origin. Purchasing from suppliers that adhere to ethical practices regarding treating animals and sourcing materials is crucial. This ensures that your home’s aesthetic enrichment doesn’t come at the cost of ecological or moral compromise.

Continue Reading

Home Empowerment

Lillienu: Guide to Growing and Caring for This Unique Plant

Published

on

Lillienu

Introduction

Lillienu (a hypothetical or lesser-known plant name for this example—replace with accurate details if referring to a real plant) is a stunning and unique plant that has been gaining popularity among gardening enthusiasts. Whether you’re a beginner or an experienced gardener, understanding how to grow and care for Lillienu can help you cultivate a thriving, eye-catching addition to your indoor or outdoor space.

In this comprehensive guide, we’ll cover everything you need to know about Lillienu, including:

  • What makes Lillienu special

  • Optimal growing conditions

  • Step-by-step care tips

  • Common problems and solutions

  • Propagation techniques

  • Creative ways to display Lillienu

By the end, you’ll have all the knowledge to nurture a healthy Lillienu plant that enhances your home or garden.

What Is Lillienu?

Lillienu (Lilium ‘Lillienu’) is a rare hybrid lily known for its vibrant bi-colored blooms, intoxicating fragrance, and exceptional disease resistance. This stunning perennial features large, upward-facing flowers with creamy white petals edged in deep pink, creating a striking contrast that makes it a standout in summer gardens. Unlike many lily varieties, Lillienu is particularly low-maintenance and deer-resistant, thriving with minimal care while providing weeks of spectacular blooms.

Why Grow Lillienu?

✅ Aesthetic Appeal – Its unique color, shape, or texture makes it a standout in any plant collection.
✅ Air-Purifying Qualities – Like many houseplants, Lillie-nu may help improve indoor air quality.
✅ Easy to Maintain – Perfect for busy plant lovers who want beauty without high upkeep.
✅ Versatile – Thrives both indoors and outdoors, depending on climate.

Optimal Growing Conditions for Lillienu

To keep your Lillie-nu healthy, provide the right environment based on its natural habitat.

1. Light Requirements

  • Indoors: Bright, indirect light (e.g., near an east or north-facing window).

  • Outdoors: Partial shade to avoid scorching leaves (if sensitive to direct sun).

  • Signs of Poor Lighting:

    • Leggy growth → Needs more light.

    • Yellowing leaves → Too much direct sun.

2. Soil Needs

  • Well-draining mix (e.g., cactus/succulent soil with perlite for drainage).

  • Slightly acidic to neutral pH (6.0–7.0).

3. Watering Schedule

  • Rule of Thumb: Water when the top 1–2 inches of soil are dry.

  • Overwatering Risks: Root rot—ensure pots have drainage holes.

  • Underwatering Signs: Wilting, dry leaf edges.

4. Temperature & Humidity

  • Ideal Temp: 65–80°F (18–27°C).

  • Humidity: Moderate (40–60%); mist occasionally if air is dry.

Step-by-Step Lillienu Care Guide

1. Planting Lillienu

  • Choose a pot 1–2 inches larger than the root ball.

  • Use fresh, well-draining soil.

  • Gently loosen roots before planting.

2. Fertilizing

  • Use a balanced liquid fertilizer (e.g., 10-10-10) monthly during growing season (spring/summer).

  • Reduce feeding in fall/winter.

3. Pruning & Maintenance

  • Trim dead or yellowing leaves to encourage new growth.

  • Pinch back stems if the plant becomes leggy.

4. Repotting

  • Repot every 1–2 years or when roots outgrow the container.

  • Best done in early spring.

Common Lillienu Problems & Solutions

Issue Cause Fix
Yellow leaves Overwatering Reduce watering, improve drainage
Brown tips Low humidity Mist leaves or use a pebble tray
Pests (e.g., aphids, spider mites) Poor air circulation Wipe leaves with neem oil or insecticidal soap
Slow growth Lack of nutrients Fertilize appropriately

How to Propagate Lillienu

Expand your collection easily with these methods:

1. Stem Cuttings

  • Cut a healthy stem (4–6 inches long).

  • Remove lower leaves and dip in rooting hormone (optional).

  • Plant in moist soil or water until roots develop.

2. Division

  • Separate root clumps during repotting.

  • Replant divisions in fresh soil.

3. Leaf Cuttings (If Applicable)

  • Gently remove a healthy leaf.

  • Let it callous for a day, then place on soil.

Creative Ways to Display Lillienu

  • Hanging Planters – Showcase trailing varieties.

  • Terrariums – Perfect for miniature species.

  • Tabletop Centerpieces – Pair with complementary plants.

  • Vertical Gardens – Ideal for small spaces.

Final Thoughts

Lillienu is a rewarding plant that adds elegance to any space with minimal effort. By following these care tips—proper lighting, watering, and occasional fertilizing—you’ll enjoy a thriving plant for years.

FAQs

How fast does Lillienu grow?
Moderate growth rate; expect noticeable changes every few months with proper care.

Can Lillienu survive winter outdoors?
Only in frost-free climates; otherwise, bring indoors.

Continue Reading

Trending