Fitness
How to Choose the Right Partial Denture for Your Needs?

Choosing the right partial denture is crucial for maintaining oral health and comfort. A partial denture can significantly improve your ability to eat and speak while providing a more natural appearance. However, selecting the most suitable option requires consideration of various factors. We will explore the key aspects to help you make an informed decision.
Understanding Your Options
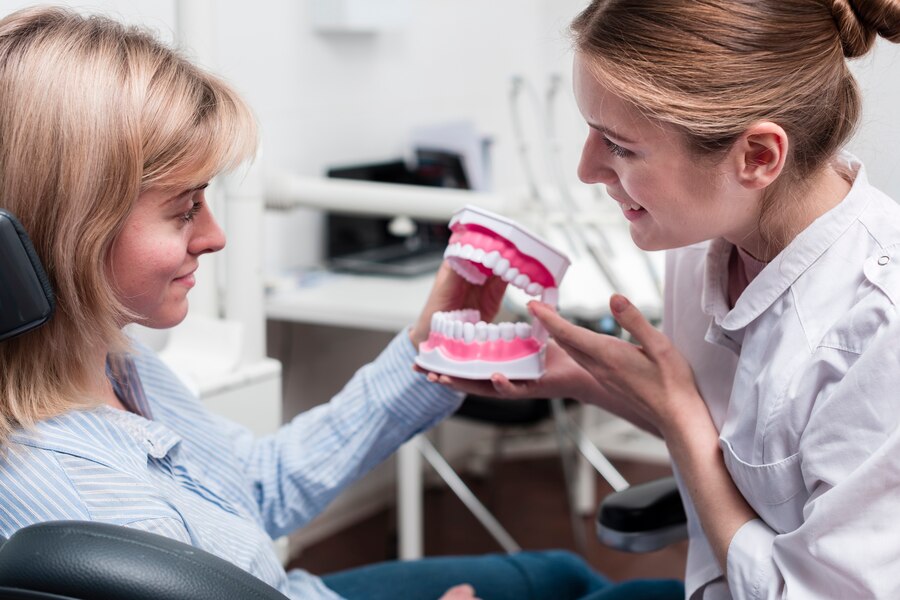
Partial dentures come in several types, each designed to meet different needs and preferences. The main types include removable and fixed partial dentures or bridges. Removable partial dentures are typically made of a combination of acrylic and metal and can be easily taken out for cleaning. They are generally more affordable and can be adjusted as your dental health changes. Fixed partial dentures, on the other hand, are attached to adjacent natural teeth or dental implants and are intended to be a permanent solution. Each type has its advantages and considerations, which should be discussed with your dental care provider to determine the most appropriate.
Assessing Your Dental Health
Before choosing a partial denture, assessing your overall dental health is essential. Your dentist will evaluate the condition of your remaining teeth, gums, and jawbone. This assessment helps determine whether you have sufficient healthy teeth to support a partial denture and if your gums and bone structure can accommodate the device. For individuals with significant dental issues, such as gum disease or bone loss, additional treatments may be required to prepare the mouth for a partial denture. Your dentist will guide you through any necessary procedures to ensure the denture’s successful fit and function.
Considering Comfort and Fit
Comfort and fit are crucial factors when selecting a partial denture. A well-fitting denture will prevent discomfort, sore spots, and difficulty speaking or eating. Removable partial dentures typically come with metal clasps or attachments that secure them to natural teeth. Ensuring that these clasps fit well and do not cause irritation is essential. Fixed partial dentures are generally more stable but require precise placement and adjustments. Your dentist will take detailed impressions and may use computer-aided design (CAD) technology to create a denture that fits comfortably and securely. Communicating discomfort or issues with your dentist is essential to achieve the best fit.
Evaluating Aesthetic Considerations
The appearance of your partial denture can affect your confidence and how you feel about your smile. Removable partial dentures can be customized to match the color and shape of your natural teeth, making them less noticeable. Fixed partial dentures, particularly those made from high-quality materials like porcelain, can provide a more natural look. Discussing your aesthetic preferences with your dentist and considering options that blend seamlessly with your teeth is helpful. A well-designed partial denture can enhance your appearance and make you feel confident in social situations.
Understanding Maintenance and Care
Proper maintenance and care are essential for your partial denture’s longevity and oral health. Removable partial dentures require regular cleaning with denture brushes and specific cleaning solutions to remove food particles and bacteria. They should be removed and cleaned daily to prevent plaque buildup and staining. Fixed partial dentures also require good oral hygiene, including brushing and flossing around the prosthesis to avoid plaque accumulation and gum disease. Your dentist will provide instructions on caring for your partial denture and schedule regular check-ups to monitor its condition and make any necessary adjustments.
Considering Cost and Budget
The cost of partial dentures can vary widely depending on the type, materials, and complexity of the dental work required. Removable partial dentures are generally more affordable and may be covered by dental insurance to a greater extent than fixed partial dentures. Discussing your budget with your dentist and exploring payment options or financing plans if needed is important. While cost is a significant factor, it is essential to balance affordability with the quality and functionality of the denture. Investing in a well-made partial denture can improve your oral health and quality of life in the long term.
Making an Informed Decision
Choosing the right partial denture involves carefully considering various factors, including the type, dental health, comfort, aesthetics, maintenance, and cost. Collaborating closely with your dentist will ensure you receive a denture that meets your needs and preferences. Take the time to discuss your options and ask questions to fully understand each choice’s benefits and limitations. By making an informed decision, you can enjoy improved oral function and a more confident smile.
Selecting the fitting partial denture involves assessing multiple aspects to ensure it meets your needs. From understanding the available options to considering comfort, aesthetics, and cost, each factor is crucial in making the best choice for dental health. With guidance from your dentist and careful consideration of your preferences, you can achieve a solution that enhances your quality of life and maintains your oral well-being.
Fitness
Cold Shower vs. Cold Plunge: Which One Is Right for You?

Ever wondered which cold therapy method packs a bigger punch—cold showers or cold plunges?
Athletes, biohackers, and wellness enthusiasts swear by cold exposure for its benefits, from boosted recovery to mental resilience. But which method delivers better results? And how do you choose the right one for your lifestyle?
In this deep dive, we’ll compare Cold Shower vs. Cold Plunge head-to-head, examining the science, benefits, and practical considerations. By the end, you’ll know exactly which icy ritual belongs in your routine.
Cold Showers vs. Cold Plunges: Key Differences
Before we weigh the pros and cons, let’s define each method:
-
Cold Shower: Standing under cold (50–60°F) water for 1–5 minutes.
-
Cold Plunge: Submerging your body (usually up to the neck) in icy water (40–55°F) for 1–10 minutes.
While both expose you to cold, the intensity and immersion level differ significantly.
The Science Behind Cold Exposure
Cold therapy triggers vasoconstriction (narrowing of blood vessels), reducing inflammation and flushing metabolic waste. It also spikes norepinephrine, a hormone linked to focus and mood.
Studies show cold exposure can:
✅ Reduce muscle soreness (1)
✅ Improve circulation (2)
✅ Boost mental resilience (3)
✅ Enhance immune response (4)
But does a cold shower deliver the same benefits as a full-body plunge?
Cold Showers: The Beginner-Friendly Option
Pros:
✔ Accessible – No special equipment needed.
✔ Gentler – Easier to tolerate for beginners.
✔ Convenient – Fits into daily showers.
Cons:
❌ Less intense – Limited full-body immersion.
❌ Shorter duration – Harder to stay in for long periods.
Best For:
-
Newcomers to cold therapy
-
People seeking a quick energy boost
-
Those with limited space or budget
Expert Tip: Start with 30 seconds of cold at the end of your shower and gradually increase.
Cold Plunges: The Ultimate Cold Therapy
Pros:
✔ Full-body immersion – More effective for recovery (5).
✔ Deeper cold exposure – Stronger metabolic and hormonal response.
✔ Customizable – Adjust temperature and duration.
Cons:
❌ Expensive – Requires a plunge tub or natural cold water source.
❌ Harder to tolerate – Not ideal for beginners.
Best For:
-
Athletes and serious recovery seekers
-
People with chronic inflammation
-
Those committed to long-term cold therapy
Expert Tip: Aim for 3–5 minutes at 50–55°F before progressing to colder temps.
Which One Wins?
Factor | Cold Shower | Cold Plunge |
---|---|---|
Ease of Use | High | Moderate |
Cost | Free | $100–$5,000+ |
Effectiveness | Moderate | High |
Recovery | Good | Excellent |
Verdict:
-
Choose cold showers if you want a simple, daily habit.
-
Opt for cold plunges if you’re serious about recovery and performance.
How to Get Started Safely
For Cold Showers:
-
Finish your normal shower with 30 seconds of cold.
-
Gradually increase to 2–5 minutes.
-
Breathe deeply to manage the shock.
For Cold Plunges:
-
Start with 50–55°F water for 1–2 minutes.
-
Use a timer to avoid overexposure.
-
Warm up naturally afterward (no hot showers immediately).
Warning: Avoid cold exposure if you have heart conditions or Raynaud’s disease.
Final Thoughts: Cold Shower vs. Cold Plunge
Both cold showers and cold plunges offer unique benefits. If you’re testing the waters (literally), start with showers. If you’re chasing peak performance, a cold plunge may be worth the investment.
The best choice? The one you’ll stick with consistently.
Now, over to you—will you brave the cold shower or take the full plunge?
Fitness
Plantar Fasciitis Slippers: Do They Really Help?

Do your feet ache the moment you step out of bed? If you suffer from plantar fasciitis, that sharp heel pain can make mornings miserable. But what if the right pair of slippers could ease your discomfort?
Plantar fasciitis slippers are designed to provide arch support, cushioning, and stability—key elements in relieving foot pain. But do they work? And how do you choose the best pair?
In this guide, we’ll break down:
✔ What makes plantar fasciitis slippers different
✔ Science-backed benefits (do they really help?)
✔ Top features to look for
✔ 5 best slippers for plantar fasciitis in 2024
✔ Expert tips for maximum relief
Let’s dive in.
What Are Plantar Fasciitis Slippers?
Unlike regular slippers, plantar fasciitis slippers are specially designed to:
-
Support the arch (reducing strain on the plantar fascia)
-
Cushion the heel (absorbing shock with every step)
-
Promote proper alignment (preventing overpronation)
Dr. Emily Splichal, a podiatrist and human movement specialist, explains:
“Plantar fasciitis slippers should mimic the support of orthopedic shoes. A contoured footbed and firm heel counter are essential to offload tension on the fascia.”
Who Needs Them?
-
People with chronic heel pain
-
Those recovering from plantar fasciitis
-
Individuals who stand or walk barefoot often
-
Postpartum women (due to relaxin hormone effects on ligaments)
Do Plantar Fasciitis Slippers Really Work?
Research says yes—with caveats.
A 2020 study in the Journal of Foot and Ankle Research found that firm arch support significantly reduces plantar fascia tension. Another study in Clinical Biomechanics showed that heel cushioning decreases impact forces by up to 20%.
But not all slippers are equal.
-
Cheap, flat slippers can worsen pain.
-
Overly soft memory foam lacks support.
-
Non-slip soles are crucial for stability.
Real-World Example:
Sarah, a nurse who spent 12-hour shifts on her feet, switched to supportive slippers at home. “Within two weeks, my morning heel pain dropped by 70%,” she reported.
5 Must-Have Features in Plantar Fasciitis Slippers
1. Firm Arch Support
-
Look for molded EVA or cork footbeds (not just soft foam).
-
Avoid flat slippers—they strain the plantar fascia.
2. Deep Heel Cup
-
Cradles the heel to reduce impact.
-
Prevents lateral instability.
3. Adjustable Straps
-
Ensures a snug fit (loose slippers cause friction).
-
Helpful for swollen feet.
4. Rigid Outsole
-
A slightly stiff sole prevents excessive flexing.
-
Rubber treads prevent slips.
5. Breathable Materials
-
Mesh or leather uppers reduce sweat.
-
Moisture-wicking liners prevent bacteria buildup.
5 Best Plantar Fasciitis Slippers of 2024
1. Oofos OOahh Slide
✅ Podiatrist-recommended
✅ Dual-density foam absorbs shock
✅ Machine washable
Best for: Recovery after workouts
2. Vionic Relax Slipper
✅ Orthotic arch support
✅ Fleece-lined for warmth
✅ APMA-approved
Best for: Cold climates
3. Crocs Classic Clog
✅ Roomy toe box
✅ Cushioned Croslite foam
✅ Easy to clean
Best for: Indoor/outdoor use
4. Hoka Ora Recovery Slide
✅ Meta-Rocker sole reduces strain
✅ Thick midsole cushioning
✅ Lightweight
Best for: Severe heel pain
5. OrthoFeet Asheville Slipper
✅ Adjustable straps
✅ Non-binding design
✅ Wide widths available
Best for: Diabetic neuropathy
Expert Tips to Maximize Relief
-
Wear them immediately after waking (when fascia is tightest).
-
Pair with stretching (calf raises, towel stretches).
-
Replace every 6–12 months (cushioning wears out).
-
Avoid going barefoot (even at home).
Dr. Markinson, NY-based podiatrist, advises:
“Think of plantar fasciitis slippers as a bridge between shoes and barefoot walking. They’re not a cure but a critical part of pain management.”
Final Verdict: Are They Worth It?
If you battle heel pain, morning stiffness, or arch fatigue, plantar fasciitis slippers can be a game-changer. The key is choosing structured support over flimsy fashion slippers.
Try this: Wear supportive slippers for 2 weeks straight (especially first thing in the morning). Track your pain levels—many users report noticeable improvement in that time.
Fitness
Rotisserie Chicken Calories & Grams: A Complete Nutrition Guide

Introduction
Picture this: You’re rushing home after a long day, and the aroma of golden-brown rotisserie chicken fills the air. It’s juicy, convenient, and seemingly healthy—but how many calories are you actually consuming? And what about protein, fat, and serving sizes?
Rotisserie chicken is a go-to meal for busy families, fitness enthusiasts, and health-conscious eaters. But not all chickens are created equal. Depending on seasoning, cooking methods, and portion size, the nutritional value can vary.
In this guide, we’ll break down rotisserie chicken calories per gram, compare different types (plain vs. seasoned), and provide expert-backed tips for making the healthiest choice.
Rotisserie Chicken Nutrition: Calories & Macros
1. Calories in Rotisserie Chicken (Per 100g & Per Serving)
A typical rotisserie chicken (without skin) contains roughly:
-
165–170 calories per 100g (about 3.5 oz)
-
31g protein
-
3.6g fat
-
0g carbs
However, with skin, the numbers change:
-
237–250 calories per 100g
-
23g protein
-
15g fat
Why the difference? The skin adds extra fat and calories—about 50–80 more calories per 100g.
2. Breaking Down a Whole Rotisserie Chicken
An average rotisserie chicken weighs 2–3 lbs (900–1,360g) and yields:
-
Breast (skinless): 284 calories, 53g protein, 6g fat (per ½ breast)
-
Thigh (skinless): 209 calories, 26g protein, 10g fat
-
Drumstick (skinless): 172 calories, 28g protein, 6g fat
-
Wing (with skin): 126 calories, 11g protein, 8g fat
Pro Tip: Removing the skin cuts calories by 20–30%, making it a leaner protein source.
Does Brand Matter? Comparing Store-Bought Rotisserie Chickens
Not all rotisserie chickens are equal. Some stores inject brine (saltwater solution) for juiciness, increasing sodium content. Here’s a quick comparison:
Brand/Store | Calories (per 100g, no skin) | Sodium (mg per serving) |
---|---|---|
Costco | 170 | 460mg |
Walmart | 165 | 510mg |
Whole Foods | 160 | 380mg |
Key Takeaway: If you’re watching sodium, opt for organic or low-sodium options.
Rotisserie Chicken vs. Homemade: Which Is Healthier?
Store-bought rotisserie chicken is convenient, but homemade lets you control ingredients.
Pros of Store-Bought:
✅ Ready-to-eat, time-saving
✅ Consistent flavor
✅ Often cheaper than raw whole chicken
Cons of Store-Bought:
❌ Higher sodium (from brining)
❌ Possible additives (preservatives, MSG)
❌ Skin is often oil-basted
Healthier Alternative:
-
Buy a plain rotisserie chicken, remove the skin, and season at home with herbs.
-
Make your own in an air fryer or slow cooker for lower sodium.
How to Use Rotisserie Chicken for Weight Loss & Muscle Gain
For Weight Loss:
-
Remove the skin to save ~80 calories per serving.
-
Pair with veggies (salads, stir-fries) for fiber.
-
Avoid creamy sauces (ranch, gravy) that add empty calories.
For Muscle Gain:
-
Eat the skin for extra calories (if bulking).
-
Combine with complex carbs (brown rice, quinoa).
-
Meal prep shredded chicken for high-protein lunches.
Real-World Example:
A fitness influencer eats rotisserie chicken + sweet potatoes + broccoli post-workout for a balanced 400-calorie meal.
Common Myths About Rotisserie Chicken
Myth 1: “It’s Always Healthier Than Fried Chicken.”
✅ True if skinless—but some rotisserie chickens are basted in oil, making them similar in fat to fried chicken.
Myth 2: “All Rotisserie Chickens Are High in Protein.”
✅ Mostly true, but brined chickens may have slightly less protein per gram due to water retention.
Myth 3: “Organic Rotisserie Chicken Is Always Better.”
✅ Organic = fewer additives, but check sodium levels—some are still high.
Final Verdict: Is Rotisserie Chicken Good for You?
Yes—if you choose wisely! Here’s how:
✔ Pick skinless portions to save calories.
✔ Compare sodium levels (aim for <500mg per serving).
✔ Use leftovers creatively (soups, tacos, salads).
Rotisserie Chicken Calories & Grams is a nutrient-dense, high-protein option—perfect for quick meals without sacrificing health.
Your Next Step: Smart Rotisserie Chicken Hacks
-
Shred & Freeze for easy meal prep.
-
Make Bone Broth with the carcass for extra nutrients.
-
DIY Seasoning to control salt and flavor.
Now that you know the calories, grams, and best practices, you can enjoy rotisserie chicken guilt-free!
-
Articles3 months ago
How Many Times Can You Regrow Green Onions
-
News10 months ago
Understanding HotLeaks: What You Need to Know
-
Fashion8 months ago
Opals in the USA: A Gemstone Transforming the Crystal Healing Market
-
Entertainment7 months ago
How to Use Snaptik: A Complete Guide to Download TikTok Videos
-
Technology1 year ago
The Wonders of Oh Em Gee Blog
-
Entertainment1 year ago
Bare it All: Unforgettable Skinny Dipping Stories Shared
-
Health1 year ago
Can You Smoke Shrooms? Exploring the Myths and Realities
-
Articles5 months ago
WHAT IS THE DIFFERENCE BETWEEN SEED GARLIC AND FOOD GARLIC?