Technology
From Idea to Reality: Bringing Detailed Designs to Life

In the world of design, transforming a concept into a tangible creation is both an art and a science. Whether you’re an amateur designer sketching ideas for fun or a professional bringing complex designs to fruition, the process of moving from idea to reality involves multiple stages. Each stage plays a crucial role in ensuring your vision can be realized as a functional and aesthetic product.
When you start with a simple sketch, it might seem daunting to imagine how it will eventually become a finished piece. However, understanding the steps and processes involved can simplify this transformation. By breaking it down into manageable parts, the creation process becomes an exciting journey rather than a challenging task.
In this blog post, we’ll explore the entire design process from concept to creation. You’ll learn about the different stages, tools, and techniques that help bring detailed designs to life. Whether you’re designing a new gadget, a piece of furniture, or a work of art, these insights will help guide you from the initial idea to the final product.
The Importance of Conceptualization
Every creation begins with an idea, and the strength of your concept often determines the success of your project. Conceptualization is the phase where you brainstorm and generate ideas, focusing on creativity without constraints. This is where you dream big and consider various possibilities before settling on the best path forward.
The key is to remain open to new ideas and inspirations. Use brainstorming sessions, mood boards, and sketchbooks to capture your thoughts. You might find it helpful to research trends and existing solutions to better understand the landscape you’re working within. Remember, your concept is the foundation upon which your creation will be built.
Refining your concept is just as important. Take time to evaluate your ideas critically, considering factors like feasibility, audience needs, and market trends. This process will help you narrow down your options and focus on the most promising concept.
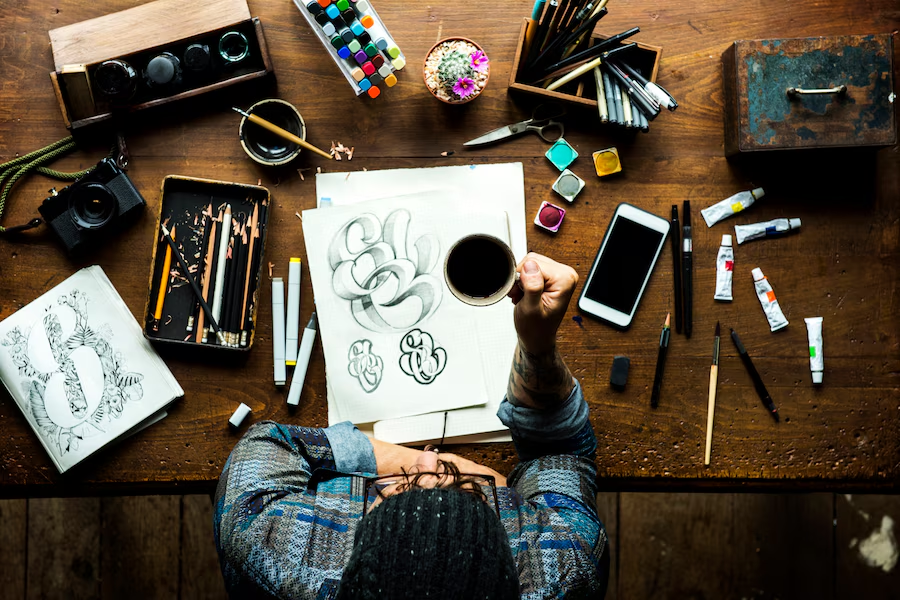
Sketching and Drawing Detailed Plans
Once your concept is clear, the next step is translating it into a visual form through sketches and drawings. This stage allows you to explore the details of your design, considering elements like shape, form, and functionality. Good sketches are the blueprint for your creation, providing a visual reference for the entire process.
Start with rough sketches to capture the essence of your idea. These don’t need to be perfect but should convey the key aspects of your design. Gradually move on to more detailed drawings, adding dimensions and notes to guide future steps. This is where your design starts to take shape, transitioning from abstract concept to concrete plan.
Make use of digital tools if possible. Software programs like Adobe Illustrator or SketchUp can help you create precise drawings with ease. These tools offer features like layers and grids, enabling detailed designs that are easy to modify and adjust as needed.
Prototyping and Testing Your Design
Prototyping is a crucial stage in the creation process, allowing you to test and refine your design before committing to the final product. A prototype is a preliminary model that lets you experiment with materials, dimensions, and functions. It serves as a tangible representation of your design, helping you identify potential issues early on.
Building a prototype can be as simple or complex as needed. For instance, you can create a basic model using household materials or employ advanced tools like 3D printers for more complex designs. The goal is to evaluate your design’s functionality, usability, and aesthetics in a real-world context.
Testing your prototype is equally important. Gather feedback from peers, experts, or potential users to assess your design’s effectiveness. Use this feedback to make necessary adjustments and improvements, ensuring your final product meets all expectations.
Material Selection and Sourcing
Choosing the right materials is a critical step in bringing your design to life. The materials you select will impact your creation’s durability, appearance, and cost. It’s essential to consider factors like strength, weight, texture, and sustainability when selecting materials for your design.
Start by researching materials that align with your design’s requirements. Visit local suppliers and manufacturers, or explore online resources to compare options. Pay attention to material properties and characteristics to ensure they suit your design’s needs.
Cost considerations are also important. Balancing quality and budget is a common challenge, especially for small-scale projects. Look for suppliers who offer competitive prices without compromising on material quality, ensuring your creation is both affordable and durable.
Craftsmanship and Technical Skills
Craftsmanship plays a vital role in the transformation from design to creation. Your technical skills and attention to detail will directly influence the quality of your finished product. Whether you’re working by hand or using machines, precision and expertise are key.
Invest time in honing your craft. Take classes, watch tutorials, or seek guidance from experienced artisans. Practice regularly to improve your skills and gain confidence in your abilities. Effective craftsmanship ensures your design is executed with accuracy and finesse.
Consider outsourcing certain tasks if needed. For example, if your design requires intricate metal work or laser cutting in Utah, partnering with specialists can enhance your creation’s quality. Collaborating with skilled professionals can fill gaps in your expertise, ensuring a high standard of craftsmanship.
Manufacturing and Production
For designs intended for mass production, manufacturing becomes an integral part of the process. This stage involves scaling your creation from a single prototype to multiple units, requiring careful planning and logistics. Manufacturing decisions can impact your design’s consistency, cost, and environmental footprint.
Choose manufacturers who align with your values and quality standards. Look for partners with experience in your industry and a track record of delivering reliable results. Clear communication is essential, ensuring your design specifications are accurately translated into the production process.
Consider sustainable practices in your manufacturing approach. Opt for eco-friendly materials and processes whenever possible, minimizing waste and reducing your environmental impact. Responsible production not only benefits the planet but also enhances your brand’s reputation.
Quality Control and Assurance
Quality control is vital to ensure your creation meets the desired standards and functions as intended. Implementing a robust quality assurance process helps identify defects and inconsistencies before your product reaches the market. This step is crucial for maintaining customer satisfaction and brand credibility.
Develop a checklist of criteria your design must meet, including functionality, safety, and aesthetics. Conduct thorough inspections at various stages of production to catch potential issues early. Regular testing and evaluation help ensure your creation performs reliably in real-world conditions.
Feedback from users and stakeholders can also be valuable in refining your quality control processes. Listen to their experiences and suggestions to identify areas for improvement, continuously enhancing your design’s quality and performance.
Bringing Detailed Designs to Life
The process of bringing detailed designs to life is a rewarding and fulfilling endeavor. Each stage, from conceptualization to quality assurance, contributes to the successful realization of your vision. By understanding and mastering these steps, you gain the tools to create exceptional and impactful products.
Remember that design is an iterative process—each project offers opportunities for learning and growth. Don’t be afraid to take creative risks and explore new approaches. The knowledge and skills you acquire along the way will empower you to tackle increasingly complex and ambitious designs.
Whether you’re a seasoned designer or just starting your creative journey, the principles outlined in this blog post provide a roadmap for success. With dedication, creativity, and perseverance, you can transform any concept into a remarkable creation.
Technology
Must-Have Recording Equipment for Beginners on a Budget

Embarking on the journey of sound recording can be an exhilarating experience, but it often comes with a common concern: budget. While professional studios are decked with state-of-the-art gear, beginners looking to dip their toes into the recording world must be supported by the costs. There are essential pieces of recording equipment that are affordable without compromising on quality. Here’s a guide to the must-have gear to kickstart your recording endeavors without breaking the bank.
Choosing an Audio Interface
An audio interface is the cornerstone of any home recording setup. It bridges your instruments, microphones, and your computer, converting analog signals into digital ones. Beginners should seek a reliable, entry-level interface that provides clear sound without latency issues. Look for interfaces with at least two inputs, which allow you to record multiple sources simultaneously.
Cables and Stands: Supporting Cast
Pay attention to the supporting accessories like cables and stands. Poor-quality cables can introduce noise and ruin recordings, so opt for cables that promise durability and precise signal transmission. The microphone should be sturdy and adjustable to accommodate different recording situations without causing any unwanted movement or noise.
For beginners on a budget, assembling a home recording studio might seem daunting, but it’s entirely feasible with some research and the right choices. In fact, recording equipment Huntington WV options are available for those starting out, ensuring that financial constraints are not a roadblock to your audio production dreams. Investing in good-quality, budget-friendly recording gear is the smart approach to building a foundation that can grow with your skills.
Microphones: The Sound Capturers
Microphones are the ears of your studio, and selecting the right one is pivotal. A versatile large-diaphragm condenser microphone is ideal for beginners and suitable for vocal recordings and various instruments. Despite the common misconception, several budget-friendly microphones are durable enough for extensive use and do not skimp on sound clarity.
Headphones and Monitors: Hear Every Detail
Quality headphones are crucial for monitoring during recording sessions, especially in a home studio setting. They should offer a flat frequency response for accurate sound reproduction. Meanwhile, studio monitors and speakers designed for professional audio production provide a true picture of what your mix sounds like. Finding affordable options that deliver a transparent and honest sound image is possible.
DAW: The Recording Software
Recording software, a Digital Audio Workstation (DAW), is where all the magic happens. Many DAWs suitable for beginners are either free or relatively inexpensive. While they might have only some of the advanced features of costly versions, they provide the necessary tools to produce professional-quality sound recordings.
Technology
RaterPoint: The Ultimate Guide to Maximizing Your Earnings

In today’s gig economy, earning extra income online has never been easier—thanks to platforms like RaterPoint. Whether you’re looking for a side hustle or a flexible full-time opportunity, RaterPoint offers a legitimate way to make money by completing simple tasks like surveys, reviews, and data rating.
But how do you maximize your earnings on RaterPoint? How can you attract and retain visitors to your content about this platform? This comprehensive guide covers everything you need to know—from signing up to advanced earning strategies—while ensuring high EEAT (Experience, Expertise, Authority, Trustworthiness) and SEO optimization for better visibility.
What Is RaterPoint?
RaterPoint is an online platform that pays users for completing micro-tasks such as:
-
Online surveys
-
Product reviews
-
Search engine evaluation
-
App testing
-
Data categorization
It’s similar to other well-known platforms like Swagbucks, Amazon Mechanical Turk, and Clickworker, but with its own unique opportunities.
Why Choose RaterPoint?
✅ Flexible Work – Earn anytime, anywhere.
✅ No Special Skills Required – Simple tasks for everyone.
✅ Multiple Payment Options – PayPal, gift cards, and more.
✅ Legitimate & Trusted – Avoid scams with a verified platform.
How to Sign Up and Get Started on RaterPoint
1. Create an Account
-
Visit the official RaterPoint website.
-
Sign up using your email or social media accounts.
-
Complete your profile with accurate details (more tasks = more earnings).
2. Verify Your Account
Some tasks may require identity verification to prevent fraud. Have your ID ready.
3. Start Completing Tasks
Browse available tasks and choose those that match your interests.
4. Cash Out Your Earnings
Most platforms have a minimum payout threshold (e.g., $10). Check RaterPoint’s payment policies.
Proven Strategies to Maximize Earnings on RaterPoint
1. Complete Your Profile 100%
More profile details = higher chances of qualifying for tasks.
2. Check for Tasks Daily
New tasks appear frequently—log in daily to grab the best ones.
3. Be Consistent & Fast
Some tasks have limited availability. Speed and accuracy increase earnings.
4. Join Multiple Platforms
Combine RaterPoint with Swagbucks, InboxDollars, or UserTesting for more income streams.
5. Refer Friends
Many platforms offer referral bonuses—invite others and earn extra.
Common Challenges & How to Overcome Them
❌ Low Task Availability
-
Solution: Check at different times (early mornings or weekdays).
❌ Disqualifications from Surveys
-
Solution: Answer honestly but consistently to avoid rejection.
❌ Delayed Payments
-
Solution: Stick to verified tasks and read payment terms carefully.
Is RaterPoint Worth It in 2024?
Pros:
✔ Easy to use – No experience needed.
✔ Flexible schedule – Work as little or as much as you want.
✔ Extra income – Perfect for students, stay-at-home parents, or freelancers.
Cons:
✖ Not a full-time income – Best as a side hustle.
✖ Task availability varies – Earnings may fluctuate.
Verdict: If you’re looking for easy, flexible side income, RaterPoint is worth trying.
Top Alternatives to RaterPoint
If Rater-Point isn’t a perfect fit, consider:
-
Swagbucks – Surveys, shopping cashback, and videos.
-
Amazon Mechanical Turk – Small tasks for Amazon.
-
UserTesting – Paid website and app testing.
-
Clickworker – Data entry and micro-jobs.
Final Tips to Boost Your RaterPoint Success
-
Set daily goals (e.g., $5/day).
-
Use a separate email for task notifications.
-
Join RaterPoint communities (Reddit, Facebook groups) for insider tips.
Conclusion: Start Earning on RaterPoint Today!
RaterPoint is a legitimate, flexible way to earn extra cash in your free time. By following the strategies in this guide, you can maximize your earnings and make the most of this platform.
Ready to start? Sign up today and turn your spare time into cash!
FAQs
Is RaterPoint free to join?
Yes, signing up is completely free.
How much can I realistically earn?
Most users earn 50−200/month depending on activity.
Are there any scams to avoid?
Only use the official Rater-Point site—avoid third-party “hacks.”
How do I get paid?
Payments are usually via PayPal, gift cards, or bank transfers.
Technology
Snowbreak Locate Uninterruptible Power Supply: Backup Power

Introduction
Power outages can disrupt businesses, damage sensitive electronics, and cause data loss. If you’re searching for “snowbreak locate uninterruptible power supply,” you likely need a reliable UPS (Uninterruptible Power Supply) to safeguard your equipment during winter storms or unexpected blackouts.
This guide covers everything you need to know about selecting, installing, and maintaining a UPS for snowbreak conditions. We’ll explore:
-
What a UPS is and why it’s essential
-
How to choose the best UPS for snowbreak-prone areas
-
Top UPS models for extreme weather
-
Installation and maintenance tips
-
Common mistakes to avoid
By the end, you’ll have the knowledge to keep your critical systems running, even during the harshest winter conditions.
What Is an Uninterruptible Power Supply (UPS)?
A UPS is a backup power device that provides emergency electricity when the main power fails. Unlike generators, a UPS offers instant power with no delay, protecting connected devices from sudden shutdowns.
Types of UPS Systems
-
Standby (Offline) UPS – Basic protection, switches to battery during outages (best for home use).
-
Line-Interactive UPS – Adjusts voltage fluctuations without switching to battery (ideal for offices).
-
Online (Double-Conversion) UPS – Continuously powers devices from the battery, offering the highest protection (critical for servers and medical equipment).
For snowbreak conditions, an online or line-interactive UPS is recommended due to its ability to handle frequent power fluctuations.
Why You Need a UPS for Snowbreak Conditions
Winter storms can cause:
-
Power surges from grid instability
-
Blackouts due to heavy snow and ice
-
Voltage drops affecting sensitive electronics
A snowbreak-ready UPS ensures:
✔ Continuous power for computers, servers, and medical devices
✔ Protection against data loss from sudden shutdowns
✔ Surge protection from electrical spikes
✔ Stable voltage to prevent hardware damage
How to Choose the Best UPS for Snowbreak Locations
1. Determine Your Power Needs
Calculate the total wattage of devices you want to protect. A typical desktop computer may need 300-600W, while servers require 1000W or more.
2. Battery Runtime
For snow-prone areas, opt for a UPS with extended battery life (15+ minutes) or models that support external battery packs.
3. Voltage Regulation
Choose a UPS with AVR (Automatic Voltage Regulation) to handle unstable power common during storms.
4. Weather Resistance
While most UPS units are indoor devices, ensure they’re installed in a dry, temperature-controlled location. Some industrial UPS models are built for harsh environments.
5. Scalability
If you expect power needs to grow, select a modular UPS that allows additional battery units.
Top UPS Models for Snowbreak Conditions
Model | Type | Capacity | Runtime | Best For |
---|---|---|---|---|
APC Smart-UPS 1500VA | Line-Interactive | 1500VA/900W | 15-30 min | Servers, Workstations |
CyberPower OL1500RTXL2U | Online (Double-Conversion) | 1500VA/1350W | 10-20 min | Data Centers, Medical Equipment |
Eaton 5SC 1500VA | Line-Interactive | 1500VA/1000W | 10-15 min | Small Businesses |
Tripp Lite SMART1500LCD | Line-Interactive | 1500VA/900W | 8-15 min | Home Offices |
Best Budget Option: *APC Back-UPS Pro 1500VA* – Affordable, reliable, and sufficient for most home/office needs.
Installation Tips for Snowbreak UPS Systems
-
Place Indoors – Avoid garages or sheds where temperatures drop below freezing.
-
Use a Surge Protector – Extra protection against electrical spikes.
-
Keep Ventilated – Prevent overheating by ensuring proper airflow.
-
Test Regularly – Simulate a power outage to confirm battery health.
-
Battery Maintenance – Replace batteries every 2-3 years for optimal performance.
Common UPS Mistakes to Avoid
❌ Overloading the UPS – Exceeding wattage limits reduces efficiency.
❌ Ignoring Alarms – Beeping indicates power issues; address them immediately.
❌ Skipping Battery Replacements – Weak batteries won’t last during outages.
❌ Poor Placement – Avoid damp or extremely cold locations.
Conclusion
A snowbreak locate uninterruptible power supply is a must-have for homes and businesses in winter-prone areas. By selecting the right UPS, installing it properly, and maintaining it, you can avoid costly downtime and protect your electronics.
FAQs
Can a UPS work in freezing temperatures?
Most UPS batteries lose efficiency below 32°F (0°C). Keep them in a climate-controlled space.
How long will a UPS last during a snowstorm?
Depends on battery capacity—typically 5-30 minutes (longer with external batteries).
Should I use a UPS with a generator?
Yes! A UPS bridges the gap until the generator starts (2-10 seconds).
-
Articles2 weeks ago
How Many Times Can You Regrow Green Onions
-
News8 months ago
Understanding HotLeaks: What You Need to Know
-
Fashion5 months ago
Opals in the USA: A Gemstone Transforming the Crystal Healing Market
-
Technology11 months ago
The Wonders of Oh Em Gee Blog
-
Entertainment12 months ago
Bare it All: Unforgettable Skinny Dipping Stories Shared
-
Health11 months ago
Can You Smoke Shrooms? Exploring the Myths and Realities
-
Entertainment5 months ago
How to Use Snaptik: A Complete Guide to Download TikTok Videos
-
Articles3 months ago
WHAT IS THE DIFFERENCE BETWEEN SEED GARLIC AND FOOD GARLIC?