Connect with us

Home Decor

Everything you need to know about Tradescantia Nanouk

Published

on

tradescantia nanouk

Introduction

Have you ever come across a plant so strikingly beautiful that it stops you in your tracks? Enter Tradescantia Nanouk, a true gem in the world of houseplants. This vibrant, easy-to-care-for plant has captured the hearts of many plant enthusiasts, and it’s no surprise why. In this article, we’ll dive deep into the fascinating world of Tradescantia Nanouk, exploring its characteristics, care requirements, and much more.

Understanding Tradescantia Nanouk

Physical Characteristics

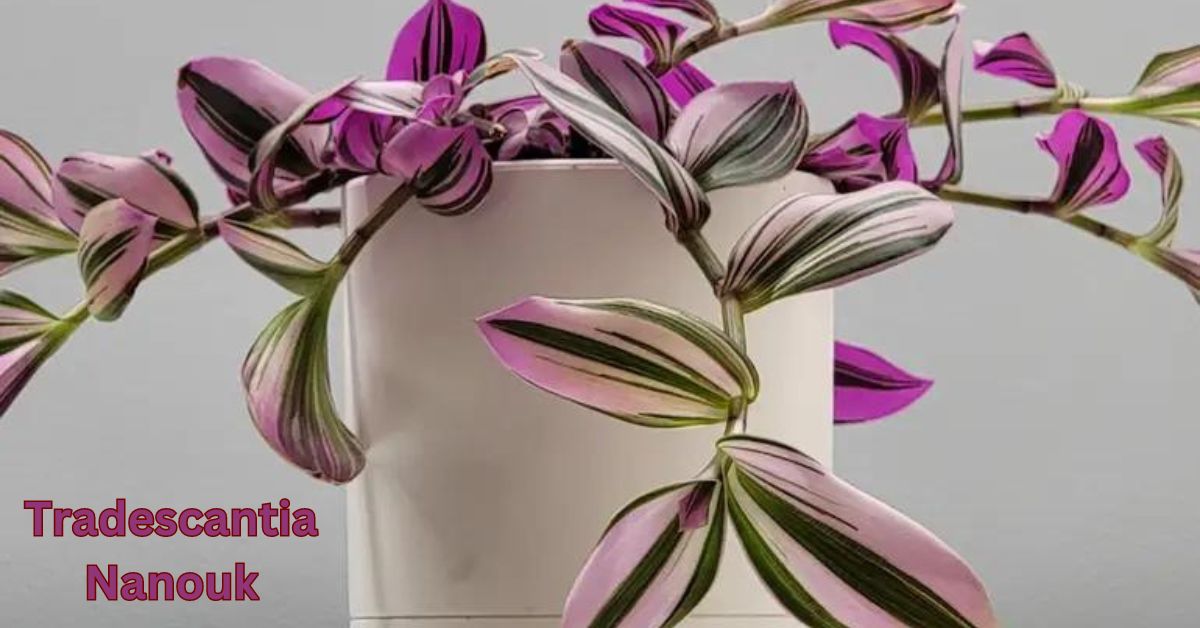
Tradescantia Nanouk, also known as Fantasy Venice, boasts a stunning combination of colors. Its leaves are a beautiful blend of green, pink, and white, making it a standout addition to any plant collection. The leaves are thick and slightly fuzzy, giving them a unique texture that adds to their charm.

Unique Features

One of the most remarkable features of Tradescantia Nanouk is its ability to trail. This makes it perfect for hanging baskets or placing on shelves where its vines can cascade down. Additionally, this plant is known for its resilience, able to bounce back even if it faces a bit of neglect.

Ideal Growing Conditions

Light Requirements

Tradescantia Nanouk thrives in bright, indirect light. While it can tolerate lower light conditions, its vibrant colors are best maintained with plenty of indirect sunlight. Direct sunlight, however, can scorch its leaves, so be mindful of placement.

Temperature and Humidity

This plant prefers a warm environment, ideally between 65-75°F (18-24°C). It can handle typical household humidity levels but will appreciate a bit of extra humidity, especially in dry climates. Misting the plant occasionally can help keep it happy.

Soil Preferences

Well-draining soil is crucial for Tradescantia Nanouk. A standard potting mix combined with perlite or sand works well to ensure that the roots don’t sit in water, which can lead to rot.

Planting Tradescantia Nanouk

Choosing the Right Pot

Select a pot with drainage holes to prevent water from accumulating at the bottom. This is essential for avoiding root rot, a common issue with many houseplants.

Soil Preparation

Mix equal parts of potting soil and perlite or sand to create the perfect growing medium. This mixture will provide the necessary nutrients while ensuring good drainage.

Planting Steps

  1. Fill the pot halfway with the prepared soil mixture.
  2. Place the Tradescantia Nanouk in the pot, ensuring the roots are spread out.
  3. Fill in around the roots with more soil, pressing gently to eliminate air pockets.
  4. Water thoroughly until water drains out of the bottom of the pot.

Watering Needs

Frequency of Watering

Tradescantia Nanouk prefers to dry out slightly between waterings. Typically, watering once a week is sufficient, but this can vary depending on the climate and indoor conditions.

Signs of Overwatering and Underwatering

Overwatering can lead to root rot, so it’s important to let the soil dry out a bit before watering again. Signs of overwatering include yellowing leaves and a soggy soil surface. Underwatering, on the other hand, may cause the leaves

to wilt and dry out. If you notice the leaves becoming crispy or the plant looking droopy, it’s time to give it a good drink.

Fertilizing Tradescantia Nanouk

Best Fertilizers to Use

A balanced, water-soluble fertilizer works best for Tradescantia Nanouk. Look for one with an equal ratio of nitrogen, phosphorus, and potassium (such as a 10-10-10 formula) to provide all the necessary nutrients for healthy growth.

Fertilizing Schedule

Fertilize your Tradescantia Nanouk once a month during the growing season, which typically runs from spring through early fall. Reduce fertilizing during the winter months when the plant’s growth slows down.

Pruning and Maintenance

How to Prune for Optimal Growth

Pruning helps maintain the plant’s shape and encourages bushier growth. Use clean, sharp scissors or pruning shears to trim back leggy stems and remove any dead or damaged leaves. This not only improves the plant’s appearance but also promotes new growth.

Managing Pests and Diseases

Tradescantia Nanouk is relatively resistant to pests, but it can occasionally attract spider mites, aphids, or mealybugs. Regularly inspect your plant for signs of pests, such as tiny webs or sticky residue. If you notice any, treat the plant with insecticidal soap or neem oil.

Propagation Techniques

Stem Cuttings

Stem cuttings are the most popular method for propagating Tradescantia Nanouk. Cut a healthy stem just below a node, where the leaves attach to the stem.

Water Propagation

Place the cut stem in a jar of water, ensuring the node is submerged. Change the water every few days to keep it fresh. Roots should start to develop within a week or two. Once the roots are a few inches long, the cutting can be transferred to soil.

Soil Propagation

Alternatively, you can plant the cutting directly into soil. Dip the cut end in rooting hormone (optional) and place it in a small pot filled with a well-draining soil mix. Keep the soil moist until roots establish.

Common Problems and Solutions

Yellowing Leaves

Yellowing leaves can be a sign of overwatering or poor drainage. Ensure your plant is in well-draining soil and that the pot has adequate drainage holes. Allow the soil to dry out between waterings.

Leggy Growth

Leggy growth is often due to insufficient light. Move your plant to a brighter location with plenty of indirect sunlight to encourage more compact and healthy growth.

Root Rot

Root rot occurs when the plant is overwatered and the roots sit in soggy soil. To prevent this, use well-draining soil and ensure the pot has drainage holes. If you suspect root rot, remove the plant from the soil, trim away the affected roots, and repot in fresh soil.

Seasonal Care Tips

Winter Care

During winter, reduce watering as the plant’s growth slows down. Ensure the plant is kept away from cold drafts and maintain a stable temperature to prevent stress.

Summer Care

In the summer, your Tradescantia Nanouk may need more frequent watering due to increased evaporation. Also, consider misting the plant to provide extra humidity during hot, dry periods.

Decorative Uses

Indoor Décor Ideas

Tradescantia Nanouk’s trailing vines make it an excellent choice for hanging baskets or high shelves. Its vibrant colors add a touch of elegance to any room. Pair it with other colorful plants to create a striking indoor garden.

Combining with Other Plants

This plant looks stunning when combined with other plants that have contrasting leaf shapes and colors. Consider pairing it with ferns, succulents, or other Tradescantia varieties for a diverse and eye-catching display.

Environmental Benefits

Air Purification

Like many houseplants, Tradescantia Nanouk can help improve indoor air quality by filtering out pollutants and releasing oxygen. This makes it a great addition to your home or office.

Psychological Benefits

Having plants like Tradescantia Nanouk around can also boost your mood and reduce stress. Its vibrant colors and lush growth can create a calming and refreshing atmosphere.

Tradescantia Nanouk in Landscaping

Outdoor Uses

While typically grown indoors, Tradescantia Nanouk can also thrive outdoors in warm climates. It works well as ground cover or in containers on patios and balconies. Just be sure to provide partial shade to protect it from direct sunlight.

Companion Plants

Tradescantia Nanouk pairs well with other shade-loving plants in the garden. Consider combining it with hostas, ferns, or impatiens for a lush, green space with pops of color.

Popular Varieties

Similar Species

Other Tradescantia species, such as Tradescantia zebrina (Wandering Jew) and Tradescantia fluminensis, share similar care requirements and can be great additions to your plant collection.

Unique Varieties

Tradescantia Nanouk is particularly prized for its unique color palette. However, you might also enjoy varieties like Tradescantia pallida, known for its deep purple leaves, or Tradescantia sillamontana with its fuzzy, silver foliage.

Conclusion

Tradescantia Nanouk is a delightful plant that brings both beauty and ease of care to any indoor garden. Its vibrant colors, trailing vines, and resilience make it a favorite among plant enthusiasts. Whether you’re a seasoned plant parent or a beginner, Tradescantia Nanouk is sure to brighten up your space and lift your spirits.

FAQs

How often should I water Tradescantia Nanouk?

Water once a week, allowing the soil to dry out slightly between waterings. Adjust frequency based on indoor climate and conditions.

Can Tradescantia Nanouk grow in low light?

While it can tolerate low light, its colors are more vibrant in bright, indirect light. Insufficient light may lead to leggy growth.

How do I propagate Tradescantia Nanouk?

Propagate using stem cuttings, either by placing them in water until roots develop or planting them directly in soil.

What are the common pests affecting Tradescantia Nanouk?

Common pests include spider mites, aphids, and mealybugs. Regular inspection and treatment with insecticidal soap or neem oil can help manage infestations.

Is Tradescantia Nanouk safe for pets?

Tradescantia species can be mildly toxic to pets if ingested, causing irritation. It’s best to keep them out of reach of curious pets.

Continue Reading
Click to comment

Leave a Reply

Your email address will not be published. Required fields are marked *

Home Decor

Maximizing Small Spaces: Creative Interior Design Tips for Any Home

Published

on

Small Spaces

Introduction to Small Space Design

Designing for small spaces can be both challenging and rewarding. With thoughtful planning and creativity, even the tiniest rooms can be transformed into functional and stylish areas. From choosing an interior design for bathroom St Louis to living room arrangements, these tips can help you make the most of any space. Clever design solutions can ensure your home feels comfortable and spacious even if you have limited square footage.

The principles of small-space design revolve around maximizing your home’s usability and aesthetic appeal. By leveraging multipurpose furniture and innovative storage solutions, you can create a living area that suits your needs without feeling cramped. Here are some expert tips to help you achieve a well-designed small space, focusing on practical techniques and unique ideas to improve your homework.

Choosing Multi-Functional Furniture

One of the critical strategies for small space design is selecting multi-functional furniture. Pieces like sofa beds, extendable dining tables, and storage ottomans serve multiple purposes, allowing you to make the most of every square foot. Multipurpose furniture is practical and can add a layer of sophistication to your home. For example, a sofa bed can be a comfortable seating area during the day and transform into a cozy bed for guests at night. Similarly, an extendable dining table can accommodate a dinner party or be compacted for everyday use.

Top Multi-Functional Furniture Ideas:

  • Sofa Beds: Perfect for studio apartments or guest rooms, combining seating and a bed in one. Look for designs that also offer under-seat storage for added functionality.
  • Extendable Dining Tables: Great for small dining areas, allowing you to adjust the size based on your needs. Modern designs often include built-in storage for tableware, maximizing the utility of your dining space.
  • Storage Ottomans: These can be used as footrests, coffee tables, or extra seating while hiding clutter. Some ottomans also come with flip-top trays, making them versatile for serving drinks or snacks.

Utilizing Vertical Space

When floor space is limited, think vertically. Use tall bookshelves, wall-mounted shelves, and hanging planters to keep your floor clear and add visual interest to your room. Vertical storage solutions help to create defined areas without consuming valuable floor space. For example, a tall bookshelf can delineate a living area from a dining space in an open-concept setting while providing ample storage for books and decorative items.

Vertical gardening is another creative option for those who love plants but lack traditional garden space. Installing wall planters or vertical gardens allows you to bring greenery into your home, enhancing aesthetics and air quality.

Maximizing Natural Light

Natural light can make any space feel larger and more inviting. Keep window treatments light and airy, and position mirrors to reflect light throughout the room. Heavy drapes can make a room feel closed off, so opt for sheer curtains or blinds that allow ample light in. Natural light brightens a space and has numerous health benefits, including boosting mood and productivity.

Tips for Enhancing Natural Light:

  • Light Window Treatments: Use sheer fabrics that let in light while providing privacy. Light-colored window treatments can enhance the brightness, making the room feel more open and airy.
  • Mirrors: Place mirrors opposite windows to reflect light and create the illusion of a larger space. Even small mirrors strategically placed can amplify natural light and add depth to a room.
  • Open Layout: Arrange furniture to allow light to flow freely. Avoid placing large, bulky furniture near windows that could block natural light.

Effective Color Schemes for Small Spaces

Light colors make spaces feel more extensive and more open. Consider a palette of soft neutrals or pastels to enhance the airy feel of your room. Adding pops of one or two bright colors can add life without overwhelming the space. Neutral color schemes also provide a versatile backdrop for various decorating styles, allowing you to easily change accent colors and accessories.

Color Scheme Ideas:

  • Neutral Palette: Shades of white, beige, and taupe create a calm and expansive feel. These colors reflect light, making the room appear more spacious and serene.
  • Pastels: Light blues, greens, and pinks add a touch of color without overpowering the room. Pastels can also evoke a sense of tranquility and softness, perfect for creating a relaxing atmosphere.
  • Accent Colors: Incorporate bold accents in small doses, such as throw pillows or artwork. Bright cushions, rugs, or vases in vibrant hues can inject personality and contrast into a light, neutral backdrop.

Using Mirrors to Create Illusions of Space

Mirrors are a fantastic tool in small-space design. Placing a large mirror opposite a window can double the natural light in a room. Smaller mirrors can also be used to reflect light and add depth. Strategically placing mirrors can significantly impact the perception of the room’s size and brightness. Use mirrored furniture or accessories to add a subtle reflective quality throughout the room.

Besides reflecting light, mirrors can also function as statement pieces, adding elegance and visual interest to your decor. Mirrored backsplashes in kitchens or mirrored tiles in bathrooms can also enhance the sense of spaciousness and luxury.

Smart Organization and Storage Solutions

Clutter can quickly make a small space feel cramped. Invest in intelligent solutions like under-bed storage boxes, wall hooks, and modular shelving units. Keeping your space organized will make it feel more extensive and more functional. Effective organization transforms a chaotic area into a serene and efficient living environment, allowing you to enjoy your space more fully.

Effective Storage Solutions:

  • Under-Bed Storage: Use the space beneath your bed for seasonal clothes or extra linens. Rolling storage bins or vacuum-sealed bags can help you maximize this often overlooked area.
  • Wall Hooks are perfect for hanging coats, bags, or keys to keep them off the floor. They can also be decorative, adding charm and character to entryways or bathrooms.
  • Modular Shelving: These customizable shelves can be adjusted to fit your changing storage needs. They can adapt to different room layouts and storage requirements, whether wall-mounted or free-standing.

Adding Your Personal Touch

Finally, remember not to add personal touches that make your space uniquely yours. These elements can bring warmth and personality to your small space through artwork, textiles, or treasured keepsakes. Personalized decor makes your home feel inviting and reflective of your style. Displaying meaningful items enhances the visual appeal and connects to your space, making it feel like home.

Personal Touch Ideas:

  • Artwork: Displaying favorite pieces can add character and tone to the room. Consider a gallery wall to showcase a collection of photos, prints, or paintings that tell a story.
  • Textiles: To incorporate color and texture, use throw blankets, rugs, and cushions. Changing textiles seasonally can refresh a room’s look without much effort or expense.
  • Keepsakes: Decorate with sentimental-valued items to create a heartfelt and personalized space. Family heirlooms, travel souvenirs, or DIY creations can add unique touches that resonate with your history and experiences.
Continue Reading

Home Decor

Porcelain Countertops: The Ultimate Guide

Published

on

Porcelain Countertops

Porcelain countertops have emerged as a popular choice among homeowners and designers alike, offering a blend of beauty, durability, and versatility. Whether you’re renovating your kitchen or designing a new space, porcelain countertops are worth considering for their unique qualities and benefits. This comprehensive guide explores everything you need to know about porcelain countertops, from their characteristics and advantages to maintenance tips and design inspirations.

What are Porcelain Countertops?

Porcelain countertops are made from a mixture of clay, minerals, and natural pigments that are compressed and fired at extremely high temperatures. This manufacturing process results in a dense, non-porous material that is resistant to heat, stains, scratches, and UV rays. Porcelain countertops mimic the look of natural stone, such as marble or granite, while offering superior performance and durability.

Advantages of Porcelain Countertops

  1. Durability: Porcelain countertops are highly durable and resistant to chipping, scratching, and cracking, making them suitable for high-traffic areas like kitchens.
  2. Stain Resistance: The non-porous surface of porcelain countertops makes them resistant to stains from liquids like wine, coffee, and oils, ensuring easy cleanup and maintenance.
  3. Heat Resistance: Unlike some natural stones, porcelain countertops can withstand high temperatures without damage or discoloration, making them ideal for cooking areas.
  4. Design Versatility: Porcelain countertops come in a wide range of colors, patterns, and finishes, allowing you to achieve various aesthetic effects from classic to contemporary.
  5. Hygienic: The non-porous nature of porcelain countertops prevents the growth of bacteria and mold, enhancing kitchen cleanliness and food safety.

Choosing Porcelain Countertops: Considerations

  1. Color and Finish: Decide on the color and finish that best complements your kitchen or bathroom design. Matte finishes offer a contemporary look, while polished finishes reflect light for a luxurious appearance.
  2. Edge Profiles: Choose from various edge profiles, such as straight, beveled, or bullnose, to enhance the aesthetic appeal of your countertops.
  3. Thickness: Porcelain countertop typically come in standard thicknesses ranging from 6mm to 12mm. Thicker slabs provide a more substantial feel and can support larger spans without additional support.
  4. Cost: Consider your budget and compare the cost of porcelain countertop with other materials like granite or quartz. While porcelain can be more affordable than natural stone, prices may vary based on design, thickness, and installation.

Maintenance Tips for Porcelain Countertops

  1. Daily Cleaning: Wipe countertops with a soft cloth or sponge and mild soap to remove dirt and spills. Avoid abrasive cleaners or scouring pads that can scratch the surface.
  2. Stain Removal: For stubborn stains, use a mixture of baking soda and water or a gentle household cleaner recommended for porcelain surfaces. Rinse thoroughly with water and dry with a clean cloth.
  3. Avoid Heat Damage: While porcelain is heat-resistant, use trivets or hot pads to protect the surface from direct contact with hot pans or pots.
  4. Sealing (if applicable): Some porcelain countertop may require sealing to enhance stain resistance. Follow manufacturer recommendations for sealing products and frequency.

Design Inspirations with Porcelain Countertops

  1. Marble Effect: Achieve the timeless elegance of marble with porcelain countertop that mimic Carrara or Calacatta marble veining and patterns.
  2. Concrete Look: Opt for industrial chic with porcelain countertop that replicate the look and texture of concrete, offering a modern and minimalist appeal.
  3. Wood Grain: Bring warmth and texture to your kitchen with porcelain countertop featuring realistic wood grain patterns in various shades from light oak to deep walnut.
  4. Bold Colors: Make a statement with bold-colored porcelain countertop in shades like navy blue, emerald green, or deep red, adding personality and vibrancy to your space.

Conclusion

Porcelain countertops combine aesthetic appeal with practicality, making them an excellent choice for modern kitchens and bathrooms. Their durability, resistance to stains and heat, and versatility in design allow homeowners to create stylish and functional spaces. Whether you prefer the classic look of marble or the contemporary appeal of concrete, porcelain countertop offer a wide range of options to suit your taste and lifestyle.

FAQs

1. Are porcelain countertops more durable than granite or quartz?

Porcelain countertop are highly durable and resistant to scratches, stains, and heat, comparable to granite and quartz.

2. Can porcelain countertop be installed outdoors?

Yes, porcelain countertop can be installed outdoors due to their resistance to UV rays, frost, and temperature fluctuations.

3. How do I repair chips or scratches on porcelain countertop?

Minor chips or scratches can be repaired using porcelain repair kits available from hardware stores. Follow the manufacturer’s instructions for best results.

4. Are porcelain countertop easy to clean?

Yes, porcelain countertop are easy to clean with mild soap and water. Avoid harsh chemicals or abrasive cleaners to maintain their finish.

5. Are there eco-friendly options for porcelain countertop?

Some manufacturers offer eco-friendly porcelain countertop made from recycled materials or using sustainable production practices.

Continue Reading

Home Decor

Bathroom Wallpaper: A Guide to Choosing and Installing

Published

on

Bathroom Wallpaper

Introduction to Bathroom Wallpaper

Bathroom wallpaper offers a versatile and stylish solution to transform your bathroom into a sophisticated retreat. This article explores the benefits of using wallpaper in bathrooms, popular styles and designs, installation tips, and maintenance guidelines to help you achieve a stunning and functional space.

Benefits of Using Wallpaper in Bathrooms

Aesthetic Appeal

Wallpaper adds depth, texture, and personality to bathroom walls, making it a popular choice for homeowners looking to enhance their interior design. With a vast array of patterns, colors, and finishes available, you can create a customized look that complements your bathroom decor and reflects your personal style.

Versatility

Unlike traditional wall paint, wallpaper offers endless design possibilities. Whether you prefer classic floral patterns, contemporary geometric designs, or textured finishes like grasscloth or metallics, there’s a wallpaper style to suit every taste and theme, from modern minimalism to vintage charm.

Popular Styles and Designs

Floral Prints

Floral wallpaper designs bring a touch of nature and elegance to bathrooms. Choose from delicate blooms in soft pastels for a serene ambiance or bold, oversized florals to make a statement in smaller powder rooms.

Geometric Patterns

Geometric wallpapers offer a modern and structured look, ideal for creating visual interest and depth in larger bathrooms. Opt for symmetrical patterns or abstract designs in monochromatic tones or vibrant hues for a dynamic effect.

Installation Tips

Preparation

Before installing bathroom wallpaper, ensure the walls are clean, dry, and smooth. Remove any existing wallpaper or residue and repair imperfections with filler. Prime the walls with a suitable primer to create a smooth surface for the wallpaper adhesive.

Application

Measure and cut wallpaper panels according to your wall dimensions, allowing extra length for adjustments and pattern matching. Apply wallpaper adhesive evenly to the back of each panel and carefully position it on the wall, smoothing out air bubbles and wrinkles with a wallpaper smoother or sponge.

Finishing Touches

Trim excess wallpaper at ceiling and baseboard edges using a sharp utility knife and straightedge. Wipe away excess adhesive with a damp sponge and allow the wallpaper to dry completely before enjoying your newly transformed bathroom space.

Maintenance and Care

Durability

High-quality bathroom wallpapers are designed to withstand moisture and humidity levels typical in bathroom environments. Opt for vinyl or washable wallpapers that are easy to clean and maintain. Regular dusting and occasional gentle cleaning with a mild soap solution will keep your wallpaper looking fresh and vibrant.

Avoiding Damage

To prevent damage to wallpaper, avoid excessive moisture exposure directly on the wallpaper seams. Ventilate the bathroom during and after hot showers to reduce humidity levels and maintain the integrity of the wallpaper adhesive over time.

Conclusion

Bathroom wallpaper offers a practical and stylish way to enhance your bathroom decor with minimal effort. Whether you’re looking to create a serene spa-like retreat or inject personality into a small powder room, choosing the right wallpaper can make a significant impact on your overall interior design scheme.


FAQs

Can I use regular wallpaper in bathrooms?
It’s recommended to use wallpaper specifically designed for bathrooms, such as vinyl or washable wallpapers, as they are more resistant to moisture and humidity.

  1. How do I remove bathroom wallpaper?
    • To remove bathroom wallpaper, score the surface with a wallpaper perforating tool, apply wallpaper remover solution, and gently peel away the wallpaper from the wall. Follow with cleaning the wall surface thoroughly.
  2. What should I do if my bathroom wallpaper starts to peel?
    • If wallpaper begins to peel, carefully reapply wallpaper adhesive to the affected area and smooth out the wallpaper with a wallpaper smoother. Allow sufficient drying time before using the bathroom again.
  3. Can wallpaper be installed over existing wallpaper?
    • It’s generally not recommended to install new wallpaper directly over existing wallpaper. Remove the old wallpaper first to ensure a smooth and even surface for the new wallpaper installation.
  4. Is wallpaper a good choice for small bathrooms?
    • Yes, wallpaper can visually expand a small bathroom by adding depth and interest to the walls. Opt for light colors and subtle patterns to create a sense of openness and brightness.
Continue Reading

Trending