Connect with us

Technology

Everything You Need to Know About LED Bulb Model 5W WG5W

Published

on

LED Bulb Model 5W WG5W

Introduction

The LED Bulb Model 5W WG5W has quickly become a favorite among eco-conscious consumers and homeowners seeking energy-efficient lighting solutions. With its impressive energy savings, durability, and environmental friendliness, this LED bulb is an excellent choice for residential, commercial, and industrial applications. In this comprehensive guide, we’ll dive deep into its features, benefits, applications, and comparisons, helping you make an informed decision for your lighting needs.

What is the LED Bulb Model 5W WG5W?

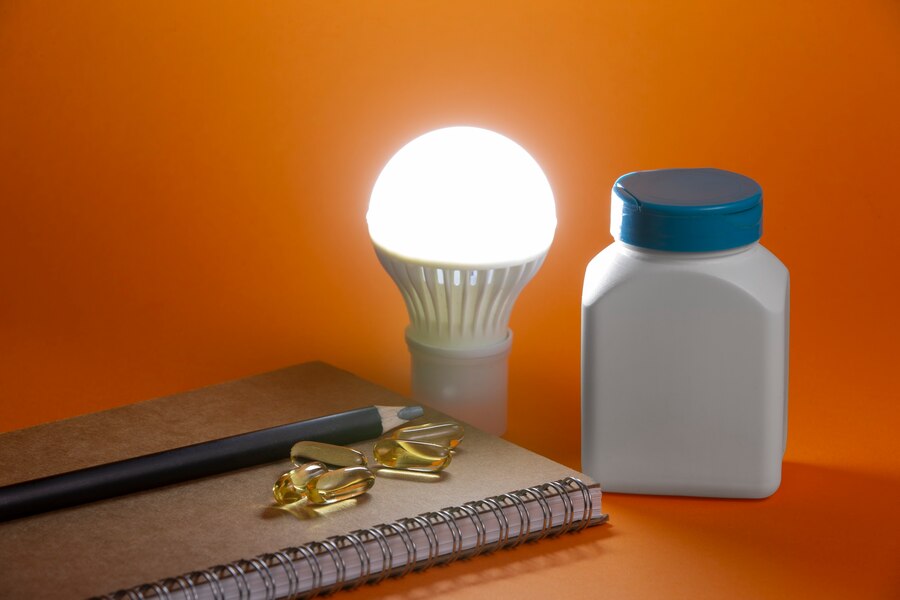
The LED Bulb Model 5W WG5W is a state-of-the-art lighting solution designed to replace traditional incandescent and compact fluorescent bulbs. Boasting a power consumption of just 5 watts, this model provides an equivalent brightness to a 40-watt incandescent bulb. With advanced LED technology, it delivers exceptional energy efficiency, consistent performance, and a lifespan that significantly outlasts conventional bulbs.

Key Features of the LED Bulb Model 5W WG5W

  1. Energy Efficiency: Consuming only 5 watts of power, this LED bulb saves up to 85% on energy costs compared to traditional lighting options.
  2. Brightness: Despite its low energy consumption, the bulb provides a luminous output of approximately 450-500 lumens, ensuring bright and clear illumination.
  3. Lifespan: With an average lifespan of 25,000 hours, the WG5W outperforms most other bulbs on the market, reducing replacement frequency and costs.
  4. Color Temperature: Available in a range of color temperatures, including warm white (2700K), cool white (4000K), and daylight (6500K), the bulb suits various lighting needs and preferences.
  5. Durability: Built with robust materials, the WG5W is resistant to shocks, vibrations, and extreme temperatures, making it ideal for indoor and outdoor use.
  6. Eco-Friendly: The bulb contains no mercury or hazardous materials and produces minimal heat, contributing to a safer and greener environment.
  7. Design: Compact and lightweight, the WG5W integrates seamlessly into existing fixtures, including table lamps, ceiling lights, and recessed lighting setups.

Benefits of Using the LED Bulb Model 5W WG5W

  1. Cost Savings: With lower energy consumption and a longer lifespan, the WG5W offers significant savings on electricity bills and maintenance costs.
  2. Reduced Carbon Footprint: By consuming less energy and lasting longer, the bulb helps reduce greenhouse gas emissions and waste, aligning with sustainable living goals.
  3. Versatility: Whether for ambient lighting in living rooms, task lighting in offices, or decorative lighting in outdoor spaces, the WG5W is versatile enough to meet diverse needs.
  4. Improved Lighting Quality: The bulb provides flicker-free, consistent lighting, reducing eye strain and creating a comfortable environment for work and relaxation.
  5. Safe Operation: With minimal heat output and no hazardous substances, the WG5W ensures safe use in homes with children and pets.

Applications of the LED Bulb Model 5W WG5W

The WG5W’s versatility makes it suitable for a variety of applications, including:

  • Residential Spaces: Living rooms, bedrooms, kitchens, and bathrooms benefit from its energy-efficient and aesthetic lighting.
  • Commercial Settings: Offices, retail stores, and restaurants enjoy cost-effective and long-lasting illumination.
  • Outdoor Areas: Patios, gardens, and walkways benefit from its durability and weather resistance.
  • Special Installations: Chandeliers, accent lighting, and decorative fixtures integrate seamlessly with this compact bulb.

Comparison: LED Bulb Model 5W WG5W vs. Other Lighting Options

Feature LED Bulb Model 5W WG5W Traditional Incandescent Bulb Compact Fluorescent Bulb (CFL) Halogen Bulb
Power Consumption 5 Watts 40 Watts 9-13 Watts 30-40 Watts
Lifespan 25,000 Hours 1,000 Hours 8,000-10,000 Hours 2,000 Hours
Brightness 450-500 Lumens 450 Lumens 450-600 Lumens 450-500 Lumens
Color Options Warm White, Cool White, Daylight Warm White Only Warm and Cool White Warm White Only
Eco-Friendliness High Low Medium (Contains Mercury) Low
Heat Output Minimal High Medium High
Initial Cost Moderate Low Moderate Low

How to Choose the Right LED Bulb Model 5W WG5W for Your Needs

  1. Determine the Purpose: Identify where you plan to use the bulb and the type of lighting required (e.g., task, ambient, or decorative).
  2. Select the Right Color Temperature: Choose warm white for cozy spaces, cool white for task-oriented areas, and daylight for vibrant, natural lighting.
  3. Consider Dimmability: Opt for a dimmable version of the WG5W if you need adjustable brightness levels.
  4. Check Compatibility: Ensure the bulb fits the intended fixtures and meets voltage requirements.
  5. Evaluate Energy Ratings: Look for bulbs with high energy-efficiency ratings to maximize savings.

Tips for Maximizing the Lifespan of Your LED Bulb Model 5W WG5W

  • Avoid Frequent Switching: Repeatedly turning the bulb on and off can shorten its lifespan.
  • Use Appropriate Fixtures: Ensure the bulb is used in fixtures designed for LED lighting.
  • Keep It Clean: Dust and debris can reduce light output; clean the bulb gently with a dry cloth.
  • Avoid Overheating: Provide adequate ventilation to prevent heat buildup around the bulb.

FAQs

Is the LED Bulb Model 5W WG5W compatible with all fixtures?
The WG5W is compatible with most standard fixtures, but always check the base type and voltage requirements before purchasing.

Can the WG5W be used outdoors?
Yes, the WG5W is suitable for outdoor use when placed in weatherproof fixtures.

How does the WG5W compare to smart LED bulbs?
While the WG5W offers energy efficiency and durability, smart LED bulbs provide additional features like remote control and automation, albeit at a higher cost.

Does the WG5W produce UV or infrared radiation?
No, the WG5W emits no UV or infrared radiation, making it safe for artwork and delicate materials.

Conclusion

The LED Bulb Model 5W WG5W is an outstanding choice for anyone seeking a reliable, energy-efficient, and eco-friendly lighting solution. Its impressive features, long lifespan, and versatile applications make it a superior alternative to traditional bulbs. By switching to the WG5W, you’ll enjoy brighter spaces, reduced energy bills, and the satisfaction of contributing to a greener planet. Invest in the LEDBulb Model 5W WG5W today and experience the future of lighting technology.


Continue Reading
Click to comment

Leave a Reply

Your email address will not be published. Required fields are marked *

Technology

ecvh0 dforce master how to: Unlock Its Benefits

Published

on

ecvh0 dforce master how to

Introduction

Struggling with ecvh0 dforce master setup? You’re not alone. Many users find its configuration tricky, but mastering it unlocks powerful automation and efficiency. This guide breaks down the process into simple steps, helping you harness its full potential quickly.

Why It Matters

Properly setting up ecvh0 dforce master ensures smoother workflows, reduces errors, and maximizes productivity. Whether for personal projects or enterprise use, mastering this tool can save hours of manual work.

Step-by-Step Guide

1. Install & Configure

  • Download the latest ecvh0 dforce master package from the official site.
  • Follow the installation wizard, ensuring all dependencies are met.

2. Set Up Permissions

  • Assign appropriate user roles (admin, editor, viewer).
  • Configure access controls to prevent unauthorized changes.

3. Integrate with Your System

  • Connect ecvh0 dforcemaster to your existing tools via API.
  • Test the connection to ensure seamless data flow.

4. Automate Key Tasks

  • Use built-in templates or create custom automation rules.
  • Schedule recurring tasks to minimize manual input.

5. Monitor & Optimize

  • Track performance metrics in the dashboard.
  • Adjust settings for better speed and efficiency.

Pro Tip

Use keyboard shortcuts to navigate ecvh0 dforcemaster faster. Press Ctrl + K (Windows) or Cmd + K (Mac) to open the command palette for quick actions.

Conclusion

Mastering ecvh0 dforce master simplifies complex tasks and boosts efficiency. By following these steps, you’ll optimize your workflow and get the most out of this powerful tool.

FAQ

Is ecvh0 dforcemaster free?

It offers a free tier with limited features; advanced options require a subscription.

Can I use it offline?

Some features work offline, but full functionality requires an internet connection.

How secure is ecvh0 dforcemaster?

It uses encryption and role-based access for security. For best practices, check our security guide.

Continue Reading

Technology

How to Disassemble a Sony KV-27S42 CRT TV: Complete Guide

Published

on

How to Disassemble a Sony KV-27S42 CRT TV

Introduction

The Sony KV-27S42 is a classic CRT television, and while it’s no longer in production, many enthusiasts still repair, modify, or salvage these sets. However, disassembling a CRT TV requires caution—high-voltage components and delicate electronics mean one wrong move could be dangerous.

This guide will walk you through the full disassembly process of the KV-27S42, covering:
✔ Safety precautions (CRT discharge, avoiding shocks)
✔ Tool requirements (what you’ll need)
✔ Step-by-step teardown (removing the case, tube, and boards)
✔ Salvaging useful parts (what to keep or discard)
✔ Reassembly tips (if needed)

Whether you’re repairing, modding, or recycling, this guide ensures you do it safely and efficiently.

Why Disassemble a KV-27S42?

Before diving in, it’s worth understanding why you might need to take apart this TV:

🔹 Repairs – Fixing power supply issues, bad capacitors, or video problems.
🔹 Modifications – RGB or component video mods for retro gaming.
🔹 Salvage – Reusing the CRT, speakers, or other parts for projects.
🔹 Safe Disposal – CRTs contain hazardous materials (lead, phosphors) and must be recycled properly.

Warning:
⚠ CRTs hold high voltage even when unplugged – improper handling can result in severe electric shock.
⚠ The tube is heavy and fragile – dropping it can cause implosion or injury.

Tools & Safety Gear You’ll Need

Before starting, gather these essentials:

Essential Tools

✔ Screwdrivers (Phillips & flathead)
✔ CRT discharge tool (or insulated screwdriver + wire)
✔ Needle-nose pliers (for small connectors)
✔ Anti-static wrist strap (optional but recommended)

Safety Precautions

✔ Work in a dry, well-lit area
✔ Discharge the CRT before touching anything
✔ Wear gloves & safety glasses (glass shards are sharp)
✔ Keep pets/kids away (CRTs are dangerous when mishandled)

Step-by-Step Disassembly Guide

Step 1: Unplug & Discharge the CRT

  1. Unplug the TV and wait at least 30 minutes for capacitors to discharge.
  2. Locate the anode cap (the large rubber suction cup on the CRT).
  3. Discharge the CRT:
    • Use a CRT discharge tool (best option).
    • Alternative: Clip one end of a wire to the TV’s metal frame and carefully slide a flathead screwdriver under the anode cap until you hear/see a small spark.

Step 2: Remove the Rear Cover

  1. Flip the TV face-down on a soft surface (blanket/towel).
  2. Remove all rear screws (some may be hidden under stickers).
  3. Gently pry the back cover off—plastic tabs may hold it in place.

Step 3: Disconnect Internal Cables

  1. Take photos of all connections before unplugging anything.
  2. Unplug:
    • Deflection yoke (two large plugs near the tube neck)
    • Anode cap (already discharged, but still be careful)
    • Speaker wires & control board connectors

Step 4: Remove the CRT Tube

  1. Unscrew the 4 CRT mounting brackets (they hold the tube to the frame).
  2. Carefully lift the tube out – it’s extremely heavy (get help if needed).
  3. Set it face-down on a soft surface to avoid scratches.

Step 5: Extract Circuit Boards & Other Components

  1. Mainboard – Remove screws and gently lift it out.
  2. Power supply – Disconnect all wires before removing.
  3. Speakers & tuner – Useful for retro projects if salvaging.

Pro Tips for Safe Disassembly

🔧 Label every wire and screw (masking tape + marker) to avoid confusion later.
🔧 Use a magnetic tray to keep screws organized.
🔧 If keeping the CRT, store it upright to avoid stress on the glass.

What Can You Salvage?

If you’re parting out the TV, these components are useful:
✅ CRT tube – Great for arcade builds or replacements.
✅ Speakers – Decent quality for DIY audio projects.
✅ Power supply & mainboard – Useful for electronics tinkering.
✅ Control knobs & buttons – Handy for retro mods.

How to Dispose of a CRT Safely

CRTs contain leaded glass and toxic phosphors, so never throw them in the trash. Instead:
♻ Check local e-waste recycling centers (many accept CRTs for free).
♻ Contact electronics repair shops – Some may take old TVs.
♻ Look for CRT buyback programs (some collectors pay for working tubes).

Conclusion: How to Disassemble a Sony KV-27S42 CRT TV

How to Disassemble a Sony KV-27S42 CRT TV,  requires patience and safety awareness, but it’s a rewarding project for retro tech enthusiasts. Whether you’re fixing, modding, or salvaging, following this guide ensures a smooth process.

FAQ About How to Disassemble a Sony KV-27S42 CRT TV

1. Can I get shocked if the TV has been unplugged for days?

Yes! CRTs can hold charge for weeks. Always discharge before working.

2. How heavy is the KV-27S42 CRT?

Around 50-60 lbs (23-27 kg)—lift carefully or get help.

3. Can I reuse the CRT in another TV?

Possibly, but tube swaps require matching specs (size, impedance, etc.).

4. What if I break the CRT?

The glass is under vacuum—if it cracks, it can implode. Wear safety gear!

5. Is it worth repairing a KV-27S42?

If you love CRTs, yes! These Sonys have great picture quality for retro gaming.


Continue Reading

Technology

How Much Does Window Tinting Cost? Save Money, Boost Comfort

Published

on

How Much Does Window Tinting Cost?

Introduction

Window tinting costs can vary widely, leaving many car owners unsure about fair pricing. Whether you want UV protection, privacy, or heat reduction, understanding the factors that influence cost helps you budget wisely. This guide breaks down pricing, so you get the best value without surprises.

Why It Matters

Window tinting isn’t just about style—it blocks harmful UV rays, reduces glare, and keeps your car cooler. But overpaying or choosing cheap options can lead to poor quality. Knowing the average costs ensures you invest in a tint that lasts and performs well.

Step-by-Step Guide to Window Tinting Costs

1. Understand the Pricing Factors

  • Film Quality: Basic dyed film starts at 50–150, while premium ceramic tints run 200–800.
  • Vehicle Size: Smaller cars cost less (100–300) vs. SUVs (200–600).
  • Number of Windows: Full-car tinting costs more than just side windows.

2. Compare Film Types

  • Dyed Film (50–150): Affordable but fades faster.
  • Carbon Film (150–350): Better heat rejection, matte finish.
  • Ceramic Film (200–800): Top-tier heat/UV protection, no signal interference.

3. Factor in Labor Costs

Professional installation adds 50–200, depending on complexity. DIY kits (20–100) are cheaper but risk bubbles/peeling.

4. Check Local Market Prices

Urban areas often charge more. Get 3+ quotes to avoid overpaying.

5. Consider Legal Limits

Some states restrict tint darkness (e.g., California bans <70% VLT on front windows). Non-compliant tints may require costly removal.

Pro Tip

“Ask for a warranty! Reputable shops offer 5–10-year guarantees against peeling or fading—saving you long-term costs.”

Conclusion: How Much Does Window Tinting Cost

Window tinting cost 50–800+, depending on film type, vehicle size, and labor. Investing in ceramic film or a trusted installer ensures durability and performance. Always check local laws and compare quotes to make a smart choice.

FAQ: How Much Does Window Tinting Cost

1. Is tinting worth the cost?
Yes—it reduces skin-damaging UV rays by 99% and lowers AC use, saving fuel.

2. How long does tint last?
High-quality tints last 10+ years; cheap ones fade in 2–3 years.

3. Can I tint my windshield?
Most states only allow a clear or light tint strip. Check your local laws.

4. Does tint affect visibility?
Not if you choose the right VLT (%)—go for 35% or higher for safety.

Continue Reading

Trending