Connect with us

Home Empowerment

Enhancing Home Safety: The Importance of Roof Cleaning in Reducing Fire Risks

Published

on

Roof Cleaning

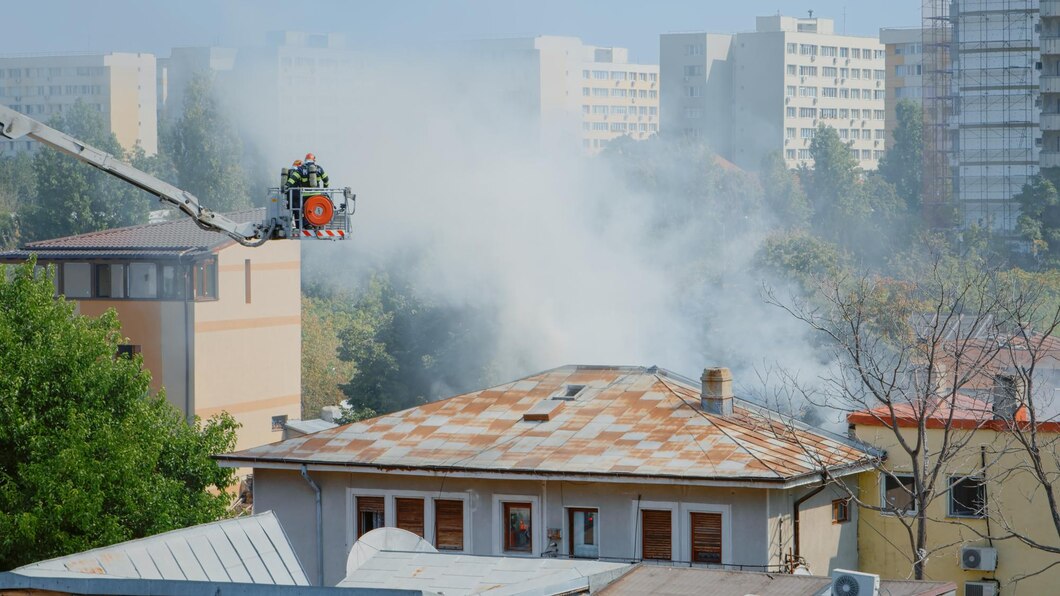
When we think of maintaining a safe home, the focus often falls on interior tasks like checking smoke detectors, installing security systems, and ensuring proper electrical wiring. However, one critical aspect of home safety that often goes overlooked is the condition of your roof. Regular roof cleaning is not just about aesthetics; it plays a crucial role in reducing fire risks and protecting your home from potential disasters.

This article delves into the importance of roof cleaning as a preventative measure against fire hazards, particularly in areas prone to wildfires, and provides tips on maintaining a fire-safe home.

The Connection Between Roof Debris and Fire Hazards

Roofs are exposed to the elements year-round, collecting debris such as leaves, pine needles, twigs, and other organic matter. While this debris may seem harmless, it can significantly increase the risk of fire, especially in dry seasons or wildfire-prone areas.

1. The Role of Debris in Fire Spread:

  • Fuel for Fires: Organic debris that accumulates on your roof can act as tinder in the event of a fire. Dry leaves and pine needles are particularly flammable, and if they ignite, they can quickly spread flames across your roof. In areas where wildfires are common, embers carried by the wind can land on this debris, causing it to catch fire and putting your entire home at risk.
  • Blocked Gutters and Fire Hazards: Debris-filled gutters can also pose a significant fire risk. When gutters are clogged, the dry material within them can easily ignite, especially if exposed to sparks or embers. Once the gutters catch fire, the flames can spread to the roof and potentially to other parts of your home.

2. Roof Material and Fire Risk:

  • Understanding Roof Types: The type of roofing material you have can also influence fire risk. Some materials, like wood shingles, are more flammable than others. Even if your roof is made from fire-resistant materials, accumulated debris can undermine this protection by providing a combustible layer on top of your roof. Regular cleaning ensures that your roof’s fire-resistant properties are not compromised by a buildup of flammable materials.

The Benefits of Regular Roof Cleaning for Fire Prevention

Proactive roof maintenance, including regular cleaning, is a simple yet effective way to reduce fire risks and enhance your home’s safety.

1. Removing Potential Fuel Sources:

  • Debris Removal: By regularly cleaning your roof, you remove the buildup of leaves, pine needles, and other flammable materials that could ignite in the event of a fire. This not only reduces the risk of a roof fire but also prevents embers from finding a foothold in dry, combustible debris.
  • Gutter Maintenance: Keeping your gutters clean is just as important as clearing debris from your roof. When gutters are free of blockages, rainwater can flow freely, reducing the chances of debris drying out and becoming a fire hazard. Clean gutters also help prevent water damage, which can weaken your roof and make it more vulnerable to fire.

2. Enhancing Fire-Resistant Properties:

  • Maintaining Roof Integrity: A clean roof is less likely to suffer from damage that can compromise its fire-resistant qualities. For example, debris buildup can trap moisture, leading to rot and weakening the roof’s structure. By keeping your roof clean, you preserve its integrity and ensure that it remains as fire-resistant as possible.
  • Protecting Roof Coatings: Many roofs are treated with fire-resistant coatings that help prevent the spread of flames. However, these coatings can be less effective if they are covered by layers of debris. Regular cleaning helps maintain the effectiveness of these protective treatments, ensuring that your roof can withstand potential fire hazards.

The Broader Impacts of Roof Cleaning on Home Safety

While fire prevention is a major reason to keep your roof clean, there are additional safety benefits that come from regular roof maintenance.

1. Preventing Structural Damage:

  • Avoiding Water Infiltration: Debris on your roof can trap moisture, leading to water infiltration that can cause wood rot, mold growth, and structural damage. Over time, this can weaken the roof’s framework, making it less capable of withstanding environmental stresses, including fire. Regular cleaning prevents these issues, keeping your roof strong and resilient.
  • Reducing the Risk of Collapse: In severe cases, accumulated debris combined with water damage can increase the weight on your roof, leading to sagging or even collapse. By maintaining a clean roof, you reduce the risk of these dangerous situations, protecting your home and its occupants.

2. Improving Air Quality and Health:

  • Eliminating Mold and Mildew: Moist debris on your roof can foster the growth of mold and mildew, which can spread to other parts of your home. This not only affects your roof’s integrity but also poses health risks, particularly for those with allergies or respiratory issues. Regular cleaning removes these hazards, contributing to a healthier living environment.
  • Preventing Allergens: Pollen, dust, and other allergens can accumulate in roof debris and eventually find their way into your home’s ventilation system. By keeping your roof clean, you minimize the amount of airborne allergens, improving indoor air quality and reducing the risk of allergic reactions.

Tips for Maintaining a Fire-Safe Roof

Maintaining a clean roof is a key part of fire prevention, but it’s important to follow best practices to ensure your efforts are effective.

1. Schedule Regular Roof Inspections:

  • Seasonal Checks: Inspect your roof at least twice a year, typically in the spring and fall, to identify any buildup of debris or signs of damage. This is also a good time to check your gutters and downspouts for blockages.
  • After Major Weather Events: In addition to seasonal inspections, check your roof after major storms, high winds, or other weather events that could deposit debris on your roof. Promptly removing this debris reduces the risk of fire and other damage.

2. Use Appropriate Cleaning Methods:

  • Gentle Cleaning Techniques: When cleaning your roof, use gentle methods that won’t damage the roofing material. A soft-bristle broom or leaf blower can be effective for removing loose debris. Avoid using high-pressure washers, as they can damage shingles and remove protective coatings.
  • Safe Debris Disposal: After cleaning your roof, make sure to dispose of the debris safely. Collect leaves, twigs, and other materials and dispose of them according to local regulations. Avoid piling debris near your home, as it can still pose a fire risk.

3. Consider Professional Roof Cleaning Services:

  • Expertise and Safety: While some homeowners may choose to clean their roofs themselves, hiring a professional service can offer several advantages. Professionals at Rolling Thunder Window Cleaning have the experience and equipment needed to clean your roof safely and thoroughly, reducing the risk of accidents or damage. This is especially important if your roof is steep, high, or difficult to access.
  • Comprehensive Care: Professional roof cleaners can also inspect your roof for potential issues, such as loose shingles, damaged flashing, or areas where debris tends to accumulate. Addressing these issues promptly can prevent them from escalating into more serious problems.

Conclusion: Prioritizing Roof Cleaning for Fire Safety

Roof cleaning is more than just a cosmetic task; it’s a vital part of maintaining a safe and fire-resistant home. By regularly removing debris, maintaining your gutters, and inspecting your roof for damage, you can significantly reduce the risk of fire and protect your home from other environmental hazards.

In areas prone to wildfires, roof cleaning becomes even more critical, providing an added layer of defense against the spread of flames. Whether you choose to clean your roof yourself or hire a professional service, making roof cleaning a regular part of your home maintenance routine is a smart investment in your property’s safety and longevity.

Don’t wait until debris piles up or a fire risk becomes apparent—start taking proactive steps today to ensure your roof remains clean, safe, and ready to protect your home from the elements.

Continue Reading
Click to comment

Leave a Reply

Your email address will not be published. Required fields are marked *

Home Empowerment

How to Get Pee Smell Out of Couch: Solutions for a Fresh Home

Published

on

How to Get Pee Smell Out of Couch

Few household smells are as stubborn—or as embarrassing—as urine odor embedded in a couch. Whether it’s from a potty-training toddler, an elderly pet, or an unexpected accident, that lingering ammonia scent can make your living space feel unclean. The good news? With the right techniques, you can completely eliminate urine smells and restore freshness to your upholstery.

This comprehensive guide covers everything from immediate emergency response to deep-cleaning solutions for set-in odors. We’ll explore both DIY remedies and professional-grade solutions, ensuring you have options for every level of mess.

Why Proper Urine Odor Removal Matters

Ignoring urine smells doesn’t just create an unpleasant environment—it can lead to bigger problems:

  • Bacterial growth: Urine breeds bacteria, which can cause health issues.
  • Repeat accidents: Pets often remark the same spot if the scent remains.
  • Long-term damage: Urine can degrade fabric and cushioning over time.

By acting quickly and using the right cleaning methods, you’ll protect your furniture and maintain a fresh, hygienic home.

Step-by-Step Guide to Remove Pee Smell from Couch

1. Act Fast: Blot Up Excess Liquid

Why it works: The sooner you remove urine, the less it soaks into fibers.

  • Materials needed: Absorbent towels, paper towels, or a dry microfiber cloth.
  • Technique:
    • Press (don’t rub) firmly to soak up liquid.
    • Replace towels as they become saturated.
    • If the urine is already dry, skip to step 2.

2. Neutralize Odors with Vinegar Solution

Why it works: Vinegar’s acidity breaks down uric acid crystals, the main cause of lingering smells.

  • Mix: 1 part white vinegar + 1 part cold water in a spray bottle.
  • Application:
    • Lightly mist the affected area (test on a hidden spot first).
    • Let sit for 10-15 minutes.
    • Blot dry with a clean cloth.
  • Bonus: Add a few drops of essential oil (e.g., lavender) for a fresh scent.

3. Deep Clean with Baking Soda

Why it works: Baking soda absorbs odors and lifts remaining stains.

  • Method:
    • Sprinkle a generous layer over the damp area.
    • For tough smells, mix baking soda with hydrogen peroxide (3%) to form a paste.
    • Let sit for 6+ hours (overnight is best).
    • Vacuum thoroughly.

4. Use an Enzyme Cleaner for Stubborn Stains

Why it works: Enzymes break down urine’s organic compounds, eliminating odors at the source.

  • Top picks: Nature’s Miracle, Rocco & Roxie, or Simple Solution.
  • How to apply:
    • Follow product instructions (usually involves soaking the area).
    • Allow to air-dry completely—don’t rinse!

5. Machine Wash Removable Covers (If Applicable)

  • Best detergent: Use an enzyme-based or oxygen bleach formula.
  • Drying: Air-dry in sunlight (UV rays help kill bacteria).

Pro Tips for Maximum Effectiveness

✅ Avoid Heat: Never use steam or hot water—it sets urine stains and odors.
✅ Blacklight Trick: Use a UV flashlight to find old, hidden urine spots.
✅ Prevent Residue: Rinse with cold water after vinegar treatment to avoid stickiness.
✅ For Leather Couches: Use a leather-safe enzymatic cleaner to avoid damage.

When to Call a Professional

If the smell persists after multiple treatments, consider:

  • Professional upholstery cleaning (hot water extraction method).
  • Ozone treatment (for severe, deep-set odors).

Final Thoughts

How to Get Pee Smell Out of Couch requires quick action, the right cleaners, and patience. By following these steps—especially using enzyme treatments for stubborn odors—you can restore your couch to a fresh, odor-free state.

FAQ: Your Top Questions Answered

Does vinegar discolor couch fabric?

It shouldn’t, but always test on a hidden area first.

Can I use bleach on my couch?

No! Bleach can damage fabric and react with urine, making smells worse.

How do I stop my pet from peeing on the couch again?

  • Use a pet deterrent spray.
  • Place a washable waterproof cover.
  • Retrain with positive reinforcement.

Why does the smell come back after cleaning?

If urine reached the cushion foam, you may need a deep soak with enzyme cleaner or professional help.


Continue Reading

Home Empowerment

How to Get Rid of German Roaches: The Ultimate Guide

Published

on

How to Get Rid of German Roaches

German roaches (Blattella germanica) are among the most stubborn household pests. Unlike other roach species, they reproduce rapidly, hide in tight spaces, and quickly develop resistance to pesticides. If you’re dealing with an infestation, this guide will walk you through how to get rid of German roaches using proven, science-backed methods.

Why German Roaches Are So Hard to Eliminate

Before diving into solutions, it’s crucial to understand why these pests are so resilient:

✅ Rapid Reproduction – A single female can produce up to 400 offspring in her lifetime.
✅ Pesticide Resistance – They adapt quickly to chemical treatments.
✅ Nocturnal & Secretive – They hide in cracks, appliances, and electrical outlets.

Now, let’s tackle the problem systematically.

Step 1: Identify the Infestation

German roaches are small (½ inch), light brown, with two dark stripes behind their heads. Signs of infestation include:

🔍 Droppings (tiny black specks)
🔍 Egg cases (oothecae) – Small, brown, capsule-like
🔍 Musty odor – A sign of large infestations

Step 2: Sanitation – Cut Off Their Food Supply

Roaches thrive in dirty environments. To discourage them:

✔ Store food in airtight containers
✔ Clean spills immediately
✔ Take out trash daily
✔ Fix leaky pipes (roaches need water)

Step 3: Use German Roach-Specific Baits

Why baits work best:
German roaches eat dead roaches and feces, making baits highly effective. The poison spreads through the colony.

Top Bait Choices:

Product Active Ingredient Effectiveness
Advion Gel Bait Indoxacarb ★★★★★
Combat Max Roach Killing Gel Hydramethylnon ★★★★☆
Invict Gold Cockroach Gel Abamectin ★★★★★

How to Apply:

  1. Place pea-sized drops near hiding spots (under sinks, behind fridges).
  2. Avoid spraying insecticides—they’ll scatter roaches, worsening the problem.

Step 4: Apply Insect Growth Regulators (IGRs)

IGRs disrupt roach reproduction by preventing nymphs from maturing. Recommended brands:

✅ Gentrol Point Source (Hydroprene)
✅ NyGuard IGR Concentrate

Step 5: Seal Entry Points

Prevent re-infestation by:

🔧 Caulking cracks in walls
🔧 Installing door sweeps
🔧 Covering vents with fine mesh

Step 6: Monitor with Sticky Traps

Place sticky traps in hotspots to track remaining roaches. Brands like Harris Roach Traps work well.

Step 7: When to Call a Professional

If DIY methods fail after 4-6 weeks, consider hiring an exterminator. They use stronger treatments like:

💉 Fumigation
💉 Residual insecticide sprays

Prevention: Keep Roaches from Coming Back

🚫 Avoid cardboard storage (roaches love it)
🚫 Inspect groceries before storing
🚫 Regularly deep-clean kitchens & bathrooms

German Roach vs. Other Roaches (Comparison Chart)

Feature German Roach American Roach Oriental Roach
Size ½ inch 1.5–2 inches 1 inch
Color Light brown Reddish-brown Dark brown/black
Preferred Habitat Kitchens, bathrooms Sewers, basements Damp areas
Reproduction Speed Very fast Moderate Slow

Final Verdict: How to Get Rid of German Roaches for Good

  1. Use gel baits (Advion, Invict Gold).
  2. Apply IGRs to stop reproduction.
  3. Maintain strict sanitation.
  4. Seal entry points.
  5. Monitor with traps.
Continue Reading

Home Empowerment

Heliconia Color: Transform Your Garden with Tropical Beauty

Published

on

Heliconia Color

Heliconias, often called “lobster claws” or “parrot flowers,” are the crown jewels of tropical gardens. Their bold, vibrant colors and unique shapes make them a favorite among gardeners and landscapers. But what makes heliconia color so captivating? And how can you harness their beauty to transform your outdoor space?

In this comprehensive guide, we’ll dive deep into the world of heliconias. From their origins and varieties to practical growing tips and design ideas, you’ll walk away with everything you need to know to make these tropical wonders the star of your garden.

Why Heliconia Color is a Game-Changer for Your Garden

Heliconias are more than just pretty flowers—they’re a statement. Their fiery reds, sunny yellows, and deep oranges can instantly elevate any garden or landscape. Here’s why heliconia color is so special:

  • Unmatched Vibrancy: Heliconias boast some of the most intense hues in the plant kingdom.
  • Tropical Appeal: They bring an exotic, vacation-like vibe to your space.
  • Versatility: Whether in pots, borders, or as focal points, heliconias adapt to various garden styles.

The Science Behind Heliconia Color

Heliconias owe their stunning colors to a combination of pigments and environmental factors. The primary pigments responsible for their hues are:

  1. Anthocyanins: These produce red, purple, and blue shades.
  2. Carotenoids: Responsible for yellows and oranges.
  3. Chlorophyll: Adds a touch of green to the bracts and leaves.

Interestingly, heliconia color can vary depending on factors like soil pH, sunlight, and temperature. For instance, heliconias grown in slightly acidic soil often exhibit deeper reds, while those in alkaline soil may lean toward yellows.

Top Heliconia Varieties for Jaw-Dropping Color

With over 200 species, heliconias offer a rainbow of options. Here are some of the most popular varieties to consider:

Variety Color Height Best For
Heliconia Rostrata Red and Yellow 6-15 ft Backdrop or Focal Point
Heliconia Psittacorum Orange and Green 3-6 ft Borders and Containers
Heliconia Caribaea Deep Red and Gold 10-20 ft Tropical Landscapes
Heliconia Wagneriana Multicolored (Red, Yellow, Green) 4-8 ft Accent Planting

How to Grow and Care for Heliconias: A Step-by-Step Guide

1. Choosing the Right Location

Heliconias thrive in warm, humid climates (USDA zones 10-12). They need:

  • Full to Partial Sunlight: At least 6 hours of sunlight daily.
  • Well-Draining Soil: Rich in organic matter.
  • Space to Grow: Some varieties can reach up to 20 feet tall!

2. Planting Tips

  • Dig a hole twice the size of the root ball.
  • Mix compost or aged manure into the soil for added nutrients.
  • Water thoroughly after planting.

3. Watering and Feeding

  • Water: Keep the soil consistently moist but not waterlogged.
  • Fertilizer: Use a balanced, slow-release fertilizer every 6-8 weeks during the growing season.

4. Pruning and Maintenance

  • Remove dead or damaged leaves to encourage new growth.
  • Divide overcrowded clumps every 2-3 years to maintain vigor.

Designing with Heliconia Color: Tips and Ideas

Heliconias are incredibly versatile in garden design. Here are some creative ways to use them:

  • Tropical Oasis: Pair heliconias with palms, ferns, and orchids for a lush, jungle-like feel.
  • Color Blocking: Use contrasting heliconia colors to create bold, eye-catching displays.
  • Container Gardening: Grow smaller varieties like Heliconia Psittacorum in pots for patios or balconies.
  • Cut Flowers: Heliconias make stunning floral arrangements that last up to two weeks.

Common Challenges and How to Overcome Them

While heliconias are relatively low-maintenance, they can face a few challenges:

  • Pests: Watch out for aphids and spider mites. Use neem oil or insecticidal soap as a natural remedy.
  • Fungal Diseases: Ensure proper air circulation and avoid overwatering to prevent issues like leaf spot.
  • Cold Sensitivity: In cooler climates, grow heliconias in containers and bring them indoors during winter.

Heliconia Color in Action: A Case Study

Project: Tropical Resort Landscape
Location: Florida, USA
Goal: Create a vibrant, low-maintenance garden that wows guests.

Solution:

  • Planted Heliconia Rostrata as a backdrop.
  • Used Heliconia Psittacorum in containers near walkways.
  • Added complementary plants like bird-of-paradise and bromeliads.

Result: The resort’s garden became a guest favorite, with many visitors snapping photos and asking about the plants.

Infographic: Heliconia Color Spectrum

Key Points:

  • Breakdown of heliconia varieties by color.
  • Tips for enhancing color through soil and sunlight.
  • Ideal pairings for garden design.

Conclusion: Bring the Magic of Heliconia Color to Your Garden

Heliconias are more than just plants—they’re a celebration of color, life, and tropical beauty. By understanding their needs and experimenting with design, you can create a garden that’s not only visually stunning but also a joy to maintain.

Ready to transform your space? Start by choosing your favorite heliconia variety and follow the tips in this guide. And don’t forget to share your heliconia journey with us—tag us in your garden photos or drop a comment below!

Continue Reading

Trending