Connect with us

Technology

Comparing Dumpster Sizes: Choosing the Right Fit for Your Project

Published

on

Dumpster Sizes

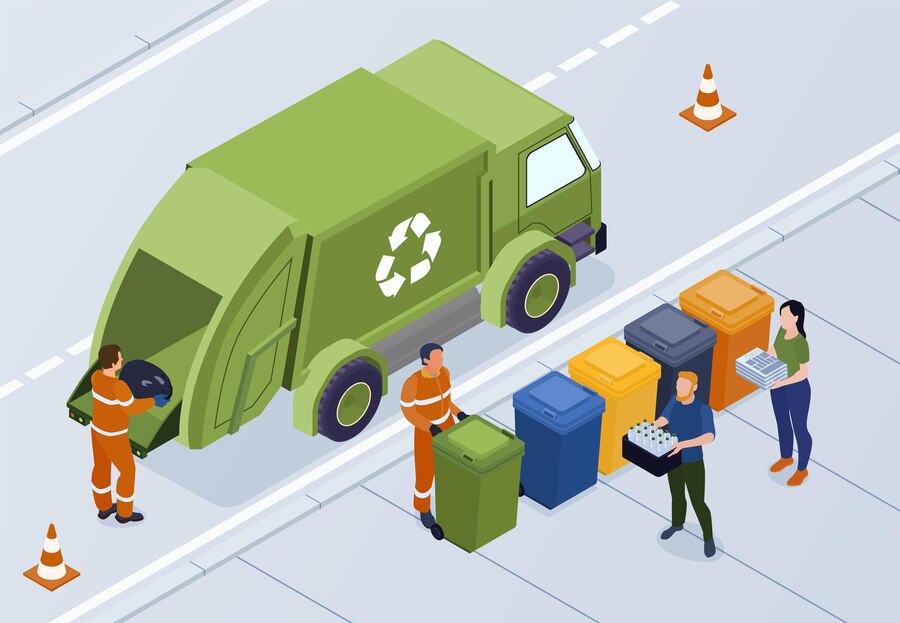
When starting a project that generates significant waste, whether it’s a home renovation, yard cleanup, or construction job, renting a dumpster can streamline your waste removal process. But with so many different sizes available, choosing the right one can be a bit overwhelming. Selecting the right dumpster size ensures you don’t overspend on unnecessary space or run out of room halfway through your project. In this guide, we’ll break down common dumpster sizes and help you determine which is best for your specific needs.

Why Choosing the Right Dumpster Size Matters

Getting the size right can make or break the efficiency of your project. If the dumpster is too small, you might end up overloading it or needing additional pickups, which can increase costs and delay your work. On the other hand, if the dumpster is too large, you’re essentially paying for space you don’t need. By understanding the different sizes and their uses, you can avoid these pitfalls and keep your project on track.

Working with a reputable provider, such as Hiep Sanitation, ensures you have access to a range of dumpster sizes and can get guidance on the best option based on your project’s scope and waste type.

Overview of Common Dumpster Sizes

Let’s dive into the standard dumpster sizes available and what types of projects each is suited for. Dumpster sizes are generally measured in cubic yards, with most residential projects using 10 to 30-yard dumpsters, while larger construction jobs may require a 40-yard option.

10-Yard Dumpster

  • Best For: Small projects like minor home cleanouts, bathroom renovations, or yard debris removal.
  • Dimensions: Typically around 10 feet long, 7 feet wide, and 3.5 feet high.
  • Capacity: Holds about three truckloads of waste, making it ideal for compact jobs.

A 10-yard dumpster is a great choice for projects that generate a modest amount of waste. It’s perfect for small cleanouts, such as clearing out a garage or attic. It’s also an effective option for small renovation jobs where you’re disposing of fixtures, flooring, or yard debris.

20-Yard Dumpster

  • Best For: Mid-sized projects like kitchen remodels, basement cleanouts, or moderate landscaping work.
  • Dimensions: Typically 22 feet long, 7 feet wide, and 4.5 feet high.
  • Capacity: Holds about six truckloads of waste.

The 20-yard dumpster is one of the most popular sizes for residential projects. It’s large enough to handle more substantial waste, but compact enough to fit on most driveways. This size is well-suited for remodeling projects and larger cleanouts, as it can accommodate bulkier items like cabinets, countertops, and roofing materials.

30-Yard Dumpster

  • Best For: Larger home renovations, multiple-room remodels, or substantial yard cleanups.
  • Dimensions: Typically 22 feet long, 7 feet wide, and 6 feet high.
  • Capacity: Holds about nine truckloads of waste.

For major projects, the 30-yard dumpster offers the capacity needed to manage a higher volume of debris. This size is ideal for home additions, significant landscaping work, and general construction projects. If you’re tackling a multi-room remodel, this dumpster provides the space to keep your work area clean and organized.

40-Yard Dumpster

  • Best For: Large construction jobs, commercial projects, or extensive renovations.
  • Dimensions: Typically 22 feet long, 7 feet wide, and 8 feet high.
  • Capacity: Holds about twelve truckloads of waste.

The 40-yard dumpster is the largest available for residential and commercial projects. It’s suitable for major construction or demolition work, as it provides ample room for bulky, heavy debris like concrete, metal, and large amounts of wood. If you’re working on a large-scale project, the 40-yard dumpster is a practical choice that can handle the waste generated by ongoing work.

How to Determine the Right Size for Your Project

While it’s helpful to know the available sizes, deciding on the right dumpster depends on your specific needs. Here are some considerations to help you make an informed choice:

1. Assess the Scope of Your Project

Consider the type and amount of waste your project will produce. If you’re tackling a small residential project, such as decluttering a room or doing a minor landscaping job, a 10-yard dumpster will likely suffice. However, if you’re undertaking a major renovation or building an addition, a larger dumpster will be necessary to accommodate the volume of debris.

2. Think About the Types of Materials

The weight and type of materials you’ll be disposing of are important factors. Heavy materials like concrete or soil require special consideration due to weight limits. If your project involves substantial amounts of heavy debris, a 10 or 20-yard dumpster may be more suitable than a larger one, as the weight limit may be reached before it’s completely full.

  • Light Materials: For lighter items, such as wood, insulation, and household items, larger dumpsters like the 30 or 40-yard sizes are ideal for fitting as much as possible.
  • Heavy Materials: For heavy materials, it’s better to choose a smaller dumpster and arrange for multiple pickups if necessary to avoid exceeding weight limits.

3. Evaluate Your Available Space

Before renting a dumpster, check your available space. Driveways, parking lots, and open yard spaces are ideal for placing dumpsters, but ensure there’s enough room for the truck to deliver and retrieve it. Most residential driveways can easily accommodate a 20 or 30-yard dumpster. However, if space is limited, consult with your dumpster rental provider for recommendations on placement.

4. Consult with Your Dumpster Rental Provider

If you’re unsure about the best size for your project, don’t hesitate to reach out to your provider. Companies like Hiep Sanitation can offer guidance based on their experience with similar projects. They can help you estimate the amount of waste based on your project type and recommend a dumpster that will fit your needs while staying within budget.

Maximizing Your Dumpster Rental’s Capacity

To make the most of your dumpster rental, take the time to load it strategically. A well-organized dumpster can hold more waste, reducing the need for multiple hauls and keeping costs down. Here are a few tips for maximizing the space:

Break Down Larger Items

Bulky items like furniture, cabinetry, and pallets take up more space if left intact. By breaking these items down into smaller pieces, you can make better use of the dumpster’s capacity. For example, dismantling an old dresser or breaking down cardboard boxes allows you to fit more into the container.

Place Heavy Items at the Bottom

Start by loading heavy materials, such as bricks or concrete, at the bottom of the dumpster. This not only keeps the load balanced but also prevents lighter materials from getting crushed. Stack lighter debris on top to make the best use of vertical space.

Avoid Overloading

Dumpsters have fill lines for a reason—overloading can result in additional fees and safety hazards. Instead of overloading a single dumpster, consider renting an additional one if necessary. This approach keeps the project moving without risking fines or delays.

Additional Tips for a Smooth Rental Experience

Choosing the right dumpster size is just the beginning. To ensure your rental goes smoothly, keep these additional tips in mind:

1. Schedule Pickups in Advance

When planning your rental, it’s helpful to schedule pickups based on your project timeline. If you anticipate needing multiple hauls, work with your provider to establish a pickup schedule that aligns with each phase of your project.

2. Keep Safety in Mind

Dumpsters should be placed on a flat, stable surface to prevent tipping. Ensure the area around the dumpster is free from obstructions, and use caution when loading heavy or sharp items to prevent injuries.

3. Be Aware of Restricted Items

Certain items, such as hazardous materials, batteries, and electronics, typically cannot be disposed of in standard dumpsters. Be sure to check with your rental provider about restricted items and have a plan for properly disposing of any hazardous materials.

Conclusion: Finding the Perfect Dumpster Size for Your Project

By understanding the common dumpster sizes and assessing your project’s specific needs, you can make an informed decision that maximizes efficiency and keeps costs under control. Whether you’re handling residential trash removal or managing construction debris, choosing the right size dumpster is key to a successful project. For expert guidance and a range of options, Hiep Sanitation offers reliable dumpster rental services that cater to projects of all sizes. With the right dumpster on-site, you’ll be able to focus on your work without worrying about waste removal.

Continue Reading
Click to comment

Leave a Reply

Your email address will not be published. Required fields are marked *

Technology

Photeeq Photo Ideas: Creative Strategies for Stunning Shots

Published

on

Photeeq Photo Ideas

Ever struggled to come up with fresh, eye-catching photo ideas? Whether you’re a budding photographer, a social media enthusiast, or just someone who loves capturing moments, finding unique photo concepts can be challenging. That’s where Photeeq photo ideas come in—helping you unlock creativity and take your photography to the next level.

In this guide, we’ll explore practical, expert-backed strategies to inspire your next photoshoot. From composition tricks to trending themes, you’ll discover actionable tips to make your images stand out.

Why Unique Photo Ideas Matter

In today’s visually driven world, standing out is key. Whether for Instagram, a portfolio, or personal memories, compelling photos:

  • Grab attention instantly

  • Tell a story more effectively

  • Boost engagement on social media

  • Enhance professional credibility

Let’s dive into proven Photeeq-inspired ideas to elevate your shots.

1. Play with Perspectives

Shooting from unusual angles can transform an ordinary scene into something extraordinary. Try these:

  • Bird’s-eye view: Capture flat lays (food, books, accessories) from directly above.

  • Worm’s-eye view: Shoot upwards for dramatic landscapes or towering architecture.

  • Dutch tilt: Tilt your camera slightly for a dynamic, edgy effect.

Example: A simple coffee cup becomes artsy when shot from above with steam rising and a notebook beside it.

2. Experiment with Lighting

Lighting can make or break a photo. Here’s how to use it creatively:

  • Golden hour magic: Shoot during sunrise/sunset for warm, soft glows.

  • Silhouettes: Position your subject against a bright background for striking outlines.

  • Artificial light play: Use fairy lights, neon signs, or candles for moody effects.

Pro tip: Diffused light (through curtains or softboxes) reduces harsh shadows for flattering portraits.

3. Incorporate Motion Blur

Adding movement creates energy and depth:

  • Panning shots: Follow a moving subject (cyclist, car) with a slower shutter speed.

  • Light trails: Capture car headlights at night with long exposure.

  • Water motion: Use a tripod to blur flowing rivers or waterfalls.

Example: A dancer mid-twirl with slight motion blur conveys elegance and motion.

4. Use Reflections Creatively

Reflections add symmetry and intrigue:

  • Puddles: After rain, shoot upside-down cityscapes in water droplets.

  • Mirrors: Frame a subject within a mirror for a surreal effect.

  • Sunglasses: Capture reflections in lenses for a cool, unexpected twist.

5. Focus on Textures & Patterns

Close-ups of textures make visually captivating shots:

  • Nature: Bark, leaves, sand dunes.

  • Urban: Brick walls, rusted metal, cobblestones.

  • Everyday objects: Fabric weaves, food textures (melting chocolate, frothy coffee).

Pro tip: Black-and-white editing enhances texture contrast.

6. Try Themed Photoshoots

A cohesive theme makes your photos more memorable:

  • Color-themed: All-blue or monochrome compositions.

  • Seasonal: Autumn leaves, snowy landscapes, spring blossoms.

  • Conceptual: “Floating objects” (using hidden supports) or “miniature worlds.”

Example: A “vintage bookshelf” theme with old books, a cup of tea, and warm lighting.

7. Candid & Emotional Shots

Authentic moments often outshine posed ones:

  • Laughter: Capture genuine smiles during conversations.

  • Street photography: Document raw, unfiltered urban life.

  • Pet antics: Animals in action make heartwarming shots.

8. Minimalist Photography

“Less is more” works wonders:

  • Negative space: Isolate a single subject against a clean background.

  • Single-color dominance: A red apple on a white table.

  • Simple silhouettes: A lone tree against a sunset.

9. Creative Editing Techniques

Post-processing can elevate your photos:

  • Selective color: Keep one color vibrant while desaturating the rest.

  • Double exposure: Blend portraits with landscapes for an artistic effect.

  • Vintage filters: Add grain and faded tones for nostalgia.

Tool suggestion: Lightroom presets or Snapseed for mobile edits.

10. Interactive & Fun Concepts

Engage your audience with participatory ideas:

  • “Follow the arrow”: Use props to lead the viewer’s eye.

  • “Holding the sun”: Play with perspective to “hold” the sun or moon.

  • Shadow play: Use shadows to create interesting shapes.

Final Thoughts: Keep Experimenting!

The best Photeeq photo ideas come from curiosity and experimentation. Don’t be afraid to:
✔ Break composition rules occasionally
✔ Test new gear (lens filters, tripods)
✔ Revisit old shots with fresh editing styles

Continue Reading

Technology

Understanding the c0765 0x4750 and c0750 0x4765 Code

Published

on

c0765 0x4750 and c0750 0x4765 Code

Introduction

Have you ever encountered the enigmatic c0765 0x4750 and c0750 0x4765 codes while working on a project? These cryptic combinations of numbers and letters can seem like a puzzling riddle at first glance. But fear not, as we are here to unravel the mystery behind these codes in this comprehensive guide. Get ready to dive into the world of error code deciphering and gain a deeper understanding of what lies beneath these perplexing symbols. Let’s embark on this journey together to demystify the secrets of the c0765 0x4750 and c0750 0x4765 code!

Understanding the Structure

When it comes to decoding error codes like c0765 0x4750 and c0750 0x4765, understanding the structure is key. These alphanumeric combinations may seem perplexing at first glance, but they follow a specific format that holds valuable information.

The structure of these codes typically consists of a prefix (such as ‘c’ or ‘0x’), followed by a series of numbers and letters. Each component plays a crucial role in identifying the nature of the error and its location within the system.

By dissecting the code piece by piece, developers can unravel its meaning and gain insights into what went wrong. This process requires attention to detail and an analytical mindset to connect the dots effectively.

In essence, comprehending the structure of error codes is akin to deciphering a cryptic message – it takes patience, logic, and persistence. With practice and experience, unraveling these intricate patterns becomes second nature for seasoned professionals in the field.

Possible Interpretations

When faced with the mysterious c0765 0x4750 and c0750 0x4765 codes, it’s natural to wonder about their possible interpretations. Could they signify a specific error in the system, or perhaps a communication breakdown between components? These codes might hold the key to unlocking hidden issues within the codebase.

One interpretation could point towards a voltage irregularity, prompting further investigation into electrical connections or sensor malfunctions. Another angle to consider is a software glitch impacting critical functions of the vehicle. Perhaps these codes are indicating an impending failure that needs prompt attention.

Delving deeper into their meanings requires dissecting each digit and character meticulously for clues. Each combination could reveal insights into complex systems at play within modern vehicles. As we unravel these enigmatic messages, new possibilities and solutions may emerge to address underlying issues effectively.

Deciphering the Context

Deciphering the context behind error codes like c0765 0x4750 and c0750 0x4765 code requires a keen eye for detail and a knack for problem-solving. It’s like unraveling a complex puzzle where each piece of information holds significance. Understanding the specific circumstances that led to these codes being triggered is crucial in finding the root cause of the issue.

Context can vary greatly depending on the system in which these error codes appear. It could be related to hardware malfunctions, software glitches, or even environmental factors affecting the device. By delving deeper into the context surrounding these codes, programmers can gain valuable insights that pave the way for effective troubleshooting strategies.

Decoding the context is akin to following breadcrumbs – each clue leading closer to a solution. It often involves examining logs, analyzing data flow, and considering recent changes made to the system. The ability to contextualize error codes not only facilitates quicker problem resolution but also enhances overall code management practices.

In essence, deciphering context is an art form that demands patience, precision, and ingenuity from developers seeking to crack the code mystery once and for all.

Troubleshooting and Solutions

When encountering the c0765 0x4750 and c0750 0x4765 code, troubleshooting can be a daunting task. One common solution is to check for any recent updates or changes in the code that might have triggered the error. It’s essential to review the entire code carefully to identify any syntax errors or missing elements.

Another approach is to debug the code step by step using tools like breakpoints or console logs to pinpoint where the issue arises. Additionally, testing different scenarios can help uncover specific conditions that trigger the error.

Collaborating with colleagues or seeking advice from online forums can provide fresh perspectives and potential solutions you might not have considered. Remember, persistence and patience are key when troubleshooting complex error codes – don’t be afraid to experiment with various approaches until you find a resolution.

Best Practices in Code Management

When it comes to managing code effectively, there are some best practices that can make a significant difference in the development process.

Maintaining clear and organized documentation is key. This includes detailed comments within the code itself as well as external documents outlining the purpose and functionality of each component.

Version control is another crucial aspect of code management. By using tools like Git, developers can track changes, collaborate seamlessly with team members, and revert back to previous versions if needed.

Regular code reviews are essential for ensuring quality and consistency across projects. Peer feedback not only helps catch errors but also promotes knowledge sharing and improvement.

Additionally, following coding standards and conventions contributes to readability and maintainability. Consistent formatting makes it easier for multiple developers to work on the same codebase without confusion or errors.

Automated testing should be integrated into the development workflow to identify bugs early on and ensure that new code doesn’t break existing functionalities.

Real-World Applications

Have you ever wondered how the cryptic c0765 0x4750 and c0750 0x4765 code play out in real-life scenarios? Well, let’s dive into some practical applications where these error codes could surface. Imagine you’re working on a cutting-edge autonomous vehicle project, and suddenly, one of the sensors triggers a c0765 0x4750 code – this could indicate an issue with the steering control system.

In another context, picture yourself managing a network infrastructure for a large corporation when a server starts throwing the c0750 0x4765 error – signaling potential connectivity problems that need immediate attention. These examples highlight how understanding and addressing these codes promptly can make or break critical systems in various industries.

From automotive engineering to IT support, being well-versed in decoding these error messages is essential for ensuring smooth operations across different fields.

The Evolution of Error Codes

Error codes have come a long way since the early days of computing. Initially, they were cryptic messages that left users scratching their heads in confusion. As technology advanced, error codes evolved to become more descriptive and user-friendly.

In the past, deciphering an error code was like cracking a secret code. But today, with advancements in programming languages and diagnostic tools, understanding error codes has become much more accessible. Developers now have access to detailed documentation that provides insights into what each code means and how to troubleshoot it effectively.

The evolution of error codes reflects the continuous improvement in software development practices. By learning from past mistakes and refining error messaging systems, developers can create more robust and user-friendly applications that minimize downtime and enhance user experience.

Conclusion

As technology continues to advance, error codes like c0765 0x4750 and c0750 0x4765 Code play a crucial role in the world of programming. Understanding these codes not only helps developers troubleshoot issues efficiently but also enhances overall code management practices.

By deciphering the structure, context, and possible interpretations of these error codes, programmers can navigate through challenges more effectively. Through troubleshooting techniques and best practices in code management, developers can streamline their processes and improve software quality.

Real-world applications demonstrate how these error codes impact various industries and highlight the importance of staying updated with evolving technologies. As we witness the evolution of error code systems, it becomes evident that continuous learning is key to mastering coding languages and ensuring optimal performance.

Embracing the complexity of error codes such as c0765 0x4750 and c0750 0x4765 opens up a realm of possibilities for innovation and problem-solving in the digital age. By delving deeper into these mysteries, developers pave the way for smoother operations and innovative solutions in an ever-changing technological landscape.

Continue Reading

Technology

Kurt Vise Adapter Plate: Easy Steps to Install and Use

Published

on

Kurt Vise Adapter Plate

When working with CNC machines, being precise and flexible is key. That’s where the Kurt Vise Adapter Plate comes into play. This important accessory makes sure your CNC machine can handle many different tasks easily and accurately. Have you ever had trouble with mounting issues or found that your machine vise doesn’t fit? If so then the Kurt Vise Adapter Plate might be just what you need. In this post we’ll look at how installing a Kurt Vise Adapter Plate can make your CNC operations better and more flexible.

Kurt Vise Adapter Plates: What Are They?

Kurt Vise Adapter Plates are made to connect your CNC machine to the vise you need to use. These plates help create a perfect fit allowing different vises to be mounted on machines that might not have matched up before. The Kurt Vise comes in various sizes and styles ensuring there’s a perfect match for any machine and vise combination.

Step-by-Step Installation of Your Kurt Vise Adapter Plate

Installing a Kurt Vise Adapter Plate is simple. Here’s how you can do it:

Step 1: Choose the Right Adapter Plate

Start by choosing the adapter plate that fits your CNC machine and your vise model. Getting this right is key to a smooth installation and operation.

Step 2: Gather Needed Tools

You will need basic tools like wrenches and screws. You might also need a torque wrench depending on what your CNC machine manufacturer suggests.

Step 3: Line Up the Adapter Plate

Place the adapter plate on the CNC machine table and line it up with the mounting holes. This step is important for the stability of your vise during use.

Step 4: Attach the Plate

Use the screws that came with your adapter plate to attach the plate to the CNC machine. Make sure each screw is tightened to the setting the manufacturer recommends. This helps prevent any movement during use.

Step 5: Put On the Vise

Once the adapter plate is secure, put your Kurt Vise onto the adapter plate. Check all connections for any looseness.

Step 6: Calibrate

After mounting the vise you should calibrate your setup. This makes sure your machine works accurately and your pieces are made precisely.

Benefits of Upgrading to a Kurt Vise Setup

With your Kurt Vise and adapter plate in place you’ll see several benefits right away:

  • More Compatibility: You can now use a wider range of vises which lets you work on more types of projects.
  • Better Precision: The firm mounting reduces shaking and movement leading to cleaner cuts.
  • Faster Work: You spend less time making adjustments which means more time for actual machining.

Real-Life Applications: How a Kurt Vise Adapter Plate Can Help

Imagine you need to make many small parts with high accuracy. With the Kurt Vise Adapter Plate you can quickly switch between different vises suited for each part. This cuts down setup time and boosts your output. Choose Pin Vise Machinable Jaws by 5th Axis to improve the efficiency of your CNC machine’s operations.

Streamline Your Workflow

With a Kurt Vise Adapter Plate setting up for a new project becomes much quicker and simpler. You no longer have to wrestle with mismatched components or spend hours troubleshooting fit issues. This ease of configuration means you can move from one job to another with minimal downtime. It’s all about making your workflow as smooth and uninterrupted as possible which in turn can lead to higher productivity and reduced stress in the workshop.

Enhance Safety and Stability

Another significant advantage of integrating a Kurt Vise Adapter Plate into your setup is the added safety and stability it provides. By ensuring a secure and proper fit between your CNC machine and the vise the adapter plate minimizes the risk of accidents caused by loose or shifting components. This means you can operate your machine with confidence knowing that everything is securely locked in place. Safety is paramount in any machining environment and the adapter plate helps reinforce this.

Cost-Effective Upgrade

Investing in a Kurt Vise Adapter Plate is a cost-effective way to enhance your CNC machinery without the need for expensive upgrades or new machines. By adapting your existing equipment to work more efficiently and handle a wider range of tasks you save money in the long run. Instead of purchasing new machines for different jobs you can utilize the flexibility that the adapter plate offers making your current setup more versatile and capable of meeting diverse machining needs.

By adopting the Kurt Vise Adapter Plate you not only optimize your machining operations but also gain the ability to adapt quickly to new challenges and opportunities in the manufacturing field. It’s a smart move for any machinist looking to stay competitive and efficient in today’s fast-paced market. So why wait? Elevate your CNC machining game with the Kurt Vise Adapter Plate today and experience a smoother, safer and more cost-effective manufacturing process.

Final Thoughts: Upgrade Today!

Installing a Kurt Vise Adapter Plate is about more than just making your CNC machine better; it’s about improving your whole machining process. Why settle for less when you can make your operations better and take on more types of work? If you want more precision and efficiency the Kurt Vise Adapter Plate is a great choice.

Continue Reading

Trending