Connect with us

Food And Drinks

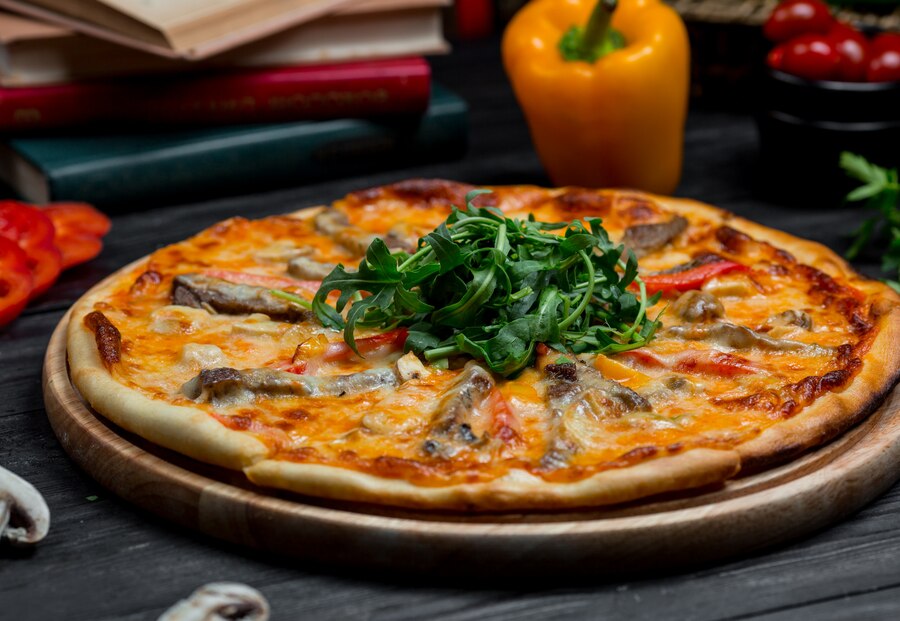
An Ode to Anchovies on Pizza: Exploring a Controversial Topping

Published

on

Anchovies on Pizza

Anchovies on pizza—a divisive topic that ignites passionate debates among pizza enthusiasts. For some, anchovies are a must-have topping, adding a burst of salty umami flavor that elevates the pizza experience. For others, the mere mention of anchovies elicits a wrinkled nose and a firm “no, thank you.” In this article, we’ll dive into the world of anchovies on pizza, exploring their history, flavor profile, and the ongoing debate surrounding their presence on one of the world’s most beloved dishes.

A Brief History of Anchovies on Pizza

Anchovies have been a traditional topping on pizzas since the early days of this iconic dish. Originating in Naples, Italy, where pizza was first created, anchovies were one of the original toppings used alongside simple ingredients like tomatoes, mozzarella cheese, and basil. As pizza spread throughout Italy and eventually around the world, anchovies remained a popular choice for those seeking a bold and briny flavor on their pies.

The Flavor Profile of Anchovies

Anchovies are small, oily fish that pack a powerful punch of flavor. While some may find their taste overly intense or salty, others appreciate the depth and complexity that anchovies bring to a dish. When cooked, anchovies melt into the pizza, infusing each bite with a rich, savory umami flavor that complements other ingredients such as cheese, tomatoes, and olives.

The Debate Rages On

Despite their historical significance and distinctive flavor, anchovies on pizza continue to divide opinion among pizza lovers. Those who enjoy anchovies praise their unique taste and assert that they are an essential component of a classic pizza experience. They argue that an-chovies add depth and character to the pizza, creating a harmonious balance of flavors that tantalize the taste buds.

On the other hand, detractors of anchovies on pizza often cite their strong, fishy taste and assert that they overpower the other ingredients, making the pizza unpalatable for those who do not enjoy seafood. Some may also find the texture of anchovies off-putting, as they can be slightly chewy or gritty when cooked.

Embracing Diversity in Pizza Toppings

Ultimately, the beauty of pizza lies in its versatility and adaptability to personal taste preferences. While an-chovies may not be to everyone’s liking, their presence on pizza serves as a reminder of the diverse array of toppings available to suit every palate. Whether you prefer classic combinations like pepperoni and mushrooms or more adventurous options like pineapple and jalapeños, there’s a pizza topping out there for everyone to enjoy.

Conclusion

Anchovies on pizza may be a divisive topic, but they undeniably hold a special place in the hearts of pizza aficionados worldwide. Whether you’re a staunch supporter of an-chovies or firmly in the “no an-chovies, please” camp, the debate surrounding this controversial topping adds an extra layer of flavor and excitement to the pizza-eating experience. So the next time you order a pizza, consider giving an-chovies a chance—you might just discover a new favorite topping that surprises and delights your taste buds.
Continue Reading
Click to comment

Leave a Reply

Your email address will not be published. Required fields are marked *

Food And Drinks

Kua Gai Noodles: A Delectable Thai Street Food Delightlong drives

Published

on

Kua Gai Noodles

Kua Gai Noodles, also known as “Kuay Teow Kua Gai,” is a popular Thai street food dish that has captured the hearts and taste buds of food enthusiasts worldwide. This savory and aromatic dish combines stir-fried rice noodles with tender chicken, vegetables, and a distinctive blend of seasonings, creating a delightful symphony of flavors and textures. Let’s explore the origins, ingredients, preparation, and why Kua Gai Noodles are a must-try for anyone who loves Thai cuisine.

Origins of Kua Gai Noodles

The roots of Kua Gai Noodles can be traced back to the vibrant street food culture of Thailand. While the exact origin of the dish is unclear, it is believed to have emerged from the bustling markets and food stalls of Bangkok, where vendors would cook up quick and flavorful meals for busy locals and tourists. The dish has since become a staple in Thai cuisine, enjoyed both at home and in restaurants.

Ingredients

The magic of Kua Gai Noodles lies in its simplicity and the harmonious blend of ingredients. Here’s what you typically need to make this delicious dish:

  • Rice Noodles: Wide rice noodles are preferred for their chewy texture and ability to absorb flavors.
  • Chicken: Sliced or diced chicken breast or thigh, marinated to enhance flavor.
  • Vegetables: Common choices include Chinese broccoli, bean sprouts, and green onions.
  • Eggs: Scrambled into the noodles to add richness.
  • Garlic: Finely chopped for a fragrant base.
  • Oyster Sauce: Adds depth and umami.
  • Soy Sauce: Provides saltiness and color.
  • Fish Sauce: Adds a unique savory note.
  • White Pepper: For a hint of spice.
  • Cooking Oil: Typically vegetable oil, for stir-frying.

Optional ingredients can include mushrooms, tofu, or shrimp, depending on personal preference.

Preparation

Making Kua Gai Noodles is straightforward, making it an excellent choice for a quick and satisfying meal. Here’s a step-by-step guide to preparing this delightful dish:

  1. Prepare the Ingredients:
    • Soak the rice noodles in warm water until they are soft, then drain and set aside.
    • Marinate the chicken with a bit of soy sauce and white pepper.
    • Chop the vegetables and garlic.
  2. Cook the Chicken:
    • Heat a wok or large skillet over medium-high heat and add a splash of oil.
    • Add the garlic and sauté until fragrant.
    • Add the marinated chicken and stir-fry until it is cooked through.
  3. Add the Noodles and Vegetables:
    • Push the chicken to one side of the wok and add a little more oil if needed.
    • Add the rice noodles and stir-fry for a couple of minutes.
    • Mix in the vegetables and continue to stir-fry until they are just tender.
  4. Incorporate the Eggs:
    • Push the noodles and chicken to the side and crack the eggs into the wok.
    • Scramble the eggs until they are mostly cooked, then mix them into the noodle mixture.
  5. Season and Serve:
    • Add oyster sauce, soy sauce, and fish sauce to taste, and mix well to coat the noodles evenly.
    • Stir-fry everything together for another minute to ensure the flavors are well combined.
    • Serve hot, garnished with fresh green onions or cilantro if desired.

Why Kua Gai Noodles Are a Must-Try

  1. Flavor Explosion: The combination of savory sauces, tender chicken, and fresh vegetables creates a mouthwatering flavor profile that is both comforting and exciting.
  2. Texture Variety: The chewiness of the rice noodles, the tenderness of the chicken, and the crunchiness of the vegetables provide a delightful mix of textures in every bite.
  3. Versatility: Kua Gai Noodles can be customized with various proteins and vegetables, making it adaptable to different tastes and dietary preferences.
  4. Quick and Easy: The dish is relatively simple to prepare, making it an excellent choice for a weeknight dinner or a quick lunch.
  5. Authentic Thai Experience: Enjoying Kua Gai Noodles is like taking a culinary trip to Thailand, offering an authentic taste of the country’s rich street food culture.

Conclusion

Kua Gai Noodles are a delicious representation of Thai street food that combines simple ingredients with bold flavors and delightful textures. Whether you’re a seasoned Thai food lover or new to the cuisine, this dish is sure to impress and satisfy. So, next time you’re looking for a quick and tasty meal, try making Kua Gai Noodles and experience the magic of Thai street food right in your own kitchen.

Continue Reading

Food And Drinks

A Guide to Sprouting Cashews: Benefits, Process, and Uses

Published

on

Sprouting Cashews

Sprouting is a process that involves germinating seeds, grains, or nuts to enhance their nutritional value and digestibility. While cashews are a popular and versatile nut, they are often consumed raw or roasted. However, sprouting cashews can unlock additional health benefits and make them easier to digest. This article delves into the benefits of sprouting cashews, the process of sprouting, and creative ways to incorporate them into your diet.

Benefits of Sprouting Cashews

  1. Enhanced Nutritional Value: Sprouting cashews increases their nutrient content, including vitamins, minerals, and antioxidants. The sprouting process activates enzymes that improve the bioavailability of nutrients, making them easier for the body to absorb.
  2. Improved Digestion: Raw nuts contain enzyme inhibitors that can interfere with digestion. Sprouting neutralizes these inhibitors, resulting in nuts that are gentler on the digestive system and less likely to cause bloating or discomfort.
  3. Reduced Anti-Nutrients: Cashews, like other nuts and seeds, contain phytic acid, an anti-nutrient that can bind to minerals and reduce their absorption. Sprouting significantly reduces phytic acid levels, enhancing mineral availability.
  4. Increased Protein Quality: The sprouting process can improve the amino acid profile of cashews, making their protein content more complete and beneficial for muscle repair and growth.

The Sprouting Process

Sprouting cashews at home is simple and requires minimal equipment. Here’s a step-by-step guide:

  1. Choose Raw Cashews: Ensure you are using raw, unroasted, and unsalted cashews. Roasted or processed cashews will not sprout.
  2. Soak the Cashews:
  1. Place the raw cashews in a bowl.
  2. Add enough filtered water to cover the cashews completely.
  3. Soak the cashews for 4-6 hours. Some prefer to soak overnight for convenience.
  4. Drain and rinse the cashews thoroughly.
  5. Rinse and Drain:
  1. After soaking, place the cashews in a sprouting jar or a large bowl.
  2. Rinse the cashews with fresh water and drain thoroughly.
  3. Repeat the rinsing and draining process every 8-12 hours for the next 1-2 days.
  4. Monitor the Sprouts:
  1. Keep the sprouting jar or bowl in a cool, dark place.
  2. Continue the rinsing and draining cycle until you notice small sprouts emerging from the cashews. This usually takes 1-2 days.
  3. Once sprouted, give the cashews a final rinse and drain well.
  4. Store the Sprouted Cashews:
  1. Transfer the sprouted cashews to an airtight container.
  2. Store them in the refrigerator for up to 5-7 days.
  3. For longer storage, you can dehydrate the sprouted cashews and keep them in an airtight container.

Creative Uses for Sprouted Cashews

Sprouted cashews are incredibly versatile and can be used in various recipes. Here are some ideas to incorporate them into your diet:

  1. Nut Milk: Blend sprouted cashews with water to create a creamy, dairy-free milk. Strain the mixture through a nut milk bag for a smooth texture.
  2. Cashew Cream: Blend sprouted cashews with water, lemon juice, and a pinch of salt to make a rich, versatile cream that can be used as a base for sauces, soups, or desserts.
  3. Smoothies: Add sprouted cashews to your smoothies for an extra boost of protein and creaminess.
  4. Salads: Sprinkle sprouted cashews over salads for added crunch and nutrition.
  5. Snacks: Enjoy sprouted cashews as a healthy snack on their own or mixed with dried fruit and seeds.
  6. Baking: Use sprouted cashews in baking recipes, such as cookies, energy bars, and granola, to enhance the nutritional value of your treats.

Conclusion

Sprouting cashews is a simple and effective way to boost their nutritional profile and make them easier to digest. By following the sprouting process and incorporating sprouted cashews into your diet, you can enjoy their enhanced benefits and versatility. Whether you’re making creamy cashew milk, adding them to smoothies, or snacking on them directly, sprouted cashews offer a delicious and nutritious addition to your meals.

Continue Reading

Food And Drinks

Is Twisted Tea Gluten-Free? Exploring Dietary Concerns

Published

on

Is Twisted Tea Gluten-Free

Twisted Tea, a popular alcoholic beverage known for its refreshing taste, often raises questions among consumers regarding its gluten content and suitability for individuals with gluten sensitivity or celiac disease. This article aims to clarify whether Twisted Tea is gluten-free and provide insights into considerations for individuals with dietary restrictions.

Understanding Twisted Tea

Twisted Tea is a flavored malt beverage that combines brewed tea with alcohol, typically marketed in various flavors such as original, half and half, raspberry, and mango. It has gained popularity for its crisp flavor profile and accessibility among consumers seeking a ready-to-drink alcoholic beverage.

Gluten-Free Status

Twisted Tea does not explicitly market itself as gluten-free. While the exact ingredients and brewing process may vary by product line and region, most flavored malt beverages, including Twisted Tea, are brewed using barley malt. Barley is a grain that contains gluten, making traditional malt beverages not suitable for individuals with gluten intolerance or celiac disease.

Dietary Considerations

  1. Gluten Sensitivity and Celiac Disease: Individuals with gluten sensitivity or celiac disease must avoid gluten-containing ingredients to prevent adverse health effects. Consuming beverages or foods that contain barley malt can trigger symptoms such as digestive discomfort, inflammation, and long-term damage to the small intestine for those with celiac disease.
  2. Labeling and Transparency: Manufacturers are required to disclose major allergens on product labels in many countries, including the presence of wheat or barley. It’s essential for consumers to read product labels carefully and look for statements indicating gluten-free status or the absence of gluten-containing ingredients.

Alternative Options

For individuals seeking gluten-free alcoholic beverages, several options are available:

  • Ciders: Many ciders are naturally gluten-free, as they are made from fermented apple juice or other fruits without barley or wheat ingredients.
  • Gluten-Free Beers: Some breweries produce gluten-free beers using alternative grains such as sorghum, rice, or gluten-free oats, providing options for beer enthusiasts with dietary restrictions.
  • Spirits and Wines: Distilled spirits like vodka, gin, and tequila, as well as wines, are generally considered gluten-free unless gluten-containing flavorings or additives are included.

Conclusion

While Twisted Tea offers a refreshing and flavorful beverage option, it typically contains barley malt and is not considered gluten-free. Individuals with gluten sensitivity or celiac disease should exercise caution and opt for beverages clearly labeled as gluten-free or explore alternative options that align with their dietary needs. Understanding product ingredients and making informed choices can help consumers enjoy beverages safely while maintaining their dietary preferences and health goals. As awareness grows around gluten-related concerns, manufacturers continue to expand their offerings to accommodate diverse dietary requirements in the beverage market.

Continue Reading

Trending