Technology
Diamantadas: How These Sparkling Creations Are Made

Step into the enchanting world of diamantadas, where craftsmanship meets elegance in a dazzling display of artistry. From argollas diamantadas to puntas diamantadas, these sparkling creations are more than just jewelry – they are a testament to skilled hands and creative minds. Join us on a journey to uncover the secrets behind the mesmerizing beauty of diamantadas and learn how these exquisite pieces come to life.
The Artistry of Diamantadas
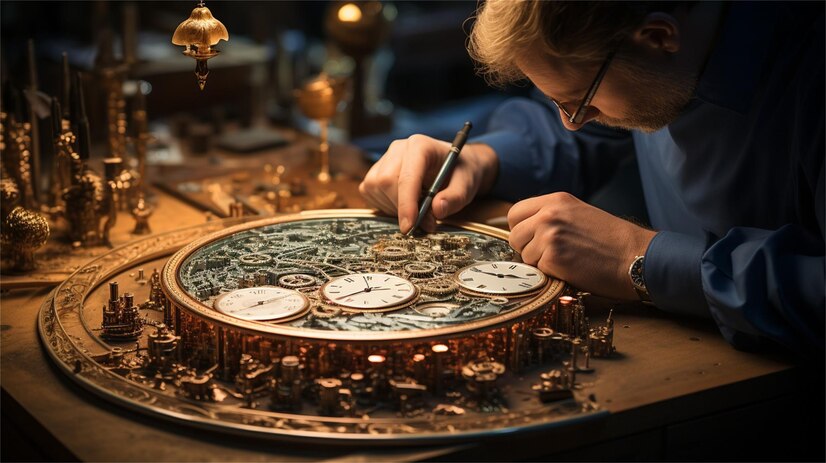
Crafted with precision and passion, diamantadas are more than just accessories – they are works of art that exude elegance and sophistication. Each piece tells a story of skillful hands meticulously shaping metal into intricate designs that captivate the eye. From delicate argollas diamantadas to sharp puntas diamantadas, every detail is carefully considered to create a stunning visual impact.
The process of creating these masterpieces involves a delicate dance between tradition and innovation. Skilled artisans draw inspiration from centuries-old techniques while infusing modern flair to ensure each piece is unique and contemporary. The result? A breathtaking fusion of timeless beauty and cutting-edge design that resonates with those who appreciate fine craftsmanship.
Diamantadas transcend mere adornment; they embody creativity, dedication, and artistry in its purest form. With every shimmering facet reflecting light like a thousand stars, these creations stand as testaments to human ingenuity and the enduring allure of jewelry-making at its finest.
Argollas diamantadas
Argollas diamantadas are a true masterpiece in the world of jewelry. These intricately designed diamond rings showcase unparalleled craftsmanship and elegance. Crafted with precision and attention to detail, argollas diamantadas are a symbol of sophistication and style.
Each diamond on the ring is carefully selected to ensure maximum brilliance and sparkle. The intricate setting of the diamonds adds a touch of glamour to these exquisite pieces. Whether worn as an engagement ring or for a special occasion, argollas diamantadas never fail to make a statement.
The beauty of argollas diamantadas lies in their versatility – they can be customized to suit individual preferences and styles. From classic designs to modern twists, there is a perfect argolla diamantada for every taste.
Puntas Diamantadas
Crafted with precision and expertise, Puntas Diamantadas are a shining example of the intricate artistry behind diamantadas. These diamond-tipped tools are designed to cut through tough materials with ease, making them essential for various industries like construction, mining, and jewelry-making.
The process of creating Puntas Diamantadas involves carefully attaching diamond crystals onto the tool’s surface through advanced techniques. This meticulous craftsmanship ensures that each point is durable and capable of delivering precise results every time it is used.
Whether you’re shaping gemstones or drilling into concrete, Puntas Diamantadas offer unmatched performance and longevity. Their ability to maintain sharpness over extended periods makes them a valuable asset for professionals seeking reliable cutting solutions in their work.
Innovative designs and superior quality make Puntas Diamantadas stand out as indispensable tools for those who demand excellence in their craft.
Bola Diamantada 7mm / 0.45gr Oro Amarillo
Crafted with precision and care, the Bola Diamantada 7mm in Oro Amarillo is a true masterpiece of jewelry artistry. This sparkling diamond ball, weighing 0.45 grams, exudes luxury and elegance like no other. The intricate design and brilliant yellow gold setting make it a standout piece that catches the eye from every angle.
Each facet of this diamantada sphere reflects light in a mesmerizing dance of sparkle and shine, creating an enchanting allure that captivates all who behold it. Whether worn as a pendant on a delicate chain or adorning a ring, this dazzling creation adds a touch of glamour to any ensemble.
The craftsmanship behind the Bola Diamantada 7mm / 0.45gr Oro Amarillo showcases the skill and dedication of skilled artisans who bring dreams to life through their meticulous attention to detail. It’s more than just jewelry; it’s an embodiment of sophistication and style that elevates any look to new heights of elegance.
Herramientas diamantadas
Crafting exquisite diamantadas requires precision tools known as herramientas diamantadas. These specialized tools are essential for cutting and shaping these sparkling creations with finesse.
From diamond-tipped saw blades to grinding wheels, herramientas diamantadas come in a variety of forms to suit different stages of the crafting process. These tools ensure accuracy and detail in every facet of the diamantada.
Professional artisans rely on herramientas diamantadas to bring out the brilliance and beauty of each piece they create. With the right tools at hand, they can transform raw materials into stunning works of art that captivate admirers worldwide.
The intricate designs and delicate features of diaman-tadas demand meticulous attention to detail, which is only achievable with high-quality herramientas diaman-tadas by their side. Masters in this craft understand the importance of using top-notch tools to achieve flawless results time and time again.
Conclusion
As we delve into the artistry of diamantadas, it becomes evident that these sparkling creations are more than just jewelry – they embody craftsmanship and elegance. From the intricate designs of argollas diaman-tadas to the precision of puntas diaman-tadas, each piece tells a story of skill and creativity.
The shimmering beauty of bola diamantada 7mm/0.45gr Oro Amarillo captures attention with its brilliance, showcasing the meticulous workmanship behind every facet. Tools like herramientas diaman-tadas play a crucial role in shaping these exquisite pieces, ensuring perfection in every detail. Each sparkle reflects not only light but also passion and artistry, making diaman-tadas truly exceptional in their allure.
FAQs
What are diamantadas?
Diaman-tadas are sparkling creations made using diamond-cut techniques to enhance the beauty and brilliance of jewelry pieces.
How are diamantadas made?
The process of creating diaman-tadas involves precision cutting and shaping of metal surfaces to create intricate patterns that resemble the facets of a diamond.
What types of diamantadas are available?
There are various types of diamantadas, including argollas diaman-tadas (diamond-cut hoops), puntas diaman-tadas (diamond-cut pointed tips), and bola diamantada 7mm / 0.45gr Oro Amarillo (yellow gold 7mm diamond-cut bead).
Technology
ecvh0 dforce master how to: Unlock Its Benefits

Introduction
Struggling with ecvh0 dforce master setup? You’re not alone. Many users find its configuration tricky, but mastering it unlocks powerful automation and efficiency. This guide breaks down the process into simple steps, helping you harness its full potential quickly.
Why It Matters
Properly setting up ecvh0 dforce master ensures smoother workflows, reduces errors, and maximizes productivity. Whether for personal projects or enterprise use, mastering this tool can save hours of manual work.
Step-by-Step Guide
1. Install & Configure
- Download the latest ecvh0 dforce master package from the official site.
- Follow the installation wizard, ensuring all dependencies are met.
2. Set Up Permissions
- Assign appropriate user roles (admin, editor, viewer).
- Configure access controls to prevent unauthorized changes.
3. Integrate with Your System
- Connect ecvh0 dforcemaster to your existing tools via API.
- Test the connection to ensure seamless data flow.
4. Automate Key Tasks
- Use built-in templates or create custom automation rules.
- Schedule recurring tasks to minimize manual input.
5. Monitor & Optimize
- Track performance metrics in the dashboard.
- Adjust settings for better speed and efficiency.
Pro Tip
Use keyboard shortcuts to navigate ecvh0 dforcemaster faster. Press
Ctrl + K
(Windows) orCmd + K
(Mac) to open the command palette for quick actions.
Conclusion
Mastering ecvh0 dforce master simplifies complex tasks and boosts efficiency. By following these steps, you’ll optimize your workflow and get the most out of this powerful tool.
FAQ
Is ecvh0 dforcemaster free?
It offers a free tier with limited features; advanced options require a subscription.
Can I use it offline?
Some features work offline, but full functionality requires an internet connection.
How secure is ecvh0 dforcemaster?
It uses encryption and role-based access for security. For best practices, check our security guide.
Technology
How to Disassemble a Sony KV-27S42 CRT TV: Complete Guide

Introduction
The Sony KV-27S42 is a classic CRT television, and while it’s no longer in production, many enthusiasts still repair, modify, or salvage these sets. However, disassembling a CRT TV requires caution—high-voltage components and delicate electronics mean one wrong move could be dangerous.
This guide will walk you through the full disassembly process of the KV-27S42, covering:
✔ Safety precautions (CRT discharge, avoiding shocks)
✔ Tool requirements (what you’ll need)
✔ Step-by-step teardown (removing the case, tube, and boards)
✔ Salvaging useful parts (what to keep or discard)
✔ Reassembly tips (if needed)
Whether you’re repairing, modding, or recycling, this guide ensures you do it safely and efficiently.
Why Disassemble a KV-27S42?
Before diving in, it’s worth understanding why you might need to take apart this TV:
🔹 Repairs – Fixing power supply issues, bad capacitors, or video problems.
🔹 Modifications – RGB or component video mods for retro gaming.
🔹 Salvage – Reusing the CRT, speakers, or other parts for projects.
🔹 Safe Disposal – CRTs contain hazardous materials (lead, phosphors) and must be recycled properly.
Warning:
⚠ CRTs hold high voltage even when unplugged – improper handling can result in severe electric shock.
⚠ The tube is heavy and fragile – dropping it can cause implosion or injury.
Tools & Safety Gear You’ll Need
Before starting, gather these essentials:
Essential Tools
✔ Screwdrivers (Phillips & flathead)
✔ CRT discharge tool (or insulated screwdriver + wire)
✔ Needle-nose pliers (for small connectors)
✔ Anti-static wrist strap (optional but recommended)
Safety Precautions
✔ Work in a dry, well-lit area
✔ Discharge the CRT before touching anything
✔ Wear gloves & safety glasses (glass shards are sharp)
✔ Keep pets/kids away (CRTs are dangerous when mishandled)
Step-by-Step Disassembly Guide
Step 1: Unplug & Discharge the CRT
- Unplug the TV and wait at least 30 minutes for capacitors to discharge.
- Locate the anode cap (the large rubber suction cup on the CRT).
- Discharge the CRT:
- Use a CRT discharge tool (best option).
- Alternative: Clip one end of a wire to the TV’s metal frame and carefully slide a flathead screwdriver under the anode cap until you hear/see a small spark.
Step 2: Remove the Rear Cover
- Flip the TV face-down on a soft surface (blanket/towel).
- Remove all rear screws (some may be hidden under stickers).
- Gently pry the back cover off—plastic tabs may hold it in place.
Step 3: Disconnect Internal Cables
- Take photos of all connections before unplugging anything.
- Unplug:
- Deflection yoke (two large plugs near the tube neck)
- Anode cap (already discharged, but still be careful)
- Speaker wires & control board connectors
Step 4: Remove the CRT Tube
- Unscrew the 4 CRT mounting brackets (they hold the tube to the frame).
- Carefully lift the tube out – it’s extremely heavy (get help if needed).
- Set it face-down on a soft surface to avoid scratches.
Step 5: Extract Circuit Boards & Other Components
- Mainboard – Remove screws and gently lift it out.
- Power supply – Disconnect all wires before removing.
- Speakers & tuner – Useful for retro projects if salvaging.
Pro Tips for Safe Disassembly
🔧 Label every wire and screw (masking tape + marker) to avoid confusion later.
🔧 Use a magnetic tray to keep screws organized.
🔧 If keeping the CRT, store it upright to avoid stress on the glass.
What Can You Salvage?
If you’re parting out the TV, these components are useful:
✅ CRT tube – Great for arcade builds or replacements.
✅ Speakers – Decent quality for DIY audio projects.
✅ Power supply & mainboard – Useful for electronics tinkering.
✅ Control knobs & buttons – Handy for retro mods.
How to Dispose of a CRT Safely
CRTs contain leaded glass and toxic phosphors, so never throw them in the trash. Instead:
♻ Check local e-waste recycling centers (many accept CRTs for free).
♻ Contact electronics repair shops – Some may take old TVs.
♻ Look for CRT buyback programs (some collectors pay for working tubes).
Conclusion: How to Disassemble a Sony KV-27S42 CRT TV
How to Disassemble a Sony KV-27S42 CRT TV, requires patience and safety awareness, but it’s a rewarding project for retro tech enthusiasts. Whether you’re fixing, modding, or salvaging, following this guide ensures a smooth process.
FAQ About How to Disassemble a Sony KV-27S42 CRT TV
1. Can I get shocked if the TV has been unplugged for days?
Yes! CRTs can hold charge for weeks. Always discharge before working.
2. How heavy is the KV-27S42 CRT?
Around 50-60 lbs (23-27 kg)—lift carefully or get help.
3. Can I reuse the CRT in another TV?
Possibly, but tube swaps require matching specs (size, impedance, etc.).
4. What if I break the CRT?
The glass is under vacuum—if it cracks, it can implode. Wear safety gear!
5. Is it worth repairing a KV-27S42?
If you love CRTs, yes! These Sonys have great picture quality for retro gaming.
Technology
How Much Does Window Tinting Cost? Save Money, Boost Comfort

Introduction
Window tinting costs can vary widely, leaving many car owners unsure about fair pricing. Whether you want UV protection, privacy, or heat reduction, understanding the factors that influence cost helps you budget wisely. This guide breaks down pricing, so you get the best value without surprises.
Why It Matters
Window tinting isn’t just about style—it blocks harmful UV rays, reduces glare, and keeps your car cooler. But overpaying or choosing cheap options can lead to poor quality. Knowing the average costs ensures you invest in a tint that lasts and performs well.
Step-by-Step Guide to Window Tinting Costs
1. Understand the Pricing Factors
- Film Quality: Basic dyed film starts at 50–150, while premium ceramic tints run 200–800.
- Vehicle Size: Smaller cars cost less (100–300) vs. SUVs (200–600).
- Number of Windows: Full-car tinting costs more than just side windows.
2. Compare Film Types
- Dyed Film (50–150): Affordable but fades faster.
- Carbon Film (150–350): Better heat rejection, matte finish.
- Ceramic Film (200–800): Top-tier heat/UV protection, no signal interference.
3. Factor in Labor Costs
Professional installation adds 50–200, depending on complexity. DIY kits (20–100) are cheaper but risk bubbles/peeling.
4. Check Local Market Prices
Urban areas often charge more. Get 3+ quotes to avoid overpaying.
5. Consider Legal Limits
Some states restrict tint darkness (e.g., California bans <70% VLT on front windows). Non-compliant tints may require costly removal.
Pro Tip
“Ask for a warranty! Reputable shops offer 5–10-year guarantees against peeling or fading—saving you long-term costs.”
Conclusion: How Much Does Window Tinting Cost
Window tinting cost 50–800+, depending on film type, vehicle size, and labor. Investing in ceramic film or a trusted installer ensures durability and performance. Always check local laws and compare quotes to make a smart choice.
FAQ: How Much Does Window Tinting Cost
1. Is tinting worth the cost?
Yes—it reduces skin-damaging UV rays by 99% and lowers AC use, saving fuel.
2. How long does tint last?
High-quality tints last 10+ years; cheap ones fade in 2–3 years.
3. Can I tint my windshield?
Most states only allow a clear or light tint strip. Check your local laws.
4. Does tint affect visibility?
Not if you choose the right VLT (%)—go for 35% or higher for safety.
-
Articles1 year ago
How Many Times Can You Regrow Green Onions
-
News7 months ago
Understanding HotLeaks: What You Need to Know
-
Fashion5 months ago
Opals in the USA: A Gemstone Transforming the Crystal Healing Market
-
Technology11 months ago
The Wonders of Oh Em Gee Blog
-
Entertainment11 months ago
Bare it All: Unforgettable Skinny Dipping Stories Shared
-
Health11 months ago
Can You Smoke Shrooms? Exploring the Myths and Realities
-
Articles2 months ago
WHAT IS THE DIFFERENCE BETWEEN SEED GARLIC AND FOOD GARLIC?
-
Fashion12 months ago
Make a Statement with Stunning Black Homecoming Dresses