Technology
What to Consider When Buying New Tractors in DFW

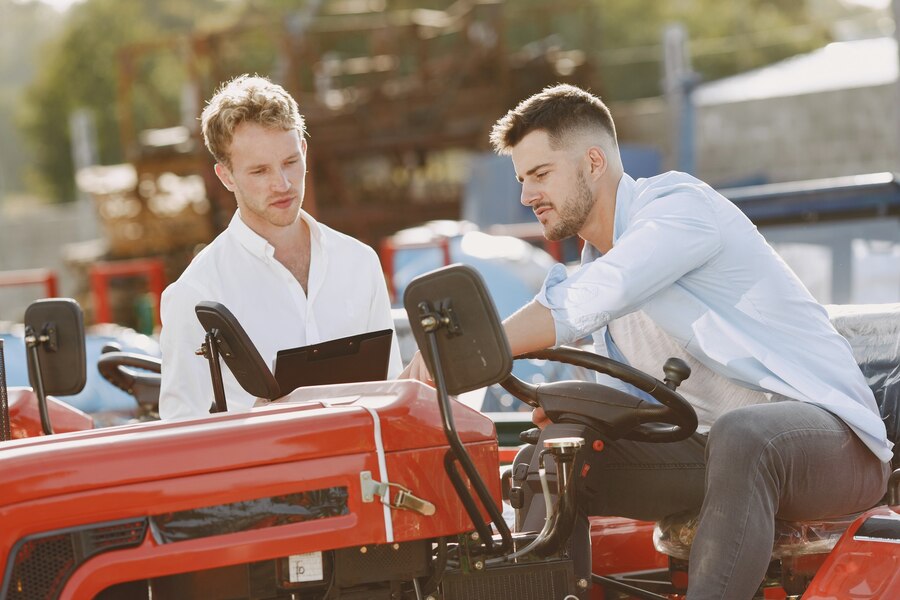
Purchasing a new tractor is a significant investment, especially when it’s for agricultural, construction, or landscaping purposes. In the DFW (Dallas-Fort Worth) area, where the demand for efficient and durable machinery is high, choosing the right tractor is crucial. Whether you’re managing a large farm or overseeing a small landscaping business, selecting the perfect machine will help improve productivity and long-term value. Here are some key factors to consider when buying a tractor in DFW.
1. Assess Your Specific Needs
Before purchasing any new tractor in DFW, it’s essential to evaluate the tasks you will be performing. Tractors come in various sizes and configurations, each suited for different applications. For example, if you’re primarily working on a small farm, a compact tractor might be sufficient for tasks like tilling, mowing, or pulling light loads. On the other hand, larger operations might require a more powerful tractor capable of handling heavy-duty tasks like plowing, hauling, or operating specialized implements.
Understanding the specific tasks your tractor needs to perform is key to making the right choice. In the DFW area, where urban and rural landscapes intersect, the demands on tractors can differ greatly depending on the location and industry.
2. Tractor Size and Power
Size and horsepower are key factors when selecting a tractor in DFW. Larger tractors provide more power and are ideal for large agricultural or commercial projects, while smaller ones are better for lighter tasks and smaller plots. It’s important to choose the right size to match your needs. A model that’s too large can be inefficient, while one that’s too small may struggle with heavy tasks. The correct horsepower ensures it can handle implements like mowers, loaders, or tillers without overtaxing the engine.
3. Safety Features and Comfort
Operating a tractor for long hours can be demanding, so comfort and safety are essential. Modern models offer safety features like roll-over protective structures (ROPS), better visibility, and adjustable seats. Ergonomic upgrades, such as easy controls, climate control, and soundproof cabins, may raise the initial cost but greatly improve comfort and reduce fatigue, boosting efficiency, especially for larger operations.
4. Maintenance and Service Support
New tractors are a big investment, and maintenance plays a crucial role in ensuring their longevity. When selecting one, consider the availability of service and repair support in your area. In DFW, it’s essential to have access to a reliable network of technicians who can provide routine maintenance and emergency repairs.
Look for manufacturers that offer comprehensive service packages and easy access to spare parts. This can make a big difference in keeping your machine running smoothly and minimizing downtime.
5. Financing and Budget
Buying a tractor in DFW is a significant investment, and many buyers choose financing to ease upfront costs. It’s important to compare interest rates, repayment terms, and loan options to stay within budget. Some dealers also offer leasing options for businesses needing equipment in the short term. Choose a financing plan that fits your financial capacity and offers a clear path to ownership.
Service and Support for New Tractors
When purchasing a new tractor, it’s important to work with a dealership that provides excellent after-sales service. The support you receive post-purchase can greatly impact your experience with the machine. This includes everything from warranty coverage to regular maintenance schedules. A reputable dealer will ensure you have the tools and resources to keep your tractor in optimal working condition for years to come.
Purchasing new tractors in DFW is a major decision that requires careful consideration. By assessing your needs, evaluating power and size, prioritizing durability, and factoring in service options, you can find a machine that suits your work environment and budget. Whether you’re managing a farm or maintaining a landscaping business, choosing the right tractor will help you get the job done efficiently and effectively.
Technology
ecvh0 dforce master how to: Unlock Its Benefits

Introduction
Struggling with ecvh0 dforce master setup? You’re not alone. Many users find its configuration tricky, but mastering it unlocks powerful automation and efficiency. This guide breaks down the process into simple steps, helping you harness its full potential quickly.
Why It Matters
Properly setting up ecvh0 dforce master ensures smoother workflows, reduces errors, and maximizes productivity. Whether for personal projects or enterprise use, mastering this tool can save hours of manual work.
Step-by-Step Guide
1. Install & Configure
- Download the latest ecvh0 dforce master package from the official site.
- Follow the installation wizard, ensuring all dependencies are met.
2. Set Up Permissions
- Assign appropriate user roles (admin, editor, viewer).
- Configure access controls to prevent unauthorized changes.
3. Integrate with Your System
- Connect ecvh0 dforcemaster to your existing tools via API.
- Test the connection to ensure seamless data flow.
4. Automate Key Tasks
- Use built-in templates or create custom automation rules.
- Schedule recurring tasks to minimize manual input.
5. Monitor & Optimize
- Track performance metrics in the dashboard.
- Adjust settings for better speed and efficiency.
Pro Tip
Use keyboard shortcuts to navigate ecvh0 dforcemaster faster. Press
Ctrl + K
(Windows) orCmd + K
(Mac) to open the command palette for quick actions.
Conclusion
Mastering ecvh0 dforce master simplifies complex tasks and boosts efficiency. By following these steps, you’ll optimize your workflow and get the most out of this powerful tool.
FAQ
Is ecvh0 dforcemaster free?
It offers a free tier with limited features; advanced options require a subscription.
Can I use it offline?
Some features work offline, but full functionality requires an internet connection.
How secure is ecvh0 dforcemaster?
It uses encryption and role-based access for security. For best practices, check our security guide.
Technology
How to Disassemble a Sony KV-27S42 CRT TV: Complete Guide

Introduction
The Sony KV-27S42 is a classic CRT television, and while it’s no longer in production, many enthusiasts still repair, modify, or salvage these sets. However, disassembling a CRT TV requires caution—high-voltage components and delicate electronics mean one wrong move could be dangerous.
This guide will walk you through the full disassembly process of the KV-27S42, covering:
✔ Safety precautions (CRT discharge, avoiding shocks)
✔ Tool requirements (what you’ll need)
✔ Step-by-step teardown (removing the case, tube, and boards)
✔ Salvaging useful parts (what to keep or discard)
✔ Reassembly tips (if needed)
Whether you’re repairing, modding, or recycling, this guide ensures you do it safely and efficiently.
Why Disassemble a KV-27S42?
Before diving in, it’s worth understanding why you might need to take apart this TV:
🔹 Repairs – Fixing power supply issues, bad capacitors, or video problems.
🔹 Modifications – RGB or component video mods for retro gaming.
🔹 Salvage – Reusing the CRT, speakers, or other parts for projects.
🔹 Safe Disposal – CRTs contain hazardous materials (lead, phosphors) and must be recycled properly.
Warning:
⚠ CRTs hold high voltage even when unplugged – improper handling can result in severe electric shock.
⚠ The tube is heavy and fragile – dropping it can cause implosion or injury.
Tools & Safety Gear You’ll Need
Before starting, gather these essentials:
Essential Tools
✔ Screwdrivers (Phillips & flathead)
✔ CRT discharge tool (or insulated screwdriver + wire)
✔ Needle-nose pliers (for small connectors)
✔ Anti-static wrist strap (optional but recommended)
Safety Precautions
✔ Work in a dry, well-lit area
✔ Discharge the CRT before touching anything
✔ Wear gloves & safety glasses (glass shards are sharp)
✔ Keep pets/kids away (CRTs are dangerous when mishandled)
Step-by-Step Disassembly Guide
Step 1: Unplug & Discharge the CRT
- Unplug the TV and wait at least 30 minutes for capacitors to discharge.
- Locate the anode cap (the large rubber suction cup on the CRT).
- Discharge the CRT:
- Use a CRT discharge tool (best option).
- Alternative: Clip one end of a wire to the TV’s metal frame and carefully slide a flathead screwdriver under the anode cap until you hear/see a small spark.
Step 2: Remove the Rear Cover
- Flip the TV face-down on a soft surface (blanket/towel).
- Remove all rear screws (some may be hidden under stickers).
- Gently pry the back cover off—plastic tabs may hold it in place.
Step 3: Disconnect Internal Cables
- Take photos of all connections before unplugging anything.
- Unplug:
- Deflection yoke (two large plugs near the tube neck)
- Anode cap (already discharged, but still be careful)
- Speaker wires & control board connectors
Step 4: Remove the CRT Tube
- Unscrew the 4 CRT mounting brackets (they hold the tube to the frame).
- Carefully lift the tube out – it’s extremely heavy (get help if needed).
- Set it face-down on a soft surface to avoid scratches.
Step 5: Extract Circuit Boards & Other Components
- Mainboard – Remove screws and gently lift it out.
- Power supply – Disconnect all wires before removing.
- Speakers & tuner – Useful for retro projects if salvaging.
Pro Tips for Safe Disassembly
🔧 Label every wire and screw (masking tape + marker) to avoid confusion later.
🔧 Use a magnetic tray to keep screws organized.
🔧 If keeping the CRT, store it upright to avoid stress on the glass.
What Can You Salvage?
If you’re parting out the TV, these components are useful:
✅ CRT tube – Great for arcade builds or replacements.
✅ Speakers – Decent quality for DIY audio projects.
✅ Power supply & mainboard – Useful for electronics tinkering.
✅ Control knobs & buttons – Handy for retro mods.
How to Dispose of a CRT Safely
CRTs contain leaded glass and toxic phosphors, so never throw them in the trash. Instead:
♻ Check local e-waste recycling centers (many accept CRTs for free).
♻ Contact electronics repair shops – Some may take old TVs.
♻ Look for CRT buyback programs (some collectors pay for working tubes).
Conclusion: How to Disassemble a Sony KV-27S42 CRT TV
How to Disassemble a Sony KV-27S42 CRT TV, requires patience and safety awareness, but it’s a rewarding project for retro tech enthusiasts. Whether you’re fixing, modding, or salvaging, following this guide ensures a smooth process.
FAQ About How to Disassemble a Sony KV-27S42 CRT TV
1. Can I get shocked if the TV has been unplugged for days?
Yes! CRTs can hold charge for weeks. Always discharge before working.
2. How heavy is the KV-27S42 CRT?
Around 50-60 lbs (23-27 kg)—lift carefully or get help.
3. Can I reuse the CRT in another TV?
Possibly, but tube swaps require matching specs (size, impedance, etc.).
4. What if I break the CRT?
The glass is under vacuum—if it cracks, it can implode. Wear safety gear!
5. Is it worth repairing a KV-27S42?
If you love CRTs, yes! These Sonys have great picture quality for retro gaming.
Technology
How Much Does Window Tinting Cost? Save Money, Boost Comfort

Introduction
Window tinting costs can vary widely, leaving many car owners unsure about fair pricing. Whether you want UV protection, privacy, or heat reduction, understanding the factors that influence cost helps you budget wisely. This guide breaks down pricing, so you get the best value without surprises.
Why It Matters
Window tinting isn’t just about style—it blocks harmful UV rays, reduces glare, and keeps your car cooler. But overpaying or choosing cheap options can lead to poor quality. Knowing the average costs ensures you invest in a tint that lasts and performs well.
Step-by-Step Guide to Window Tinting Costs
1. Understand the Pricing Factors
- Film Quality: Basic dyed film starts at 50–150, while premium ceramic tints run 200–800.
- Vehicle Size: Smaller cars cost less (100–300) vs. SUVs (200–600).
- Number of Windows: Full-car tinting costs more than just side windows.
2. Compare Film Types
- Dyed Film (50–150): Affordable but fades faster.
- Carbon Film (150–350): Better heat rejection, matte finish.
- Ceramic Film (200–800): Top-tier heat/UV protection, no signal interference.
3. Factor in Labor Costs
Professional installation adds 50–200, depending on complexity. DIY kits (20–100) are cheaper but risk bubbles/peeling.
4. Check Local Market Prices
Urban areas often charge more. Get 3+ quotes to avoid overpaying.
5. Consider Legal Limits
Some states restrict tint darkness (e.g., California bans <70% VLT on front windows). Non-compliant tints may require costly removal.
Pro Tip
“Ask for a warranty! Reputable shops offer 5–10-year guarantees against peeling or fading—saving you long-term costs.”
Conclusion: How Much Does Window Tinting Cost
Window tinting cost 50–800+, depending on film type, vehicle size, and labor. Investing in ceramic film or a trusted installer ensures durability and performance. Always check local laws and compare quotes to make a smart choice.
FAQ: How Much Does Window Tinting Cost
1. Is tinting worth the cost?
Yes—it reduces skin-damaging UV rays by 99% and lowers AC use, saving fuel.
2. How long does tint last?
High-quality tints last 10+ years; cheap ones fade in 2–3 years.
3. Can I tint my windshield?
Most states only allow a clear or light tint strip. Check your local laws.
4. Does tint affect visibility?
Not if you choose the right VLT (%)—go for 35% or higher for safety.
-
Articles1 year ago
How Many Times Can You Regrow Green Onions
-
News7 months ago
Understanding HotLeaks: What You Need to Know
-
Fashion5 months ago
Opals in the USA: A Gemstone Transforming the Crystal Healing Market
-
Technology11 months ago
The Wonders of Oh Em Gee Blog
-
Entertainment11 months ago
Bare it All: Unforgettable Skinny Dipping Stories Shared
-
Health11 months ago
Can You Smoke Shrooms? Exploring the Myths and Realities
-
Articles2 months ago
WHAT IS THE DIFFERENCE BETWEEN SEED GARLIC AND FOOD GARLIC?
-
Fashion12 months ago
Make a Statement with Stunning Black Homecoming Dresses