Articles
Amenities That Make Elderly Living Facilities Ideal for Old Grandmas

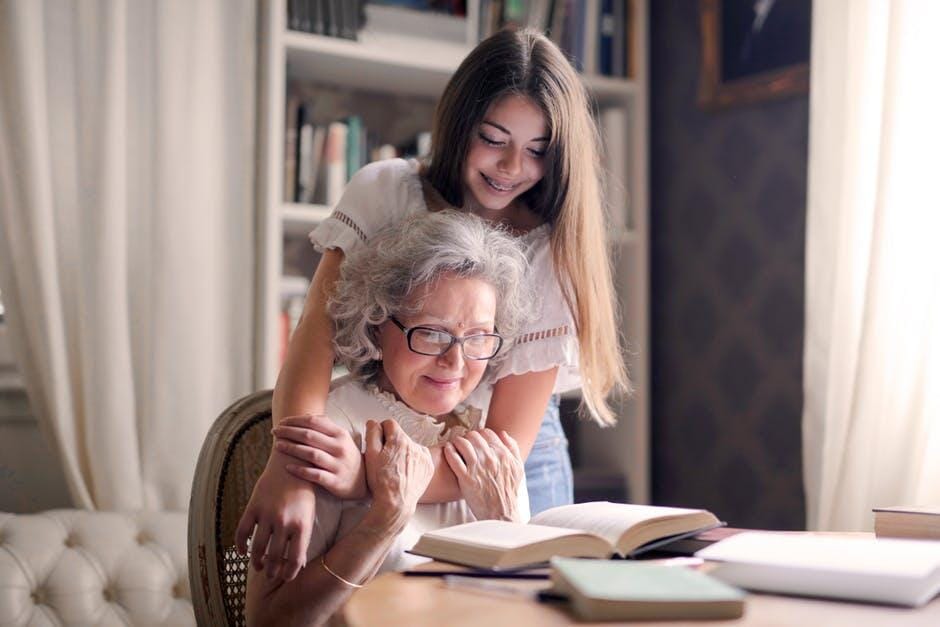
What makes a place feel like home for old grandmas?
Elderly living facilities have many features to keep life easy and happy. Private rooms offer comfort, while shared spaces give chances to meet others. Fun activities like gardening and simple exercises bring joy to each day.
Meals are made to match tastes, so eating is always a treat. Helpers are always nearby to make daily tasks easier. These places are warm and friendly, letting grandmas keep their freedom while feeling cared for.
Learn how these features make elderly living facilities great for old grandmas who want a happy, safe place to live.
Cozy and Customizable Living Spaces
Comfort starts with having a space that feels like home. Elderly living facilities focus on creating cozy rooms that old grandmas can make their own. Residents can add personal touches like pictures or favorite decorations.
Many spaces also include features like roomy closets, private bathrooms, and senior-friendly design to keep them safe and comfortable. These thoughtful details help make each living space warm and welcoming, which can improve mood and overall happiness.
Comprehensive Healthcare Services
Having easy access to healthcare is important for old grandmas. Many elderly living facilities offer on-site medical care, like medicine reminders and regular health check-ups.
Some even work with local hospitals to ensure special care is available when needed. Knowing that help is close by can bring comfort and reduce worry. These services help residents stay healthy and feel secure, while also giving families peace of mind about their loved ones.
Nutrition and Dining Options
Healthy eating is key to staying strong and feeling good. Elderly living facilities often have flexible meal plans made for old grandmas’ needs and preferences.
Meals are tailored to fit different diets while staying tasty and nutritious. Dining areas also encourage social time, letting residents enjoy meals together. This shared time builds friendships and makes mealtime something to look forward to every day. A good diet paired with social interaction supports overall health and happiness.
Engaging Activities and Social Programs
Being active and connected is important for old grandmas. Facilities with fun activities like crafts, gentle exercise, and group games give residents many ways to stay involved. Joining social programs helps build friendships and creates a sense of community.
These activities also keep minds sharp and spirits high. Studies show that staying active can improve thinking skills and bring more joy, making these programs an essential part of daily life.
Secure Outdoor Spaces
Outdoor areas can make a big difference for old grandmas. Safe gardens, walking paths, and sitting spots let residents enjoy fresh air and nature. Spending time outside can boost mood, lower stress, and bring a sense of calm.
These spaces are perfect for relaxing alone or chatting with friends. Facilities with accessible bathrooms near outdoor areas ensure that residents can enjoy their time outside without any worries, making outdoor spaces even more inviting.
Choosing the best independent senior living community in Plano means thinking about what matters most for old grandmas. Looking at the top amenities can make a big difference in comfort and happiness.
Discover the Perfect Place for Old Grandmas to Thrive
Finding the right home can bring joy and comfort to old grandmas. From senior-friendly designs to accessible bathrooms, everything is made with care.
These places help grandmas feel safe, happy, and connected. Take time to look at these options and find a home where old grandmas can truly feel at ease.
Did you find this article helpful? You can check out our website for more awesome content like this.
Articles
How to Repair a Ripped Plate Carrier: A Quick & Durable Fix

A ripped plate carrier isn’t just an inconvenience—it’s a potential safety hazard. Whether the damage comes from rigorous training, field use, or long-term wear, a compromised carrier can fail when you need it most. Fortunately, with the right tools and techniques, you can restore its strength and reliability. This guide covers everything from quick field fixes to heavy-duty repairs, ensuring your plate carrier remains mission-ready.
Why Repairing Your Plate Carrier Matters
A plate carrier is a critical piece of tactical gear, designed to hold armor plates and distribute weight efficiently. When torn, its structural integrity weakens, leading to:
- Reduced ballistic protection (if plates shift or become exposed).
- Increased strain on seams and straps, accelerating further damage.
- Poor load distribution, causing discomfort and mobility issues.
Ignoring small tears can turn them into catastrophic failures. A proper repair extends your gear’s lifespan, saving money and ensuring performance when it counts.
Step-by-Step Guide to Repairing a Ripped Plate Carrier
1. Assess the Damage
Before starting, determine the extent of the tear:
- Seam Rip: Common in high-stress areas like shoulder straps or side seams.
- Fabric Tear: Often in Cordura or nylon panels due to abrasion.
- MOLLE Webbing Damage: Can affect pouch attachment points.
Check for:
✔️ Loose threads or fraying edges.
✔️ Weak spots near the tear that may need reinforcement.
2. Gather the Right Tools
For a field-expedient repair, you’ll need:
- Ripstop tape (like Gear Aid Tenacious Tape)
- Fabric glue (such as Seam Grip or Shoe Goo)
- Lighter (to melt frayed edges and prevent further unraveling)
For a permanent, heavy-duty fix, use:
- Bonded polyester or nylon thread (avoid cotton—it rots over time).
- Sewing awl or heavy-duty needle (for thick fabrics).
- Cordura or ballistic nylon patch (for large tears).
- Bar tack stitching (reinforced stitching used in military gear).
3. Prepare the Torn Area
- Trim loose threads with scissors.
- Use a lighter to carefully melt frayed edges (prevents further tearing).
- If using a patch, cut it slightly larger than the tear for full coverage.
4. Sewing the Repair (Best for Long-Term Durability)
For Seam Repairs:
- Use a backstitch for maximum strength.
- Sew at least ¼ inch from the edge to prevent pull-through.
- Double-stitch high-stress areas (shoulders, side buckles).
For Fabric Tears:
- Place a fabric patch behind the tear (glue it first for stability).
- Use a box stitch (X-pattern) to secure the patch.
- Seal edges with fabric glue for waterproofing.
For MOLLE Webbing:
- Re-stitch using a zigzag pattern to maintain flexibility.
- Add a reinforcing bar tack at stress points.
5. Field-Expedient Fixes (When You Can’t Sew)
- Ripstop Tape: Apply on both sides of the tear for an instant bond.
- Zip Ties or Paracord: Temporarily secure loose straps or webbing.
- Super Glue + Fabric: Works for small tears but isn’t as flexible.
6. Stress-Test the Repair
- Load the carrier with plates and gear.
- Tug firmly on the repaired area to check for weak points.
- Adjust stitching or reinforcement if needed.
Pro Tip: Preventing Future Damage
🔥 Rotate Your Carriers: If used daily, alternate between two to reduce wear.
🔥 Wash Properly: Hand-wash with mild soap; avoid harsh detergents that weaken fibers.
🔥 Inspect Regularly: Check stitching and fabric after each use.
Conclusion: How to Repair a Ripped Plate Carrier
A ripped plate carrier doesn’t have to mean the end of its service life. With How to Repair a Ripped Plate Carrier—whether a quick field fix or a reinforced stitch—you can restore its strength and reliability. For more on extending tactical gear lifespan, check our Ultimate Tactical Gear Maintenance Guide.
FAQ About How to Repair a Ripped Plate Carrier
1. Can I use a regular sewing machine for plate carrier repairs?
Yes, but only if it’s heavy-duty (like a Sailrite or industrial machine). Most home machines struggle with thick nylon webbing.
2. How long will a fabric glue repair last?
Temporary fixes (like glue or tape) hold for weeks, but stitching is the only permanent solution.
3. What’s the strongest stitch for tactical gear?
Bar tacking (used in military gear) or a triple-stitched box pattern provides the best durability.
4. Can I repair a torn plate carrier strap?
Yes—either re-stitch it with a patch or replace the strap entirely if too damaged.
5. Does duct tape work for emergency repairs?
It’s a last-resort option—duct tape loses adhesion quickly under movement and sweat.
Articles
How Much Paint to Paint a Car: Estimating Paint Quantity

Repainting your car can transform its appearance, but one of the biggest challenges is figuring out how much paint you’ll need. Use too little, and you risk an uneven, patchy finish. Use too much, and you’re wasting money on excess material. This comprehensive guide will walk you through every factor that affects paint quantity—from car size to paint type—so you can budget accurately and achieve professional results.
Why Calculating Paint Quantity Correctly Matters
Getting the right amount of paint isn’t just about saving money—it’s about ensuring a smooth, long-lasting finish. Running out of paint mid-job can lead to color mismatches, while excess paint may go to waste. Proper estimation helps you:
- Avoid costly mistakes (uneven coats, color inconsistencies).
- Save money by buying only what you need.
- Ensure durability (correct paint thickness prevents premature peeling).
Step-by-Step Guide to Calculating How Much Paint You Need
1. Determine Your Car’s Size & Surface Area
The larger your vehicle, the more paint it will require. Here’s a general breakdown:
Vehicle Type | Approx. Paint Needed (Gallons) | Surface Area (Sq. Ft.) |
---|---|---|
Compact Car (e.g., Honda Civic) | 1–1.5 gallons | 150–175 sq ft |
Mid-Size Sedan (e.g., Toyota Camry) | 1.5–2 gallons | 175–200 sq ft |
Full-Size SUV/Truck (e.g., Ford F-150) | 2–3 gallons | 200–250 sq ft |
Large Van/Commercial Vehicle | 3+ gallons | 250+ sq ft |
Pro Tip: If you’re painting only certain sections (like a hood or fender), measure their square footage separately.
2. Choose the Right Paint System
Different paint systems require varying amounts of product:
- Single-Stage Paint: Combines color and clear coat in one layer (requires less paint—about 1 gallon for a small car).
- Basecoat + Clearcoat: Needs multiple layers (basecoat: 1–1.5 gallons, clearcoat: 0.5–1 gallon).
- Metallic/Pearl Finishes: Often need extra coats for even coverage (add 10–20% more paint).
3. Factor in the Application Method
How you apply paint affects how much you’ll use:
- HVLP (High Volume Low Pressure) Spray Gun: Most efficient (minimal overspray, 90% transfer rate).
- Conventional Spray Gun: Wastes more paint (30–40% overspray).
- Brush/Roller (Rare for cars): Uses more paint but is harder to apply smoothly.
4. Don’t Forget Primer & Clearcoat
- Primer: Essential for adhesion (1 gallon typically covers a car).
- Clearcoat: Adds gloss and protection (0.5–1 gallon depending on layers).
5. Adjust for Paint Brand & Coverage Rate
Different brands have varying coverage rates (check the label). For example:
- 1 Gallon of Standard Automotive Paint ≈ Covers 100–150 sq ft per coat.
- High-Solid Paints (better coverage) may require 10–15% less.
Pro Tip: Always Buy Extra (The 10–20% Rule)
Even with careful measuring, unexpected issues can arise:
- Overspray waste
- Mistakes requiring reapplication
- Inconsistent coverage on certain panels
Ordering 10–20% more paint than calculated ensures you won’t run out mid-project.
How Much Does It Cost to Paint a Car Yourself?
- Paint Only: 100–500 (depending on quality).
- Primer & Clearcoat: 50–200.
- Supplies (Spray gun, sandpaper, masking): 200–500.
- Total DIY Cost: 300–1,500 (vs. 2,000–10,000 for professional work).
Conclusion: Smart Planning = Flawless Paint Job
Estimating paint correctly ensures a smooth, professional finish without overspending. Small cars typically need 1–1.5 gallons, while trucks may require 3+ gallons. Always check manufacturer specs, account for primer/clearcoat, and buy a little extra for safety.
FAQ – Your Paint Quantity Questions Answered
1. Can I paint a whole car with just 1 gallon?
Yes, for a small car with single-stage paint, but 1.5 gallons is safer to avoid running out.
2. Does color affect how much paint I need?
- Darker colors (black, navy): May need extra coats for full coverage.
- Metallic/pearl paints: Require more careful application (add 10–20% more).
3. How many coats of paint does a car need?
- Basecoat: 2–3 coats.
- Clearcoat: 2 coats (for durability).
4. Can I mix different paint brands?
Not recommended—stick to one brand/system to avoid adhesion or color-matching issues.
5. How long does a gallon of car paint last?
Unopened: 2–3 years (stored properly). Once opened: 6–12 months (sealed tightly).
Articles
How Much Is a Private Investigator: Costs & Key Factors

Introduction
Hiring a private investigator (PI) can feel overwhelming, especially with unclear pricing. Costs vary based on case complexity, location, and experience—typically 50–150/hour or 500–5,000+ per case. This guide breaks down pricing factors to help you budget wisely and avoid surprises.
Why Private Investigator Costs Matter
Whether you need surveillance, background checks, or legal support, understanding PI fees ensures you hire the right professional without overspending. Hidden costs or inexperienced investigators can derail your case, so transparency is key.
Step-by-Step Guide to PI Pricing
1. Understand Common Pricing Models
- Hourly Rates: 50–150/hour (e.g., surveillance or interviews).
- Flat Fees: 500–3,000 for simple cases (like locating a person).
- Retainers: Upfront payments (e.g., 2,000–5,000) for long-term cases.
2. Identify Cost Factors
- Case Type: Cheating spouse (75–125/hour) vs. corporate fraud (100–200/hour).
- Location: Urban areas (higher demand = higher rates).
- Expertise: Ex-law enforcement/PIs with niche skills charge premium rates.
3. Get Quotes & Compare
- Ask for itemized estimates (e.g., travel fees, report writing).
- Verify licenses and reviews (NAPIA is a trusted resource).
4. Budget for Extras
- Court testimony (150–300/hour) or database access fees (50–200).
5. Negotiate Smartly
- Bundle services (e.g., surveillance + background check) for discounts.
Pro Tip: Avoid PIs who demand full payment upfront. Reputable investigators bill incrementally or offer payment plans.
Conclusion
Private investigator costs depend on your needs, but research and clear contracts prevent overpaying. Prioritize experience over low rates—quality evidence saves time and money long-term.
FAQ
1. What’s the cheapest PI service?
Basic background checks start at $200, but complex cases (e.g., missing persons) cost more.
2. Are online PIs legit?
Some are, but verify licenses and avoid those refusing in-person consultations.
3. Can I deduct PI costs legally?
Sometimes (e.g., child custody cases); consult a tax professional.
-
Articles1 year ago
How Many Times Can You Regrow Green Onions
-
News7 months ago
Understanding HotLeaks: What You Need to Know
-
Fashion5 months ago
Opals in the USA: A Gemstone Transforming the Crystal Healing Market
-
Technology11 months ago
The Wonders of Oh Em Gee Blog
-
Entertainment11 months ago
Bare it All: Unforgettable Skinny Dipping Stories Shared
-
Health11 months ago
Can You Smoke Shrooms? Exploring the Myths and Realities
-
Articles2 months ago
WHAT IS THE DIFFERENCE BETWEEN SEED GARLIC AND FOOD GARLIC?
-
Fashion12 months ago
Make a Statement with Stunning Black Homecoming Dresses