Home Empowerment
What to Expect from Roofers in Corvallis During a Roof Inspection

If you’re looking to hire a roofer for an inspection, you’re making a smart decision. A roof inspection is a critical part of maintaining the health of your home, and it can save you from costly repairs down the line. Before you schedule an appointment, it’s helpful to read reviews of local companies to understand what to expect. Here’s a breakdown of what you can expect from roofers in Corvallis during a roof inspection.
Why Roof Inspections Matter
A roof inspection is more than just a quick check-up. It’s a thorough evaluation of your roof’s condition, designed to catch problems before they become expensive disasters. Here’s why you should schedule regular inspections:
- Early problem detection: Roofers can spot small issues, such as damaged shingles or leaks, that could turn into bigger problems if left unattended.
- Peace of mind: Knowing your roof is in good shape allows you to relax, without the worry of sudden leaks or structural failures.
- Increased roof lifespan: Proper maintenance and early repairs can extend the life of your roof.
What Roofers Look for During an Inspection
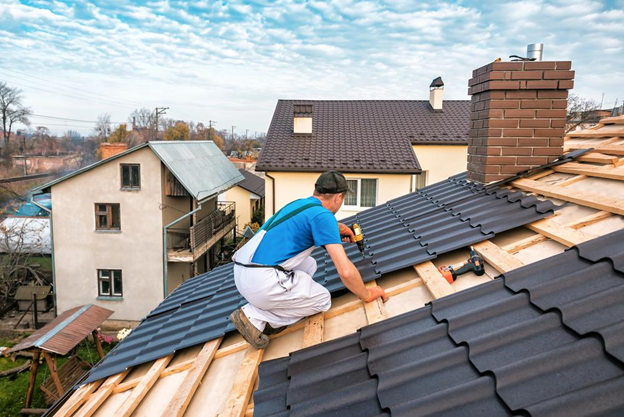
A professional roofer will conduct a thorough evaluation, paying attention to every detail. Here’s what they’ll be looking for during the inspection:
- Shingle damage: Missing, cracked, or curled shingles are a clear sign that your roof is under stress and may need repair.
- Leaks and moisture: Roofers will check for any signs of water damage or leaks, both on the roof itself and inside your home.
- Flashing and seals: Flashing around chimneys, skylights, and vents can deteriorate over time, allowing water to seep in. Roofers will examine these areas closely.
- Gutter and downspout condition: Proper drainage is essential to protect your roof. Clogged or damaged gutters can lead to water damage.
- Roof structure: Professionals will inspect the underlying structure of the roof, including beams and decking, for signs of wear or damage.
Roof inspections cover every corner of your roof to identify potential risks.
The Roof Inspection Process
When you hire a professional roofer in Corvallis for an inspection, here’s what you can expect during the process:
- Initial consultation: The roofer will ask questions about any concerns you may have and your roof’s history.
- Exterior inspection: The roofer will inspect the roof from the outside, checking for visible damage or wear.
- Interior inspection: They’ll examine the attic for any signs of leaks, poor ventilation, or water damage.
- Detailed report: After completing the inspection, the roofer will provide you with a detailed report on your roof’s condition, outlining any recommended repairs or maintenance.
- Estimates: If any repairs are needed, the roofer will offer an estimate and explain the work required to fix the issues.
Common Issues Discovered During a Roof Inspection
There are a number of issues that roofers commonly discover during inspections. Catching these early can save you from much bigger expenses later on. Some of the most common problems include:
- Worn shingles: Over time, shingles can lose their granules or become cracked, which reduces their effectiveness.
- Leaks: Leaks may appear as water stains on ceilings or in the attic. If left unchecked, they can lead to mold and wood rot.
- Punctures: Roof punctures can occur from falling branches or debris. Even small punctures can let water in if not repaired promptly.
- Poor ventilation: If your roof isn’t properly ventilated, it can cause moisture buildup, which can lead to mold and mildew.
- Clogged gutters: If gutters are clogged, water can’t flow off the roof properly, leading to water damage to the structure.
Roofers are trained to identify these problems before they escalate.
Roof Repair Recommendations
After completing the inspection, the roofer will provide a list of recommendations. This can range from simple repairs to more extensive work. Here are some of the most common recommendations you might receive:
- Replacing damaged shingles: If shingles are missing or cracked, they may need to be replaced to prevent leaks.
- Resealing flashing: Flashing around chimneys or vents may need resealing to prevent water from getting inside.
- Clearing gutters: If gutters are clogged or damaged, clearing them out or replacing them will improve water drainage.
- Fixing leaks: Any leaks discovered during the inspection will need to be sealed to prevent further water damage.
- Improving ventilation: Adding vents or fans to your attic can help reduce moisture buildup and prevent mold.
A professional roofer will help you prioritize these repairs, so you don’t have to worry about unnecessary expenses.
How Long Does a Roof Inspection Take?
The time it takes for a roofer to complete an inspection depends on the size and complexity of your roof. On average, a standard roof inspection will take between 30 minutes to 2 hours. Factors like roof size, pitch, and the extent of the inspection can influence the timeline. A large, multi-story home with a complex roof structure will take longer to inspect.
You can expect the roofer to be thorough, but the process is typically not time-consuming.
What Happens After the Inspection?
Once the inspection is complete, the roofer will provide you with a full assessment. Here’s what to expect:
- Inspection report: The roofer will provide you with a written report, including pictures of any damage or areas of concern.
- Repair recommendations: The roofer will explain what needs to be fixed and offer solutions for the issues discovered.
- Estimates for repair costs: If repairs are needed, you’ll receive an estimate outlining the costs involved.
- Scheduling repairs: If you decide to go ahead with repairs, the roofer will help you schedule the work.
Roof inspections are meant to give you the information you need to make informed decisions about your roof’s maintenance and repairs.
How Much Does a Roof Inspection Cost?
The cost of a roof inspection can vary depending on the size and condition of your roof. On average, roof inspections in Corvallis can cost anywhere from $100 to $400. Many roofing companies offer free inspections, especially if you’re considering their services for repairs or replacement. It’s always a good idea to ask for a free estimate before committing to any work.
While the cost may seem high, it’s important to remember that an inspection can save you money in the long run by identifying problems early and preventing expensive repairs.
The Benefits of Hiring a Local Roofer in Corvallis
When hiring a roofer for an inspection, consider choosing a local Corvallis company. Here’s why:
- Familiarity with local conditions: Local roofers understand the unique weather patterns and environmental factors that can affect your roof.
- Community trust: Local businesses tend to have strong reputations in their communities, which means you’re more likely to get reliable service.
- Easy follow-up: If additional repairs or inspections are needed, a local roofer can easily schedule follow-up visits.
Choosing a local roofer in Corvallis gives you peace of mind knowing they understand your specific roofing needs.
Conclusion: Don’t Wait for a Problem to Arise
A roof inspection is an essential part of home maintenance. Don’t wait until you see a leak or notice water damage inside your home. By scheduling regular roof inspections, you can catch small issues before they turn into major problems. Contact a professional roofer in Corvallis today to ensure your roof is in top condition. You’ll avoid the hassle and expense of unexpected repairs, giving you peace of mind for years to come.
Home Empowerment
How to Get Pee Smell Out of Couch: Solutions for a Fresh Home

Few household smells are as stubborn—or as embarrassing—as urine odor embedded in a couch. Whether it’s from a potty-training toddler, an elderly pet, or an unexpected accident, that lingering ammonia scent can make your living space feel unclean. The good news? With the right techniques, you can completely eliminate urine smells and restore freshness to your upholstery.
This comprehensive guide covers everything from immediate emergency response to deep-cleaning solutions for set-in odors. We’ll explore both DIY remedies and professional-grade solutions, ensuring you have options for every level of mess.
Why Proper Urine Odor Removal Matters
Ignoring urine smells doesn’t just create an unpleasant environment—it can lead to bigger problems:
- Bacterial growth: Urine breeds bacteria, which can cause health issues.
- Repeat accidents: Pets often remark the same spot if the scent remains.
- Long-term damage: Urine can degrade fabric and cushioning over time.
By acting quickly and using the right cleaning methods, you’ll protect your furniture and maintain a fresh, hygienic home.
Step-by-Step Guide to Remove Pee Smell from Couch
1. Act Fast: Blot Up Excess Liquid
Why it works: The sooner you remove urine, the less it soaks into fibers.
- Materials needed: Absorbent towels, paper towels, or a dry microfiber cloth.
- Technique:
- Press (don’t rub) firmly to soak up liquid.
- Replace towels as they become saturated.
- If the urine is already dry, skip to step 2.
2. Neutralize Odors with Vinegar Solution
Why it works: Vinegar’s acidity breaks down uric acid crystals, the main cause of lingering smells.
- Mix: 1 part white vinegar + 1 part cold water in a spray bottle.
- Application:
- Lightly mist the affected area (test on a hidden spot first).
- Let sit for 10-15 minutes.
- Blot dry with a clean cloth.
- Bonus: Add a few drops of essential oil (e.g., lavender) for a fresh scent.
3. Deep Clean with Baking Soda
Why it works: Baking soda absorbs odors and lifts remaining stains.
- Method:
- Sprinkle a generous layer over the damp area.
- For tough smells, mix baking soda with hydrogen peroxide (3%) to form a paste.
- Let sit for 6+ hours (overnight is best).
- Vacuum thoroughly.
4. Use an Enzyme Cleaner for Stubborn Stains
Why it works: Enzymes break down urine’s organic compounds, eliminating odors at the source.
- Top picks: Nature’s Miracle, Rocco & Roxie, or Simple Solution.
- How to apply:
- Follow product instructions (usually involves soaking the area).
- Allow to air-dry completely—don’t rinse!
5. Machine Wash Removable Covers (If Applicable)
- Best detergent: Use an enzyme-based or oxygen bleach formula.
- Drying: Air-dry in sunlight (UV rays help kill bacteria).
Pro Tips for Maximum Effectiveness
✅ Avoid Heat: Never use steam or hot water—it sets urine stains and odors.
✅ Blacklight Trick: Use a UV flashlight to find old, hidden urine spots.
✅ Prevent Residue: Rinse with cold water after vinegar treatment to avoid stickiness.
✅ For Leather Couches: Use a leather-safe enzymatic cleaner to avoid damage.
When to Call a Professional
If the smell persists after multiple treatments, consider:
- Professional upholstery cleaning (hot water extraction method).
- Ozone treatment (for severe, deep-set odors).
Final Thoughts
How to Get Pee Smell Out of Couch requires quick action, the right cleaners, and patience. By following these steps—especially using enzyme treatments for stubborn odors—you can restore your couch to a fresh, odor-free state.
FAQ: Your Top Questions Answered
Does vinegar discolor couch fabric?
It shouldn’t, but always test on a hidden area first.
Can I use bleach on my couch?
No! Bleach can damage fabric and react with urine, making smells worse.
How do I stop my pet from peeing on the couch again?
- Use a pet deterrent spray.
- Place a washable waterproof cover.
- Retrain with positive reinforcement.
Why does the smell come back after cleaning?
If urine reached the cushion foam, you may need a deep soak with enzyme cleaner or professional help.
Home Empowerment
How to Get Rid of German Roaches: The Ultimate Guide

German roaches (Blattella germanica) are among the most stubborn household pests. Unlike other roach species, they reproduce rapidly, hide in tight spaces, and quickly develop resistance to pesticides. If you’re dealing with an infestation, this guide will walk you through how to get rid of German roaches using proven, science-backed methods.
Why German Roaches Are So Hard to Eliminate
Before diving into solutions, it’s crucial to understand why these pests are so resilient:
✅ Rapid Reproduction – A single female can produce up to 400 offspring in her lifetime.
✅ Pesticide Resistance – They adapt quickly to chemical treatments.
✅ Nocturnal & Secretive – They hide in cracks, appliances, and electrical outlets.
Now, let’s tackle the problem systematically.
Step 1: Identify the Infestation
German roaches are small (½ inch), light brown, with two dark stripes behind their heads. Signs of infestation include:
🔍 Droppings (tiny black specks)
🔍 Egg cases (oothecae) – Small, brown, capsule-like
🔍 Musty odor – A sign of large infestations
Step 2: Sanitation – Cut Off Their Food Supply
Roaches thrive in dirty environments. To discourage them:
✔ Store food in airtight containers
✔ Clean spills immediately
✔ Take out trash daily
✔ Fix leaky pipes (roaches need water)
Step 3: Use German Roach-Specific Baits
Why baits work best:
German roaches eat dead roaches and feces, making baits highly effective. The poison spreads through the colony.
Top Bait Choices:
Product | Active Ingredient | Effectiveness |
---|---|---|
Advion Gel Bait | Indoxacarb | ★★★★★ |
Combat Max Roach Killing Gel | Hydramethylnon | ★★★★☆ |
Invict Gold Cockroach Gel | Abamectin | ★★★★★ |
How to Apply:
- Place pea-sized drops near hiding spots (under sinks, behind fridges).
- Avoid spraying insecticides—they’ll scatter roaches, worsening the problem.
Step 4: Apply Insect Growth Regulators (IGRs)
IGRs disrupt roach reproduction by preventing nymphs from maturing. Recommended brands:
✅ Gentrol Point Source (Hydroprene)
✅ NyGuard IGR Concentrate
Step 5: Seal Entry Points
Prevent re-infestation by:
🔧 Caulking cracks in walls
🔧 Installing door sweeps
🔧 Covering vents with fine mesh
Step 6: Monitor with Sticky Traps
Place sticky traps in hotspots to track remaining roaches. Brands like Harris Roach Traps work well.
Step 7: When to Call a Professional
If DIY methods fail after 4-6 weeks, consider hiring an exterminator. They use stronger treatments like:
💉 Fumigation
💉 Residual insecticide sprays
Prevention: Keep Roaches from Coming Back
🚫 Avoid cardboard storage (roaches love it)
🚫 Inspect groceries before storing
🚫 Regularly deep-clean kitchens & bathrooms
German Roach vs. Other Roaches (Comparison Chart)
Feature | German Roach | American Roach | Oriental Roach |
---|---|---|---|
Size | ½ inch | 1.5–2 inches | 1 inch |
Color | Light brown | Reddish-brown | Dark brown/black |
Preferred Habitat | Kitchens, bathrooms | Sewers, basements | Damp areas |
Reproduction Speed | Very fast | Moderate | Slow |
Final Verdict: How to Get Rid of German Roaches for Good
- Use gel baits (Advion, Invict Gold).
- Apply IGRs to stop reproduction.
- Maintain strict sanitation.
- Seal entry points.
- Monitor with traps.
Home Empowerment
Heliconia Color: Transform Your Garden with Tropical Beauty

Heliconias, often called “lobster claws” or “parrot flowers,” are the crown jewels of tropical gardens. Their bold, vibrant colors and unique shapes make them a favorite among gardeners and landscapers. But what makes heliconia color so captivating? And how can you harness their beauty to transform your outdoor space?
In this comprehensive guide, we’ll dive deep into the world of heliconias. From their origins and varieties to practical growing tips and design ideas, you’ll walk away with everything you need to know to make these tropical wonders the star of your garden.
Why Heliconia Color is a Game-Changer for Your Garden
Heliconias are more than just pretty flowers—they’re a statement. Their fiery reds, sunny yellows, and deep oranges can instantly elevate any garden or landscape. Here’s why heliconia color is so special:
- Unmatched Vibrancy: Heliconias boast some of the most intense hues in the plant kingdom.
- Tropical Appeal: They bring an exotic, vacation-like vibe to your space.
- Versatility: Whether in pots, borders, or as focal points, heliconias adapt to various garden styles.
The Science Behind Heliconia Color
Heliconias owe their stunning colors to a combination of pigments and environmental factors. The primary pigments responsible for their hues are:
- Anthocyanins: These produce red, purple, and blue shades.
- Carotenoids: Responsible for yellows and oranges.
- Chlorophyll: Adds a touch of green to the bracts and leaves.
Interestingly, heliconia color can vary depending on factors like soil pH, sunlight, and temperature. For instance, heliconias grown in slightly acidic soil often exhibit deeper reds, while those in alkaline soil may lean toward yellows.
Top Heliconia Varieties for Jaw-Dropping Color
With over 200 species, heliconias offer a rainbow of options. Here are some of the most popular varieties to consider:
Variety | Color | Height | Best For |
---|---|---|---|
Heliconia Rostrata | Red and Yellow | 6-15 ft | Backdrop or Focal Point |
Heliconia Psittacorum | Orange and Green | 3-6 ft | Borders and Containers |
Heliconia Caribaea | Deep Red and Gold | 10-20 ft | Tropical Landscapes |
Heliconia Wagneriana | Multicolored (Red, Yellow, Green) | 4-8 ft | Accent Planting |
How to Grow and Care for Heliconias: A Step-by-Step Guide
1. Choosing the Right Location
Heliconias thrive in warm, humid climates (USDA zones 10-12). They need:
- Full to Partial Sunlight: At least 6 hours of sunlight daily.
- Well-Draining Soil: Rich in organic matter.
- Space to Grow: Some varieties can reach up to 20 feet tall!
2. Planting Tips
- Dig a hole twice the size of the root ball.
- Mix compost or aged manure into the soil for added nutrients.
- Water thoroughly after planting.
3. Watering and Feeding
- Water: Keep the soil consistently moist but not waterlogged.
- Fertilizer: Use a balanced, slow-release fertilizer every 6-8 weeks during the growing season.
4. Pruning and Maintenance
- Remove dead or damaged leaves to encourage new growth.
- Divide overcrowded clumps every 2-3 years to maintain vigor.
Designing with Heliconia Color: Tips and Ideas
Heliconias are incredibly versatile in garden design. Here are some creative ways to use them:
- Tropical Oasis: Pair heliconias with palms, ferns, and orchids for a lush, jungle-like feel.
- Color Blocking: Use contrasting heliconia colors to create bold, eye-catching displays.
- Container Gardening: Grow smaller varieties like Heliconia Psittacorum in pots for patios or balconies.
- Cut Flowers: Heliconias make stunning floral arrangements that last up to two weeks.
Common Challenges and How to Overcome Them
While heliconias are relatively low-maintenance, they can face a few challenges:
- Pests: Watch out for aphids and spider mites. Use neem oil or insecticidal soap as a natural remedy.
- Fungal Diseases: Ensure proper air circulation and avoid overwatering to prevent issues like leaf spot.
- Cold Sensitivity: In cooler climates, grow heliconias in containers and bring them indoors during winter.
Heliconia Color in Action: A Case Study
Project: Tropical Resort Landscape
Location: Florida, USA
Goal: Create a vibrant, low-maintenance garden that wows guests.
Solution:
- Planted Heliconia Rostrata as a backdrop.
- Used Heliconia Psittacorum in containers near walkways.
- Added complementary plants like bird-of-paradise and bromeliads.
Result: The resort’s garden became a guest favorite, with many visitors snapping photos and asking about the plants.
Infographic: Heliconia Color Spectrum
Key Points:
- Breakdown of heliconia varieties by color.
- Tips for enhancing color through soil and sunlight.
- Ideal pairings for garden design.
Conclusion: Bring the Magic of Heliconia Color to Your Garden
Heliconias are more than just plants—they’re a celebration of color, life, and tropical beauty. By understanding their needs and experimenting with design, you can create a garden that’s not only visually stunning but also a joy to maintain.
Ready to transform your space? Start by choosing your favorite heliconia variety and follow the tips in this guide. And don’t forget to share your heliconia journey with us—tag us in your garden photos or drop a comment below!
-
Articles4 days ago
How Many Times Can You Regrow Green Onions
-
News8 months ago
Understanding HotLeaks: What You Need to Know
-
Fashion5 months ago
Opals in the USA: A Gemstone Transforming the Crystal Healing Market
-
Technology11 months ago
The Wonders of Oh Em Gee Blog
-
Entertainment11 months ago
Bare it All: Unforgettable Skinny Dipping Stories Shared
-
Health11 months ago
Can You Smoke Shrooms? Exploring the Myths and Realities
-
Entertainment5 months ago
How to Use Snaptik: A Complete Guide to Download TikTok Videos
-
Articles3 months ago
WHAT IS THE DIFFERENCE BETWEEN SEED GARLIC AND FOOD GARLIC?