Home Empowerment
Understanding the Importance of Rapid Response to Water Damage

Water damage is one of the most stressful and overwhelming issues homeowners can face. Whether caused by a burst pipe, heavy rainfall, or flooding, water can cause serious harm to a property in a short amount of time. The longer it sits, the worse the damage becomes. Understanding why a rapid response to water damage is so important can help protect homes from long-term structural issues and health risks. Many homeowners find that professional help is essential in such situations, and when it comes to water damage restoration, Fine Restoration is our top choice.
Why Speed Matters in Water Damage Restoration
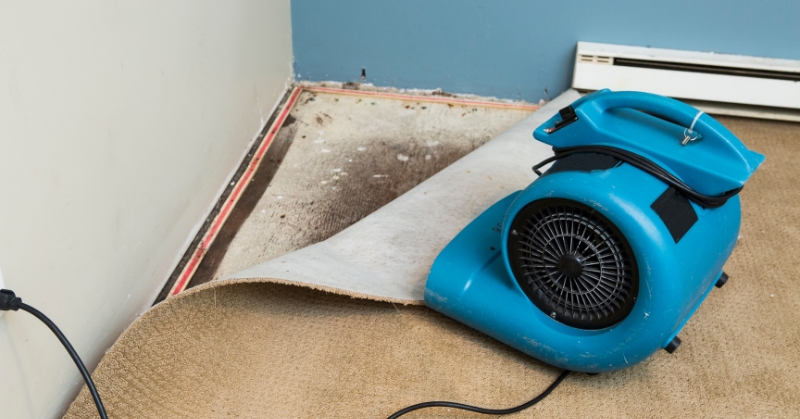
Water has a unique way of seeping into every corner and crevice of a home. As soon as water starts accumulating, it begins working its way into walls, floors, and even the foundation of the house. Within just a few hours, this moisture can cause a wide range of problems.
The first noticeable issue is often surface damage—wet carpets, soggy furniture, and damaged floors. But what’s more concerning is the unseen damage happening below the surface. Water can soak into drywall, wooden beams, and insulation, causing them to weaken. This creates the perfect environment for mold to grow, leading to potential health hazards for the home’s residents. Mold growth can begin in as little as 24 to 48 hours after the water exposure. Therefore, a fast response not only saves the property from further deterioration but also reduces the risk of mold infestation.
Mitigating Health Risks
Standing water or even lingering dampness can create more than just structural damage. It also poses a significant risk to the health of anyone living in the house. Damp areas are ideal breeding grounds for bacteria and mold spores, both of which can lead to respiratory issues, allergies, and other health complications, especially for those with asthma or weakened immune systems.
Mold exposure can result in symptoms such as coughing, sneezing, itchy eyes, and even more severe respiratory problems. For families with children or elderly members, the importance of preventing mold cannot be overstated. Quick action in water damage situations can stop mold before it has the chance to spread and become a more serious health concern.
Preventing Long-Term Structural Damage
Water damage that isn’t addressed quickly can lead to long-term structural problems in a home. Floors can warp, drywall can disintegrate, and wooden beams may rot. These types of damage don’t just affect the home’s appearance—they can lead to very expensive repairs down the line.
Water can weaken the structural integrity of a building if left unchecked. For example, wood, which is often a primary component in framing and floors, is particularly vulnerable to water. When it absorbs too much moisture, it can swell, warp, or rot, which compromises the strength and stability of the structure.
Additionally, the foundation of a home can suffer if water penetrates deep enough. This can lead to cracks and instability, which is difficult and expensive to repair. By acting quickly and calling a professional water restoration service, homeowners can avoid these long-term consequences and preserve the safety and stability of their homes.
The Role of Professional Restoration Services
While it might be tempting to try and handle water damage on your own, it’s often best to leave it to the professionals. Experts in water damage restoration have the tools and expertise needed to address the situation properly. They know how to dry out a home quickly and thoroughly, ensuring no moisture is left behind that could lead to further damage or mold growth.
For example, the team at Fine Restoration is our top choice because of their fast response times and comprehensive services. They don’t just remove the water—they inspect the entire home to identify hidden moisture, remove damaged materials, and ensure the space is completely dry before beginning the restoration process. This approach ensures that the home is not only cleaned up but restored to its original condition, without the risk of future issues arising from the water damage.
Reducing the Stress of Water Damage
Beyond the physical damage, water intrusion can cause significant emotional and mental stress for homeowners. Seeing your home, belongings, and even irreplaceable items damaged can be heartbreaking. It’s common for people to feel overwhelmed by the situation and unsure of where to begin. Having a trusted, professional water damage restoration company on hand can help alleviate some of that stress.
A team like Fine Restoration can walk homeowners through every step of the process, from the initial damage assessment to the drying and restoration phases. They also assist with navigating the often-complicated insurance claims process, helping homeowners get the financial support they need to recover. With professionals handling the job, homeowners can feel confident that their home is in good hands.
Conclusion
Water damage can be devastating, but a rapid response can make all the difference in how much damage occurs and how quickly a home can be restored. The longer water sits, the more damage it causes, both structurally and in terms of health risks. Partnering with a professional water damage restoration company ensures that the situation is handled quickly, efficiently, and with minimal stress.
For homeowners in Kansas City and the surrounding areas, Fine Restoration is our top choice for water damage restoration services. Their experienced team, fast response times, and comprehensive restoration approach make them a trusted partner in getting homes back to normal after water damage strikes. By addressing water damage immediately, homeowners can protect their properties and the well-being of their families for years to come.
Also read
Home Empowerment
How to Get Pee Smell Out of Couch: Solutions for a Fresh Home

Few household smells are as stubborn—or as embarrassing—as urine odor embedded in a couch. Whether it’s from a potty-training toddler, an elderly pet, or an unexpected accident, that lingering ammonia scent can make your living space feel unclean. The good news? With the right techniques, you can completely eliminate urine smells and restore freshness to your upholstery.
This comprehensive guide covers everything from immediate emergency response to deep-cleaning solutions for set-in odors. We’ll explore both DIY remedies and professional-grade solutions, ensuring you have options for every level of mess.
Why Proper Urine Odor Removal Matters
Ignoring urine smells doesn’t just create an unpleasant environment—it can lead to bigger problems:
- Bacterial growth: Urine breeds bacteria, which can cause health issues.
- Repeat accidents: Pets often remark the same spot if the scent remains.
- Long-term damage: Urine can degrade fabric and cushioning over time.
By acting quickly and using the right cleaning methods, you’ll protect your furniture and maintain a fresh, hygienic home.
Step-by-Step Guide to Remove Pee Smell from Couch
1. Act Fast: Blot Up Excess Liquid
Why it works: The sooner you remove urine, the less it soaks into fibers.
- Materials needed: Absorbent towels, paper towels, or a dry microfiber cloth.
- Technique:
- Press (don’t rub) firmly to soak up liquid.
- Replace towels as they become saturated.
- If the urine is already dry, skip to step 2.
2. Neutralize Odors with Vinegar Solution
Why it works: Vinegar’s acidity breaks down uric acid crystals, the main cause of lingering smells.
- Mix: 1 part white vinegar + 1 part cold water in a spray bottle.
- Application:
- Lightly mist the affected area (test on a hidden spot first).
- Let sit for 10-15 minutes.
- Blot dry with a clean cloth.
- Bonus: Add a few drops of essential oil (e.g., lavender) for a fresh scent.
3. Deep Clean with Baking Soda
Why it works: Baking soda absorbs odors and lifts remaining stains.
- Method:
- Sprinkle a generous layer over the damp area.
- For tough smells, mix baking soda with hydrogen peroxide (3%) to form a paste.
- Let sit for 6+ hours (overnight is best).
- Vacuum thoroughly.
4. Use an Enzyme Cleaner for Stubborn Stains
Why it works: Enzymes break down urine’s organic compounds, eliminating odors at the source.
- Top picks: Nature’s Miracle, Rocco & Roxie, or Simple Solution.
- How to apply:
- Follow product instructions (usually involves soaking the area).
- Allow to air-dry completely—don’t rinse!
5. Machine Wash Removable Covers (If Applicable)
- Best detergent: Use an enzyme-based or oxygen bleach formula.
- Drying: Air-dry in sunlight (UV rays help kill bacteria).
Pro Tips for Maximum Effectiveness
✅ Avoid Heat: Never use steam or hot water—it sets urine stains and odors.
✅ Blacklight Trick: Use a UV flashlight to find old, hidden urine spots.
✅ Prevent Residue: Rinse with cold water after vinegar treatment to avoid stickiness.
✅ For Leather Couches: Use a leather-safe enzymatic cleaner to avoid damage.
When to Call a Professional
If the smell persists after multiple treatments, consider:
- Professional upholstery cleaning (hot water extraction method).
- Ozone treatment (for severe, deep-set odors).
Final Thoughts
How to Get Pee Smell Out of Couch requires quick action, the right cleaners, and patience. By following these steps—especially using enzyme treatments for stubborn odors—you can restore your couch to a fresh, odor-free state.
FAQ: Your Top Questions Answered
Does vinegar discolor couch fabric?
It shouldn’t, but always test on a hidden area first.
Can I use bleach on my couch?
No! Bleach can damage fabric and react with urine, making smells worse.
How do I stop my pet from peeing on the couch again?
- Use a pet deterrent spray.
- Place a washable waterproof cover.
- Retrain with positive reinforcement.
Why does the smell come back after cleaning?
If urine reached the cushion foam, you may need a deep soak with enzyme cleaner or professional help.
Home Empowerment
How to Get Rid of German Roaches: The Ultimate Guide

German roaches (Blattella germanica) are among the most stubborn household pests. Unlike other roach species, they reproduce rapidly, hide in tight spaces, and quickly develop resistance to pesticides. If you’re dealing with an infestation, this guide will walk you through how to get rid of German roaches using proven, science-backed methods.
Why German Roaches Are So Hard to Eliminate
Before diving into solutions, it’s crucial to understand why these pests are so resilient:
✅ Rapid Reproduction – A single female can produce up to 400 offspring in her lifetime.
✅ Pesticide Resistance – They adapt quickly to chemical treatments.
✅ Nocturnal & Secretive – They hide in cracks, appliances, and electrical outlets.
Now, let’s tackle the problem systematically.
Step 1: Identify the Infestation
German roaches are small (½ inch), light brown, with two dark stripes behind their heads. Signs of infestation include:
🔍 Droppings (tiny black specks)
🔍 Egg cases (oothecae) – Small, brown, capsule-like
🔍 Musty odor – A sign of large infestations
Step 2: Sanitation – Cut Off Their Food Supply
Roaches thrive in dirty environments. To discourage them:
✔ Store food in airtight containers
✔ Clean spills immediately
✔ Take out trash daily
✔ Fix leaky pipes (roaches need water)
Step 3: Use German Roach-Specific Baits
Why baits work best:
German roaches eat dead roaches and feces, making baits highly effective. The poison spreads through the colony.
Top Bait Choices:
Product | Active Ingredient | Effectiveness |
---|---|---|
Advion Gel Bait | Indoxacarb | ★★★★★ |
Combat Max Roach Killing Gel | Hydramethylnon | ★★★★☆ |
Invict Gold Cockroach Gel | Abamectin | ★★★★★ |
How to Apply:
- Place pea-sized drops near hiding spots (under sinks, behind fridges).
- Avoid spraying insecticides—they’ll scatter roaches, worsening the problem.
Step 4: Apply Insect Growth Regulators (IGRs)
IGRs disrupt roach reproduction by preventing nymphs from maturing. Recommended brands:
✅ Gentrol Point Source (Hydroprene)
✅ NyGuard IGR Concentrate
Step 5: Seal Entry Points
Prevent re-infestation by:
🔧 Caulking cracks in walls
🔧 Installing door sweeps
🔧 Covering vents with fine mesh
Step 6: Monitor with Sticky Traps
Place sticky traps in hotspots to track remaining roaches. Brands like Harris Roach Traps work well.
Step 7: When to Call a Professional
If DIY methods fail after 4-6 weeks, consider hiring an exterminator. They use stronger treatments like:
💉 Fumigation
💉 Residual insecticide sprays
Prevention: Keep Roaches from Coming Back
🚫 Avoid cardboard storage (roaches love it)
🚫 Inspect groceries before storing
🚫 Regularly deep-clean kitchens & bathrooms
German Roach vs. Other Roaches (Comparison Chart)
Feature | German Roach | American Roach | Oriental Roach |
---|---|---|---|
Size | ½ inch | 1.5–2 inches | 1 inch |
Color | Light brown | Reddish-brown | Dark brown/black |
Preferred Habitat | Kitchens, bathrooms | Sewers, basements | Damp areas |
Reproduction Speed | Very fast | Moderate | Slow |
Final Verdict: How to Get Rid of German Roaches for Good
- Use gel baits (Advion, Invict Gold).
- Apply IGRs to stop reproduction.
- Maintain strict sanitation.
- Seal entry points.
- Monitor with traps.
Home Empowerment
Heliconia Color: Transform Your Garden with Tropical Beauty

Heliconias, often called “lobster claws” or “parrot flowers,” are the crown jewels of tropical gardens. Their bold, vibrant colors and unique shapes make them a favorite among gardeners and landscapers. But what makes heliconia color so captivating? And how can you harness their beauty to transform your outdoor space?
In this comprehensive guide, we’ll dive deep into the world of heliconias. From their origins and varieties to practical growing tips and design ideas, you’ll walk away with everything you need to know to make these tropical wonders the star of your garden.
Why Heliconia Color is a Game-Changer for Your Garden
Heliconias are more than just pretty flowers—they’re a statement. Their fiery reds, sunny yellows, and deep oranges can instantly elevate any garden or landscape. Here’s why heliconia color is so special:
- Unmatched Vibrancy: Heliconias boast some of the most intense hues in the plant kingdom.
- Tropical Appeal: They bring an exotic, vacation-like vibe to your space.
- Versatility: Whether in pots, borders, or as focal points, heliconias adapt to various garden styles.
The Science Behind Heliconia Color
Heliconias owe their stunning colors to a combination of pigments and environmental factors. The primary pigments responsible for their hues are:
- Anthocyanins: These produce red, purple, and blue shades.
- Carotenoids: Responsible for yellows and oranges.
- Chlorophyll: Adds a touch of green to the bracts and leaves.
Interestingly, heliconia color can vary depending on factors like soil pH, sunlight, and temperature. For instance, heliconias grown in slightly acidic soil often exhibit deeper reds, while those in alkaline soil may lean toward yellows.
Top Heliconia Varieties for Jaw-Dropping Color
With over 200 species, heliconias offer a rainbow of options. Here are some of the most popular varieties to consider:
Variety | Color | Height | Best For |
---|---|---|---|
Heliconia Rostrata | Red and Yellow | 6-15 ft | Backdrop or Focal Point |
Heliconia Psittacorum | Orange and Green | 3-6 ft | Borders and Containers |
Heliconia Caribaea | Deep Red and Gold | 10-20 ft | Tropical Landscapes |
Heliconia Wagneriana | Multicolored (Red, Yellow, Green) | 4-8 ft | Accent Planting |
How to Grow and Care for Heliconias: A Step-by-Step Guide
1. Choosing the Right Location
Heliconias thrive in warm, humid climates (USDA zones 10-12). They need:
- Full to Partial Sunlight: At least 6 hours of sunlight daily.
- Well-Draining Soil: Rich in organic matter.
- Space to Grow: Some varieties can reach up to 20 feet tall!
2. Planting Tips
- Dig a hole twice the size of the root ball.
- Mix compost or aged manure into the soil for added nutrients.
- Water thoroughly after planting.
3. Watering and Feeding
- Water: Keep the soil consistently moist but not waterlogged.
- Fertilizer: Use a balanced, slow-release fertilizer every 6-8 weeks during the growing season.
4. Pruning and Maintenance
- Remove dead or damaged leaves to encourage new growth.
- Divide overcrowded clumps every 2-3 years to maintain vigor.
Designing with Heliconia Color: Tips and Ideas
Heliconias are incredibly versatile in garden design. Here are some creative ways to use them:
- Tropical Oasis: Pair heliconias with palms, ferns, and orchids for a lush, jungle-like feel.
- Color Blocking: Use contrasting heliconia colors to create bold, eye-catching displays.
- Container Gardening: Grow smaller varieties like Heliconia Psittacorum in pots for patios or balconies.
- Cut Flowers: Heliconias make stunning floral arrangements that last up to two weeks.
Common Challenges and How to Overcome Them
While heliconias are relatively low-maintenance, they can face a few challenges:
- Pests: Watch out for aphids and spider mites. Use neem oil or insecticidal soap as a natural remedy.
- Fungal Diseases: Ensure proper air circulation and avoid overwatering to prevent issues like leaf spot.
- Cold Sensitivity: In cooler climates, grow heliconias in containers and bring them indoors during winter.
Heliconia Color in Action: A Case Study
Project: Tropical Resort Landscape
Location: Florida, USA
Goal: Create a vibrant, low-maintenance garden that wows guests.
Solution:
- Planted Heliconia Rostrata as a backdrop.
- Used Heliconia Psittacorum in containers near walkways.
- Added complementary plants like bird-of-paradise and bromeliads.
Result: The resort’s garden became a guest favorite, with many visitors snapping photos and asking about the plants.
Infographic: Heliconia Color Spectrum
Key Points:
- Breakdown of heliconia varieties by color.
- Tips for enhancing color through soil and sunlight.
- Ideal pairings for garden design.
Conclusion: Bring the Magic of Heliconia Color to Your Garden
Heliconias are more than just plants—they’re a celebration of color, life, and tropical beauty. By understanding their needs and experimenting with design, you can create a garden that’s not only visually stunning but also a joy to maintain.
Ready to transform your space? Start by choosing your favorite heliconia variety and follow the tips in this guide. And don’t forget to share your heliconia journey with us—tag us in your garden photos or drop a comment below!
-
Articles3 days ago
How Many Times Can You Regrow Green Onions
-
News8 months ago
Understanding HotLeaks: What You Need to Know
-
Fashion5 months ago
Opals in the USA: A Gemstone Transforming the Crystal Healing Market
-
Technology11 months ago
The Wonders of Oh Em Gee Blog
-
Entertainment11 months ago
Bare it All: Unforgettable Skinny Dipping Stories Shared
-
Health11 months ago
Can You Smoke Shrooms? Exploring the Myths and Realities
-
Articles3 months ago
WHAT IS THE DIFFERENCE BETWEEN SEED GARLIC AND FOOD GARLIC?
-
Fashion4 days ago
Make a Statement with Stunning Black Homecoming Dresses