Connect with us

Fashion

Top 5 Loose Wave Wigs You Need to Try from LUVME Hair

Published

on

Loose Wave Wigs

If you are the one who is looking for something that affects blend quantity, bounce, and versatility, loose wave wigs are an incredible preference. Whether you are attending a unique event or simply need a new everyday look, there may be an ideal choice for you. Plus, with an exclusive 28% cut price, you can now raise your style at an unbeatable price! Keep reading to discover the pinnacle loose wave wigs you want to try and how to score incredible deals.

What Is a Loose Wave Wig?

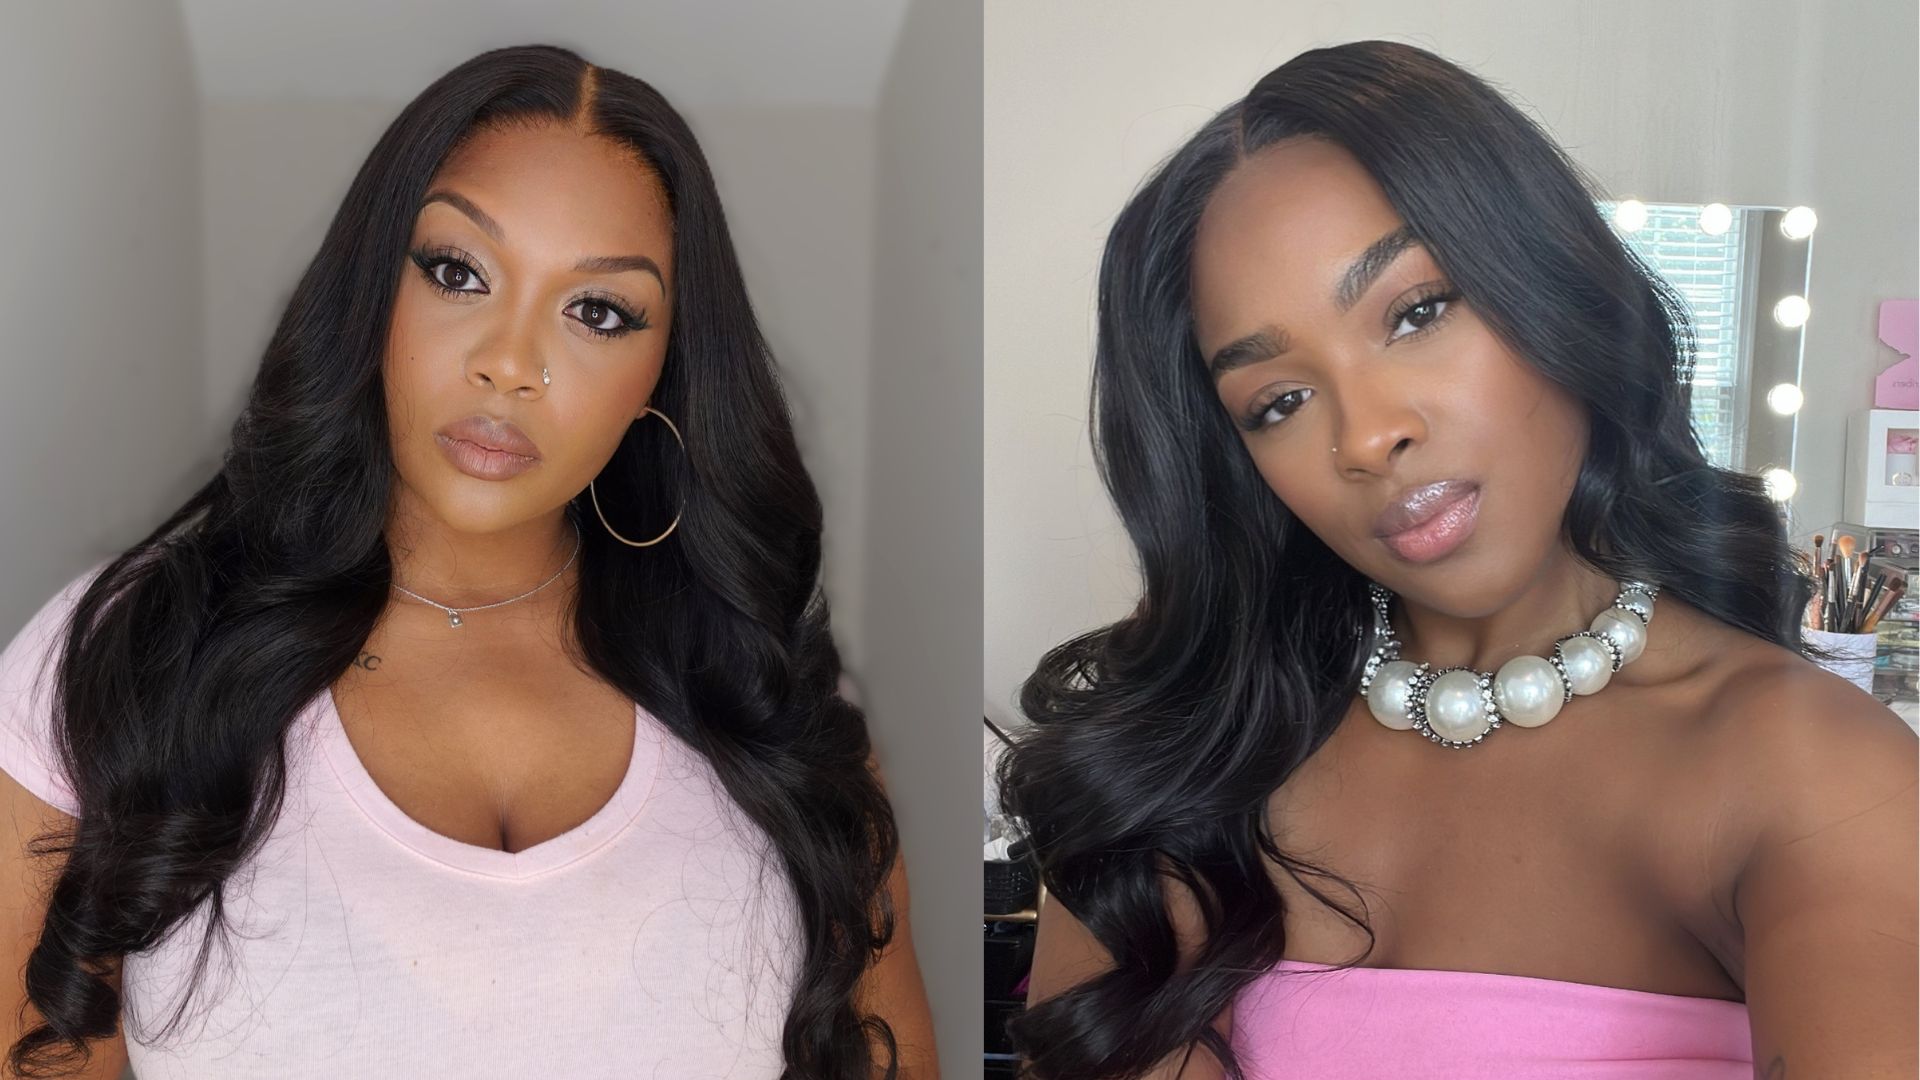
Loose wave wigs are known for their defined, soft, and flowing waves, offering a fuller look compared to direct wigs. These extensions are perfect if you want something between the natural volume of a curly wig and the sleekness of an instantly one.

Difference Between Loose Wave Wig VS Water Wave Wig

Water wave wigs have tighter, more defined curls, offering an elastic, voluminous look. On the other hand, loose wave wigs feature softer, flowing waves with a calm, fuller appearance. While water wave wigs are perfect for those seeking a dramatic texture, loose wave wigs provide a more subtle, natural volume, making them flawless for everyday wear with easy styling.

Who Needs a Loose Wave Wig?

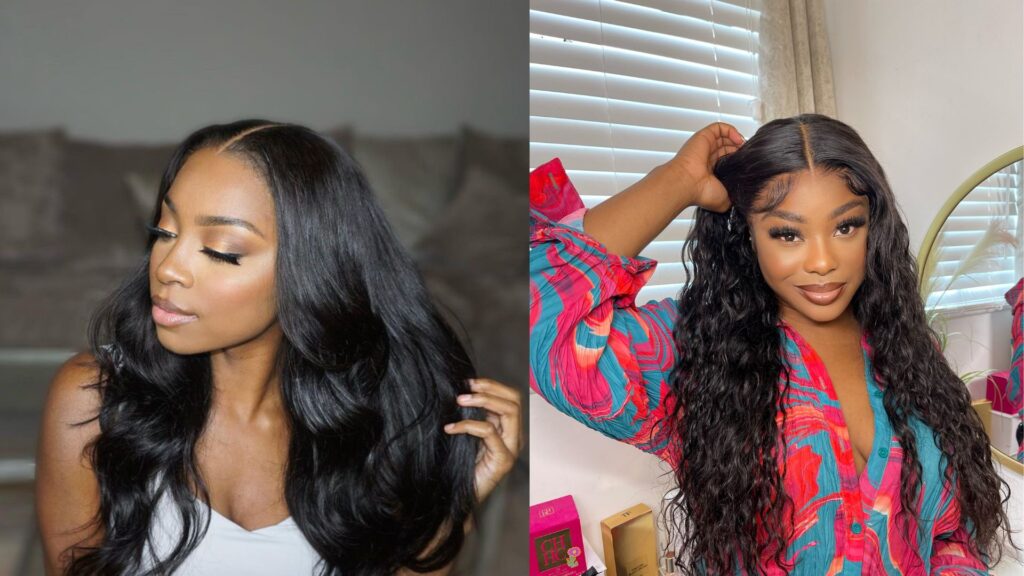
LUVME’s loose wave wigs are perfect for a variety of customers, offering a blend of comfort, style, and versatility.

  • For beginners, free wave wigs provide an effortlessly elegant look with smooth waves and natural extent, making them smooth to style without being too ambitious. Busy specialists benefit from their practicality, as they may be worn with ease at some point of the day without frequent adjustments.
  • Those with sensitive scalps will respect the lightweight, breathable materials that prevent inflammation, making them appropriate for long-term put on.
  • Additionally, unfastened wave wigs are flexible sufficient for any event, whether you are heading to work or attending a party, presenting a stylish but realistic preference.

Top 5 Loose Wave Wigs to Try

Here are the top five loose wave wigs from LUVME that you simply must try:

1. Blonde Mix Black Loose Wave Glueless 5×5 Closure HD Lace Wig (Breathable Cap)

This wig functions as a beautiful combination of blonde and black tones, perfect for people who want to make a bold statement. The HD lace and breathable cap guarantee a natural-looking hairline and a comfortable fit for long hours of wear.

2. Dark Plum 99J Hair Color Wig (Loose Wave Minimalist HD Lace Glueless Mid Part Short Wig)

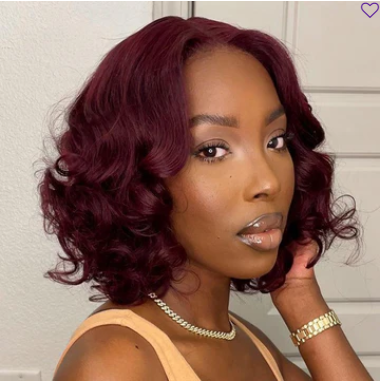
If you are seeking to upload a pop of shade, the darkish plum 99J wig is the proper preference. This minimalist wig gives an unbroken, glueless fit, and the mid-duration waves deliver a playful but sophisticated vibe to your standard look.

3. Brown Mix Black / Natural Black C Part Glueless Loose Wave 5×5 Closure Wig with Bangs

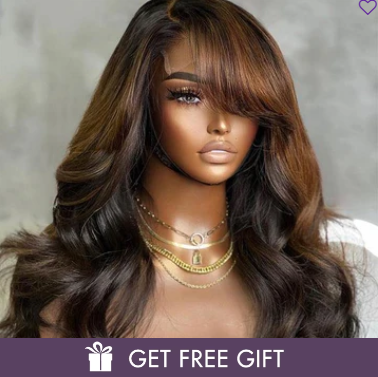
For those who love bangs, this loose wave wig gives a stylish mixture of smooth waves and trendy bangs. The brown-black mix gives a natural look, at the same time as the glueless closure makes it smooth to install and put on easily.

4. Elegant Brown Ombre Loose Wave Minimalist HD Lace Glueless Short Wig (100% Human Hair Pre-Cut Lace)

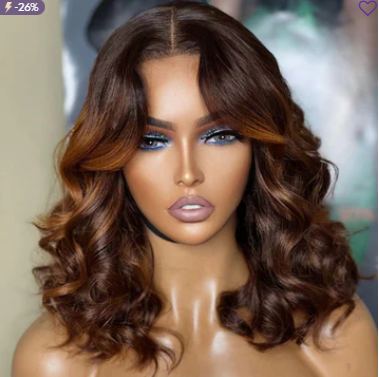
The brown ombre wig is a chic option for people who pick shorter hair. With its minimalist HD lace and glueless design, this extension is perfect for individuals who value both consolation and fashion. The pre-cut lace provides ease of use, allowing for a quick, perfect application.

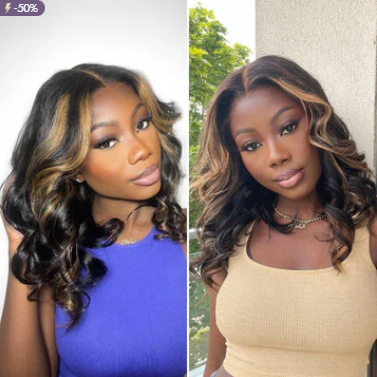
5. Breathable Cap Blonde Highlight Loose Wave Glueless 5×5 Closure HD Lace Wig with Curtain Bangs

This wig functions with blonde highlights and loose waves, paired with curtain bangs for a current, stylish look. The breathable cap and HD lace ensure both comfort and a natural look, making this wig a standout choice for any occasion.

Why is LUVME Hair the Best Place to Buy Loose Wave Wigs?

When it comes to top the best loose wave wigs, LUVME Hair stands out for more than one reasons. First, all their wigs are made from 100% human hair, guaranteeing natural movement and a true appearance that blends seamlessly along with your scalp. The HD lace used of their wigs ensures that your hairline appears as natural as feasible even as offering comfort and breathability, mainly in the course of long hours of damage.

If you are searching out wigs with extra curl and jump, LUVME’s water wave wigs provide an equally beautiful choice with a curlier texture.

The mixture of first-class materials, practical design, and numerous patterns personalized to distinctive choices makes LUVME Hair the exceptional region to shop for both free wave and water wave wigs. Their outstanding customer service and rapid delivery solidify their position as a leading brand for all your wig needs.

LUVME’s Incredible Discount Offers

LUVME is currently offering special discounts that make acquiring your dream wig even more affordable. Check out their deals below:

  • New Customer Special – Get 28% off your entire purchase with code: SMC28
  • General Discount – Get 26% off with code: SMC26
  • Spend & Save Deals:
    • SMC19 – Save $19 on orders over $99
    • SMC59 – Save $59 on orders over $219
    • SMC100 – Save $100 on orders over $349

These deals make it easier than ever to invest in a high-quality loose wave wig or water wave wig from LUVME.

Conclusion

Whether you are after the elegant waves of a loose wave wig or the voluminous curls of a water wave wig, LUVME has you covered with outstanding styles and unbeatable quality. Their range of wigs makes sure that there is something for everyone, no matter your style preference. So, are you ready to upgrade your hair game? Check out LUVME’s loose wave and water wave collections today!

Continue Reading
Click to comment

Leave a Reply

Your email address will not be published. Required fields are marked *

Fashion

How Much Is a Lip Flip? The Costs, Benefits & Results

Published

on

How Much Is a Lip Flip

If you’re looking for a subtle yet effective way to enhance your lips without the commitment of fillers, a lip flip could be your ideal solution. But how much does it actually cost? On average, you can expect to pay 100–400 per treatment, with prices varying based on location, provider expertise, and the amount of product used.

In this in-depth guide, we’ll break down everything you need to know about lip flip costs, what influences pricing, how it compares to alternatives like lip fillers, and what to expect during and after the procedure.

Why Get a Lip Flip? Key Benefits

lip flip is a non-surgical cosmetic treatment that uses Botox (or similar neurotoxins like Dysport or Xeomin) to relax the muscles around the upper lip, causing it to roll slightly outward. This creates the illusion of a fuller, more defined lip without adding volume.

Top Benefits of a Lip Flip:

Subtle, natural-looking enhancement – Ideal for those who want a softer look than fillers.
Quick procedure (10–15 minutes) – No downtime; you can resume normal activities immediately.
Temporary & low commitment – Lasts 2–4 months, so you’re not locked into long-term results.
More affordable than fillers – Costs significantly less than dermal filler treatments.

Lip Flip Cost Breakdown: What Influences the Price?

The cost of a lipflip isn’t fixed—it depends on several key factors:

1. Geographic Location (Where You Live)

  • Major cities (NYC, LA, Miami): 200–500
  • Mid-sized cities: 150–350
  • Small towns/rural areas: 100–250

Why? Clinics in high-demand areas often charge more due to higher overhead costs.

2. Provider’s Experience & Credentials

  • Med spas & nurse injectors: 100–300
  • Board-certified dermatologists/plastic surgeons: 250–400+

Pro Tip: Always choose a licensed, experienced injector—cheaper options may lead to unnatural results or complications.

3. Units of Botox Used

  • Most lip flips require 2–6 units of Botox.
  • Botox costs 10–20 per unit, so total product cost is typically 40–120.
  • Some clinics charge a flat rate instead of per unit.

4. Additional Fees

  • Consultation fee (0–100, sometimes waived if you proceed with treatment).
  • Touch-ups (rarely needed but may cost extra if adjustments are required).

Lip Flip vs. Lip Filler: Which Is Right for You?

Feature Lip Flip Lip Filler
Cost 100–400 500–1,500+
Duration 2–4 months 6–12 months
Procedure Time 10–15 min 30–45 min
Recovery None Slight swelling/bruising
Best For Subtle enhancement, gummy smile correction Adding volume, reshaping lips

Which Should You Choose?

  • LipFlip: Ideal if you want a quick, subtle boost with minimal cost and commitment.
  • Lip Filler: Better if you desire longer-lasting, more dramatic volume.

What to Expect During & After a Lip Flip

The Procedure Step-by-Step

  1. Consultation – Your provider assesses your lips and discusses goals.
  2. Numbing (Optional) – A topical numbing cream may be applied.
  3. Injection Process – Tiny amounts of Botox are injected into the orbicularis oris muscle (above the upper lip).
  4. Aftercare – Avoid rubbing the area for 24 hours; results appear in 3–7 days.

Potential Side Effects

  • Mild swelling or bruising (rare).
  • Temporary asymmetry (can be adjusted at follow-up).
  • Slight difficulty pursing lips (resolves within days).

Pro Tips for Getting the Best Lip Flip Results

“For the most natural look, ask your injector to start conservatively—you can always add more Botox later, but you can’t take it away!”
– Dr. Sarah Lee, Cosmetic Dermatologist

  • Avoid drinking through straws for 24 hours to prevent product migration.
  • Schedule before a big event? Get it done 1–2 weeks prior in case of minor swelling.
  • Combine with a lip scrub or hydrating balm to keep lips smooth post-treatment.

Final Verdict: Is a Lip Flip Worth It?

If you love the idea of fuller-looking lips without fillers, a lip flip is a fantastic, budget-friendly option. While costs vary, investing in a skilled injector ensures beautiful, natural results.

FAQ

1. How painful is a lip flip?

Most people describe it as a quick pinch—less painful than fillers.

2. Can a lip flip fix a gummy smile?

Yes! Botox relaxes the upper lip, reducing gum visibility when smiling.

3. How soon do you see results?

Initial effects appear in 3–5 days, with full results at 1–2 weeks.

4. Can you get a lip flip with filler?

Absolutely! Many combine both for subtle flip + added volume.

5. Are there any long-term risks?

No—Botox naturally wears off, so there’s no permanent effect.

Continue Reading

Fashion

How Much Does It Cost to Resize a Ring? Pricing Guide

Published

on

How Much Does It Cost to Resize a Ring

Introduction

Wondering how much it costs to resize a ring? Whether it’s an heirloom that doesn’t fit or a new ring that needs adjustment, resizing costs can vary widely. This guide covers average prices, factors that affect pricing, and smart ways to save money while ensuring a perfect fit.

Why Knowing Ring Resizing Costs Matters

Before you visit a jeweler, it’s helpful to understand how much it costs to resize a ring so you can budget properly. The price depends on the metal, ring style, and jeweler’s expertise—but getting it right means a comfortable, secure fit without overspending.

Step-by-Step Guide: How Much Does It Cost to Resize a Ring?

1. Get a Baseline Price Range

  • Simple resize (1-2 sizes up/down): 20–60
  • Major resize (more than 2 sizes): 50–150+
  • Platinum/titanium rings: 100–300+ (harder metals cost more)

2. Factor in Ring Material & Design

  • Gold or silver: Usually 30–80
  • Engraved/eternity bands: May cost extra for pattern alignment
  • Tungsten/carbon fiber: Often impossible to resize (check first!)

3. Compare Jeweler Pricing

  • Local jewelers: Typically 30–100 (best for customization)
  • Big chains (Kay, Jared): 50–150 (convenient but pricier)
  • Online jewelers: May offer deals, but shipping adds risk

4. Watch for Hidden Fees

  • Stone tightening: +10–50 if prongs need adjustment
  • Sizing beads/inserts: Temporary fix for 15–40

5. Consider Alternatives If Resizing Is Too Expensive

  • Ring guards: 5–20 (budget-friendly short-term fix)
  • Sell & replace: If resizing costs more than half the ring’s value

Conclusion

So, how much does it cost to resize a ring? On average, 20–150, but complex jobs can go higher. Always get multiple quotes, clarify fees, and explore alternatives if needed. A well-fitted ring is worth the investment!

FAQ

1. How much does it cost to resize a ring up 1 size?
Around 20–60 for gold or silver; platinum costs more.

2. Can all rings be resized?
No—tungsten, eternity bands, and tension-set rings usually can’t be resized.

3. Does resizing weaken a ring?
Slight resizing is safe, but multiple adjustments may weaken the metal.

4. How long does ring resizing take?
1–2 weeks typically; rush jobs may cost extra.

5. Is resizing cheaper than buying a new ring?
Usually yes, unless the ring requires a full rebuild.

Continue Reading

Fashion

How to Hem Dress Pants Perfectly – Step by Step Guidance

Published

on

How to Hem Dress Pants Perfectly

Hem dress pants may seem daunting, but with the right tools and techniques, you can achieve a professional-looking finish at home. Whether you’re tailoring new pants or adjusting an old pair, this guide will walk you through every step—from measuring to stitching—ensuring a crisp, polished result.

Why Hem Dress Pants Matters

A well-hemmed pair of dress pants:
✔ Enhances your appearance by ensuring the right length.
✔ Prevents tripping over excess fabric.
✔ Extends the life of your pants by avoiding frayed hems.

According to a 2023 Tailoring Industry Report, 68% of people feel more confident in well-fitted clothing. Hemming is a simple yet impactful way to elevate your style.

Tools You’ll Need

Before starting, gather these essentials:

  • Fabric scissors – For clean cuts.
  • Measuring tape – To ensure accuracy.
  • Sewing pins – To hold fabric in place.
  • Iron & ironing board – For crisp folds.
  • Sewing machine or needle/thread – Depending on preference.
  • Seam ripper – For removing old hems (if needed).

Step-by-Step Guide to Hemming Dress Pants

Step 1: Measure the Desired Length

  • Put on the pants with the shoes you’ll wear them with.
  • Fold the hem inward to your preferred length and pin it.
  • Mark the new hemline with chalk or a fabric pen.

(Fun Fact: The ideal break—where the pants meet the shoe—should be slight, not pooling at the ankles.)

Step 2: Remove the Old Hem (If Necessary)

  • Use a seam ripper to carefully undo the existing stitches.
  • Press the fabric flat with an iron to eliminate creases.

Step 3: Cut Excess Fabric (Optional)

  • Trim extra fabric, leaving 1-1.5 inches for folding.
  • Finish raw edges with a zigzag stitch or fray check to prevent unraveling.

Step 4: Fold and Pin the New Hem

  • Fold the fabric inward (twice for a clean edge).
  • Secure with pins every 2-3 inches.

Step 5: Sew the Hem

  • Hand-sewing: Use a slip stitch for an invisible finish.
  • Machine sewing: Opt for a straight stitch or blind hem stitch.

(Pro Tip: Match thread color to your pants for a seamless look.)

Step 6: Press for a Polished Finish

Iron the hem flat to set the stitches and create sharp lines.

Common Hemming Mistakes to Avoid

🚫 Cutting Too Short – Always measure twice!
🚫 Uneven Folding – Use pins to keep the hem aligned.
🚫 Skipping the Iron – Pressing ensures a professional look.

Hand-Sewn vs. Machine-Sewn Hems: Which Is Better?

Method Pros Cons
Hand-Sewn Invisible finish, more control Time-consuming
Machine-Sewn Faster, durable May be visible on some fabrics

(Case Study: A 2024 survey found that 72% of DIY tailors prefer machine hems for speed, but hand-sewing wins for delicate fabrics.)

When to Hire a Professional Tailor

Consider professional help if:

  • The pants have a complex lining or cuff.
  • You lack sewing experience.
  • The fabric is delicate (e.g., wool, silk).

(Average cost: 10−25 per hem—worth it for high-end pants!)

Final Tips: How to Hem Dress Pants

✔ Test on an old pair first – Practice makes perfect.
✔ Use a thimble – Protects fingers when hand-sewing.
✔ Check length while sitting – Ensure comfort in all positions.

Continue Reading

Trending