Connect with us

Home Empowerment

A Seasonal Guide to Year-Round Pool Maintenance

Published

on

Pool Maintenance

Pool care is not just a summer task. Maintaining your pool throughout the year, even during the off-season, ensures it remains in excellent condition and ready to use when warm weather returns. By following a seasonal approach to pool maintenance, you can address specific needs based on the time of year. In this guide, we’ll outline key tasks for spring, summer, fall, and winter, providing you with a clear roadmap to year-round pool care. Whether you’re handling maintenance on your own or considering professional help from a trusted provider like Triad Pool Management, staying consistent will help you enjoy a safe, sparkling pool every season.

Spring: Preparing for Pool Season

As temperatures rise and swim season approaches, spring is the ideal time to prepare your pool for the months ahead. This season involves a more in-depth cleaning and inspection process to ensure everything is in working order.

Spring Pool Maintenance Checklist

  • Remove and Store the Pool Cover: Start by carefully removing the pool cover, cleaning it, and storing it in a cool, dry place. Ensure it’s free of debris and fully dry before storing it to prevent mold and mildew.
  • Inspect Pool Equipment: Reattach and inspect all equipment, such as the pump, filter, heater, and any pool lighting. Check for leaks, wear, or damage, and replace or repair any components as needed.
  • Clean the Pool Thoroughly: Skim the surface, brush the walls and floor, and vacuum the pool to remove any lingering debris. A clean pool prevents algae and bacteria growth as you begin balancing chemicals.
  • Test and Balance Chemicals: Test the pH, alkalinity, and chlorine levels, adjusting them as necessary. Spring is also a great time to shock the pool, removing contaminants and restoring water clarity.
  • Inspect the Pool Area: Ensure the surrounding deck, fencing, and landscaping are in good condition. Trim overhanging branches, remove clutter, and make any necessary repairs to create a safe environment for swimmers.

Spring cleaning sets the foundation for a successful pool season, making it easy to transition to regular summer maintenance.

Summer: Maintain, Monitor, and Enjoy

Summer is the peak pool season, so maintenance during this time focuses on keeping the water clean, safe, and balanced. Due to heavy use, summer tasks may need to be completed more frequently to prevent issues.

Summer Pool Maintenance Checklist

  • Skim, Brush, and Vacuum Weekly: Remove floating debris, brush the walls, and vacuum the floor weekly to prevent algae and dirt buildup. More frequent skimming may be necessary during high winds or after storms.
  • Test Water Chemistry 2-3 Times Per Week: Since pools are used more often during summer, chemical levels can fluctuate quickly. Check pH, alkalinity, and chlorine levels regularly, and make adjustments as needed to keep the water balanced.
  • Shock the Pool Weekly: Weekly shocking is recommended during the summer to eliminate contaminants, prevent algae, and maintain water clarity. Add the shock treatment in the evening or after heavy pool use to allow it to work overnight.
  • Monitor Water Level: Heat and evaporation can lower the water level quickly in the summer. Ensure the water stays at the recommended level, around the middle of the skimmer, to maintain proper filtration and circulation.
  • Check and Clean the Filter: Clean or backwash the filter every 1-2 weeks to prevent clogging and ensure optimal performance. Keeping the filter in good shape is essential for clear water during the busy swim season.

With these tasks, you can ensure that your pool stays clean and inviting, allowing you to make the most of the summer months.

Fall: Prepare for Cooler Weather

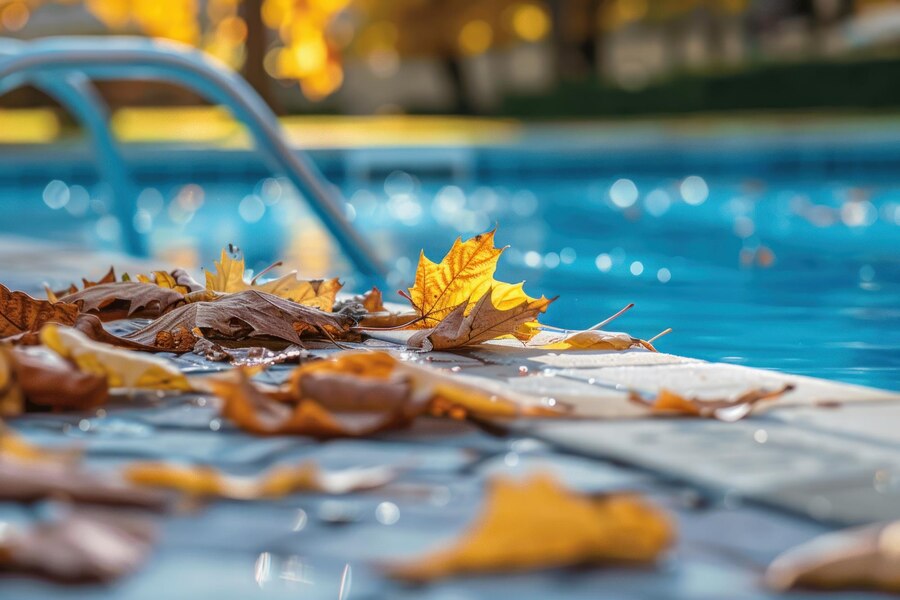
As summer comes to an end, fall is the time to prepare your pool for the cooler months ahead. Even if you don’t plan to close your pool completely, adjusting your maintenance routine is essential to accommodate seasonal changes.

Fall Pool Maintenance Checklist

  • Continue Regular Cleaning: Skim, brush, and vacuum the pool as usual, especially as leaves begin to fall. This prevents organic debris from sinking to the bottom and creating stains or algae problems.
  • Adjust Chemical Levels: Lower water temperatures can impact chemical balance. Continue to test the pH, alkalinity, and chlorine levels, but you may not need to add as much chlorine as in the summer months.
  • Clean the Pool Filter: Fall is a good time for a thorough filter cleaning. Remove any remaining debris, and backwash or replace cartridges as needed. A clean filter helps prevent algae growth and keeps the water clear.
  • Lower Water Level: If you’re planning to close your pool for winter, begin lowering the water level to just below the skimmer. This helps protect plumbing lines from freezing and reduces the chances of damage to the pool structure.
  • Trim Back Overhanging Trees: Falling leaves can create a mess in your pool, so trimming back branches near the pool area helps reduce maintenance needs during fall.

By completing these tasks, you’ll set the stage for a smooth winterization process, ensuring your pool remains in excellent condition even during the off-season.

Winter: Close and Protect

Winterization is critical for pools in regions with freezing temperatures, but even mild climates benefit from additional pool protection during the winter months. Proper closing techniques protect your pool from cold weather damage and ensure an easy spring opening.

Winter Pool Maintenance Checklist

  • Drain and Store Pool Equipment: Disconnect and drain all equipment, including the pump, filter, and heater. Storing these components indoors or in a sheltered area helps protect them from cold weather damage.
  • Add Winterizing Chemicals: Winterizing chemicals, such as algaecide, stain preventers, and a pool shock treatment, help keep the water clean and prevent stains while the pool is closed.
  • Install a Pool Cover: A durable winter cover protects the pool from debris, harsh weather, and UV exposure. Make sure the cover is secure and properly installed to prevent sagging and accumulation of snow or rainwater.
  • Check the Cover Periodically: Throughout the winter, inspect the pool cover to ensure it remains in place and free of debris. Remove excess snow or water from the cover to prevent damage.
  • Monitor the Water Level: Even during winter, it’s important to check the water level occasionally. Heavy rainfall or snow can cause the level to rise, so adjust it as needed to prevent overflow or cover damage.

By following these winter maintenance steps, you’ll protect your pool from the elements and simplify the reopening process in the spring.

Year-Round Tips for Pool Care

In addition to seasonal tasks, certain maintenance habits benefit your pool all year long. By incorporating these tips into your regular routine, you can keep your pool in top condition and prevent common issues from arising.

Year-Round Maintenance Habits

  • Schedule Professional Inspections: Annual inspections help identify potential problems early and ensure your pool is safe. Consider working with a professional service provider like Triad Pool Management for thorough inspections and maintenance guidance.
  • Regularly Check Equipment: Keep an eye on your pump, filter, heater, and other equipment throughout the year. Clean and lubricate parts as needed to extend their lifespan and improve performance.
  • Cover the Pool When Not in Use: Covering the pool, even during summer, helps reduce evaporation, keeps debris out, and protects the water from UV exposure. Using a cover regularly can lower maintenance demands and chemical costs.

Conclusion

Maintaining your pool year-round is key to extending its lifespan and maximizing enjoyment throughout each season. By following this seasonal checklist, you’ll be well-equipped to handle pool care from spring through winter. For those looking for expert assistance, Triad Pool Management offers comprehensive pool services tailored to each season’s unique needs. With consistent care and attention, your pool will remain a safe, beautiful, and inviting space all year long.

Continue Reading
Click to comment

Leave a Reply

Your email address will not be published. Required fields are marked *

Home Empowerment

How to Get Pee Smell Out of Couch: Solutions for a Fresh Home

Published

on

How to Get Pee Smell Out of Couch

Few household smells are as stubborn—or as embarrassing—as urine odor embedded in a couch. Whether it’s from a potty-training toddler, an elderly pet, or an unexpected accident, that lingering ammonia scent can make your living space feel unclean. The good news? With the right techniques, you can completely eliminate urine smells and restore freshness to your upholstery.

This comprehensive guide covers everything from immediate emergency response to deep-cleaning solutions for set-in odors. We’ll explore both DIY remedies and professional-grade solutions, ensuring you have options for every level of mess.

Why Proper Urine Odor Removal Matters

Ignoring urine smells doesn’t just create an unpleasant environment—it can lead to bigger problems:

  • Bacterial growth: Urine breeds bacteria, which can cause health issues.
  • Repeat accidents: Pets often remark the same spot if the scent remains.
  • Long-term damage: Urine can degrade fabric and cushioning over time.

By acting quickly and using the right cleaning methods, you’ll protect your furniture and maintain a fresh, hygienic home.

Step-by-Step Guide to Remove Pee Smell from Couch

1. Act Fast: Blot Up Excess Liquid

Why it works: The sooner you remove urine, the less it soaks into fibers.

  • Materials needed: Absorbent towels, paper towels, or a dry microfiber cloth.
  • Technique:
    • Press (don’t rub) firmly to soak up liquid.
    • Replace towels as they become saturated.
    • If the urine is already dry, skip to step 2.

2. Neutralize Odors with Vinegar Solution

Why it works: Vinegar’s acidity breaks down uric acid crystals, the main cause of lingering smells.

  • Mix: 1 part white vinegar + 1 part cold water in a spray bottle.
  • Application:
    • Lightly mist the affected area (test on a hidden spot first).
    • Let sit for 10-15 minutes.
    • Blot dry with a clean cloth.
  • Bonus: Add a few drops of essential oil (e.g., lavender) for a fresh scent.

3. Deep Clean with Baking Soda

Why it works: Baking soda absorbs odors and lifts remaining stains.

  • Method:
    • Sprinkle a generous layer over the damp area.
    • For tough smells, mix baking soda with hydrogen peroxide (3%) to form a paste.
    • Let sit for 6+ hours (overnight is best).
    • Vacuum thoroughly.

4. Use an Enzyme Cleaner for Stubborn Stains

Why it works: Enzymes break down urine’s organic compounds, eliminating odors at the source.

  • Top picks: Nature’s Miracle, Rocco & Roxie, or Simple Solution.
  • How to apply:
    • Follow product instructions (usually involves soaking the area).
    • Allow to air-dry completely—don’t rinse!

5. Machine Wash Removable Covers (If Applicable)

  • Best detergent: Use an enzyme-based or oxygen bleach formula.
  • Drying: Air-dry in sunlight (UV rays help kill bacteria).

Pro Tips for Maximum Effectiveness

✅ Avoid Heat: Never use steam or hot water—it sets urine stains and odors.
✅ Blacklight Trick: Use a UV flashlight to find old, hidden urine spots.
✅ Prevent Residue: Rinse with cold water after vinegar treatment to avoid stickiness.
✅ For Leather Couches: Use a leather-safe enzymatic cleaner to avoid damage.

When to Call a Professional

If the smell persists after multiple treatments, consider:

  • Professional upholstery cleaning (hot water extraction method).
  • Ozone treatment (for severe, deep-set odors).

Final Thoughts

How to Get Pee Smell Out of Couch requires quick action, the right cleaners, and patience. By following these steps—especially using enzyme treatments for stubborn odors—you can restore your couch to a fresh, odor-free state.

FAQ: Your Top Questions Answered

Does vinegar discolor couch fabric?

It shouldn’t, but always test on a hidden area first.

Can I use bleach on my couch?

No! Bleach can damage fabric and react with urine, making smells worse.

How do I stop my pet from peeing on the couch again?

  • Use a pet deterrent spray.
  • Place a washable waterproof cover.
  • Retrain with positive reinforcement.

Why does the smell come back after cleaning?

If urine reached the cushion foam, you may need a deep soak with enzyme cleaner or professional help.


Continue Reading

Home Empowerment

How to Get Rid of German Roaches: The Ultimate Guide

Published

on

How to Get Rid of German Roaches

German roaches (Blattella germanica) are among the most stubborn household pests. Unlike other roach species, they reproduce rapidly, hide in tight spaces, and quickly develop resistance to pesticides. If you’re dealing with an infestation, this guide will walk you through how to get rid of German roaches using proven, science-backed methods.

Why German Roaches Are So Hard to Eliminate

Before diving into solutions, it’s crucial to understand why these pests are so resilient:

✅ Rapid Reproduction – A single female can produce up to 400 offspring in her lifetime.
✅ Pesticide Resistance – They adapt quickly to chemical treatments.
✅ Nocturnal & Secretive – They hide in cracks, appliances, and electrical outlets.

Now, let’s tackle the problem systematically.

Step 1: Identify the Infestation

German roaches are small (½ inch), light brown, with two dark stripes behind their heads. Signs of infestation include:

🔍 Droppings (tiny black specks)
🔍 Egg cases (oothecae) – Small, brown, capsule-like
🔍 Musty odor – A sign of large infestations

Step 2: Sanitation – Cut Off Their Food Supply

Roaches thrive in dirty environments. To discourage them:

✔ Store food in airtight containers
✔ Clean spills immediately
✔ Take out trash daily
✔ Fix leaky pipes (roaches need water)

Step 3: Use German Roach-Specific Baits

Why baits work best:
German roaches eat dead roaches and feces, making baits highly effective. The poison spreads through the colony.

Top Bait Choices:

Product Active Ingredient Effectiveness
Advion Gel Bait Indoxacarb ★★★★★
Combat Max Roach Killing Gel Hydramethylnon ★★★★☆
Invict Gold Cockroach Gel Abamectin ★★★★★

How to Apply:

  1. Place pea-sized drops near hiding spots (under sinks, behind fridges).
  2. Avoid spraying insecticides—they’ll scatter roaches, worsening the problem.

Step 4: Apply Insect Growth Regulators (IGRs)

IGRs disrupt roach reproduction by preventing nymphs from maturing. Recommended brands:

✅ Gentrol Point Source (Hydroprene)
✅ NyGuard IGR Concentrate

Step 5: Seal Entry Points

Prevent re-infestation by:

🔧 Caulking cracks in walls
🔧 Installing door sweeps
🔧 Covering vents with fine mesh

Step 6: Monitor with Sticky Traps

Place sticky traps in hotspots to track remaining roaches. Brands like Harris Roach Traps work well.

Step 7: When to Call a Professional

If DIY methods fail after 4-6 weeks, consider hiring an exterminator. They use stronger treatments like:

💉 Fumigation
💉 Residual insecticide sprays

Prevention: Keep Roaches from Coming Back

🚫 Avoid cardboard storage (roaches love it)
🚫 Inspect groceries before storing
🚫 Regularly deep-clean kitchens & bathrooms

German Roach vs. Other Roaches (Comparison Chart)

Feature German Roach American Roach Oriental Roach
Size ½ inch 1.5–2 inches 1 inch
Color Light brown Reddish-brown Dark brown/black
Preferred Habitat Kitchens, bathrooms Sewers, basements Damp areas
Reproduction Speed Very fast Moderate Slow

Final Verdict: How to Get Rid of German Roaches for Good

  1. Use gel baits (Advion, Invict Gold).
  2. Apply IGRs to stop reproduction.
  3. Maintain strict sanitation.
  4. Seal entry points.
  5. Monitor with traps.
Continue Reading

Home Empowerment

Heliconia Color: Transform Your Garden with Tropical Beauty

Published

on

Heliconia Color

Heliconias, often called “lobster claws” or “parrot flowers,” are the crown jewels of tropical gardens. Their bold, vibrant colors and unique shapes make them a favorite among gardeners and landscapers. But what makes heliconia color so captivating? And how can you harness their beauty to transform your outdoor space?

In this comprehensive guide, we’ll dive deep into the world of heliconias. From their origins and varieties to practical growing tips and design ideas, you’ll walk away with everything you need to know to make these tropical wonders the star of your garden.

Why Heliconia Color is a Game-Changer for Your Garden

Heliconias are more than just pretty flowers—they’re a statement. Their fiery reds, sunny yellows, and deep oranges can instantly elevate any garden or landscape. Here’s why heliconia color is so special:

  • Unmatched Vibrancy: Heliconias boast some of the most intense hues in the plant kingdom.
  • Tropical Appeal: They bring an exotic, vacation-like vibe to your space.
  • Versatility: Whether in pots, borders, or as focal points, heliconias adapt to various garden styles.

The Science Behind Heliconia Color

Heliconias owe their stunning colors to a combination of pigments and environmental factors. The primary pigments responsible for their hues are:

  1. Anthocyanins: These produce red, purple, and blue shades.
  2. Carotenoids: Responsible for yellows and oranges.
  3. Chlorophyll: Adds a touch of green to the bracts and leaves.

Interestingly, heliconia color can vary depending on factors like soil pH, sunlight, and temperature. For instance, heliconias grown in slightly acidic soil often exhibit deeper reds, while those in alkaline soil may lean toward yellows.

Top Heliconia Varieties for Jaw-Dropping Color

With over 200 species, heliconias offer a rainbow of options. Here are some of the most popular varieties to consider:

Variety Color Height Best For
Heliconia Rostrata Red and Yellow 6-15 ft Backdrop or Focal Point
Heliconia Psittacorum Orange and Green 3-6 ft Borders and Containers
Heliconia Caribaea Deep Red and Gold 10-20 ft Tropical Landscapes
Heliconia Wagneriana Multicolored (Red, Yellow, Green) 4-8 ft Accent Planting

How to Grow and Care for Heliconias: A Step-by-Step Guide

1. Choosing the Right Location

Heliconias thrive in warm, humid climates (USDA zones 10-12). They need:

  • Full to Partial Sunlight: At least 6 hours of sunlight daily.
  • Well-Draining Soil: Rich in organic matter.
  • Space to Grow: Some varieties can reach up to 20 feet tall!

2. Planting Tips

  • Dig a hole twice the size of the root ball.
  • Mix compost or aged manure into the soil for added nutrients.
  • Water thoroughly after planting.

3. Watering and Feeding

  • Water: Keep the soil consistently moist but not waterlogged.
  • Fertilizer: Use a balanced, slow-release fertilizer every 6-8 weeks during the growing season.

4. Pruning and Maintenance

  • Remove dead or damaged leaves to encourage new growth.
  • Divide overcrowded clumps every 2-3 years to maintain vigor.

Designing with Heliconia Color: Tips and Ideas

Heliconias are incredibly versatile in garden design. Here are some creative ways to use them:

  • Tropical Oasis: Pair heliconias with palms, ferns, and orchids for a lush, jungle-like feel.
  • Color Blocking: Use contrasting heliconia colors to create bold, eye-catching displays.
  • Container Gardening: Grow smaller varieties like Heliconia Psittacorum in pots for patios or balconies.
  • Cut Flowers: Heliconias make stunning floral arrangements that last up to two weeks.

Common Challenges and How to Overcome Them

While heliconias are relatively low-maintenance, they can face a few challenges:

  • Pests: Watch out for aphids and spider mites. Use neem oil or insecticidal soap as a natural remedy.
  • Fungal Diseases: Ensure proper air circulation and avoid overwatering to prevent issues like leaf spot.
  • Cold Sensitivity: In cooler climates, grow heliconias in containers and bring them indoors during winter.

Heliconia Color in Action: A Case Study

Project: Tropical Resort Landscape
Location: Florida, USA
Goal: Create a vibrant, low-maintenance garden that wows guests.

Solution:

  • Planted Heliconia Rostrata as a backdrop.
  • Used Heliconia Psittacorum in containers near walkways.
  • Added complementary plants like bird-of-paradise and bromeliads.

Result: The resort’s garden became a guest favorite, with many visitors snapping photos and asking about the plants.

Infographic: Heliconia Color Spectrum

Key Points:

  • Breakdown of heliconia varieties by color.
  • Tips for enhancing color through soil and sunlight.
  • Ideal pairings for garden design.

Conclusion: Bring the Magic of Heliconia Color to Your Garden

Heliconias are more than just plants—they’re a celebration of color, life, and tropical beauty. By understanding their needs and experimenting with design, you can create a garden that’s not only visually stunning but also a joy to maintain.

Ready to transform your space? Start by choosing your favorite heliconia variety and follow the tips in this guide. And don’t forget to share your heliconia journey with us—tag us in your garden photos or drop a comment below!

Continue Reading

Trending