Connect with us

Home Empowerment

Top 5 Benefits of Professional Roof Inspections and Why They Matter

Published

on

Roof Inspections

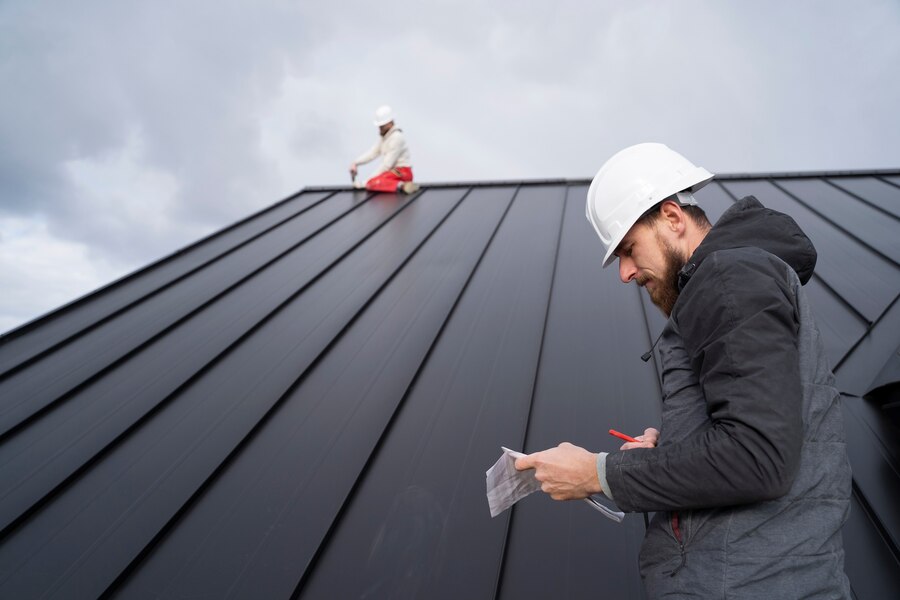
Your roof is a critical component of your home, protecting you from the elements and helping to maintain a comfortable indoor environment. But, like any part of your home, it requires regular maintenance and inspection to ensure it remains in top condition. While you may be able to spot obvious signs of damage, there are many issues that only a professional can detect. Regular roof inspections can save you time, money, and stress by identifying potential problems early. In this article, we’ll explore the top five benefits of professional roof inspections and explain why they’re essential for homeowners.

1. Early Detection of Potential Issues

One of the biggest advantages of a professional roof inspection is the early detection of potential issues. Roof problems often start small, but they can quickly escalate if not addressed. By catching these problems early, you can avoid costly repairs down the line.

How Early Detection Helps

  • Prevents Escalation: Small issues, such as loose shingles or minor leaks, can become major problems if left untreated. For example, a small leak can lead to extensive water damage, mold growth, and even structural issues over time.
  • Saves Money: Addressing minor repairs before they worsen can save you significant amounts of money. A quick fix is often much less expensive than a major repair or replacement.

What Professionals Look For

During an inspection, a professional will look for signs of wear and tear, such as cracked or missing shingles, rusted flashing, and areas where moisture may be seeping through. By identifying these signs early, they can recommend repairs before they turn into larger problems.

2. Extends the Lifespan of Your Roof

Your roof is a major investment, so it makes sense to do everything you can to extend its lifespan. Regular roof inspections can help you get the most out of your roof by identifying and addressing issues that can cause premature aging.

The Impact on Roof Lifespan

  • Prevents Premature Aging: Elements like UV rays, wind, and rain can cause your roof to deteriorate over time. A professional can spot signs of weather-related damage and make repairs to keep your roof in peak condition.
  • Reduces the Need for Replacement: By staying on top of minor repairs, you can delay the need for a complete roof replacement, maximizing the return on your investment.

How Maintenance Impacts Roof Longevity

Routine maintenance, as part of a regular inspection schedule, helps ensure that your roof remains in good condition for years to come. A professional can provide guidance on how to protect your roof from weather-related wear and suggest materials and techniques that offer better durability. Coons Roofing, for example, can assist in assessing the condition of your roof and recommending ways to maintain it effectively.

3. Protects Against Water Damage

Water damage is one of the most common and costly issues for homeowners. A leaking roof can lead to mold growth, damage to the structure of your home, and even health problems. A professional inspection can help prevent these issues by ensuring your roof remains watertight.

How Inspections Prevent Water Damage

  • Identify Leaks Early: Small leaks may go unnoticed until they’ve caused significant damage. Professionals have the expertise to detect subtle signs of water infiltration, such as damp spots, stains, or mold.
  • Evaluate Flashing and Seals: Flashing and seals around chimneys, vents, and skylights are often vulnerable to leaks. A professional can assess these areas for damage and make repairs to keep water out.

The Cost of Ignoring Leaks

Ignoring leaks can lead to more than just roof damage. Over time, water infiltration can affect insulation, drywall, and wood structures, leading to expensive repairs. Addressing leaks promptly as part of regular roof inspections helps protect your home and your budget.

4. Enhances Energy Efficiency

Roof inspections can also impact the energy efficiency of your home. When your roof is in good condition, it helps regulate indoor temperatures, reducing the need for heating and cooling. A well-maintained roof can improve energy efficiency and lower your utility bills.

How Inspections Contribute to Energy Savings

  • Improve Insulation: A professional inspection includes checking for gaps in insulation that can lead to heat loss in the winter and heat gain in the summer. Addressing these gaps keeps your home more comfortable and reduces energy consumption.
  • Assess Ventilation: Proper roof ventilation is crucial for maintaining a consistent indoor temperature. A professional can inspect your ventilation system to ensure it’s functioning effectively, helping to lower energy costs.

Tips for Energy Efficiency

After an inspection, a professional may recommend improvements to insulation or ventilation to help reduce energy loss. They may suggest additional steps, such as reflective roof coatings, to further improve your home’s energy performance and lower your monthly bills.

5. Increases Home Value and Curb Appeal

A well-maintained roof not only protects your home but also adds value. Whether you’re planning to sell in the near future or simply want to enhance your home’s curb appeal, a professional roof inspection can provide peace of mind and help maintain the aesthetic and functional aspects of your home.

The Role of Roof Inspections in Home Value

  • Improves Curb Appeal: A roof that looks well-kept and free of damage adds to the overall appearance of your home. This is especially important if you’re planning to sell, as buyers are more likely to be interested in homes with roofs that are in good condition.
  • Demonstrates Proper Maintenance: Homebuyers often view a well-maintained roof as a sign that the rest of the home has been cared for. A recent inspection report showing a healthy roof can make your home more attractive to potential buyers.

Adding Value Through Maintenance

A professional inspection can identify aesthetic improvements as well as structural ones. For example, replacing faded shingles or cleaning the roof’s surface can improve the overall look of your home. Additionally, addressing small repairs and documenting these updates can provide added reassurance to buyers.

When to Schedule a Roof Inspection

It’s generally recommended to have your roof inspected at least once a year, and more often if you live in an area with severe weather. Here are some key times to schedule a professional inspection:

  • After a Severe Storm: High winds, hail, and heavy rain can all cause damage. Schedule an inspection to ensure that your roof hasn’t sustained any harm.
  • Before Buying or Selling a Home: A professional inspection provides valuable information for both buyers and sellers. Buyers gain peace of mind, while sellers can address any issues before listing the property.
  • In the Fall: An inspection before winter ensures your roof is prepared for cold weather and potential snow or ice buildup.

Regular inspections help maintain your roof’s condition, prevent expensive repairs, and protect your home year-round. Working with professionals, like those at Coons Roofing, ensures that you receive a thorough inspection and expert recommendations to keep your roof in optimal shape.

Conclusion

Professional roof inspections offer numerous benefits, from early problem detection and water damage prevention to enhanced energy efficiency and improved home value. By investing in regular inspections, you can enjoy a longer-lasting roof and peace of mind knowing your home is protected. Coons Roofing provides reliable roof inspection services to help you maintain a secure and energy-efficient roof. Protect your home and maximize the lifespan of your roof by scheduling routine inspections, addressing any issues promptly, and staying proactive about maintenance.

Continue Reading
Click to comment

Leave a Reply

Your email address will not be published. Required fields are marked *

Home Empowerment

How to Get Pee Smell Out of Couch: Solutions for a Fresh Home

Published

on

How to Get Pee Smell Out of Couch

Few household smells are as stubborn—or as embarrassing—as urine odor embedded in a couch. Whether it’s from a potty-training toddler, an elderly pet, or an unexpected accident, that lingering ammonia scent can make your living space feel unclean. The good news? With the right techniques, you can completely eliminate urine smells and restore freshness to your upholstery.

This comprehensive guide covers everything from immediate emergency response to deep-cleaning solutions for set-in odors. We’ll explore both DIY remedies and professional-grade solutions, ensuring you have options for every level of mess.

Why Proper Urine Odor Removal Matters

Ignoring urine smells doesn’t just create an unpleasant environment—it can lead to bigger problems:

  • Bacterial growth: Urine breeds bacteria, which can cause health issues.
  • Repeat accidents: Pets often remark the same spot if the scent remains.
  • Long-term damage: Urine can degrade fabric and cushioning over time.

By acting quickly and using the right cleaning methods, you’ll protect your furniture and maintain a fresh, hygienic home.

Step-by-Step Guide to Remove Pee Smell from Couch

1. Act Fast: Blot Up Excess Liquid

Why it works: The sooner you remove urine, the less it soaks into fibers.

  • Materials needed: Absorbent towels, paper towels, or a dry microfiber cloth.
  • Technique:
    • Press (don’t rub) firmly to soak up liquid.
    • Replace towels as they become saturated.
    • If the urine is already dry, skip to step 2.

2. Neutralize Odors with Vinegar Solution

Why it works: Vinegar’s acidity breaks down uric acid crystals, the main cause of lingering smells.

  • Mix: 1 part white vinegar + 1 part cold water in a spray bottle.
  • Application:
    • Lightly mist the affected area (test on a hidden spot first).
    • Let sit for 10-15 minutes.
    • Blot dry with a clean cloth.
  • Bonus: Add a few drops of essential oil (e.g., lavender) for a fresh scent.

3. Deep Clean with Baking Soda

Why it works: Baking soda absorbs odors and lifts remaining stains.

  • Method:
    • Sprinkle a generous layer over the damp area.
    • For tough smells, mix baking soda with hydrogen peroxide (3%) to form a paste.
    • Let sit for 6+ hours (overnight is best).
    • Vacuum thoroughly.

4. Use an Enzyme Cleaner for Stubborn Stains

Why it works: Enzymes break down urine’s organic compounds, eliminating odors at the source.

  • Top picks: Nature’s Miracle, Rocco & Roxie, or Simple Solution.
  • How to apply:
    • Follow product instructions (usually involves soaking the area).
    • Allow to air-dry completely—don’t rinse!

5. Machine Wash Removable Covers (If Applicable)

  • Best detergent: Use an enzyme-based or oxygen bleach formula.
  • Drying: Air-dry in sunlight (UV rays help kill bacteria).

Pro Tips for Maximum Effectiveness

✅ Avoid Heat: Never use steam or hot water—it sets urine stains and odors.
✅ Blacklight Trick: Use a UV flashlight to find old, hidden urine spots.
✅ Prevent Residue: Rinse with cold water after vinegar treatment to avoid stickiness.
✅ For Leather Couches: Use a leather-safe enzymatic cleaner to avoid damage.

When to Call a Professional

If the smell persists after multiple treatments, consider:

  • Professional upholstery cleaning (hot water extraction method).
  • Ozone treatment (for severe, deep-set odors).

Final Thoughts

How to Get Pee Smell Out of Couch requires quick action, the right cleaners, and patience. By following these steps—especially using enzyme treatments for stubborn odors—you can restore your couch to a fresh, odor-free state.

FAQ: Your Top Questions Answered

Does vinegar discolor couch fabric?

It shouldn’t, but always test on a hidden area first.

Can I use bleach on my couch?

No! Bleach can damage fabric and react with urine, making smells worse.

How do I stop my pet from peeing on the couch again?

  • Use a pet deterrent spray.
  • Place a washable waterproof cover.
  • Retrain with positive reinforcement.

Why does the smell come back after cleaning?

If urine reached the cushion foam, you may need a deep soak with enzyme cleaner or professional help.


Continue Reading

Home Empowerment

How to Get Rid of German Roaches: The Ultimate Guide

Published

on

How to Get Rid of German Roaches

German roaches (Blattella germanica) are among the most stubborn household pests. Unlike other roach species, they reproduce rapidly, hide in tight spaces, and quickly develop resistance to pesticides. If you’re dealing with an infestation, this guide will walk you through how to get rid of German roaches using proven, science-backed methods.

Why German Roaches Are So Hard to Eliminate

Before diving into solutions, it’s crucial to understand why these pests are so resilient:

✅ Rapid Reproduction – A single female can produce up to 400 offspring in her lifetime.
✅ Pesticide Resistance – They adapt quickly to chemical treatments.
✅ Nocturnal & Secretive – They hide in cracks, appliances, and electrical outlets.

Now, let’s tackle the problem systematically.

Step 1: Identify the Infestation

German roaches are small (½ inch), light brown, with two dark stripes behind their heads. Signs of infestation include:

🔍 Droppings (tiny black specks)
🔍 Egg cases (oothecae) – Small, brown, capsule-like
🔍 Musty odor – A sign of large infestations

Step 2: Sanitation – Cut Off Their Food Supply

Roaches thrive in dirty environments. To discourage them:

✔ Store food in airtight containers
✔ Clean spills immediately
✔ Take out trash daily
✔ Fix leaky pipes (roaches need water)

Step 3: Use German Roach-Specific Baits

Why baits work best:
German roaches eat dead roaches and feces, making baits highly effective. The poison spreads through the colony.

Top Bait Choices:

Product Active Ingredient Effectiveness
Advion Gel Bait Indoxacarb ★★★★★
Combat Max Roach Killing Gel Hydramethylnon ★★★★☆
Invict Gold Cockroach Gel Abamectin ★★★★★

How to Apply:

  1. Place pea-sized drops near hiding spots (under sinks, behind fridges).
  2. Avoid spraying insecticides—they’ll scatter roaches, worsening the problem.

Step 4: Apply Insect Growth Regulators (IGRs)

IGRs disrupt roach reproduction by preventing nymphs from maturing. Recommended brands:

✅ Gentrol Point Source (Hydroprene)
✅ NyGuard IGR Concentrate

Step 5: Seal Entry Points

Prevent re-infestation by:

🔧 Caulking cracks in walls
🔧 Installing door sweeps
🔧 Covering vents with fine mesh

Step 6: Monitor with Sticky Traps

Place sticky traps in hotspots to track remaining roaches. Brands like Harris Roach Traps work well.

Step 7: When to Call a Professional

If DIY methods fail after 4-6 weeks, consider hiring an exterminator. They use stronger treatments like:

💉 Fumigation
💉 Residual insecticide sprays

Prevention: Keep Roaches from Coming Back

🚫 Avoid cardboard storage (roaches love it)
🚫 Inspect groceries before storing
🚫 Regularly deep-clean kitchens & bathrooms

German Roach vs. Other Roaches (Comparison Chart)

Feature German Roach American Roach Oriental Roach
Size ½ inch 1.5–2 inches 1 inch
Color Light brown Reddish-brown Dark brown/black
Preferred Habitat Kitchens, bathrooms Sewers, basements Damp areas
Reproduction Speed Very fast Moderate Slow

Final Verdict: How to Get Rid of German Roaches for Good

  1. Use gel baits (Advion, Invict Gold).
  2. Apply IGRs to stop reproduction.
  3. Maintain strict sanitation.
  4. Seal entry points.
  5. Monitor with traps.
Continue Reading

Home Empowerment

Heliconia Color: Transform Your Garden with Tropical Beauty

Published

on

Heliconia Color

Heliconias, often called “lobster claws” or “parrot flowers,” are the crown jewels of tropical gardens. Their bold, vibrant colors and unique shapes make them a favorite among gardeners and landscapers. But what makes heliconia color so captivating? And how can you harness their beauty to transform your outdoor space?

In this comprehensive guide, we’ll dive deep into the world of heliconias. From their origins and varieties to practical growing tips and design ideas, you’ll walk away with everything you need to know to make these tropical wonders the star of your garden.

Why Heliconia Color is a Game-Changer for Your Garden

Heliconias are more than just pretty flowers—they’re a statement. Their fiery reds, sunny yellows, and deep oranges can instantly elevate any garden or landscape. Here’s why heliconia color is so special:

  • Unmatched Vibrancy: Heliconias boast some of the most intense hues in the plant kingdom.
  • Tropical Appeal: They bring an exotic, vacation-like vibe to your space.
  • Versatility: Whether in pots, borders, or as focal points, heliconias adapt to various garden styles.

The Science Behind Heliconia Color

Heliconias owe their stunning colors to a combination of pigments and environmental factors. The primary pigments responsible for their hues are:

  1. Anthocyanins: These produce red, purple, and blue shades.
  2. Carotenoids: Responsible for yellows and oranges.
  3. Chlorophyll: Adds a touch of green to the bracts and leaves.

Interestingly, heliconia color can vary depending on factors like soil pH, sunlight, and temperature. For instance, heliconias grown in slightly acidic soil often exhibit deeper reds, while those in alkaline soil may lean toward yellows.

Top Heliconia Varieties for Jaw-Dropping Color

With over 200 species, heliconias offer a rainbow of options. Here are some of the most popular varieties to consider:

Variety Color Height Best For
Heliconia Rostrata Red and Yellow 6-15 ft Backdrop or Focal Point
Heliconia Psittacorum Orange and Green 3-6 ft Borders and Containers
Heliconia Caribaea Deep Red and Gold 10-20 ft Tropical Landscapes
Heliconia Wagneriana Multicolored (Red, Yellow, Green) 4-8 ft Accent Planting

How to Grow and Care for Heliconias: A Step-by-Step Guide

1. Choosing the Right Location

Heliconias thrive in warm, humid climates (USDA zones 10-12). They need:

  • Full to Partial Sunlight: At least 6 hours of sunlight daily.
  • Well-Draining Soil: Rich in organic matter.
  • Space to Grow: Some varieties can reach up to 20 feet tall!

2. Planting Tips

  • Dig a hole twice the size of the root ball.
  • Mix compost or aged manure into the soil for added nutrients.
  • Water thoroughly after planting.

3. Watering and Feeding

  • Water: Keep the soil consistently moist but not waterlogged.
  • Fertilizer: Use a balanced, slow-release fertilizer every 6-8 weeks during the growing season.

4. Pruning and Maintenance

  • Remove dead or damaged leaves to encourage new growth.
  • Divide overcrowded clumps every 2-3 years to maintain vigor.

Designing with Heliconia Color: Tips and Ideas

Heliconias are incredibly versatile in garden design. Here are some creative ways to use them:

  • Tropical Oasis: Pair heliconias with palms, ferns, and orchids for a lush, jungle-like feel.
  • Color Blocking: Use contrasting heliconia colors to create bold, eye-catching displays.
  • Container Gardening: Grow smaller varieties like Heliconia Psittacorum in pots for patios or balconies.
  • Cut Flowers: Heliconias make stunning floral arrangements that last up to two weeks.

Common Challenges and How to Overcome Them

While heliconias are relatively low-maintenance, they can face a few challenges:

  • Pests: Watch out for aphids and spider mites. Use neem oil or insecticidal soap as a natural remedy.
  • Fungal Diseases: Ensure proper air circulation and avoid overwatering to prevent issues like leaf spot.
  • Cold Sensitivity: In cooler climates, grow heliconias in containers and bring them indoors during winter.

Heliconia Color in Action: A Case Study

Project: Tropical Resort Landscape
Location: Florida, USA
Goal: Create a vibrant, low-maintenance garden that wows guests.

Solution:

  • Planted Heliconia Rostrata as a backdrop.
  • Used Heliconia Psittacorum in containers near walkways.
  • Added complementary plants like bird-of-paradise and bromeliads.

Result: The resort’s garden became a guest favorite, with many visitors snapping photos and asking about the plants.

Infographic: Heliconia Color Spectrum

Key Points:

  • Breakdown of heliconia varieties by color.
  • Tips for enhancing color through soil and sunlight.
  • Ideal pairings for garden design.

Conclusion: Bring the Magic of Heliconia Color to Your Garden

Heliconias are more than just plants—they’re a celebration of color, life, and tropical beauty. By understanding their needs and experimenting with design, you can create a garden that’s not only visually stunning but also a joy to maintain.

Ready to transform your space? Start by choosing your favorite heliconia variety and follow the tips in this guide. And don’t forget to share your heliconia journey with us—tag us in your garden photos or drop a comment below!

Continue Reading

Trending