Connect with us

Technology

Unveiling the World of Snuffers: A Comprehensive Guide

Published

on

Snuffers

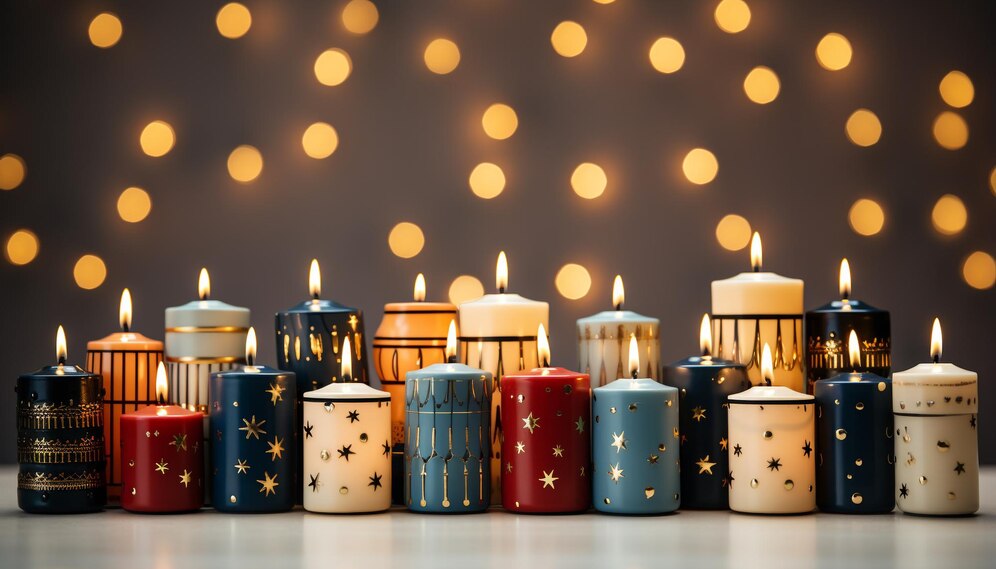
Welcome to the enchanting world of snuffers, where practicality meets elegance in the art of extinguishing candles. Whether you’re a candle enthusiast or simply looking to add a touch of sophistication to your decor, snuffers are here to elevate your candle experience. Join us on a journey as we unveil the beauty and functionality of different types of snuffers, from classic designs to modern innovations. Let’s dive in and explore the fascinating realm of these essential candle accessories!

Beehive Candle Snuffer

The Beehive Candle Snuffer is a charming and practical accessory for any candle lover. Its unique beehive shape adds a whimsical touch to your decor while serving the important function of safely extinguishing candles. Crafted from high-quality materials, this snuffer ensures a clean and efficient way to put out candles without the need for blowing, preventing wax splatters and preserving the wick for future use. Embrace both style and functionality with the Beehive Candle Snuffer, a must-have tool for every candle enthusiast’s collection.

Description

Embark on a journey to discover the world of snuffers, an essential tool for any candle enthusiast. A snuffer is a device used to extinguish candles safely and efficiently without causing smoke or hot wax splatters. With various designs available, such as the Beehive Candle Snuffer, each snuffer brings its unique charm to your candle-lit moments. From traditional metal options to modern silicone alternatives, there’s a snuffer for every style preference. Delve into the intricate details of these fascinating accessories that add both practicality and elegance to your home decor setup.

Related products

When exploring the world of snuffers, it’s essential to consider related products that can enhance your candle extinguishing experience. From elegant Beehive Candle Snuffers to innovative Dragon Egg Snuffers, there are various options available to suit different preferences and styles. These related products not only provide practical solutions for safely putting out candles but also add a touch of sophistication and charm to your space. Experiment with different designs and materials to find the perfect complement for your candle collection.
Whether you opt for a traditional Taper Candle Snuffer or a modern Silicone Snuffer, each product offers unique features that cater to diverse needs. Discover how these related products can elevate your candle rituals and make extinguishing flames effortless yet stylish.

Snuffers

Welcome to the world of snuffers! These handy tools are a must-have for any candle enthusiast. Snuffers come in various shapes and sizes, each designed to help you safely extinguish candles without the mess or hassle of blowing them out.

Whether you prefer a classic taper candle snuffer or a modern silicone snuffer, there’s something for everyone. Discover the convenience and elegance that snuffers bring to your candle-lit moments.

Dragon Egg Snuffer

Looking for a touch of whimsy in your candle accessories? Enter the Dragon Egg Snuffer, a unique and enchanting tool that adds a mystical flair to extinguishing candles. With its intricate dragon egg design, this snuffer is not just functional but also serves as a decorative piece for any room.

Crafted with attention to detail, the Dragon Egg Snuffer brings an element of fantasy into your daily routine. Say goodbye to mundane snuffers and embrace the magic of this intriguing accessory for your candle collection.

Silicone Snuffer

Have you heard about silicone snuffers? These innovative tools are designed to safely extinguish candles without the risk of hot wax splatter. Silicone snuffers are heat-resistant and can be easily cleaned, making them a practical choice for candle enthusiasts.

Their flexible and soft material allows for gentle extinguishing, ensuring that your candles stay intact and free from damage. With various colors and designs available, silicone snuffers not only serve a functional purpose but also add a touch of style to your candle accessories collection.

Why use a silicone snuffer?

Silicone snuffers are the modern solution for safely extinguishing candles without the risk of hot wax splattering. The flexible and heat-resistant material makes them durable and easy to use, ensuring a clean and efficient candle-snuffing experience.

Their non-abrasive nature also protects delicate candle wicks from damage, prolonging the life of your favorite candles. Say goodbye to traditional metal snuffers that can sometimes cause marks or scratches on your candles—switch to silicone for a hassle-free way to keep your ambiance intact.

Specifications

When it comes to snuffers, understanding the specifications is key. The materials used, dimensions, and design details can all play a role in how effective a snuffer will be for your candle extinguishing needs.

Silicone snuffers are lightweight and heat-resistant, making them safe and easy to use. With a long handle for reaching candles in deep holders, they offer convenience and versatility. Paying attention to these specifications ensures you find the perfect snuffer for your candle care routine.

Related products

When it comes to snuffers, there are various related products that can enhance your candle-snuffing experience. From classic designs to innovative options, there is a wide range of choices available for every preference. Whether you prefer the traditional elegance of a beehive candle snuffer or the sleek functionality of a silicone snuffer, there is something out there for everyone.

For those looking for a unique touch, dragon egg snuffers offer a whimsical twist on a practical tool. Additionally, taper candle snuffers provide precision when extinguishing smaller candles with ease and finesse. Explore these related products to find the perfect companion for your candle care routine.

Taper Candle Snuffer

The Taper Candle Snuffer is a handy tool for extinguishing candles without the mess of blowing them out. With its long handle and cone-shaped end, it allows you to reach candles in tall holders or deep jars easily. Simply place the snuffer over the flame, cutting off its oxygen supply and putting out the candle with minimal smoke or splatter.

Using a Taper Candle Snuffer not only adds an elegant touch to your candle ritual but also helps prolong the life of your candles by preventing wicks from getting charred. Say goodbye to smoky rooms and wax splatters – invest in a Taper Candle Snuffer for a cleaner and more sophisticated candle experience!

Candle Snuffer

The candle snuffer is a practical tool designed to extinguish candles safely and effectively. Its long handle allows users to reach into deep or narrow candle holders without the risk of burns. By simply placing the bell-shaped end over the flame, you can quickly put out the candle without any mess or smoke.

Historically, candle snuffers were popular in households where candles were the primary source of lighting. Today, they remain a handy accessory for anyone looking to prolong their candle’s lifespan and avoid unnecessary spills or smoky odors in their living space.

Description

Snuffers are essential tools for safely extinguishing candles without the risk of hot wax splatters. Among the variety of snuffers available, the Beehive Candle Snuffer stands out with its elegant design and practical functionality. Crafted from high-quality materials, this snuffer features a long handle for easy reach and a bell-shaped top to efficiently smother flames. Whether you’re a candle enthusiast or simply enjoy creating a cozy ambiance at home, the Beehive Candle Snuffer is a must-have accessory that combines style with utility.

Historical usage

In the intriguing world of snuffers, historical usage adds a touch of nostalgia and tradition. Back in the day, before modern conveniences like lighters and electric candles, snuffers were essential tools for extinguishing flames. Their long handles allowed individuals to safely reach and put out candles without risking burns or accidents.

Throughout history, snuffers were not only practical but also considered elegant accessories that adorned households with sophistication. From grand castles to humble abodes, these tools played a vital role in maintaining candlelit spaces while showcasing exquisite craftsmanship.

Conclusion

Snuffers are essential tools for safely extinguishing candles without the risk of hot wax splatter or accidental fires. Whether you opt for a traditional metal snuffer like the beehive candle snuffer, a whimsical dragon egg snuffer, or a modern silicone option, each type offers its unique advantages in candle care and maintenance.

By investing in a high-quality snuffer and incorporating it into your candle routine, you can enhance both the safety and longevity of your favorite candles while adding an elegant touch to your decor. So why not explore the world of snuffers today and elevate your candle experience to new heights?

Continue Reading
Click to comment

Leave a Reply

Your email address will not be published. Required fields are marked *

Technology

ecvh0 dforce master how to: Unlock Its Benefits

Published

on

ecvh0 dforce master how to

Introduction

Struggling with ecvh0 dforce master setup? You’re not alone. Many users find its configuration tricky, but mastering it unlocks powerful automation and efficiency. This guide breaks down the process into simple steps, helping you harness its full potential quickly.

Why It Matters

Properly setting up ecvh0 dforce master ensures smoother workflows, reduces errors, and maximizes productivity. Whether for personal projects or enterprise use, mastering this tool can save hours of manual work.

Step-by-Step Guide

1. Install & Configure

  • Download the latest ecvh0 dforce master package from the official site.
  • Follow the installation wizard, ensuring all dependencies are met.

2. Set Up Permissions

  • Assign appropriate user roles (admin, editor, viewer).
  • Configure access controls to prevent unauthorized changes.

3. Integrate with Your System

  • Connect ecvh0 dforcemaster to your existing tools via API.
  • Test the connection to ensure seamless data flow.

4. Automate Key Tasks

  • Use built-in templates or create custom automation rules.
  • Schedule recurring tasks to minimize manual input.

5. Monitor & Optimize

  • Track performance metrics in the dashboard.
  • Adjust settings for better speed and efficiency.

Pro Tip

Use keyboard shortcuts to navigate ecvh0 dforcemaster faster. Press Ctrl + K (Windows) or Cmd + K (Mac) to open the command palette for quick actions.

Conclusion

Mastering ecvh0 dforce master simplifies complex tasks and boosts efficiency. By following these steps, you’ll optimize your workflow and get the most out of this powerful tool.

FAQ

Is ecvh0 dforcemaster free?

It offers a free tier with limited features; advanced options require a subscription.

Can I use it offline?

Some features work offline, but full functionality requires an internet connection.

How secure is ecvh0 dforcemaster?

It uses encryption and role-based access for security. For best practices, check our security guide.

Continue Reading

Technology

How to Disassemble a Sony KV-27S42 CRT TV: Complete Guide

Published

on

How to Disassemble a Sony KV-27S42 CRT TV

Introduction

The Sony KV-27S42 is a classic CRT television, and while it’s no longer in production, many enthusiasts still repair, modify, or salvage these sets. However, disassembling a CRT TV requires caution—high-voltage components and delicate electronics mean one wrong move could be dangerous.

This guide will walk you through the full disassembly process of the KV-27S42, covering:
✔ Safety precautions (CRT discharge, avoiding shocks)
✔ Tool requirements (what you’ll need)
✔ Step-by-step teardown (removing the case, tube, and boards)
✔ Salvaging useful parts (what to keep or discard)
✔ Reassembly tips (if needed)

Whether you’re repairing, modding, or recycling, this guide ensures you do it safely and efficiently.

Why Disassemble a KV-27S42?

Before diving in, it’s worth understanding why you might need to take apart this TV:

🔹 Repairs – Fixing power supply issues, bad capacitors, or video problems.
🔹 Modifications – RGB or component video mods for retro gaming.
🔹 Salvage – Reusing the CRT, speakers, or other parts for projects.
🔹 Safe Disposal – CRTs contain hazardous materials (lead, phosphors) and must be recycled properly.

Warning:
⚠ CRTs hold high voltage even when unplugged – improper handling can result in severe electric shock.
⚠ The tube is heavy and fragile – dropping it can cause implosion or injury.

Tools & Safety Gear You’ll Need

Before starting, gather these essentials:

Essential Tools

✔ Screwdrivers (Phillips & flathead)
✔ CRT discharge tool (or insulated screwdriver + wire)
✔ Needle-nose pliers (for small connectors)
✔ Anti-static wrist strap (optional but recommended)

Safety Precautions

✔ Work in a dry, well-lit area
✔ Discharge the CRT before touching anything
✔ Wear gloves & safety glasses (glass shards are sharp)
✔ Keep pets/kids away (CRTs are dangerous when mishandled)

Step-by-Step Disassembly Guide

Step 1: Unplug & Discharge the CRT

  1. Unplug the TV and wait at least 30 minutes for capacitors to discharge.
  2. Locate the anode cap (the large rubber suction cup on the CRT).
  3. Discharge the CRT:
    • Use a CRT discharge tool (best option).
    • Alternative: Clip one end of a wire to the TV’s metal frame and carefully slide a flathead screwdriver under the anode cap until you hear/see a small spark.

Step 2: Remove the Rear Cover

  1. Flip the TV face-down on a soft surface (blanket/towel).
  2. Remove all rear screws (some may be hidden under stickers).
  3. Gently pry the back cover off—plastic tabs may hold it in place.

Step 3: Disconnect Internal Cables

  1. Take photos of all connections before unplugging anything.
  2. Unplug:
    • Deflection yoke (two large plugs near the tube neck)
    • Anode cap (already discharged, but still be careful)
    • Speaker wires & control board connectors

Step 4: Remove the CRT Tube

  1. Unscrew the 4 CRT mounting brackets (they hold the tube to the frame).
  2. Carefully lift the tube out – it’s extremely heavy (get help if needed).
  3. Set it face-down on a soft surface to avoid scratches.

Step 5: Extract Circuit Boards & Other Components

  1. Mainboard – Remove screws and gently lift it out.
  2. Power supply – Disconnect all wires before removing.
  3. Speakers & tuner – Useful for retro projects if salvaging.

Pro Tips for Safe Disassembly

🔧 Label every wire and screw (masking tape + marker) to avoid confusion later.
🔧 Use a magnetic tray to keep screws organized.
🔧 If keeping the CRT, store it upright to avoid stress on the glass.

What Can You Salvage?

If you’re parting out the TV, these components are useful:
✅ CRT tube – Great for arcade builds or replacements.
✅ Speakers – Decent quality for DIY audio projects.
✅ Power supply & mainboard – Useful for electronics tinkering.
✅ Control knobs & buttons – Handy for retro mods.

How to Dispose of a CRT Safely

CRTs contain leaded glass and toxic phosphors, so never throw them in the trash. Instead:
♻ Check local e-waste recycling centers (many accept CRTs for free).
♻ Contact electronics repair shops – Some may take old TVs.
♻ Look for CRT buyback programs (some collectors pay for working tubes).

Conclusion: How to Disassemble a Sony KV-27S42 CRT TV

How to Disassemble a Sony KV-27S42 CRT TV,  requires patience and safety awareness, but it’s a rewarding project for retro tech enthusiasts. Whether you’re fixing, modding, or salvaging, following this guide ensures a smooth process.

FAQ About How to Disassemble a Sony KV-27S42 CRT TV

1. Can I get shocked if the TV has been unplugged for days?

Yes! CRTs can hold charge for weeks. Always discharge before working.

2. How heavy is the KV-27S42 CRT?

Around 50-60 lbs (23-27 kg)—lift carefully or get help.

3. Can I reuse the CRT in another TV?

Possibly, but tube swaps require matching specs (size, impedance, etc.).

4. What if I break the CRT?

The glass is under vacuum—if it cracks, it can implode. Wear safety gear!

5. Is it worth repairing a KV-27S42?

If you love CRTs, yes! These Sonys have great picture quality for retro gaming.


Continue Reading

Technology

How Much Does Window Tinting Cost? Save Money, Boost Comfort

Published

on

How Much Does Window Tinting Cost?

Introduction

Window tinting costs can vary widely, leaving many car owners unsure about fair pricing. Whether you want UV protection, privacy, or heat reduction, understanding the factors that influence cost helps you budget wisely. This guide breaks down pricing, so you get the best value without surprises.

Why It Matters

Window tinting isn’t just about style—it blocks harmful UV rays, reduces glare, and keeps your car cooler. But overpaying or choosing cheap options can lead to poor quality. Knowing the average costs ensures you invest in a tint that lasts and performs well.

Step-by-Step Guide to Window Tinting Costs

1. Understand the Pricing Factors

  • Film Quality: Basic dyed film starts at 50–150, while premium ceramic tints run 200–800.
  • Vehicle Size: Smaller cars cost less (100–300) vs. SUVs (200–600).
  • Number of Windows: Full-car tinting costs more than just side windows.

2. Compare Film Types

  • Dyed Film (50–150): Affordable but fades faster.
  • Carbon Film (150–350): Better heat rejection, matte finish.
  • Ceramic Film (200–800): Top-tier heat/UV protection, no signal interference.

3. Factor in Labor Costs

Professional installation adds 50–200, depending on complexity. DIY kits (20–100) are cheaper but risk bubbles/peeling.

4. Check Local Market Prices

Urban areas often charge more. Get 3+ quotes to avoid overpaying.

5. Consider Legal Limits

Some states restrict tint darkness (e.g., California bans <70% VLT on front windows). Non-compliant tints may require costly removal.

Pro Tip

“Ask for a warranty! Reputable shops offer 5–10-year guarantees against peeling or fading—saving you long-term costs.”

Conclusion: How Much Does Window Tinting Cost

Window tinting cost 50–800+, depending on film type, vehicle size, and labor. Investing in ceramic film or a trusted installer ensures durability and performance. Always check local laws and compare quotes to make a smart choice.

FAQ: How Much Does Window Tinting Cost

1. Is tinting worth the cost?
Yes—it reduces skin-damaging UV rays by 99% and lowers AC use, saving fuel.

2. How long does tint last?
High-quality tints last 10+ years; cheap ones fade in 2–3 years.

3. Can I tint my windshield?
Most states only allow a clear or light tint strip. Check your local laws.

4. Does tint affect visibility?
Not if you choose the right VLT (%)—go for 35% or higher for safety.

Continue Reading

Trending