Connect with us

Home Empowerment

Protecting Your Belongings from Water Damage During a Move

Published

on

Water Damage During a Move

Introduction

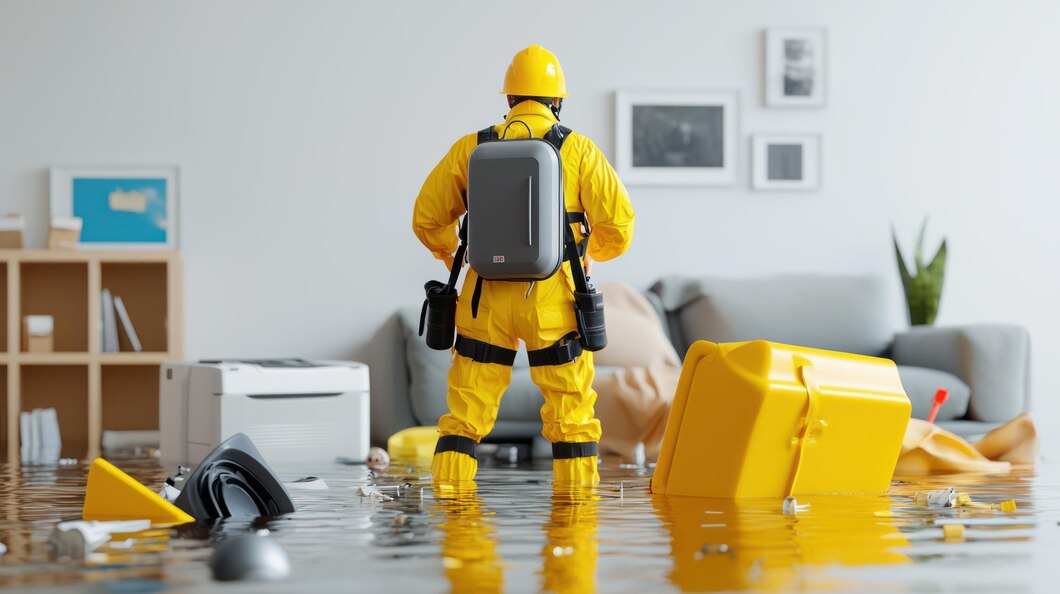
Moving can be challenging enough on its own, but when you add unexpected elements like rain, snow, or even humidity, the risk of water damage becomes a serious concern. Water damage can ruin furniture, electronics, clothing, and sentimental items that are hard to replace. Preparing for inclement weather and taking steps to protect your belongings can prevent unnecessary loss and ensure a safe, smooth move.

This article explores effective strategies for keeping your possessions safe from water damage during the moving process. From selecting the right packing materials to planning for unpredictable weather, these tips will help you protect your valuables and navigate your move with confidence.

Understanding the Risks of Water Damage During a Move

Water damage during a move can occur for several reasons. Understanding potential risks and preparing for them ahead of time is key to avoiding costly repairs and replacements.

1. Rain and Snow Exposure

If you’re moving during a rainy season or winter, moisture exposure is one of the biggest threats. Rain or snow can seep into boxes, damage furniture, and create lasting issues if water reaches electronics or fragile items. It’s essential to plan for extra protection during wet weather.

2. Humidity and Moisture Buildup

High humidity, especially during summer months, can lead to moisture buildup on items like wooden furniture, electronics, and leather goods. This moisture can cause warping, mildew, and even mold growth if not properly managed.

3. Condensation During Storage

If you’re using storage solutions as part of your move, condensation is another risk. Condensation forms when stored items, especially in non-climate-controlled environments, experience temperature fluctuations. This moisture can affect the contents of cardboard boxes, leading to mold and mildew growth on fabrics and paper items.

Essential Packing Materials for Water Protection

Investing in the right packing materials can make a significant difference in protecting your items from water damage. Here’s a breakdown of the materials you’ll need to safeguard your belongings.

1. Plastic Bins and Waterproof Containers

For items that are particularly vulnerable to moisture, consider using plastic bins with tight-sealing lids. Unlike cardboard boxes, plastic bins offer a waterproof barrier, keeping rain and humidity at bay.

  • Perfect for Sensitive Items: Electronics, important documents, and sentimental items like photo albums benefit from the extra protection that waterproof containers provide.
  • Reusable and Durable: Plastic bins are durable, easy to stack, and can be used for storage in your new home, making them a worthwhile investment for any move.

2. Waterproof Wrapping Materials

Using protective wrapping materials like plastic wrap, garbage bags, and waterproof packing tape adds an extra layer of defense.

  • Plastic Wrap: Large rolls of plastic wrap can be used to cover furniture, mattresses, and upholstered items. Wrapping your furniture tightly keeps moisture from seeping into fabric and cushions.
  • Waterproof Packing Tape: For boxes that may encounter rain, seal the tops and bottoms with waterproof tape to prevent leaks. This tape is also useful for reinforcing boxes, making them sturdier and less likely to collapse when exposed to moisture.
  • Garbage Bags for Clothing: Large garbage bags are perfect for covering clothes and shoes. You can also use them to wrap the contents inside of boxes for added protection.

3. Heavy-Duty Trash Bags and Ziplock Bags

These everyday items are excellent for waterproofing smaller belongings:

  • Heavy-Duty Trash Bags: Place these bags inside cardboard boxes as a liner, adding a layer of protection against water. You can also use them to wrap small appliances, decor, or even bundles of cables.
  • Ziplock Bags: For smaller items, such as electronics or toiletries, large ziplock bags keep moisture out while allowing you to store things in an organized way.

4. Moisture Absorbers

Desiccant packets and silica gel packets are compact, affordable, and effective at reducing humidity in boxes. Placing a few in your boxes helps prevent moisture buildup, especially in storage.

Protecting Large and Bulky Items

Larger items, such as furniture and appliances, are particularly vulnerable to water damage. Here’s how to keep them safe:

1. Furniture Covers and Moving Blankets

Furniture covers, especially those made of plastic, shield large items from rain and moisture. Moving blankets are an added layer that can absorb small amounts of moisture and help prevent scratches and dents. Be sure to secure these covers with plastic wrap or stretch wrap to keep them in place.

2. Palletizing and Elevating

When moving or storing items, elevating them off the ground minimizes the risk of water damage. Wooden pallets or risers keep furniture and boxes from direct contact with the ground, protecting them from potential leaks or puddles.

  • Temporary Elevation: For short-term storage or when unloading in wet conditions, use items like cardboard sheets, old towels, or plastic mats to keep things off the ground.
  • In Storage Units: If you’re using a storage unit, wooden pallets or plastic shelving can make a big difference, particularly in units without climate control.

Planning for Unpredictable Weather on Moving Day

Preparation is your best defense against unforeseen weather conditions on moving day. Here’s how to stay ahead of any weather-related issues:

1. Check the Weather Forecast

Monitor the weather forecast leading up to your moving day. If rain is likely, plan accordingly by setting up a covered area outside, like a pop-up canopy, to protect your boxes and furniture as they’re moved in and out.

2. Create a Moving Day Kit

Prepare a kit with items that will make it easier to manage wet conditions, such as:

  • Towels: Keep old towels on hand to dry off furniture, boxes, and any wet surfaces.
  • Tarps: Large tarps can be laid down on floors to prevent mud and water from being tracked into your new home. They can also be draped over boxes if you’re waiting to load the truck.
  • Extra Packing Supplies: Waterproof tape, plastic wrap, and garbage bags are essentials that will come in handy for last-minute adjustments.

3. Keep Delicate Items Inside Until Last

For fragile or water-sensitive items, save the loading of these items for last. By keeping them inside until the end, you minimize their exposure to the elements and reduce the risk of water damage. If possible, pack these items in plastic bins for added security.

4. Choose Professional Help

Hiring a moving company like Town & Country Moving can provide you with peace of mind, especially in challenging weather. Professionals have the experience, equipment, and know-how to manage moves in all kinds of conditions, helping you protect your belongings every step of the way.

Additional Tips for Storage in Wet Conditions

If you’ll be storing items, either temporarily or long-term, here are a few more precautions to take to prevent water damage:

1. Choose a Climate-Controlled Storage Unit

A climate-controlled storage unit regulates both temperature and humidity, preventing condensation from forming on your items. It’s particularly valuable for wooden furniture, electronics, and clothing that could otherwise suffer from mold and mildew.

2. Pack Boxes to Maximize Space and Protection

Pack boxes with minimal empty space to reduce shifting. Over-packed or loosely packed boxes are more likely to experience wear and tear, which can lead to breaks or leaks in wet conditions. Use bubble wrap or towels to fill any gaps, ensuring items remain secure.

3. Schedule Routine Checks

If you’re storing items long-term, consider checking on them periodically to ensure there are no signs of water damage. This proactive approach lets you catch any issues early, before they become more costly problems.

Conclusion

Water damage is a common yet preventable risk when moving. By taking the time to gather appropriate packing materials, plan for bad weather, and utilize reliable storage solutions, you can keep your belongings safe and secure. For added peace of mind, partnering with experienced movers like Town & Country Moving can ensure your move goes smoothly, no matter the weather.

Whether you’re moving in the rain or simply storing items for a period of time, taking the right precautions can help protect your cherished possessions from the elements. With these strategies in place, you’ll be well-prepared for a move that’s both efficient and worry-free.

Continue Reading
Click to comment

Leave a Reply

Your email address will not be published. Required fields are marked *

Home Empowerment

How to Get Pee Smell Out of Couch: Solutions for a Fresh Home

Published

on

How to Get Pee Smell Out of Couch

Few household smells are as stubborn—or as embarrassing—as urine odor embedded in a couch. Whether it’s from a potty-training toddler, an elderly pet, or an unexpected accident, that lingering ammonia scent can make your living space feel unclean. The good news? With the right techniques, you can completely eliminate urine smells and restore freshness to your upholstery.

This comprehensive guide covers everything from immediate emergency response to deep-cleaning solutions for set-in odors. We’ll explore both DIY remedies and professional-grade solutions, ensuring you have options for every level of mess.

Why Proper Urine Odor Removal Matters

Ignoring urine smells doesn’t just create an unpleasant environment—it can lead to bigger problems:

  • Bacterial growth: Urine breeds bacteria, which can cause health issues.
  • Repeat accidents: Pets often remark the same spot if the scent remains.
  • Long-term damage: Urine can degrade fabric and cushioning over time.

By acting quickly and using the right cleaning methods, you’ll protect your furniture and maintain a fresh, hygienic home.

Step-by-Step Guide to Remove Pee Smell from Couch

1. Act Fast: Blot Up Excess Liquid

Why it works: The sooner you remove urine, the less it soaks into fibers.

  • Materials needed: Absorbent towels, paper towels, or a dry microfiber cloth.
  • Technique:
    • Press (don’t rub) firmly to soak up liquid.
    • Replace towels as they become saturated.
    • If the urine is already dry, skip to step 2.

2. Neutralize Odors with Vinegar Solution

Why it works: Vinegar’s acidity breaks down uric acid crystals, the main cause of lingering smells.

  • Mix: 1 part white vinegar + 1 part cold water in a spray bottle.
  • Application:
    • Lightly mist the affected area (test on a hidden spot first).
    • Let sit for 10-15 minutes.
    • Blot dry with a clean cloth.
  • Bonus: Add a few drops of essential oil (e.g., lavender) for a fresh scent.

3. Deep Clean with Baking Soda

Why it works: Baking soda absorbs odors and lifts remaining stains.

  • Method:
    • Sprinkle a generous layer over the damp area.
    • For tough smells, mix baking soda with hydrogen peroxide (3%) to form a paste.
    • Let sit for 6+ hours (overnight is best).
    • Vacuum thoroughly.

4. Use an Enzyme Cleaner for Stubborn Stains

Why it works: Enzymes break down urine’s organic compounds, eliminating odors at the source.

  • Top picks: Nature’s Miracle, Rocco & Roxie, or Simple Solution.
  • How to apply:
    • Follow product instructions (usually involves soaking the area).
    • Allow to air-dry completely—don’t rinse!

5. Machine Wash Removable Covers (If Applicable)

  • Best detergent: Use an enzyme-based or oxygen bleach formula.
  • Drying: Air-dry in sunlight (UV rays help kill bacteria).

Pro Tips for Maximum Effectiveness

✅ Avoid Heat: Never use steam or hot water—it sets urine stains and odors.
✅ Blacklight Trick: Use a UV flashlight to find old, hidden urine spots.
✅ Prevent Residue: Rinse with cold water after vinegar treatment to avoid stickiness.
✅ For Leather Couches: Use a leather-safe enzymatic cleaner to avoid damage.

When to Call a Professional

If the smell persists after multiple treatments, consider:

  • Professional upholstery cleaning (hot water extraction method).
  • Ozone treatment (for severe, deep-set odors).

Final Thoughts

How to Get Pee Smell Out of Couch requires quick action, the right cleaners, and patience. By following these steps—especially using enzyme treatments for stubborn odors—you can restore your couch to a fresh, odor-free state.

FAQ: Your Top Questions Answered

Does vinegar discolor couch fabric?

It shouldn’t, but always test on a hidden area first.

Can I use bleach on my couch?

No! Bleach can damage fabric and react with urine, making smells worse.

How do I stop my pet from peeing on the couch again?

  • Use a pet deterrent spray.
  • Place a washable waterproof cover.
  • Retrain with positive reinforcement.

Why does the smell come back after cleaning?

If urine reached the cushion foam, you may need a deep soak with enzyme cleaner or professional help.


Continue Reading

Home Empowerment

How to Get Rid of German Roaches: The Ultimate Guide

Published

on

How to Get Rid of German Roaches

German roaches (Blattella germanica) are among the most stubborn household pests. Unlike other roach species, they reproduce rapidly, hide in tight spaces, and quickly develop resistance to pesticides. If you’re dealing with an infestation, this guide will walk you through how to get rid of German roaches using proven, science-backed methods.

Why German Roaches Are So Hard to Eliminate

Before diving into solutions, it’s crucial to understand why these pests are so resilient:

✅ Rapid Reproduction – A single female can produce up to 400 offspring in her lifetime.
✅ Pesticide Resistance – They adapt quickly to chemical treatments.
✅ Nocturnal & Secretive – They hide in cracks, appliances, and electrical outlets.

Now, let’s tackle the problem systematically.

Step 1: Identify the Infestation

German roaches are small (½ inch), light brown, with two dark stripes behind their heads. Signs of infestation include:

🔍 Droppings (tiny black specks)
🔍 Egg cases (oothecae) – Small, brown, capsule-like
🔍 Musty odor – A sign of large infestations

Step 2: Sanitation – Cut Off Their Food Supply

Roaches thrive in dirty environments. To discourage them:

✔ Store food in airtight containers
✔ Clean spills immediately
✔ Take out trash daily
✔ Fix leaky pipes (roaches need water)

Step 3: Use German Roach-Specific Baits

Why baits work best:
German roaches eat dead roaches and feces, making baits highly effective. The poison spreads through the colony.

Top Bait Choices:

Product Active Ingredient Effectiveness
Advion Gel Bait Indoxacarb ★★★★★
Combat Max Roach Killing Gel Hydramethylnon ★★★★☆
Invict Gold Cockroach Gel Abamectin ★★★★★

How to Apply:

  1. Place pea-sized drops near hiding spots (under sinks, behind fridges).
  2. Avoid spraying insecticides—they’ll scatter roaches, worsening the problem.

Step 4: Apply Insect Growth Regulators (IGRs)

IGRs disrupt roach reproduction by preventing nymphs from maturing. Recommended brands:

✅ Gentrol Point Source (Hydroprene)
✅ NyGuard IGR Concentrate

Step 5: Seal Entry Points

Prevent re-infestation by:

🔧 Caulking cracks in walls
🔧 Installing door sweeps
🔧 Covering vents with fine mesh

Step 6: Monitor with Sticky Traps

Place sticky traps in hotspots to track remaining roaches. Brands like Harris Roach Traps work well.

Step 7: When to Call a Professional

If DIY methods fail after 4-6 weeks, consider hiring an exterminator. They use stronger treatments like:

💉 Fumigation
💉 Residual insecticide sprays

Prevention: Keep Roaches from Coming Back

🚫 Avoid cardboard storage (roaches love it)
🚫 Inspect groceries before storing
🚫 Regularly deep-clean kitchens & bathrooms

German Roach vs. Other Roaches (Comparison Chart)

Feature German Roach American Roach Oriental Roach
Size ½ inch 1.5–2 inches 1 inch
Color Light brown Reddish-brown Dark brown/black
Preferred Habitat Kitchens, bathrooms Sewers, basements Damp areas
Reproduction Speed Very fast Moderate Slow

Final Verdict: How to Get Rid of German Roaches for Good

  1. Use gel baits (Advion, Invict Gold).
  2. Apply IGRs to stop reproduction.
  3. Maintain strict sanitation.
  4. Seal entry points.
  5. Monitor with traps.
Continue Reading

Home Empowerment

Heliconia Color: Transform Your Garden with Tropical Beauty

Published

on

Heliconia Color

Heliconias, often called “lobster claws” or “parrot flowers,” are the crown jewels of tropical gardens. Their bold, vibrant colors and unique shapes make them a favorite among gardeners and landscapers. But what makes heliconia color so captivating? And how can you harness their beauty to transform your outdoor space?

In this comprehensive guide, we’ll dive deep into the world of heliconias. From their origins and varieties to practical growing tips and design ideas, you’ll walk away with everything you need to know to make these tropical wonders the star of your garden.

Why Heliconia Color is a Game-Changer for Your Garden

Heliconias are more than just pretty flowers—they’re a statement. Their fiery reds, sunny yellows, and deep oranges can instantly elevate any garden or landscape. Here’s why heliconia color is so special:

  • Unmatched Vibrancy: Heliconias boast some of the most intense hues in the plant kingdom.
  • Tropical Appeal: They bring an exotic, vacation-like vibe to your space.
  • Versatility: Whether in pots, borders, or as focal points, heliconias adapt to various garden styles.

The Science Behind Heliconia Color

Heliconias owe their stunning colors to a combination of pigments and environmental factors. The primary pigments responsible for their hues are:

  1. Anthocyanins: These produce red, purple, and blue shades.
  2. Carotenoids: Responsible for yellows and oranges.
  3. Chlorophyll: Adds a touch of green to the bracts and leaves.

Interestingly, heliconia color can vary depending on factors like soil pH, sunlight, and temperature. For instance, heliconias grown in slightly acidic soil often exhibit deeper reds, while those in alkaline soil may lean toward yellows.

Top Heliconia Varieties for Jaw-Dropping Color

With over 200 species, heliconias offer a rainbow of options. Here are some of the most popular varieties to consider:

Variety Color Height Best For
Heliconia Rostrata Red and Yellow 6-15 ft Backdrop or Focal Point
Heliconia Psittacorum Orange and Green 3-6 ft Borders and Containers
Heliconia Caribaea Deep Red and Gold 10-20 ft Tropical Landscapes
Heliconia Wagneriana Multicolored (Red, Yellow, Green) 4-8 ft Accent Planting

How to Grow and Care for Heliconias: A Step-by-Step Guide

1. Choosing the Right Location

Heliconias thrive in warm, humid climates (USDA zones 10-12). They need:

  • Full to Partial Sunlight: At least 6 hours of sunlight daily.
  • Well-Draining Soil: Rich in organic matter.
  • Space to Grow: Some varieties can reach up to 20 feet tall!

2. Planting Tips

  • Dig a hole twice the size of the root ball.
  • Mix compost or aged manure into the soil for added nutrients.
  • Water thoroughly after planting.

3. Watering and Feeding

  • Water: Keep the soil consistently moist but not waterlogged.
  • Fertilizer: Use a balanced, slow-release fertilizer every 6-8 weeks during the growing season.

4. Pruning and Maintenance

  • Remove dead or damaged leaves to encourage new growth.
  • Divide overcrowded clumps every 2-3 years to maintain vigor.

Designing with Heliconia Color: Tips and Ideas

Heliconias are incredibly versatile in garden design. Here are some creative ways to use them:

  • Tropical Oasis: Pair heliconias with palms, ferns, and orchids for a lush, jungle-like feel.
  • Color Blocking: Use contrasting heliconia colors to create bold, eye-catching displays.
  • Container Gardening: Grow smaller varieties like Heliconia Psittacorum in pots for patios or balconies.
  • Cut Flowers: Heliconias make stunning floral arrangements that last up to two weeks.

Common Challenges and How to Overcome Them

While heliconias are relatively low-maintenance, they can face a few challenges:

  • Pests: Watch out for aphids and spider mites. Use neem oil or insecticidal soap as a natural remedy.
  • Fungal Diseases: Ensure proper air circulation and avoid overwatering to prevent issues like leaf spot.
  • Cold Sensitivity: In cooler climates, grow heliconias in containers and bring them indoors during winter.

Heliconia Color in Action: A Case Study

Project: Tropical Resort Landscape
Location: Florida, USA
Goal: Create a vibrant, low-maintenance garden that wows guests.

Solution:

  • Planted Heliconia Rostrata as a backdrop.
  • Used Heliconia Psittacorum in containers near walkways.
  • Added complementary plants like bird-of-paradise and bromeliads.

Result: The resort’s garden became a guest favorite, with many visitors snapping photos and asking about the plants.

Infographic: Heliconia Color Spectrum

Key Points:

  • Breakdown of heliconia varieties by color.
  • Tips for enhancing color through soil and sunlight.
  • Ideal pairings for garden design.

Conclusion: Bring the Magic of Heliconia Color to Your Garden

Heliconias are more than just plants—they’re a celebration of color, life, and tropical beauty. By understanding their needs and experimenting with design, you can create a garden that’s not only visually stunning but also a joy to maintain.

Ready to transform your space? Start by choosing your favorite heliconia variety and follow the tips in this guide. And don’t forget to share your heliconia journey with us—tag us in your garden photos or drop a comment below!

Continue Reading

Trending