Home Empowerment
Illuminate Your Space with Lava Lamps- A Retro Delight

Imagine a soft glow filling your room, with colorful blobs of wax bubbling and flowing. Have you ever thought about how relaxing it is to watch a lava lamp? These iconic lamps not only add a fun touch to your space but also create a cozy atmosphere that can turn any moment into something special.
Lava lamps have been around for decades and still capture our hearts. They’re perfect for winding down after a long day or adding a unique flair to your home. Let’s explore the enchanting world of lava lamps and discover how to choose the perfect one for your space!
What is a Lava Lamp?
A lava lamp is a unique decorative light that has captivated people since the 1960s. It features a glass container filled with a special wax mixture and colored liquid. When you turn it on, a light bulb at the base heats the wax, causing it to rise and fall in mesmerizing shapes. As the wax flows and bubbles, it creates a calming effect that draws you in.
Watching the colorful blobs dance is not just fun; it’s a relaxing experience that can transport you to a different state of mind. So, how does this magical lampwork to create such enchanting visuals? Let’s take a closer look at the science behind it!
The History of Lava Lamps
Lava lamps have a fascinating back-story that adds to their charm and retro appeal. These iconic lighting pieces have lit up homes for decades, and their journey began unexpectedly.
- Invented in 1963: Lava lamps were created by British inventor Edward Craven Walker. He developed the idea after watching a homemade egg timer made of liquids move in a pub.
- First introduced as “Astro Lamps”: When Walker launched his invention, it was marketed as the “Astro Lamp” in the UK. Its psychedelic, flowing design immediately caught the attention of people in the 1960s.
- Gained popularity in the 1960s and 70s: Lava lamps became symbols of the counterculture movement, fitting perfectly with the groovy, free-spirited vibe of the era. They were often found in homes, clubs, and even TV shows, adding a unique atmosphere to any space.
- Cultural Icon: Throughout the years, lava lamps have appeared in movies, music videos, and advertisements. Their popularity has never truly faded, making them a lasting symbol of retro style.
From their humble beginnings to becoming a cultural icon, lava lamps have maintained their status as timeless decor pieces. These unique lamps continue to mesmerize people of all ages today.
How Lava Lamp Works?
Lava lamps are not just beautiful to look at; they operate in a simple yet fascinating way. Let’s explore the working of lava lamps step by step.
- Two main ingredients: Inside a lava lamp, there is a mix of colored wax and a special liquid. The wax is heavier than the liquid when it’s cool.
- Heat source: At the bottom of the lamp, there’s a small light bulb that provides heat. When you turn on the lamp, this bulb heats up the wax.
- Wax movement: As the wax gets warm, it becomes less dense and lighter than the liquid around it. This causes the wax to rise toward the top of the lamp.
- Cooling effect: When the wax reaches the top, it cools down and becomes heavier again, sinking back to the bottom of the lamp.
- Constant cycle: This process repeats, creating the mesmerizing movement of blobs of wax floating up and down, which gives lava lamps their soothing and hypnotic flow.
Lava lamps operate using basic science principles but create a magical effect that captivates anyone who watches them. The warm glow and flowing wax make them perfect for adding style and ambiance to any room.

Types of Lava Lamp:
Lava lamps come in a variety of styles, each with its own unique charm. Let’s explore the most popular types of lava lamps that can light up your space and add a splash of personality!
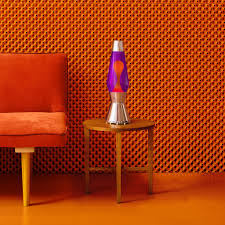
1. Wax Lava Lamp
The classic wax lava lamp is what most people picture when they think of these enchanting lights. With its colorful wax blobs flowing gracefully in a clear liquid, it creates a timeless ambiance. Whether you choose a vibrant red, soothing blue, or sunny yellow, a wax lava lamp never fails to captivate.
2. Glitter Lava Lamp
If you love a little sparkle, the glitter lava lamp is your go-to choice! Instead of wax, it features shimmering glitter that dances and twirls in the liquid. As the light shines through, it creates a magical effect that’s perfect for adding a touch of glam to any room. Who doesn’t love a bit of bling?
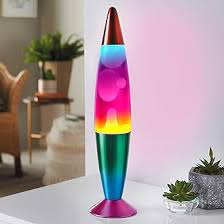
3. Rainbow Lava Lamp
Feeling colorful? The rainbow lava lamp combines multiple colors of wax to create a stunning visual experience! Each blob brings a new hue to the mix, resulting in a vibrant display that’s sure to brighten your mood. It’s like having a little piece of a rainbow right in your home!
4. Tornado Lava Lamp
The tornado lava lamp offers a unique twist on the traditional design. Instead of the usual wax motion, it creates a swirling effect reminiscent of a mini tornado! This dynamic movement draws you in and keeps you mesmerized. It’s perfect for those who appreciate a little drama in their decor.
5. Galaxy Lava Lamp
For the dreamers out there, the galaxy lava lamp is a fantastic choice. It combines glowing colors with star-like specks to mimic the cosmos. Watching the colorful blobs move through a starry backdrop feels like gazing into outer space. It’s a perfect addition for any stargazer or sci-fi fan!

The Comeback of Lava Lamps- A Trend You Can’t Miss!
Lava lamps are back in a big way, and for good reason! These iconic pieces of decor are not just for retro enthusiasts anymore. With their calming visuals and nostalgic vibes, they’re capturing the hearts of a new generation. Let’s dive into what’s driving this stylish resurgence!
- Nostalgia: Who doesn’t love a trip down memory lane? For many, lava lamps evoke fond memories of childhood or carefree days in the ’60s and ’70s. They remind us of a simpler time when life felt a bit more relaxed. Don’t you want to bring a piece of that nostalgia into your home?
- Retro Trend: The retro trend is hotter than ever! From fashion to home decor, vintage styles are making a comeback. Lava lamps fit perfectly into this trend, offering a unique blend of style and fun. They add a playful touch to any space, making them a favorite among those looking to create a trendy, nostalgic atmosphere. So why not hop on the retro bandwagon and showcase a lava lamp in your living room?
- Relaxation and Well-Being: In today’s fast-paced world, finding moments of calm is essential. Lava lamps create a soothing ambiance that promotes relaxation and well-being. The gentle, flowing movements of the wax can help reduce stress and create a tranquil environment. Who wouldn’t want a little relaxation in their life? Picture unwinding with a good book while your lava lamp softly illuminates the room—it’s pure bliss!
- Presence in Popular Culture: Lava lamps are everywhere in popular culture, from movies to music videos. They’ve made appearances in shows and films, reminding us of their iconic status. This renewed visibility is helping them regain their popularity among younger audiences.
Have you noticed how often you see them in trendy cafes or on social media? It’s clear that lava lamps are back in the spotlight, and they’re here to stay! With their nostalgic charm, stylish retro appeal, and calming effects, it’s no wonder that lava lamps are making a comeback. Ready to join the trend and light up your space with a fabulous lava lamp? Let’s find the perfect Lava Lamp for you!
Lava lamps are more than just decorative lights; they’re a delightful blend of nostalgia, style, and relaxation. Whether you’re looking to unwind after a busy day or add a unique touch to your home decor, a lava lamp can do it all. They create a cozy atmosphere that invites calm and sparks joy.
With so many types to choose from, you’re sure to find a lava lamp that suits your personality and space. From the classic wax design to the eye-catching Glitter variety, there’s something for everyone. Why not embrace this trend and let a lava lamp transform your environment? Don’t miss out on the chance to elevate your space!
Explore Our Collection of stunning lava lamps and find the perfect one to light up your life today!
Home Empowerment
How to Get Pee Smell Out of Couch: Solutions for a Fresh Home

Few household smells are as stubborn—or as embarrassing—as urine odor embedded in a couch. Whether it’s from a potty-training toddler, an elderly pet, or an unexpected accident, that lingering ammonia scent can make your living space feel unclean. The good news? With the right techniques, you can completely eliminate urine smells and restore freshness to your upholstery.
This comprehensive guide covers everything from immediate emergency response to deep-cleaning solutions for set-in odors. We’ll explore both DIY remedies and professional-grade solutions, ensuring you have options for every level of mess.
Why Proper Urine Odor Removal Matters
Ignoring urine smells doesn’t just create an unpleasant environment—it can lead to bigger problems:
- Bacterial growth: Urine breeds bacteria, which can cause health issues.
- Repeat accidents: Pets often remark the same spot if the scent remains.
- Long-term damage: Urine can degrade fabric and cushioning over time.
By acting quickly and using the right cleaning methods, you’ll protect your furniture and maintain a fresh, hygienic home.
Step-by-Step Guide to Remove Pee Smell from Couch
1. Act Fast: Blot Up Excess Liquid
Why it works: The sooner you remove urine, the less it soaks into fibers.
- Materials needed: Absorbent towels, paper towels, or a dry microfiber cloth.
- Technique:
- Press (don’t rub) firmly to soak up liquid.
- Replace towels as they become saturated.
- If the urine is already dry, skip to step 2.
2. Neutralize Odors with Vinegar Solution
Why it works: Vinegar’s acidity breaks down uric acid crystals, the main cause of lingering smells.
- Mix: 1 part white vinegar + 1 part cold water in a spray bottle.
- Application:
- Lightly mist the affected area (test on a hidden spot first).
- Let sit for 10-15 minutes.
- Blot dry with a clean cloth.
- Bonus: Add a few drops of essential oil (e.g., lavender) for a fresh scent.
3. Deep Clean with Baking Soda
Why it works: Baking soda absorbs odors and lifts remaining stains.
- Method:
- Sprinkle a generous layer over the damp area.
- For tough smells, mix baking soda with hydrogen peroxide (3%) to form a paste.
- Let sit for 6+ hours (overnight is best).
- Vacuum thoroughly.
4. Use an Enzyme Cleaner for Stubborn Stains
Why it works: Enzymes break down urine’s organic compounds, eliminating odors at the source.
- Top picks: Nature’s Miracle, Rocco & Roxie, or Simple Solution.
- How to apply:
- Follow product instructions (usually involves soaking the area).
- Allow to air-dry completely—don’t rinse!
5. Machine Wash Removable Covers (If Applicable)
- Best detergent: Use an enzyme-based or oxygen bleach formula.
- Drying: Air-dry in sunlight (UV rays help kill bacteria).
Pro Tips for Maximum Effectiveness
✅ Avoid Heat: Never use steam or hot water—it sets urine stains and odors.
✅ Blacklight Trick: Use a UV flashlight to find old, hidden urine spots.
✅ Prevent Residue: Rinse with cold water after vinegar treatment to avoid stickiness.
✅ For Leather Couches: Use a leather-safe enzymatic cleaner to avoid damage.
When to Call a Professional
If the smell persists after multiple treatments, consider:
- Professional upholstery cleaning (hot water extraction method).
- Ozone treatment (for severe, deep-set odors).
Final Thoughts
How to Get Pee Smell Out of Couch requires quick action, the right cleaners, and patience. By following these steps—especially using enzyme treatments for stubborn odors—you can restore your couch to a fresh, odor-free state.
FAQ: Your Top Questions Answered
Does vinegar discolor couch fabric?
It shouldn’t, but always test on a hidden area first.
Can I use bleach on my couch?
No! Bleach can damage fabric and react with urine, making smells worse.
How do I stop my pet from peeing on the couch again?
- Use a pet deterrent spray.
- Place a washable waterproof cover.
- Retrain with positive reinforcement.
Why does the smell come back after cleaning?
If urine reached the cushion foam, you may need a deep soak with enzyme cleaner or professional help.
Home Empowerment
How to Get Rid of German Roaches: The Ultimate Guide

German roaches (Blattella germanica) are among the most stubborn household pests. Unlike other roach species, they reproduce rapidly, hide in tight spaces, and quickly develop resistance to pesticides. If you’re dealing with an infestation, this guide will walk you through how to get rid of German roaches using proven, science-backed methods.
Why German Roaches Are So Hard to Eliminate
Before diving into solutions, it’s crucial to understand why these pests are so resilient:
✅ Rapid Reproduction – A single female can produce up to 400 offspring in her lifetime.
✅ Pesticide Resistance – They adapt quickly to chemical treatments.
✅ Nocturnal & Secretive – They hide in cracks, appliances, and electrical outlets.
Now, let’s tackle the problem systematically.
Step 1: Identify the Infestation
German roaches are small (½ inch), light brown, with two dark stripes behind their heads. Signs of infestation include:
🔍 Droppings (tiny black specks)
🔍 Egg cases (oothecae) – Small, brown, capsule-like
🔍 Musty odor – A sign of large infestations
Step 2: Sanitation – Cut Off Their Food Supply
Roaches thrive in dirty environments. To discourage them:
✔ Store food in airtight containers
✔ Clean spills immediately
✔ Take out trash daily
✔ Fix leaky pipes (roaches need water)
Step 3: Use German Roach-Specific Baits
Why baits work best:
German roaches eat dead roaches and feces, making baits highly effective. The poison spreads through the colony.
Top Bait Choices:
Product | Active Ingredient | Effectiveness |
---|---|---|
Advion Gel Bait | Indoxacarb | ★★★★★ |
Combat Max Roach Killing Gel | Hydramethylnon | ★★★★☆ |
Invict Gold Cockroach Gel | Abamectin | ★★★★★ |
How to Apply:
- Place pea-sized drops near hiding spots (under sinks, behind fridges).
- Avoid spraying insecticides—they’ll scatter roaches, worsening the problem.
Step 4: Apply Insect Growth Regulators (IGRs)
IGRs disrupt roach reproduction by preventing nymphs from maturing. Recommended brands:
✅ Gentrol Point Source (Hydroprene)
✅ NyGuard IGR Concentrate
Step 5: Seal Entry Points
Prevent re-infestation by:
🔧 Caulking cracks in walls
🔧 Installing door sweeps
🔧 Covering vents with fine mesh
Step 6: Monitor with Sticky Traps
Place sticky traps in hotspots to track remaining roaches. Brands like Harris Roach Traps work well.
Step 7: When to Call a Professional
If DIY methods fail after 4-6 weeks, consider hiring an exterminator. They use stronger treatments like:
💉 Fumigation
💉 Residual insecticide sprays
Prevention: Keep Roaches from Coming Back
🚫 Avoid cardboard storage (roaches love it)
🚫 Inspect groceries before storing
🚫 Regularly deep-clean kitchens & bathrooms
German Roach vs. Other Roaches (Comparison Chart)
Feature | German Roach | American Roach | Oriental Roach |
---|---|---|---|
Size | ½ inch | 1.5–2 inches | 1 inch |
Color | Light brown | Reddish-brown | Dark brown/black |
Preferred Habitat | Kitchens, bathrooms | Sewers, basements | Damp areas |
Reproduction Speed | Very fast | Moderate | Slow |
Final Verdict: How to Get Rid of German Roaches for Good
- Use gel baits (Advion, Invict Gold).
- Apply IGRs to stop reproduction.
- Maintain strict sanitation.
- Seal entry points.
- Monitor with traps.
Home Empowerment
Heliconia Color: Transform Your Garden with Tropical Beauty

Heliconias, often called “lobster claws” or “parrot flowers,” are the crown jewels of tropical gardens. Their bold, vibrant colors and unique shapes make them a favorite among gardeners and landscapers. But what makes heliconia color so captivating? And how can you harness their beauty to transform your outdoor space?
In this comprehensive guide, we’ll dive deep into the world of heliconias. From their origins and varieties to practical growing tips and design ideas, you’ll walk away with everything you need to know to make these tropical wonders the star of your garden.
Why Heliconia Color is a Game-Changer for Your Garden
Heliconias are more than just pretty flowers—they’re a statement. Their fiery reds, sunny yellows, and deep oranges can instantly elevate any garden or landscape. Here’s why heliconia color is so special:
- Unmatched Vibrancy: Heliconias boast some of the most intense hues in the plant kingdom.
- Tropical Appeal: They bring an exotic, vacation-like vibe to your space.
- Versatility: Whether in pots, borders, or as focal points, heliconias adapt to various garden styles.
The Science Behind Heliconia Color
Heliconias owe their stunning colors to a combination of pigments and environmental factors. The primary pigments responsible for their hues are:
- Anthocyanins: These produce red, purple, and blue shades.
- Carotenoids: Responsible for yellows and oranges.
- Chlorophyll: Adds a touch of green to the bracts and leaves.
Interestingly, heliconia color can vary depending on factors like soil pH, sunlight, and temperature. For instance, heliconias grown in slightly acidic soil often exhibit deeper reds, while those in alkaline soil may lean toward yellows.
Top Heliconia Varieties for Jaw-Dropping Color
With over 200 species, heliconias offer a rainbow of options. Here are some of the most popular varieties to consider:
Variety | Color | Height | Best For |
---|---|---|---|
Heliconia Rostrata | Red and Yellow | 6-15 ft | Backdrop or Focal Point |
Heliconia Psittacorum | Orange and Green | 3-6 ft | Borders and Containers |
Heliconia Caribaea | Deep Red and Gold | 10-20 ft | Tropical Landscapes |
Heliconia Wagneriana | Multicolored (Red, Yellow, Green) | 4-8 ft | Accent Planting |
How to Grow and Care for Heliconias: A Step-by-Step Guide
1. Choosing the Right Location
Heliconias thrive in warm, humid climates (USDA zones 10-12). They need:
- Full to Partial Sunlight: At least 6 hours of sunlight daily.
- Well-Draining Soil: Rich in organic matter.
- Space to Grow: Some varieties can reach up to 20 feet tall!
2. Planting Tips
- Dig a hole twice the size of the root ball.
- Mix compost or aged manure into the soil for added nutrients.
- Water thoroughly after planting.
3. Watering and Feeding
- Water: Keep the soil consistently moist but not waterlogged.
- Fertilizer: Use a balanced, slow-release fertilizer every 6-8 weeks during the growing season.
4. Pruning and Maintenance
- Remove dead or damaged leaves to encourage new growth.
- Divide overcrowded clumps every 2-3 years to maintain vigor.
Designing with Heliconia Color: Tips and Ideas
Heliconias are incredibly versatile in garden design. Here are some creative ways to use them:
- Tropical Oasis: Pair heliconias with palms, ferns, and orchids for a lush, jungle-like feel.
- Color Blocking: Use contrasting heliconia colors to create bold, eye-catching displays.
- Container Gardening: Grow smaller varieties like Heliconia Psittacorum in pots for patios or balconies.
- Cut Flowers: Heliconias make stunning floral arrangements that last up to two weeks.
Common Challenges and How to Overcome Them
While heliconias are relatively low-maintenance, they can face a few challenges:
- Pests: Watch out for aphids and spider mites. Use neem oil or insecticidal soap as a natural remedy.
- Fungal Diseases: Ensure proper air circulation and avoid overwatering to prevent issues like leaf spot.
- Cold Sensitivity: In cooler climates, grow heliconias in containers and bring them indoors during winter.
Heliconia Color in Action: A Case Study
Project: Tropical Resort Landscape
Location: Florida, USA
Goal: Create a vibrant, low-maintenance garden that wows guests.
Solution:
- Planted Heliconia Rostrata as a backdrop.
- Used Heliconia Psittacorum in containers near walkways.
- Added complementary plants like bird-of-paradise and bromeliads.
Result: The resort’s garden became a guest favorite, with many visitors snapping photos and asking about the plants.
Infographic: Heliconia Color Spectrum
Key Points:
- Breakdown of heliconia varieties by color.
- Tips for enhancing color through soil and sunlight.
- Ideal pairings for garden design.
Conclusion: Bring the Magic of Heliconia Color to Your Garden
Heliconias are more than just plants—they’re a celebration of color, life, and tropical beauty. By understanding their needs and experimenting with design, you can create a garden that’s not only visually stunning but also a joy to maintain.
Ready to transform your space? Start by choosing your favorite heliconia variety and follow the tips in this guide. And don’t forget to share your heliconia journey with us—tag us in your garden photos or drop a comment below!
-
Articles3 days ago
How Many Times Can You Regrow Green Onions
-
News8 months ago
Understanding HotLeaks: What You Need to Know
-
Fashion5 months ago
Opals in the USA: A Gemstone Transforming the Crystal Healing Market
-
Technology11 months ago
The Wonders of Oh Em Gee Blog
-
Entertainment11 months ago
Bare it All: Unforgettable Skinny Dipping Stories Shared
-
Health11 months ago
Can You Smoke Shrooms? Exploring the Myths and Realities
-
Articles3 months ago
WHAT IS THE DIFFERENCE BETWEEN SEED GARLIC AND FOOD GARLIC?
-
Fashion4 days ago
Make a Statement with Stunning Black Homecoming Dresses