Connect with us

Home Empowerment

Trusted Water Damage Restoration in Portland, Oregon

Published

on

Water Damage Restoration

Water damage can strike your home or business without warning, and when it does, quick and efficient action is crucial. From burst pipes to severe weather, the potential sources of water damage are numerous, making it one of the most common and costly issues property owners face. This guide will provide detailed information on Water Damage Cleanup Portland, offering insights into the process, prevention tips, and how to choose the best service provider.

Understanding Water Damage: Causes and Consequences

Water damage occurs when excess water infiltrates an area where it shouldn’t be. It can come from several sources, such as:

  • Natural Disasters: Heavy rains, floods, and storms can overwhelm drainage systems and flood homes.
  • Leaking or Burst Pipes: Poor plumbing, old or corroded pipes, and frozen water lines are common causes of leaks.
  • Appliance Malfunctions: Water heaters, dishwashers, and washing machines can fail, releasing large volumes of water into your property.
  • Roof Leaks: Damaged or missing shingles, clogged gutters, or ice dams can lead to significant roof leaks.

Immediate Consequences

  1. Structural Damage: Water can weaken the structural integrity of buildings, affecting walls, floors, and ceilings.
  2. Mold Growth: Within 24-48 hours, mold can start to grow in damp areas, posing health risks and additional repair costs.
  3. Electrical Hazards: Water in contact with electrical systems can cause short circuits and pose a risk of fire or electrocution.
  4. Damage to Personal Belongings: Furniture, electronics, documents, and personal items can be ruined if not addressed promptly.

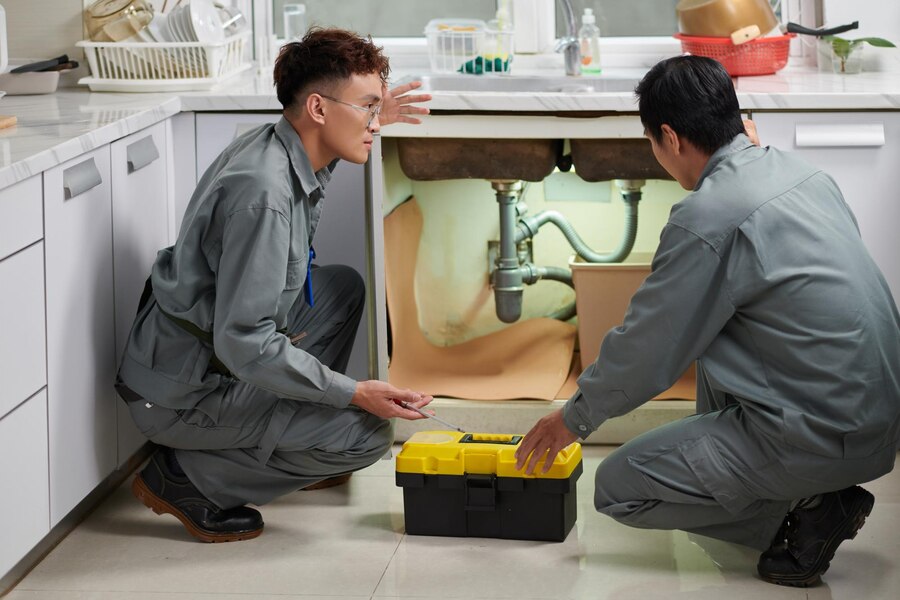
The Water Damage Cleanup Process

Water damage cleanup is a comprehensive process that requires professional expertise. Here’s a step-by-step guide to what you can expect during the cleanup:

1. Assessment and Inspection

A professional water damage cleanup company will start with a thorough inspection to assess the extent of the damage. This step involves using moisture detectors, hygrometers, and infrared cameras to locate all affected areas, including hidden pockets of moisture.

2. Water Removal

The next step is water extraction, which involves using powerful pumps and vacuums to remove standing water. Quick removal is critical to preventing further damage and mold growth.

3. Drying and Dehumidification

Once the bulk of the water is removed, the affected areas need to be thoroughly dried using industrial-grade dehumidifiers and air movers. This process can take several days, depending on the extent of the damage.

4. Cleaning and Sanitizing

All affected surfaces, including walls, floors, and personal belongings, need to be cleaned and sanitized. This step helps prevent mold growth and removes any contaminants from the water.

5. Restoration and Repair

The final step involves restoring your property to its pre-damage condition. This can range from minor repairs, such as replacing drywall and painting, to major reconstruction projects.

Why Choose Professional Water Damage Cleanup in Portland?

Portland’s unique climate, with its heavy rains and occasional flooding, makes it particularly susceptible to water damage. Professional cleanup services offer several benefits:

Expertise and Equipment

Professionals have the knowledge, experience, and specialized equipment needed to handle all types of water damage, ensuring that the cleanup is thorough and efficient.

Quick Response Time

Water damage worsens with time. A professional company can respond quickly to mitigate the damage and begin the cleanup process, minimizing further harm to your property.

Insurance Assistance

Navigating insurance claims can be a daunting task. Many professional water damage cleanup companies offer assistance in documenting the damage and filing claims, helping you get the coverage you need for repairs.

Preventing Water Damage: Tips for Portland Property Owners

While not all water damage can be prevented, there are steps you can take to reduce the risk:

1. Regular Maintenance

Inspect your property regularly for signs of leaks or water damage, especially after storms. Check your roof, gutters, and downspouts to ensure they are in good condition.

2. Install a Sump Pump

A sump pump can help keep your basement dry during heavy rains or flooding. Make sure it is in working order, and consider a battery backup in case of power outages.

3. Upgrade Plumbing Systems

Older plumbing systems are more susceptible to leaks and bursts. Consider upgrading to modern, more durable materials, especially if your home is older.

4. Seal Cracks and Gaps

Water can enter through cracks in your foundation or walls. Inspect your property and seal any cracks or gaps to prevent water intrusion.

5. Invest in a Water Leak Detection System

These systems can detect leaks early and shut off your water supply automatically, preventing extensive damage.

Choosing the Right Water Damage Cleanup Service in Portland

When selecting a water damage cleanup service, consider the following factors:

Experience and Certification

Choose a company with a proven track record and the necessary certifications, such as those from the Institute of Inspection, Cleaning, and Restoration Certification (IICRC).

Availability

Water damage can happen at any time. Look for a company that offers 24/7 emergency services.

Customer Reviews

Check online reviews and testimonials to gauge the company’s reputation and the quality of its services.

Insurance Assistance

A company that helps with insurance claims can make the recovery process smoother and less stressful.

USA Water Restoration: A Trusted Partner in Water Damage Cleanup

https://usawaterrestoration.com is a nationwide leader in water damage cleanup and restoration. With a team of certified professionals, they offer fast and reliable services to help you get your property back to its pre-damage condition. Whether you’re dealing with a minor leak or extensive flooding, they have the expertise and equipment to handle any situation. Their commitment to customer satisfaction and quality service has made them a trusted name in the industry.

Conclusion

Water damage can be a devastating experience for any property owner. However, with the right information and professional help, you can effectively manage the cleanup process and restore your home or business. If you’re in Portland and dealing with water damage, don’t wait—call a professional service immediately to minimize the damage and start the restoration process.

For reliable and efficient water damage cleanup, USA Water Restoration is a trusted choice. Their expertise and dedication to quality service ensure that your property will be restored quickly and thoroughly.

By taking proactive steps to prevent water damage and knowing what to do when it occurs, you can protect your property and ensure the safety of its occupants. Remember, quick action is key to minimizing the impact of water damage.

Continue Reading
Click to comment

Leave a Reply

Your email address will not be published. Required fields are marked *

Home Empowerment

How to Get Pee Smell Out of Couch: Solutions for a Fresh Home

Published

on

How to Get Pee Smell Out of Couch

Few household smells are as stubborn—or as embarrassing—as urine odor embedded in a couch. Whether it’s from a potty-training toddler, an elderly pet, or an unexpected accident, that lingering ammonia scent can make your living space feel unclean. The good news? With the right techniques, you can completely eliminate urine smells and restore freshness to your upholstery.

This comprehensive guide covers everything from immediate emergency response to deep-cleaning solutions for set-in odors. We’ll explore both DIY remedies and professional-grade solutions, ensuring you have options for every level of mess.

Why Proper Urine Odor Removal Matters

Ignoring urine smells doesn’t just create an unpleasant environment—it can lead to bigger problems:

  • Bacterial growth: Urine breeds bacteria, which can cause health issues.
  • Repeat accidents: Pets often remark the same spot if the scent remains.
  • Long-term damage: Urine can degrade fabric and cushioning over time.

By acting quickly and using the right cleaning methods, you’ll protect your furniture and maintain a fresh, hygienic home.

Step-by-Step Guide to Remove Pee Smell from Couch

1. Act Fast: Blot Up Excess Liquid

Why it works: The sooner you remove urine, the less it soaks into fibers.

  • Materials needed: Absorbent towels, paper towels, or a dry microfiber cloth.
  • Technique:
    • Press (don’t rub) firmly to soak up liquid.
    • Replace towels as they become saturated.
    • If the urine is already dry, skip to step 2.

2. Neutralize Odors with Vinegar Solution

Why it works: Vinegar’s acidity breaks down uric acid crystals, the main cause of lingering smells.

  • Mix: 1 part white vinegar + 1 part cold water in a spray bottle.
  • Application:
    • Lightly mist the affected area (test on a hidden spot first).
    • Let sit for 10-15 minutes.
    • Blot dry with a clean cloth.
  • Bonus: Add a few drops of essential oil (e.g., lavender) for a fresh scent.

3. Deep Clean with Baking Soda

Why it works: Baking soda absorbs odors and lifts remaining stains.

  • Method:
    • Sprinkle a generous layer over the damp area.
    • For tough smells, mix baking soda with hydrogen peroxide (3%) to form a paste.
    • Let sit for 6+ hours (overnight is best).
    • Vacuum thoroughly.

4. Use an Enzyme Cleaner for Stubborn Stains

Why it works: Enzymes break down urine’s organic compounds, eliminating odors at the source.

  • Top picks: Nature’s Miracle, Rocco & Roxie, or Simple Solution.
  • How to apply:
    • Follow product instructions (usually involves soaking the area).
    • Allow to air-dry completely—don’t rinse!

5. Machine Wash Removable Covers (If Applicable)

  • Best detergent: Use an enzyme-based or oxygen bleach formula.
  • Drying: Air-dry in sunlight (UV rays help kill bacteria).

Pro Tips for Maximum Effectiveness

✅ Avoid Heat: Never use steam or hot water—it sets urine stains and odors.
✅ Blacklight Trick: Use a UV flashlight to find old, hidden urine spots.
✅ Prevent Residue: Rinse with cold water after vinegar treatment to avoid stickiness.
✅ For Leather Couches: Use a leather-safe enzymatic cleaner to avoid damage.

When to Call a Professional

If the smell persists after multiple treatments, consider:

  • Professional upholstery cleaning (hot water extraction method).
  • Ozone treatment (for severe, deep-set odors).

Final Thoughts

How to Get Pee Smell Out of Couch requires quick action, the right cleaners, and patience. By following these steps—especially using enzyme treatments for stubborn odors—you can restore your couch to a fresh, odor-free state.

FAQ: Your Top Questions Answered

Does vinegar discolor couch fabric?

It shouldn’t, but always test on a hidden area first.

Can I use bleach on my couch?

No! Bleach can damage fabric and react with urine, making smells worse.

How do I stop my pet from peeing on the couch again?

  • Use a pet deterrent spray.
  • Place a washable waterproof cover.
  • Retrain with positive reinforcement.

Why does the smell come back after cleaning?

If urine reached the cushion foam, you may need a deep soak with enzyme cleaner or professional help.


Continue Reading

Home Empowerment

How to Get Rid of German Roaches: The Ultimate Guide

Published

on

How to Get Rid of German Roaches

German roaches (Blattella germanica) are among the most stubborn household pests. Unlike other roach species, they reproduce rapidly, hide in tight spaces, and quickly develop resistance to pesticides. If you’re dealing with an infestation, this guide will walk you through how to get rid of German roaches using proven, science-backed methods.

Why German Roaches Are So Hard to Eliminate

Before diving into solutions, it’s crucial to understand why these pests are so resilient:

✅ Rapid Reproduction – A single female can produce up to 400 offspring in her lifetime.
✅ Pesticide Resistance – They adapt quickly to chemical treatments.
✅ Nocturnal & Secretive – They hide in cracks, appliances, and electrical outlets.

Now, let’s tackle the problem systematically.

Step 1: Identify the Infestation

German roaches are small (½ inch), light brown, with two dark stripes behind their heads. Signs of infestation include:

🔍 Droppings (tiny black specks)
🔍 Egg cases (oothecae) – Small, brown, capsule-like
🔍 Musty odor – A sign of large infestations

Step 2: Sanitation – Cut Off Their Food Supply

Roaches thrive in dirty environments. To discourage them:

✔ Store food in airtight containers
✔ Clean spills immediately
✔ Take out trash daily
✔ Fix leaky pipes (roaches need water)

Step 3: Use German Roach-Specific Baits

Why baits work best:
German roaches eat dead roaches and feces, making baits highly effective. The poison spreads through the colony.

Top Bait Choices:

Product Active Ingredient Effectiveness
Advion Gel Bait Indoxacarb ★★★★★
Combat Max Roach Killing Gel Hydramethylnon ★★★★☆
Invict Gold Cockroach Gel Abamectin ★★★★★

How to Apply:

  1. Place pea-sized drops near hiding spots (under sinks, behind fridges).
  2. Avoid spraying insecticides—they’ll scatter roaches, worsening the problem.

Step 4: Apply Insect Growth Regulators (IGRs)

IGRs disrupt roach reproduction by preventing nymphs from maturing. Recommended brands:

✅ Gentrol Point Source (Hydroprene)
✅ NyGuard IGR Concentrate

Step 5: Seal Entry Points

Prevent re-infestation by:

🔧 Caulking cracks in walls
🔧 Installing door sweeps
🔧 Covering vents with fine mesh

Step 6: Monitor with Sticky Traps

Place sticky traps in hotspots to track remaining roaches. Brands like Harris Roach Traps work well.

Step 7: When to Call a Professional

If DIY methods fail after 4-6 weeks, consider hiring an exterminator. They use stronger treatments like:

💉 Fumigation
💉 Residual insecticide sprays

Prevention: Keep Roaches from Coming Back

🚫 Avoid cardboard storage (roaches love it)
🚫 Inspect groceries before storing
🚫 Regularly deep-clean kitchens & bathrooms

German Roach vs. Other Roaches (Comparison Chart)

Feature German Roach American Roach Oriental Roach
Size ½ inch 1.5–2 inches 1 inch
Color Light brown Reddish-brown Dark brown/black
Preferred Habitat Kitchens, bathrooms Sewers, basements Damp areas
Reproduction Speed Very fast Moderate Slow

Final Verdict: How to Get Rid of German Roaches for Good

  1. Use gel baits (Advion, Invict Gold).
  2. Apply IGRs to stop reproduction.
  3. Maintain strict sanitation.
  4. Seal entry points.
  5. Monitor with traps.
Continue Reading

Home Empowerment

Heliconia Color: Transform Your Garden with Tropical Beauty

Published

on

Heliconia Color

Heliconias, often called “lobster claws” or “parrot flowers,” are the crown jewels of tropical gardens. Their bold, vibrant colors and unique shapes make them a favorite among gardeners and landscapers. But what makes heliconia color so captivating? And how can you harness their beauty to transform your outdoor space?

In this comprehensive guide, we’ll dive deep into the world of heliconias. From their origins and varieties to practical growing tips and design ideas, you’ll walk away with everything you need to know to make these tropical wonders the star of your garden.

Why Heliconia Color is a Game-Changer for Your Garden

Heliconias are more than just pretty flowers—they’re a statement. Their fiery reds, sunny yellows, and deep oranges can instantly elevate any garden or landscape. Here’s why heliconia color is so special:

  • Unmatched Vibrancy: Heliconias boast some of the most intense hues in the plant kingdom.
  • Tropical Appeal: They bring an exotic, vacation-like vibe to your space.
  • Versatility: Whether in pots, borders, or as focal points, heliconias adapt to various garden styles.

The Science Behind Heliconia Color

Heliconias owe their stunning colors to a combination of pigments and environmental factors. The primary pigments responsible for their hues are:

  1. Anthocyanins: These produce red, purple, and blue shades.
  2. Carotenoids: Responsible for yellows and oranges.
  3. Chlorophyll: Adds a touch of green to the bracts and leaves.

Interestingly, heliconia color can vary depending on factors like soil pH, sunlight, and temperature. For instance, heliconias grown in slightly acidic soil often exhibit deeper reds, while those in alkaline soil may lean toward yellows.

Top Heliconia Varieties for Jaw-Dropping Color

With over 200 species, heliconias offer a rainbow of options. Here are some of the most popular varieties to consider:

Variety Color Height Best For
Heliconia Rostrata Red and Yellow 6-15 ft Backdrop or Focal Point
Heliconia Psittacorum Orange and Green 3-6 ft Borders and Containers
Heliconia Caribaea Deep Red and Gold 10-20 ft Tropical Landscapes
Heliconia Wagneriana Multicolored (Red, Yellow, Green) 4-8 ft Accent Planting

How to Grow and Care for Heliconias: A Step-by-Step Guide

1. Choosing the Right Location

Heliconias thrive in warm, humid climates (USDA zones 10-12). They need:

  • Full to Partial Sunlight: At least 6 hours of sunlight daily.
  • Well-Draining Soil: Rich in organic matter.
  • Space to Grow: Some varieties can reach up to 20 feet tall!

2. Planting Tips

  • Dig a hole twice the size of the root ball.
  • Mix compost or aged manure into the soil for added nutrients.
  • Water thoroughly after planting.

3. Watering and Feeding

  • Water: Keep the soil consistently moist but not waterlogged.
  • Fertilizer: Use a balanced, slow-release fertilizer every 6-8 weeks during the growing season.

4. Pruning and Maintenance

  • Remove dead or damaged leaves to encourage new growth.
  • Divide overcrowded clumps every 2-3 years to maintain vigor.

Designing with Heliconia Color: Tips and Ideas

Heliconias are incredibly versatile in garden design. Here are some creative ways to use them:

  • Tropical Oasis: Pair heliconias with palms, ferns, and orchids for a lush, jungle-like feel.
  • Color Blocking: Use contrasting heliconia colors to create bold, eye-catching displays.
  • Container Gardening: Grow smaller varieties like Heliconia Psittacorum in pots for patios or balconies.
  • Cut Flowers: Heliconias make stunning floral arrangements that last up to two weeks.

Common Challenges and How to Overcome Them

While heliconias are relatively low-maintenance, they can face a few challenges:

  • Pests: Watch out for aphids and spider mites. Use neem oil or insecticidal soap as a natural remedy.
  • Fungal Diseases: Ensure proper air circulation and avoid overwatering to prevent issues like leaf spot.
  • Cold Sensitivity: In cooler climates, grow heliconias in containers and bring them indoors during winter.

Heliconia Color in Action: A Case Study

Project: Tropical Resort Landscape
Location: Florida, USA
Goal: Create a vibrant, low-maintenance garden that wows guests.

Solution:

  • Planted Heliconia Rostrata as a backdrop.
  • Used Heliconia Psittacorum in containers near walkways.
  • Added complementary plants like bird-of-paradise and bromeliads.

Result: The resort’s garden became a guest favorite, with many visitors snapping photos and asking about the plants.

Infographic: Heliconia Color Spectrum

Key Points:

  • Breakdown of heliconia varieties by color.
  • Tips for enhancing color through soil and sunlight.
  • Ideal pairings for garden design.

Conclusion: Bring the Magic of Heliconia Color to Your Garden

Heliconias are more than just plants—they’re a celebration of color, life, and tropical beauty. By understanding their needs and experimenting with design, you can create a garden that’s not only visually stunning but also a joy to maintain.

Ready to transform your space? Start by choosing your favorite heliconia variety and follow the tips in this guide. And don’t forget to share your heliconia journey with us—tag us in your garden photos or drop a comment below!

Continue Reading

Trending