Connect with us

Home Empowerment

How to Remove Clear Coat from Wood?

Published

on

Coat from Wood

Wood surfaces like polyurethane, varnish, and lacquer have a clear coat finish. This coat helps to restore the wood’s natural beauty. However, this clear coat can be damaged over time, so you might need to remove it.

Why Remove Clear Coat from Wood?

The clear coat on a wood surface serves many purposes, such as protecting it from general wear, moisture, and scratches. However, certain situations require removing the clear coat.

  • Over time, the finish on the surface may become chipped or worn out. This requires complete removal before finishing.
  • Recoloring also requires removing the previous coats. So you might have to remove the clear coat.
    The repairing of wood surfaces also requires the removal of clear coats. This is how you can apply a new coat and restore the wood’s beauty. Just in case you removed your clear coat from wood and wanted to buy a new one must check out WoodEmotions.pk

Things you might need

You should collect the things before starting the removal process.

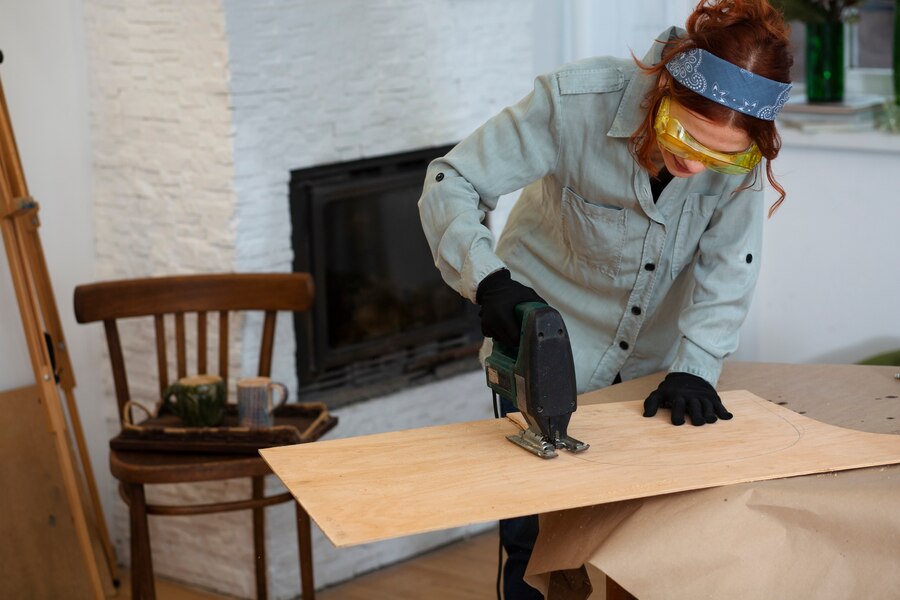
To remove a clear coat from a wood surface, you need a chemical stripper, scrapper, steel wool, gloves, eye protection, plastic sheet or drop cloth, respirator, mineral spirits, and cleaning cloths.

Method # 1: Using Chemical Strippers

Chemical strippers are one of the most effective ways to remove clear coat from wood. They break the bond between the wood and the clear coat, making it easy to scrape the clear coat from the wood surface.

Start by applying the chemical stripper to the wood surface with a paintbrush. Follow the instructions on the label, as different strippers have different application times. Let the stripper sit on the surface for about 15-30 minutes.

Once the stripper has softened the clear coat surface, gently remove it using a scrapper. For thicker finishes, you might need to repeat the application process. After removing the coat, wipe down the wood surface with denatured alcohol.

Method # 2: Sand the clear coat

Sanding is another method of removing a clear coat from wood. This method is suitable for smaller sections and delicate wood surfaces. Chemical strippers can be used to sand in detail.

Start by using coarse sandpaper on the wood surface. Sand in the direction of the wood grain to avoid scratching. After sanding the surface with coarse sandpaper, it is time to use finer sandpaper to remove any finishes. Clean the wood after sanding.

Method # 3: Using a heat gun

You can also use a heat gun to remove the clear coat from the wood. A heat gun softens the clear coat, making it easy to scrape off. This is one of the finest methods for removing clear coat from larger surfaces.

You need to heat the surface by holding the heat gun a few inches above it. As the heat softens the clear coat, it will bubble and lift away from the wood surface.

Now, scrape the surface with a wood scraper. Work on small patches to avoid burning the wood. Do not forget to sand the surface to smooth it.

Safety Tips

There are some safety tips that you need to follow when working with chemicals.

  • When working with chemical strippers, you need to work in a properly ventilated room to avoid inhaling fumes.
  • Do not work with chemicals or a heat gun without wearing protective gear such as a mask, eye protection, and gloves.
  • Always do a patch test before starting to work on the entire surface.

Conclusion

Removing a clear coat from wood requires patience and the right tools, but it can be done efficiently using chemical strippers, sanding, or a heat gun. Following these steps, you can restore and prepare your wood surfaces for refinishing. Whether you are restoring furniture, floors, or wood trim, always protect yourself and the wood as you work.

Continue Reading
Click to comment

Leave a Reply

Your email address will not be published. Required fields are marked *

Home Empowerment

Repair YEX382V3YTE Air Conditioner: Instructions And Tips

Published

on

Repair YEX382V3YTE Air Conditioner

As temperatures rise, the last thing anyone wants is for their air conditioner to malfunction. If you’re the owner of the YEX382V3YTE air conditioner, this guide will provide you with a step-by-step approach to diagnosing and repairing common problems. Whether you’re a homeowner with basic DIY skills or a professional HVAC technician, this article will help you troubleshoot and potentially repair your unit without the need for extensive service calls.

Introduction to the YEX382V3YTE Air Conditioner

The YEX382V3YTE air conditioner is a high-efficiency, durable air conditioning unit that offers powerful cooling for homes and businesses. However, like any piece of machinery, it can experience problems over time due to wear and tear, improper maintenance, or external factors like power surges.

In this guide, we will cover:

  • Common issues with the YEX382V3YTE air conditioner
  • Basic diagnostic procedures
  • Step-by-step repair tips for common problems
  • Preventive maintenance tips

Common Problems with the YEX382V3YTE Air Conditioner

Before diving into the repair process, it’s crucial to identify the common issues that affect the YEX382V3YTE air conditioner. By narrowing down the problem, you can save time and effort, leading to quicker repairs. Below are some common problems users report:

  1. The Air Conditioner Won’t Turn On
  2. Unit is Not Cooling Properly
    • Causes: Dirty filters, low refrigerant levels, clogged condenser coils, or a malfunctioning compressor.
  3. The Air Conditioner Is Leaking Water
    • Causes: Clogged drain line, broken condensate pump, or improper installation.
  4. Unusual Noises
    • Causes: Loose parts, failing fan motor, or obstructed air pathways.
  5. Frequent Cycling (Turning On and Off Too Often)
    • Causes: Dirty air filter, refrigerant leaks, or a malfunctioning thermostat.

Step-by-Step Guide to Diagnosing and Repairing the YEX382V3YTE Air Conditioner

Let’s now get into the core of this guide: troubleshooting and repairing your air conditioner. For safety, always ensure the unit is powered off before performing any repairs.

1. The Air Conditioner Won’t Turn On

  • Step 1: Check the Power Supply Begin by checking the fuse box or circuit breaker. A tripped breaker can prevent the unit from receiving power. If you notice the breaker is tripped, reset it and try turning the air conditioner back on.
  • Step 2: Test the Thermostat Sometimes, the issue lies with the thermostat. Ensure that the thermostat is set to a cooling mode and the temperature is set lower than the current room temperature. Replace the batteries in the thermostat if necessary.
  • Step 3: Inspect the Wiring Check for any loose or disconnected wires between the thermostat and the air conditioner. If you find a loose connection, secure it firmly. If you suspect a wiring issue, you may need the help of a certified HVAC technician to avoid safety hazards.

2. Unit Is Not Cooling Properly

  • Step 1: Clean or Replace the Filters One of the most common causes of inefficient cooling is a clogged air filter. Dirty filters obstruct airflow and reduce the unit’s efficiency. Remove the filters and clean them using warm water and mild detergent. If they are damaged, replace them with compatible filters.
  • Step 2: Check the Refrigerant Levels Low refrigerant levels can affect the unit’s cooling performance. If you suspect a refrigerant leak, contact an HVAC technician, as handling refrigerant requires specialized tools and knowledge.
  • Step 3: Clean the Condenser Coils Dust and debris can accumulate on the condenser coils over time. Turn off the unit, access the outdoor section, and carefully clean the coils using a coil cleaner or a soft brush.
  • Step 4: Inspect the Compressor The compressor is a vital component of the air conditioning unit. If it’s malfunctioning, you might need to replace it, which may require professional assistance.

3. The Air Conditioner Is Leaking Water

  • Step 1: Clear the Drain Line If the drain line is clogged, it can cause water to back up and leak. Use a wet/dry vacuum to suck out any clogs or pour a mixture of water and vinegar down the drain line to break up debris.
  • Step 2: Check the Condensate Pump If the condensate pump has failed, it won’t be able to remove water from the unit. Inspect the pump for any visible damage and replace it if necessary.
  • Step 3: Recheck Installation If the air conditioner was recently installed, ensure that it was installed at the proper angle. The unit should be slightly tilted to allow water to drain out of the back.

4. Unusual Noises

  • Step 1: Tighten Any Loose Components If you hear rattling or banging noises, it could be due to loose screws or parts within the unit. Tighten any loose parts, especially around the fan or casing.
  • Step 2: Inspect the Fan Blades Bent or damaged fan blades can create a lot of noise. If the blades appear bent, carefully straighten them. If they are beyond repair, replace the blades with compatible parts.

5. Frequent Cycling

  • Step 1: Replace the Air Filter A clogged filter can cause the unit to overheat, leading to frequent cycling. Replace the filter and observe whether the issue resolves itself.
  • Step 2: Check for Refrigerant Leaks Low refrigerant can also cause frequent cycling. Have a professional check the refrigerant levels and repair any leaks.
  • Step 3: Test the Thermostat If the thermostat is malfunctioning, it may cause the unit to turn on and off irregularly. Recalibrate or replace the thermostat as needed.

Preventive Maintenance Tips for the YEX382V3YTE Air Conditioner

Routine maintenance can significantly extend the lifespan of your air conditioner and reduce the likelihood of major repairs. Here are some maintenance tips:

  1. Change Filters Regularly: Depending on usage, replace or clean filters every 1-3 months to ensure optimal airflow and cooling efficiency.
  2. Inspect and Clean Coils: Clean the condenser and evaporator coils at least once a year to prevent dirt buildup.
  3. Clear Debris Around the Outdoor Unit: Ensure that the outdoor unit has at least two feet of clearance on all sides and that it is free from leaves, grass, and other debris.
  4. Schedule Annual Professional Inspections: Even if your unit seems to be functioning correctly, it’s a good idea to have a professional perform an annual inspection to check for potential issues.

Repair Cost Estimates for Common YEX382V3YTE Air Conditioner Issues

Here’s a breakdown of typical costs for repairing common issues with the YEX382V3YTE air conditioner:

IssueEstimated Repair Cost
Thermostat Replacement$100 – $300
Air Filter Replacement$10 – $50
Refrigerant Recharge$200 – $600
Compressor Repair/Replacement$1,200 – $2,500
Condensate Pump Replacement$100 – $300
Coil Cleaning$100 – $400

Conclusion

Repair YEX382V3YTE Air Conditioner may seem daunting, but with the right knowledge and tools, many issues can be resolved by homeowners themselves. This guide has provided a comprehensive overview of common problems, troubleshooting steps, and repair tips to help keep your air conditioner running efficiently.

However, remember that certain repairs—especially those involving refrigerants or complex electrical components—should be left to licensed HVAC professionals for safety and compliance reasons.

Regular maintenance is the best way to avoid costly repairs and extend the life of your unit. With attention to detail and proper care, your YEX382V3YTE air conditioner will keep you cool and comfortable for many years to come.

Continue Reading

Home Empowerment

From Drab to Fab: How Epoxy Flooring Reinvents Residential Design

Published

on

Epoxy Flooring

When it comes to home design, floors often don’t get the attention they deserve. They are, after all, the foundation upon which the entire aesthetic of a room is built. While many homeowners default to traditional options like hardwood, tile, or carpet, there’s a rising trend that’s shaking up the design world: epoxy flooring. This innovative material is redefining what residential floors can be, offering a blend of durability, style, and creativity that transforms any space from drab to fab.

In this article, we’ll explore how epoxy flooring is reinventing residential design, turning everyday floors into standout features that elevate the entire look and feel of a home.

The Epoxy Advantage: More Than Just a Floor

Epoxy flooring has long been associated with industrial settings, but it’s quickly gaining popularity in residential spaces. This shift is due in part to epoxy’s unique combination of practicality and aesthetics, which offers homeowners a versatile and stylish alternative to traditional flooring materials.

1. Durability Meets Design:

  • Built to Last: One of the biggest draws of epoxy flooring is its incredible durability. Unlike wood, which can scratch or warp, or tile, which can crack, epoxy is resistant to just about everything—foot traffic, spills, stains, and even impacts. This makes it an ideal choice for high-traffic areas like kitchens, entryways, and basements, where other types of flooring might wear down over time.
  • A Designer’s Dream: But epoxy isn’t just about toughness. It’s also a designer’s dream come true, offering a wide range of customization options that allow homeowners to create floors that are as beautiful as they are functional. Whether you’re looking for a sleek, modern look or something more eclectic, epoxy can be tailored to match your vision.

2. Endless Customization:

  • Color and Pattern Galore: The beauty of epoxy flooring lies in its versatility. Because it’s a liquid that hardens into a solid, it can be mixed with a variety of pigments and additives to create a nearly limitless array of colors and patterns. Want a bold, solid color to make a statement in your living room? No problem. Prefer a more subdued, marble-like pattern for your bathroom? Epoxy’s got you covered.
  • Personalized Finishes: Beyond color, epoxy can be finished in a variety of ways to achieve different effects. A high-gloss finish can give a room a sleek, modern vibe, while a matte finish can create a more subtle, sophisticated look. For those who want to take it a step further, metallic finishes or embedded materials like glitter or quartz can add an extra layer of interest and texture.

Creative Applications of Epoxy in the Home

While epoxy flooring is certainly practical, its true potential lies in its ability to transform spaces in creative and unexpected ways. Here are a few innovative applications that show just how versatile epoxy flooring can be.

1. The Kitchen: A Hub of Style and Functionality:

  • Making a Statement: The kitchen is often considered the heart of the home, so why not make it a showstopper? Epoxy flooring can turn a standard kitchen into a designer’s dream. For a modern look, consider a high-gloss black or white epoxy floor that contrasts with your cabinetry and countertops. Or, for something more artistic, opt for a custom design that incorporates swirls of color or a metallic finish that catches the light.
  • Practical Perks: Beyond aesthetics, epoxy is also incredibly practical for kitchens. Its seamless surface makes it easy to clean, and its resistance to stains means that spilled wine or dropped food won’t leave lasting marks. Plus, because it’s so durable, you won’t have to worry about it getting scratched or damaged by heavy pots, pans, or foot traffic.

2. The Bathroom: Spa-Like Serenity:

  • A Seamless Solution: Bathrooms are another area where epoxy flooring can really shine—literally. Its water-resistant properties make it ideal for this moisture-prone space, while its seamless finish means no grout lines to clean or maintain. Consider a pale, reflective finish to create a spa-like atmosphere, or go bold with a deep, rich color that adds drama and depth.
  • Heat-Friendly: Epoxy flooring can also be paired with radiant floor heating systems, making it a warm and cozy option for bathrooms. Imagine stepping out of the shower onto a heated, smooth, and stylish surface—it’s the kind of luxury that’s surprisingly affordable with epoxy.

3. The Basement: From Functional to Fabulous:

  • Beyond Utility: Basements are often overlooked when it comes to design, but with epoxy flooring, this space can become a true extension of your home’s living area. Epoxy’s resistance to moisture makes it perfect for basements, which are prone to dampness and potential flooding. But more than that, epoxy can transform a dreary basement into a vibrant playroom, a sleek home gym, or even a cozy family room.
  • Design Continuity: One of the benefits of choosing epoxy for your basement is the ability to maintain design continuity throughout your home. If you have a modern aesthetic upstairs, you can continue that look with an epoxy floor in a complementary color or finish. This creates a cohesive feel that makes your basement feel like an integral part of the home, rather than an afterthought.

Sustainability and Low Maintenance: The Hidden Benefits of Epoxy

In addition to its aesthetic and practical advantages, epoxy flooring also offers several benefits that align with modern values, including sustainability and low maintenance.

1. A Greener Option:

  • Eco-Friendly Choices: Many homeowners are looking for ways to reduce their environmental footprint, and epoxy flooring can help in that regard. Some epoxy formulations are now available with low VOC (volatile organic compound) content, which means they emit fewer harmful chemicals during installation and over time. Additionally, because epoxy can be applied over existing flooring, it reduces the need for new materials, cutting down on waste.
  • Longevity Equals Sustainability: The durability of epoxy flooring also contributes to its sustainability. Floors that last longer need to be replaced less frequently, which means fewer materials consumed and less waste generated. This makes epoxy a smart choice for those who want to invest in a flooring option that’s both beautiful and environmentally responsible.

2. Easy Upkeep:

  • Hassle-Free Cleaning: If you’re tired of scrubbing grout lines or worrying about spills, epoxy flooring offers a welcome alternative. Its smooth, non-porous surface resists dirt, dust, and stains, making it incredibly easy to keep clean. A quick sweep and a damp mop are usually all it takes to keep epoxy floors looking their best.
  • Minimal Maintenance: Unlike other flooring options that may require regular sealing, polishing, or refinishing, epoxy floors are low-maintenance by design. Once installed, they require little more than basic cleaning to maintain their appearance. This makes them an excellent choice for busy households where time is at a premium.

Bringing It All Together: Epoxy as a Design Statement

Epoxy flooring is far more than just a functional choice—it’s a way to make a design statement that reflects your personal style and enhances the overall aesthetic of your home. Whether you’re looking to create a bold, modern space or a serene, minimalist retreat, epoxy flooring offers the versatility and creativity you need to bring your vision to life.

1. Personalization is Key:

  • A Floor That’s Uniquely Yours: The ability to customize epoxy flooring is one of its greatest strengths. With so many colors, patterns, and finishes available, no two epoxy floors need to be alike. This allows you to create a space that’s truly personalized, whether you’re designing a home that’s full of vibrant energy or one that’s calm and understated. According to Expert Epoxy, this allows you to create a space that’s truly personalized, whether you’re designing a home that’s full of vibrant energy or one that’s calm and understated.
  • Complementing Your Decor: Epoxy flooring can be designed to complement any style of decor, from industrial chic to classic elegance. By choosing the right color and finish, you can tie the floor into the rest of the room’s design, creating a harmonious look that pulls everything together.

2. A Lasting Impression:

  • Timeless Appeal: While trends in flooring come and go, the sleek, polished look of epoxy flooring has a timeless appeal that transcends fads. Its ability to mimic high-end materials like marble or stone ensures that it will never go out of style, while its durability means it will continue to look great for years to come.
  • Adding Value to Your Home: Finally, investing in epoxy flooring can also add value to your home. Potential buyers will appreciate the durability, low maintenance, and modern aesthetic that epoxy floors provide, making your home more attractive in a competitive market.

Conclusion: Epoxy Flooring—The Future of Residential Design

Epoxy flooring is more than just a practical choice—it’s a revolutionary approach to residential design that combines beauty, durability, and sustainability. As homeowners continue to seek out ways to personalize their spaces and invest in materials that offer long-term value, epoxy flooring is poised to become a go-to option for those who want to transform their homes from the ground up.

Whether you’re looking to make a bold statement in your kitchen, create a serene retreat in your bathroom, or reinvent your basement, epoxy flooring offers the perfect blend of form and function to bring your vision to life.

Continue Reading

Home Empowerment

How to Properly Store Furniture in a Self-Storage Facility?

Published

on

Furniture

Properly storing furniture in a self-storage facility requires more than placing items into a unit. Protecting your belongings from damage and deterioration involves careful planning and organization. Self-storage offers a convenient temporary or long-term storage solution, but achieving optimal results involves more than simply filling a space. We will explore effective strategies for storing furniture to maintain its condition and maximize the use of storage space.

Preparation Before Storage

Proper preparation is critical before placing furniture into a self-storage unit. Start by cleaning each piece of furniture thoroughly. Dust and dirt can lead to damage or stains if left unattended. For upholstered items, consider vacuuming to remove debris. Cleaning wooden surfaces helps prevent mold and mildew growth, which can occur in a closed environment.

Additionally, disassemble any furniture that can be taken apart. This step saves space and reduces the risk of damage during transportation. Wrap and label each piece accordingly to ensure that reassembly is straightforward when you retrieve the items. Finally, an inventory list of all stored items should be made to track their condition and location within the unit.

Packing Techniques for Furniture

The way you pack furniture is crucial for ensuring its longevity while in storage. Start by covering each item with protective material. Use moving blankets or furniture pads to shield surfaces from scratches and dust. Plastic wraps or covers can protect upholstered pieces against moisture and pests. Place smaller items inside larger pieces, such as drawers or cabinets, to optimize space when packing. Avoid overloading boxes, as this can lead to damage or difficulty when handling. If storing items with glass components, such as tables or mirrors, wrap them carefully with bubble wrap and place them in sturdy boxes. Position these items vertically to minimize the risk of breakage. Proper packing ensures that your furniture remains in good condition and makes accessing items easier when needed.

Organizing the Storage Unit

Efficiently organizing the AAA Storage Cibolo Texasstorage unit is essential for accessibility and space management. Begin by placing large and heavy items against the walls of the unit. This arrangement creates a stable foundation and allows easier access to smaller items. Consider creating pathways within the unit for easy navigation. Place frequently accessed items towards the front to avoid moving other furniture to reach them. Use shelves or pallets to elevate items off the floor, which protects them from potential water damage and pests. Label boxes clearly and arrange them systematically to streamline retrieval. This methodical approach protects your furniture and saves time when accessing specific pieces. A well-organized storage unit maximizes space and preserves the condition of your belongings.

Climate Control Considerations

Climate control is a significant factor in maintaining the condition of stored furniture. Extreme temperatures and humidity levels can adversely affect different types of furniture. Wooden furniture can warp or crack in fluctuating temperatures, while metal items are rust-resistant. Upholstered pieces and mattresses can develop mold if exposed to high humidity. Opt for a climate-controlled storage unit if you store valuable or delicate items. These units maintain a consistent temperature and humidity level, providing added protection against environmental factors. Even if you choose a standard unit, consider using desiccants or moisture absorbers to mitigate humidity. Ensuring a stable environment for your furniture is crucial in preventing long-term damage and maintaining its quality.

Handling and Transportation Tips

Proper handling and transportation are essential for avoiding damage during the moving process. When moving furniture into or out of a storage unit, use appropriate tools such as dollies and moving straps to avoid lifting heavy items by hand. This reduces the risk of physical strain and potential damage to the furniture. Ensure that items are securely fastened during transit to prevent shifting and collisions. For large or heavy pieces, enlist the help of additional movers to ensure safety and efficiency. Proper handling during transportation protects your furniture from scratches, dents, and other forms of damage, ensuring that it remains in excellent condition while in storage.

Access and Security Measures

Maintaining access and security is vital when using a self-storage facility. Choose a facility with robust security measures such as surveillance cameras and secure access controls to safeguard your belongings. Ensure that you have easy access to your storage unit without compromising security. Consider visiting the unit periodically to check on the condition of your furniture and address any potential issues, such as pest infestations or mold growth. If you need to access your furniture frequently, opt for a location that provides convenient access hours. Keeping your storage unit secure and well-maintained contributes to the overall protection of your furniture and ensures that it remains in good condition throughout its time in storage.

Storing furniture in a self-storage facility effectively requires careful preparation, packing, and organization. By cleaning and disassembling items, using protective packing materials, and arranging furniture thoughtfully within the unit, you can preserve the condition of your belongings. Climate control and proper handling during transportation further contribute to maintaining furnitures quality. Prioritizing access and security ensures that your furniture remains protected and easily accessible. By following these guidelines, you can make the most of your self-storage experience and keep your furniture in excellent shape when you need it again.

Continue Reading

Trending