Connect with us

Technology

Slave Cylinder: Essential Insights for Automotive Maintenance

Published

on

Slave Cylinder

Introduction

In the complex world of automotive mechanics, every component has a critical role in ensuring a vehicle operates smoothly and efficiently. Among these components, the slave cylinder is a key player in the hydraulic clutch system. Its proper functioning is crucial for seamless gear changes and overall driving comfort. This article provides an in-depth look at the slave cylinder, including its functions, types, common issues, and maintenance tips, along with a comparative chart and frequently asked questions.

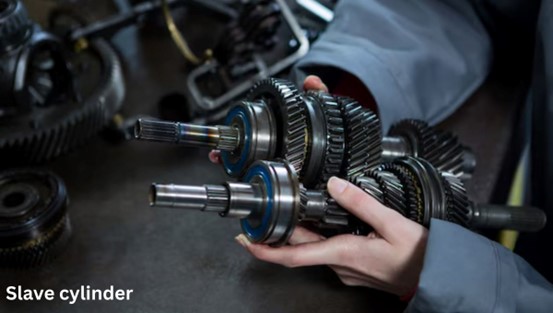
What is a Slave Cylinder?

The slave cylinder is an integral part of a vehicle’s hydraulic clutch system. It works in conjunction with the master cylinder to facilitate the disengagement of the clutch when the driver presses the clutch pedal. Located near the transmission, the slave cylinder uses hydraulic pressure to push the clutch release fork or bearing, enabling smooth gear shifts and effective power transfer from the engine to the transmission.

Key Functions of the Slave Cylinder

Hydraulic Pressure Transmission

The slave cylinder transmits hydraulic pressure from the master cylinder to the clutch mechanism. When the clutch pedal is pressed, the master cylinder generates hydraulic pressure, which is transferred through a fluid line to the slave cylinder. This pressure actuates the clutch release mechanism, disengaging the clutch and allowing for gear changes.

Clutch Engagement and Disengagement

The slave cylinder plays a crucial role in engaging and disengaging the clutch. Proper operation of the slave cylinder ensures that the clutch fully disengages when the pedal is pressed and re-engages when the pedal is released. This is essential for smooth shifting and preventing gear grinding.

Compensating for Wear

As clutch components wear over time, the slave cylinder compensates by adjusting the clutch engagement point. This helps maintain proper clutch operation and performance, even as the clutch system ages.

Types of Slave Cylinders

There are several types of slave cylinders, each with distinct features and applications:

Hydraulic Slave Cylinder

  • Operation: Uses hydraulic fluid to actuate the clutch mechanism.
  • Advantages: Provides precise control and smooth operation; less physical effort required from the driver.
  • Maintenance: Requires regular checks of hydraulic fluid levels and system for leaks.

Mechanical Slave Cylinder

  • Operation: Operated by a mechanical linkage rather than hydraulic pressure.
  • Advantages: Simpler design with fewer parts; generally lower cost.
  • Maintenance: Requires adjustment of mechanical linkages and periodic inspection for wear.

Remote Slave Cylinder

  • Operation: Located away from the transmission, often connected via a hydraulic line.
  • Advantages: Allows for more flexible installation; useful in certain performance or custom applications.
  • Maintenance: Similar to hydraulic systems, requires checks for fluid levels and leaks.

Comparative Analysis of Slave Cylinders

To provide a clearer understanding of the different types of slave cylinders and their characteristics, here’s an expanded comparative chart:

FeatureHydraulic Slave CylinderMechanical Slave CylinderRemote Slave Cylinder
OperationUses hydraulic fluidOperated by mechanical linkageUses hydraulic fluid
Installation LocationMounted near the transmissionMounted on the clutch housingCan be mounted remotely from the transmission
MaintenanceRequires periodic fluid checksMinimal maintenance, but linkage needs adjustmentRequires periodic fluid checks
PerformanceProvides smooth and precise operationMay have more play and less precisionProvides smooth and precise operation
CostModerate to highGenerally lowerModerate to high
Common IssuesLeaks, air in the systemWear on linkage, adjustment issuesLeaks, air in the system
Fluid TypeHydraulic fluid (often DOT 3 or DOT 4)N/AHydraulic fluid (often DOT 3 or DOT 4)
Installation ComplexityModerateLowModerate

Common Issues with Slave Cylinders

Leaking Fluid

Fluid leaks are a common issue with hydraulic slave cylinders. A leak can result in a drop in hydraulic pressure, leading to difficulties in clutch operation. Regular inspection and prompt repair of leaks are essential to maintaining system performance.

Air in the System

Air bubbles trapped in the hydraulic system can cause a spongy or soft clutch pedal and reduce the effectiveness of the clutch. Bleeding the system to remove air is necessary to restore proper function.

Wear and Tear

Over time, the internal components of the slavecylinder can wear out, leading to reduced performance or failure. Regular maintenance and timely replacement of worn parts can prevent this issue.

Clutch Drag

If the slavecylinder fails to fully disengage the clutch, it can cause clutch drag, which makes shifting gears difficult and can lead to increased wear on the transmission.

Conclusion

The slave cylinder is a critical component of the hydraulic clutch system, playing a vital role in ensuring smooth and efficient gear changes. By understanding its function, common issues, and maintenance requirements, vehicle owners can better manage this essential part of their automotive system. Whether you’re a seasoned mechanic or a car enthusiast, keeping the slavecylinder in good condition is key to maintaining overall vehicle performance and preventing costly repairs. Regular inspections, timely maintenance, and prompt repairs are essential for keeping this crucial component operating smoothly and effectively.

FAQs

How does a slave cylinder differ from a master cylinder?

The master cylinder generates hydraulic pressure when the clutch pedal is pressed, while the slavecylinder receives this pressure and uses it to actuate the clutch release mechanism. The master cylinder is typically located at the clutch pedal, and the slavecylinder is located near the transmission.

Can a malfunctioning slave cylinder cause damage to other components?

Yes, a malfunctioning slavecylinder can lead to improper clutch engagement or disengagement, which can cause damage to the clutch, transmission, and related components. Ensuring proper maintenance and timely repair is crucial to prevent such damage.

How can I determine if my slave cylinder needs replacement?

Signs that your slavecylinder may need replacement include difficulty shifting gears, a soft or spongy clutch pedal, fluid leaks around the transmission, and grinding noises during gear changes. If you experience these symptoms, it’s advisable to have the slavecylinder inspected by a professional mechanic.

What is the typical lifespan of a slave cylinder?

The lifespan of a slavecylinder can vary depending on driving conditions and maintenance practices. On average, a slavecylinder can last between 60,000 to 100,000 miles. Regular maintenance and prompt attention to any issues can help extend its lifespan.

Are there any special tools required for replacing a slave cylinder?

Replacing a slavecylinder typically requires basic automotive tools, including wrenches, screwdrivers, and a brake fluid bleeder kit. In some cases, specialized tools may be needed to access or remove the slavecylinder, depending on the vehicle’s design.

Continue Reading
Click to comment

Leave a Reply

Your email address will not be published. Required fields are marked *

Technology

ecvh0 dforce master how to: Unlock Its Benefits

Published

on

ecvh0 dforce master how to

Introduction

Struggling with ecvh0 dforce master setup? You’re not alone. Many users find its configuration tricky, but mastering it unlocks powerful automation and efficiency. This guide breaks down the process into simple steps, helping you harness its full potential quickly.

Why It Matters

Properly setting up ecvh0 dforce master ensures smoother workflows, reduces errors, and maximizes productivity. Whether for personal projects or enterprise use, mastering this tool can save hours of manual work.

Step-by-Step Guide

1. Install & Configure

  • Download the latest ecvh0 dforce master package from the official site.
  • Follow the installation wizard, ensuring all dependencies are met.

2. Set Up Permissions

  • Assign appropriate user roles (admin, editor, viewer).
  • Configure access controls to prevent unauthorized changes.

3. Integrate with Your System

  • Connect ecvh0 dforcemaster to your existing tools via API.
  • Test the connection to ensure seamless data flow.

4. Automate Key Tasks

  • Use built-in templates or create custom automation rules.
  • Schedule recurring tasks to minimize manual input.

5. Monitor & Optimize

  • Track performance metrics in the dashboard.
  • Adjust settings for better speed and efficiency.

Pro Tip

Use keyboard shortcuts to navigate ecvh0 dforcemaster faster. Press Ctrl + K (Windows) or Cmd + K (Mac) to open the command palette for quick actions.

Conclusion

Mastering ecvh0 dforce master simplifies complex tasks and boosts efficiency. By following these steps, you’ll optimize your workflow and get the most out of this powerful tool.

FAQ

Is ecvh0 dforcemaster free?

It offers a free tier with limited features; advanced options require a subscription.

Can I use it offline?

Some features work offline, but full functionality requires an internet connection.

How secure is ecvh0 dforcemaster?

It uses encryption and role-based access for security. For best practices, check our security guide.

Continue Reading

Technology

How to Disassemble a Sony KV-27S42 CRT TV: Complete Guide

Published

on

How to Disassemble a Sony KV-27S42 CRT TV

Introduction

The Sony KV-27S42 is a classic CRT television, and while it’s no longer in production, many enthusiasts still repair, modify, or salvage these sets. However, disassembling a CRT TV requires caution—high-voltage components and delicate electronics mean one wrong move could be dangerous.

This guide will walk you through the full disassembly process of the KV-27S42, covering:
✔ Safety precautions (CRT discharge, avoiding shocks)
✔ Tool requirements (what you’ll need)
✔ Step-by-step teardown (removing the case, tube, and boards)
✔ Salvaging useful parts (what to keep or discard)
✔ Reassembly tips (if needed)

Whether you’re repairing, modding, or recycling, this guide ensures you do it safely and efficiently.

Why Disassemble a KV-27S42?

Before diving in, it’s worth understanding why you might need to take apart this TV:

🔹 Repairs – Fixing power supply issues, bad capacitors, or video problems.
🔹 Modifications – RGB or component video mods for retro gaming.
🔹 Salvage – Reusing the CRT, speakers, or other parts for projects.
🔹 Safe Disposal – CRTs contain hazardous materials (lead, phosphors) and must be recycled properly.

Warning:
⚠ CRTs hold high voltage even when unplugged – improper handling can result in severe electric shock.
⚠ The tube is heavy and fragile – dropping it can cause implosion or injury.

Tools & Safety Gear You’ll Need

Before starting, gather these essentials:

Essential Tools

✔ Screwdrivers (Phillips & flathead)
✔ CRT discharge tool (or insulated screwdriver + wire)
✔ Needle-nose pliers (for small connectors)
✔ Anti-static wrist strap (optional but recommended)

Safety Precautions

✔ Work in a dry, well-lit area
✔ Discharge the CRT before touching anything
✔ Wear gloves & safety glasses (glass shards are sharp)
✔ Keep pets/kids away (CRTs are dangerous when mishandled)

Step-by-Step Disassembly Guide

Step 1: Unplug & Discharge the CRT

  1. Unplug the TV and wait at least 30 minutes for capacitors to discharge.
  2. Locate the anode cap (the large rubber suction cup on the CRT).
  3. Discharge the CRT:
    • Use a CRT discharge tool (best option).
    • Alternative: Clip one end of a wire to the TV’s metal frame and carefully slide a flathead screwdriver under the anode cap until you hear/see a small spark.

Step 2: Remove the Rear Cover

  1. Flip the TV face-down on a soft surface (blanket/towel).
  2. Remove all rear screws (some may be hidden under stickers).
  3. Gently pry the back cover off—plastic tabs may hold it in place.

Step 3: Disconnect Internal Cables

  1. Take photos of all connections before unplugging anything.
  2. Unplug:
    • Deflection yoke (two large plugs near the tube neck)
    • Anode cap (already discharged, but still be careful)
    • Speaker wires & control board connectors

Step 4: Remove the CRT Tube

  1. Unscrew the 4 CRT mounting brackets (they hold the tube to the frame).
  2. Carefully lift the tube out – it’s extremely heavy (get help if needed).
  3. Set it face-down on a soft surface to avoid scratches.

Step 5: Extract Circuit Boards & Other Components

  1. Mainboard – Remove screws and gently lift it out.
  2. Power supply – Disconnect all wires before removing.
  3. Speakers & tuner – Useful for retro projects if salvaging.

Pro Tips for Safe Disassembly

🔧 Label every wire and screw (masking tape + marker) to avoid confusion later.
🔧 Use a magnetic tray to keep screws organized.
🔧 If keeping the CRT, store it upright to avoid stress on the glass.

What Can You Salvage?

If you’re parting out the TV, these components are useful:
✅ CRT tube – Great for arcade builds or replacements.
✅ Speakers – Decent quality for DIY audio projects.
✅ Power supply & mainboard – Useful for electronics tinkering.
✅ Control knobs & buttons – Handy for retro mods.

How to Dispose of a CRT Safely

CRTs contain leaded glass and toxic phosphors, so never throw them in the trash. Instead:
♻ Check local e-waste recycling centers (many accept CRTs for free).
♻ Contact electronics repair shops – Some may take old TVs.
♻ Look for CRT buyback programs (some collectors pay for working tubes).

Conclusion: How to Disassemble a Sony KV-27S42 CRT TV

How to Disassemble a Sony KV-27S42 CRT TV,  requires patience and safety awareness, but it’s a rewarding project for retro tech enthusiasts. Whether you’re fixing, modding, or salvaging, following this guide ensures a smooth process.

FAQ About How to Disassemble a Sony KV-27S42 CRT TV

1. Can I get shocked if the TV has been unplugged for days?

Yes! CRTs can hold charge for weeks. Always discharge before working.

2. How heavy is the KV-27S42 CRT?

Around 50-60 lbs (23-27 kg)—lift carefully or get help.

3. Can I reuse the CRT in another TV?

Possibly, but tube swaps require matching specs (size, impedance, etc.).

4. What if I break the CRT?

The glass is under vacuum—if it cracks, it can implode. Wear safety gear!

5. Is it worth repairing a KV-27S42?

If you love CRTs, yes! These Sonys have great picture quality for retro gaming.


Continue Reading

Technology

How Much Does Window Tinting Cost? Save Money, Boost Comfort

Published

on

How Much Does Window Tinting Cost?

Introduction

Window tinting costs can vary widely, leaving many car owners unsure about fair pricing. Whether you want UV protection, privacy, or heat reduction, understanding the factors that influence cost helps you budget wisely. This guide breaks down pricing, so you get the best value without surprises.

Why It Matters

Window tinting isn’t just about style—it blocks harmful UV rays, reduces glare, and keeps your car cooler. But overpaying or choosing cheap options can lead to poor quality. Knowing the average costs ensures you invest in a tint that lasts and performs well.

Step-by-Step Guide to Window Tinting Costs

1. Understand the Pricing Factors

  • Film Quality: Basic dyed film starts at 50–150, while premium ceramic tints run 200–800.
  • Vehicle Size: Smaller cars cost less (100–300) vs. SUVs (200–600).
  • Number of Windows: Full-car tinting costs more than just side windows.

2. Compare Film Types

  • Dyed Film (50–150): Affordable but fades faster.
  • Carbon Film (150–350): Better heat rejection, matte finish.
  • Ceramic Film (200–800): Top-tier heat/UV protection, no signal interference.

3. Factor in Labor Costs

Professional installation adds 50–200, depending on complexity. DIY kits (20–100) are cheaper but risk bubbles/peeling.

4. Check Local Market Prices

Urban areas often charge more. Get 3+ quotes to avoid overpaying.

5. Consider Legal Limits

Some states restrict tint darkness (e.g., California bans <70% VLT on front windows). Non-compliant tints may require costly removal.

Pro Tip

“Ask for a warranty! Reputable shops offer 5–10-year guarantees against peeling or fading—saving you long-term costs.”

Conclusion: How Much Does Window Tinting Cost

Window tinting cost 50–800+, depending on film type, vehicle size, and labor. Investing in ceramic film or a trusted installer ensures durability and performance. Always check local laws and compare quotes to make a smart choice.

FAQ: How Much Does Window Tinting Cost

1. Is tinting worth the cost?
Yes—it reduces skin-damaging UV rays by 99% and lowers AC use, saving fuel.

2. How long does tint last?
High-quality tints last 10+ years; cheap ones fade in 2–3 years.

3. Can I tint my windshield?
Most states only allow a clear or light tint strip. Check your local laws.

4. Does tint affect visibility?
Not if you choose the right VLT (%)—go for 35% or higher for safety.

Continue Reading

Trending