Home Empowerment
Post-Construction Cleaning: Transforming Chaos into a Pristine Space

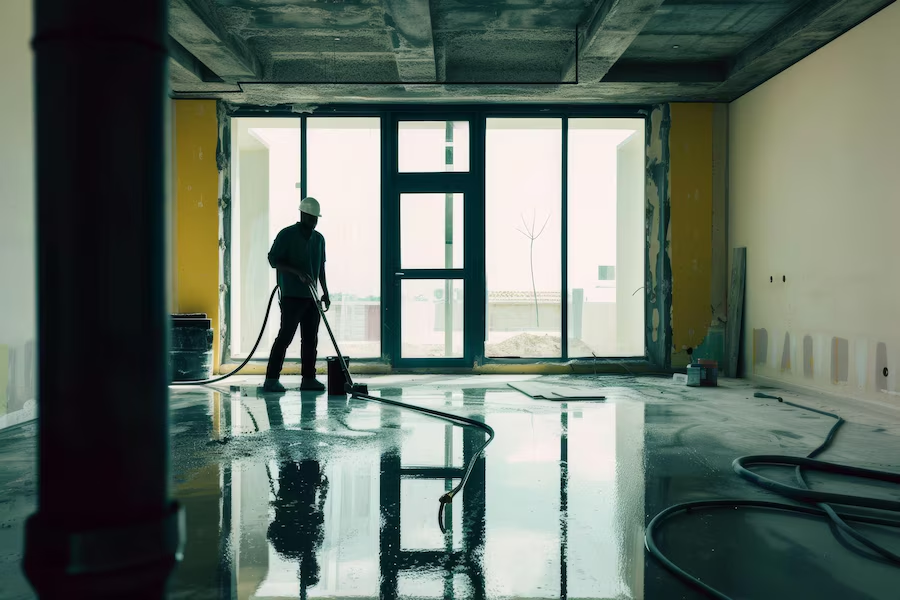
The completion of a construction project, whether it’s a home renovation, new build, or commercial development, is an exciting milestone. However, before you can fully enjoy the results, there’s one critical task left: post-construction cleaning. The dust, debris, and clutter left behind can be overwhelming, but with the right approach, you can transform the chaos into a pristine, livable space.
This article explores the importance of post-construction cleaning, outlines the key areas to focus on, and provides practical tips for tackling the mess effectively.
Why Post-Construction Cleaning is Essential
Post-construction cleaning is not just about aesthetics; it’s about ensuring that your new or renovated space is safe, functional, and ready to be occupied. Here’s why this step is so crucial.
1. Ensuring a Safe Environment:
- Health Risks: Construction dust and debris can pose significant health risks, particularly to those with allergies, asthma, or other respiratory conditions. Fine dust particles, in particular, can linger in the air long after the construction crew has left, leading to poor indoor air quality. Post-construction cleaning removes these particles, making the space safe for occupants.
- Preventing Accidents: Construction sites are filled with potential hazards, from sharp objects like nails and screws to leftover materials like wood scraps and tiles. Thorough cleaning eliminates these dangers, reducing the risk of accidents and injuries once the space is in use.
2. Preparing the Space for Use:
- Functional Readiness: A newly constructed or renovated space is only as good as its usability. Dust-covered floors, smudged windows, and debris-cluttered countertops can detract from the functionality of the space. Post-construction cleaning ensures that every surface is clean, polished, and ready for immediate use.
- Enhancing Aesthetics: The final step in any construction project is revealing the finished product in all its glory. However, even the most beautifully designed space can lose its appeal if it’s covered in dust and grime. Cleaning reveals the true beauty of the work done, allowing the design elements to shine through without distractions.
Key Areas to Focus on During Post-Construction Cleaning
Post-construction cleaning is more intensive than regular cleaning and requires a systematic approach to ensure no area is overlooked. Here are the key areas that need special attention.
1. Floors and Carpets:
- Hard Floors: Construction dust and debris can scratch and damage hard floors if not cleaned properly. Start by sweeping or vacuuming to remove loose dirt and particles. Follow up with a thorough mopping using a cleaner suitable for the flooring material, whether it’s wood, tile, or laminate. For stubborn spots like paint splatters or adhesive residue, use a gentle scraper or a specialized cleaning solution.
- Carpets and Rugs: Carpets can trap dust and debris, making them a challenge to clean after construction. Begin by vacuuming slowly and thoroughly, going over each area multiple times to ensure all particles are removed. If the carpet still appears dirty or has absorbed construction odors, consider having it professionally cleaned. This will ensure that any deep-seated dirt is extracted, leaving the carpet fresh and clean.
2. Windows and Glass Surfaces:
- Removing Smudges and Residue: Windows and glass surfaces often bear the brunt of construction activities, with smudges, fingerprints, and adhesive residues marring their appearance. Use a streak-free glass cleaner and a microfiber cloth to clean these surfaces, paying special attention to corners and edges where dust tends to accumulate. For stubborn residues, a razor blade or specialized window scraper can be used, but be careful not to scratch the glass.
- Clearing Out Dust: Dust can settle in window tracks, frames, and sills, creating an unsightly and potentially damaging buildup. Use a vacuum with a brush attachment to clean out these areas, followed by wiping down with a damp cloth. Clean windows not only improve the aesthetics of the space but also allow more natural light to filter in, enhancing the overall atmosphere.
3. Walls, Ceilings, and Baseboards:
- Dusting and Wiping: Even vertical surfaces like walls and ceilings can accumulate a surprising amount of dust during construction. Use a dry microfiber cloth or a dusting tool with an extendable handle to remove dust from these surfaces. For painted walls, use a damp cloth with a mild cleaner if needed, but test in an inconspicuous area first to ensure it doesn’t damage the paint.
- Baseboards and Trim: Baseboards and trim are often overlooked but can collect significant dust and debris during construction. Wipe them down with a damp cloth, and use a small brush or vacuum attachment to clean any intricate detailing. This attention to detail can make a big difference in the overall cleanliness of the space.
4. Kitchen and Bathroom Areas:
- Appliance Cleaning: Kitchens and bathrooms often house appliances that need special attention after construction. Clean inside and out, ensuring no construction dust has settled in vents, filters, or behind appliances. In the bathroom, scrub and disinfect sinks, toilets, bathtubs, and showers to remove any construction residue.
- Cabinets and Drawers: Dust can settle inside cabinets and drawers, even if they’ve been closed during construction. Empty each cabinet and drawer, vacuum out any debris, and wipe down the surfaces with a damp cloth. This ensures that these storage spaces are clean and ready for use.
5. Light Fixtures and Vents:
- Light Fixtures: Dust and debris can accumulate on light fixtures, affecting their appearance and functionality. Carefully remove light covers or shades, and clean them with warm, soapy water or a suitable cleaner. Wipe down the bulbs and fixtures themselves, and ensure they are free from dust before reassembling.
- Air Vents and Filters: Construction dust can easily find its way into air vents and filters, which can compromise air quality and the efficiency of your HVAC system. Replace or clean air filters as needed, and vacuum the vent covers to remove any buildup. Ensuring that your HVAC system is clean helps maintain a healthy indoor environment post-construction.
Practical Tips for Efficient Post-Construction Cleaning
Post-construction cleaning can be a daunting task, but with a few strategic approaches, it can be manageable and effective.
1. Start from the Top:
- Ceilings to Floors: Always begin cleaning from the highest point in the room, such as the ceiling or top of the walls, and work your way down. This ensures that any dust or debris that falls during cleaning is addressed as you move downwards, preventing you from having to re-clean surfaces.
- High Areas First: Clean high shelves, light fixtures, and ceiling fans first. Then, move on to the lower areas like countertops and floors. This method saves time and ensures that no area is accidentally overlooked.
2. Use the Right Tools:
- Microfiber Cloths: Microfiber cloths are excellent for capturing dust and debris without spreading it around. They’re gentle on surfaces and can be used both dry and damp, making them versatile for various cleaning tasks.
- HEPA-Filter Vacuum: A vacuum with a HEPA filter is essential for capturing fine dust particles that might otherwise be recirculated into the air. Use it on all surfaces, including floors, walls, and even upholstery, to ensure thorough dust removal.
- Specialized Cleaners: Depending on the surfaces you’re cleaning, you may need specialized products. For example, a gentle, non-abrasive cleaner is ideal for stainless steel appliances, while a pH-neutral cleaner is best for natural stone surfaces like granite or marble.
3. Don’t Rush the Process:
- Take Your Time: Post-construction cleaning is not a task that should be rushed. Take the time to clean each area thoroughly, ensuring that no detail is overlooked. This attention to detail will pay off when the space is finally ready for use.
- Consider Hiring Professionals: If the scope of the cleaning is large or particularly challenging, consider hiring a professional cleaning service. Experts like Cleaners Kingdom have the experience, tools, and knowledge to handle post-construction cleaning efficiently and effectively, ensuring that the space is ready for occupancy.
Conclusion: Bringing Your New Space to Life
Post-construction cleaning is a vital step in the transition from a construction site to a livable, functional space. By focusing on key areas, using the right tools, and taking your time, you can transform a dusty, cluttered environment into a pristine, welcoming home or workspace.
Whether you handle the cleaning yourself or enlist the help of professionals, the end result will be a space that’s not only beautiful but also safe and ready for whatever comes next. After all the hard work of construction, a thorough cleaning is the final touch that brings your new space to life.
Home Empowerment
How to Get Pee Smell Out of Couch: Solutions for a Fresh Home

Few household smells are as stubborn—or as embarrassing—as urine odor embedded in a couch. Whether it’s from a potty-training toddler, an elderly pet, or an unexpected accident, that lingering ammonia scent can make your living space feel unclean. The good news? With the right techniques, you can completely eliminate urine smells and restore freshness to your upholstery.
This comprehensive guide covers everything from immediate emergency response to deep-cleaning solutions for set-in odors. We’ll explore both DIY remedies and professional-grade solutions, ensuring you have options for every level of mess.
Why Proper Urine Odor Removal Matters
Ignoring urine smells doesn’t just create an unpleasant environment—it can lead to bigger problems:
- Bacterial growth: Urine breeds bacteria, which can cause health issues.
- Repeat accidents: Pets often remark the same spot if the scent remains.
- Long-term damage: Urine can degrade fabric and cushioning over time.
By acting quickly and using the right cleaning methods, you’ll protect your furniture and maintain a fresh, hygienic home.
Step-by-Step Guide to Remove Pee Smell from Couch
1. Act Fast: Blot Up Excess Liquid
Why it works: The sooner you remove urine, the less it soaks into fibers.
- Materials needed: Absorbent towels, paper towels, or a dry microfiber cloth.
- Technique:
- Press (don’t rub) firmly to soak up liquid.
- Replace towels as they become saturated.
- If the urine is already dry, skip to step 2.
2. Neutralize Odors with Vinegar Solution
Why it works: Vinegar’s acidity breaks down uric acid crystals, the main cause of lingering smells.
- Mix: 1 part white vinegar + 1 part cold water in a spray bottle.
- Application:
- Lightly mist the affected area (test on a hidden spot first).
- Let sit for 10-15 minutes.
- Blot dry with a clean cloth.
- Bonus: Add a few drops of essential oil (e.g., lavender) for a fresh scent.
3. Deep Clean with Baking Soda
Why it works: Baking soda absorbs odors and lifts remaining stains.
- Method:
- Sprinkle a generous layer over the damp area.
- For tough smells, mix baking soda with hydrogen peroxide (3%) to form a paste.
- Let sit for 6+ hours (overnight is best).
- Vacuum thoroughly.
4. Use an Enzyme Cleaner for Stubborn Stains
Why it works: Enzymes break down urine’s organic compounds, eliminating odors at the source.
- Top picks: Nature’s Miracle, Rocco & Roxie, or Simple Solution.
- How to apply:
- Follow product instructions (usually involves soaking the area).
- Allow to air-dry completely—don’t rinse!
5. Machine Wash Removable Covers (If Applicable)
- Best detergent: Use an enzyme-based or oxygen bleach formula.
- Drying: Air-dry in sunlight (UV rays help kill bacteria).
Pro Tips for Maximum Effectiveness
✅ Avoid Heat: Never use steam or hot water—it sets urine stains and odors.
✅ Blacklight Trick: Use a UV flashlight to find old, hidden urine spots.
✅ Prevent Residue: Rinse with cold water after vinegar treatment to avoid stickiness.
✅ For Leather Couches: Use a leather-safe enzymatic cleaner to avoid damage.
When to Call a Professional
If the smell persists after multiple treatments, consider:
- Professional upholstery cleaning (hot water extraction method).
- Ozone treatment (for severe, deep-set odors).
Final Thoughts
How to Get Pee Smell Out of Couch requires quick action, the right cleaners, and patience. By following these steps—especially using enzyme treatments for stubborn odors—you can restore your couch to a fresh, odor-free state.
FAQ: Your Top Questions Answered
Does vinegar discolor couch fabric?
It shouldn’t, but always test on a hidden area first.
Can I use bleach on my couch?
No! Bleach can damage fabric and react with urine, making smells worse.
How do I stop my pet from peeing on the couch again?
- Use a pet deterrent spray.
- Place a washable waterproof cover.
- Retrain with positive reinforcement.
Why does the smell come back after cleaning?
If urine reached the cushion foam, you may need a deep soak with enzyme cleaner or professional help.
Home Empowerment
How to Get Rid of German Roaches: The Ultimate Guide

German roaches (Blattella germanica) are among the most stubborn household pests. Unlike other roach species, they reproduce rapidly, hide in tight spaces, and quickly develop resistance to pesticides. If you’re dealing with an infestation, this guide will walk you through how to get rid of German roaches using proven, science-backed methods.
Why German Roaches Are So Hard to Eliminate
Before diving into solutions, it’s crucial to understand why these pests are so resilient:
✅ Rapid Reproduction – A single female can produce up to 400 offspring in her lifetime.
✅ Pesticide Resistance – They adapt quickly to chemical treatments.
✅ Nocturnal & Secretive – They hide in cracks, appliances, and electrical outlets.
Now, let’s tackle the problem systematically.
Step 1: Identify the Infestation
German roaches are small (½ inch), light brown, with two dark stripes behind their heads. Signs of infestation include:
🔍 Droppings (tiny black specks)
🔍 Egg cases (oothecae) – Small, brown, capsule-like
🔍 Musty odor – A sign of large infestations
Step 2: Sanitation – Cut Off Their Food Supply
Roaches thrive in dirty environments. To discourage them:
✔ Store food in airtight containers
✔ Clean spills immediately
✔ Take out trash daily
✔ Fix leaky pipes (roaches need water)
Step 3: Use German Roach-Specific Baits
Why baits work best:
German roaches eat dead roaches and feces, making baits highly effective. The poison spreads through the colony.
Top Bait Choices:
Product | Active Ingredient | Effectiveness |
---|---|---|
Advion Gel Bait | Indoxacarb | ★★★★★ |
Combat Max Roach Killing Gel | Hydramethylnon | ★★★★☆ |
Invict Gold Cockroach Gel | Abamectin | ★★★★★ |
How to Apply:
- Place pea-sized drops near hiding spots (under sinks, behind fridges).
- Avoid spraying insecticides—they’ll scatter roaches, worsening the problem.
Step 4: Apply Insect Growth Regulators (IGRs)
IGRs disrupt roach reproduction by preventing nymphs from maturing. Recommended brands:
✅ Gentrol Point Source (Hydroprene)
✅ NyGuard IGR Concentrate
Step 5: Seal Entry Points
Prevent re-infestation by:
🔧 Caulking cracks in walls
🔧 Installing door sweeps
🔧 Covering vents with fine mesh
Step 6: Monitor with Sticky Traps
Place sticky traps in hotspots to track remaining roaches. Brands like Harris Roach Traps work well.
Step 7: When to Call a Professional
If DIY methods fail after 4-6 weeks, consider hiring an exterminator. They use stronger treatments like:
💉 Fumigation
💉 Residual insecticide sprays
Prevention: Keep Roaches from Coming Back
🚫 Avoid cardboard storage (roaches love it)
🚫 Inspect groceries before storing
🚫 Regularly deep-clean kitchens & bathrooms
German Roach vs. Other Roaches (Comparison Chart)
Feature | German Roach | American Roach | Oriental Roach |
---|---|---|---|
Size | ½ inch | 1.5–2 inches | 1 inch |
Color | Light brown | Reddish-brown | Dark brown/black |
Preferred Habitat | Kitchens, bathrooms | Sewers, basements | Damp areas |
Reproduction Speed | Very fast | Moderate | Slow |
Final Verdict: How to Get Rid of German Roaches for Good
- Use gel baits (Advion, Invict Gold).
- Apply IGRs to stop reproduction.
- Maintain strict sanitation.
- Seal entry points.
- Monitor with traps.
Home Empowerment
Heliconia Color: Transform Your Garden with Tropical Beauty

Heliconias, often called “lobster claws” or “parrot flowers,” are the crown jewels of tropical gardens. Their bold, vibrant colors and unique shapes make them a favorite among gardeners and landscapers. But what makes heliconia color so captivating? And how can you harness their beauty to transform your outdoor space?
In this comprehensive guide, we’ll dive deep into the world of heliconias. From their origins and varieties to practical growing tips and design ideas, you’ll walk away with everything you need to know to make these tropical wonders the star of your garden.
Why Heliconia Color is a Game-Changer for Your Garden
Heliconias are more than just pretty flowers—they’re a statement. Their fiery reds, sunny yellows, and deep oranges can instantly elevate any garden or landscape. Here’s why heliconia color is so special:
- Unmatched Vibrancy: Heliconias boast some of the most intense hues in the plant kingdom.
- Tropical Appeal: They bring an exotic, vacation-like vibe to your space.
- Versatility: Whether in pots, borders, or as focal points, heliconias adapt to various garden styles.
The Science Behind Heliconia Color
Heliconias owe their stunning colors to a combination of pigments and environmental factors. The primary pigments responsible for their hues are:
- Anthocyanins: These produce red, purple, and blue shades.
- Carotenoids: Responsible for yellows and oranges.
- Chlorophyll: Adds a touch of green to the bracts and leaves.
Interestingly, heliconia color can vary depending on factors like soil pH, sunlight, and temperature. For instance, heliconias grown in slightly acidic soil often exhibit deeper reds, while those in alkaline soil may lean toward yellows.
Top Heliconia Varieties for Jaw-Dropping Color
With over 200 species, heliconias offer a rainbow of options. Here are some of the most popular varieties to consider:
Variety | Color | Height | Best For |
---|---|---|---|
Heliconia Rostrata | Red and Yellow | 6-15 ft | Backdrop or Focal Point |
Heliconia Psittacorum | Orange and Green | 3-6 ft | Borders and Containers |
Heliconia Caribaea | Deep Red and Gold | 10-20 ft | Tropical Landscapes |
Heliconia Wagneriana | Multicolored (Red, Yellow, Green) | 4-8 ft | Accent Planting |
How to Grow and Care for Heliconias: A Step-by-Step Guide
1. Choosing the Right Location
Heliconias thrive in warm, humid climates (USDA zones 10-12). They need:
- Full to Partial Sunlight: At least 6 hours of sunlight daily.
- Well-Draining Soil: Rich in organic matter.
- Space to Grow: Some varieties can reach up to 20 feet tall!
2. Planting Tips
- Dig a hole twice the size of the root ball.
- Mix compost or aged manure into the soil for added nutrients.
- Water thoroughly after planting.
3. Watering and Feeding
- Water: Keep the soil consistently moist but not waterlogged.
- Fertilizer: Use a balanced, slow-release fertilizer every 6-8 weeks during the growing season.
4. Pruning and Maintenance
- Remove dead or damaged leaves to encourage new growth.
- Divide overcrowded clumps every 2-3 years to maintain vigor.
Designing with Heliconia Color: Tips and Ideas
Heliconias are incredibly versatile in garden design. Here are some creative ways to use them:
- Tropical Oasis: Pair heliconias with palms, ferns, and orchids for a lush, jungle-like feel.
- Color Blocking: Use contrasting heliconia colors to create bold, eye-catching displays.
- Container Gardening: Grow smaller varieties like Heliconia Psittacorum in pots for patios or balconies.
- Cut Flowers: Heliconias make stunning floral arrangements that last up to two weeks.
Common Challenges and How to Overcome Them
While heliconias are relatively low-maintenance, they can face a few challenges:
- Pests: Watch out for aphids and spider mites. Use neem oil or insecticidal soap as a natural remedy.
- Fungal Diseases: Ensure proper air circulation and avoid overwatering to prevent issues like leaf spot.
- Cold Sensitivity: In cooler climates, grow heliconias in containers and bring them indoors during winter.
Heliconia Color in Action: A Case Study
Project: Tropical Resort Landscape
Location: Florida, USA
Goal: Create a vibrant, low-maintenance garden that wows guests.
Solution:
- Planted Heliconia Rostrata as a backdrop.
- Used Heliconia Psittacorum in containers near walkways.
- Added complementary plants like bird-of-paradise and bromeliads.
Result: The resort’s garden became a guest favorite, with many visitors snapping photos and asking about the plants.
Infographic: Heliconia Color Spectrum
Key Points:
- Breakdown of heliconia varieties by color.
- Tips for enhancing color through soil and sunlight.
- Ideal pairings for garden design.
Conclusion: Bring the Magic of Heliconia Color to Your Garden
Heliconias are more than just plants—they’re a celebration of color, life, and tropical beauty. By understanding their needs and experimenting with design, you can create a garden that’s not only visually stunning but also a joy to maintain.
Ready to transform your space? Start by choosing your favorite heliconia variety and follow the tips in this guide. And don’t forget to share your heliconia journey with us—tag us in your garden photos or drop a comment below!
-
Articles3 days ago
How Many Times Can You Regrow Green Onions
-
News8 months ago
Understanding HotLeaks: What You Need to Know
-
Fashion5 months ago
Opals in the USA: A Gemstone Transforming the Crystal Healing Market
-
Technology11 months ago
The Wonders of Oh Em Gee Blog
-
Entertainment11 months ago
Bare it All: Unforgettable Skinny Dipping Stories Shared
-
Health11 months ago
Can You Smoke Shrooms? Exploring the Myths and Realities
-
Articles3 months ago
WHAT IS THE DIFFERENCE BETWEEN SEED GARLIC AND FOOD GARLIC?
-
Fashion4 days ago
Make a Statement with Stunning Black Homecoming Dresses