Connect with us

Articles

The Ultimate Guide to Eco-Friendly Cleaning Practices

Published

on

Eco-Friendly Cleaning Practices

Maintaining a clean home is essential, but it’s equally important to consider the impact of your cleaning practices on the environment. Eco-friendly cleaning not only benefits the planet but also creates a healthier living space for you and your family. 

Incorporating eco-friendly practices into your cleaning routine doesn’t mean compromising on quality. CSI Cleaning Services Island Wide exemplifies this balance by offering meticulous cleaning solutions that prioritize both effectiveness and client satisfaction, ensuring your spaces are impeccably maintained while still being mindful of the environment.

This guide explores various eco-friendly cleaning methods, products, and tips to help you maintain a spotless home without harming the environment.

The Basics of Eco-Friendly Cleaning

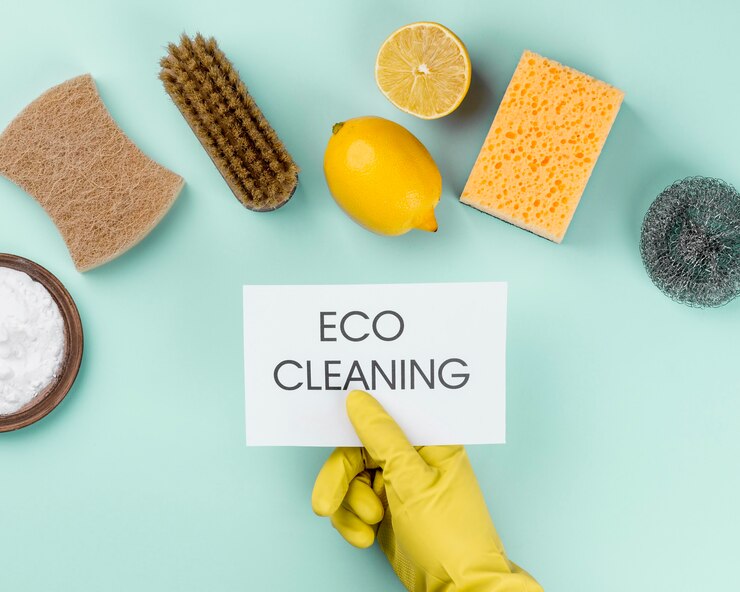
Understanding Eco-Friendly Cleaning: Eco-friendly cleaning involves using products and methods that have minimal environmental impact. This includes using biodegradable, non-toxic, and natural cleaning agents, as well as adopting practices that reduce waste and conserve resources.

Benefits of Eco-Friendly Cleaning: Using eco-friendly products reduces exposure to harmful chemicals, improves indoor air quality, and minimizes environmental pollution. Additionally, many natural cleaning agents are cost-effective and versatile, offering a safe alternative to conventional cleaning products.

Natural Cleaning Agents

Vinegar: A versatile and powerful cleaner, vinegar can be used to clean glass, disinfect surfaces, and remove odors. Its acidic nature makes it effective at cutting through grease and grime. Mix equal parts of vinegar and water in a spray bottle for a general-purpose cleaner.

Baking Soda: Baking soda is a natural abrasive that can be used to scrub surfaces, remove stains, and deodorize. Sprinkle baking soda on carpets before vacuuming to freshen them up, or mix it with water to create a paste for cleaning tough stains.

Lemon: The natural acidity and antibacterial properties of lemons make them excellent for cleaning. Use lemon juice to remove stains, polish metal, and disinfect surfaces. Rubbing a lemon half over cutting boards can help sanitize them and remove odors.

Castile Soap: Made from vegetable oils, castile soap is a gentle yet effective cleaner. It can be used to wash dishes, clean floors, and even as a laundry detergent. Mix it with water and a few drops of essential oil for a pleasant-smelling, all-purpose cleaner.

Essential Oils: Essential oils like tea tree, lavender, and eucalyptus have natural antibacterial properties and can be added to cleaning solutions for a fresh scent. Be sure to use them sparingly and in proper dilutions to avoid any potential adverse reactions.

Eco-Friendly Cleaning Practices

Reduce, Reuse, Recycle: Minimize waste by reducing your use of disposable cleaning products like paper towels. Opt for reusable cloths and sponges, and recycle any packaging materials when possible. Consider making your cleaning cloths from old t-shirts or towels.

DIY Cleaning Products: Making your cleaning products is an excellent way to ensure they are eco-friendly. Simple ingredients like vinegar, baking soda, and essential oils can be combined to create effective cleaners without harmful chemicals.

Conserve Water: Be mindful of water usage while cleaning. Use a bucket instead of running water for tasks like mopping floors, and fix any leaks promptly to prevent water waste. When washing dishes by hand, fill one sink with soapy water and the other with rinse water.

Choose Eco-Friendly Brands: Many companies offer eco-friendly cleaning products that are biodegradable, non-toxic, and sustainably packaged. Look for certifications like USDA Organic, Green Seal, or EPA Safer Choice to ensure you’re choosing environmentally responsible products.

Eco-Friendly Cleaning Tips for Different Areas of Your Home

Kitchen:

  • Clean countertops with a mixture of vinegar and water.
  • Use baking soda to scrub sinks and remove stains.
  • Clean your oven by applying a paste of baking soda and water, letting it sit overnight, and wiping it off the next day.
  • For stainless steel appliances, use a mixture of vinegar and water to remove fingerprints and streaks.

Bathroom:

  • Use lemon juice to remove soap scum and hard water stains.
  • Clean toilet bowls by sprinkling baking soda inside, followed by a splash of vinegar. Scrub with a toilet brush and flush.
  • For mirrors and glass, use a solution of vinegar and water for a streak-free shine.

Living Areas:

  • Dust surfaces with a microfiber cloth to capture dust particles effectively.
  • Freshen up carpets by sprinkling baking soda, letting it sit for 15 minutes, and then vacuuming.
  • Clean upholstery by mixing a few drops of castile soap with water, applying with a spray bottle, and wiping with a damp cloth.

Bedrooms:

  • Wash bedding regularly with eco-friendly laundry detergent.
  • Dust surfaces and vacuum carpets frequently to reduce allergens.
  • Use a mixture of vinegar and water to clean windows and mirrors.

Laundry:

  • Use cold water for washing whenever possible to save energy.
  • Opt for eco-friendly laundry detergents and avoid fabric softeners, which can contain harmful chemicals.
  • Air dry clothes to reduce energy consumption and extend the life of your garments.

Outdoor Cleaning Tips

Garden Tools: Clean garden tools with a mixture of vinegar and water to remove dirt and prevent rust. Regular maintenance will extend their lifespan.

Patios and Decks: Use a solution of vinegar and water to clean outdoor furniture and decks. This will remove dirt and mildew without harming plants or the environment.

Driveways and Walkways: Baking soda and water can be used to scrub away stains and grime from driveways and walkways. For tougher stains, consider using a pressure washer with eco-friendly soap.

Conclusion

Adopting eco-friendly cleaning practices is a simple yet effective way to reduce your environmental impact while maintaining a clean and healthy home. By choosing natural cleaning agents, conserving resources, and reducing waste, you can create a more sustainable cleaning routine. These practices not only benefit the planet but also promote a safer and healthier living environment for you and your family. Start making small changes today, and enjoy the numerous benefits of eco-friendly cleaning.

Continue Reading
Click to comment

Leave a Reply

Your email address will not be published. Required fields are marked *

Articles

How to Repair a Ripped Plate Carrier: A Quick & Durable Fix

Published

on

How to Repair a Ripped Plate Carrier

A ripped plate carrier isn’t just an inconvenience—it’s a potential safety hazard. Whether the damage comes from rigorous training, field use, or long-term wear, a compromised carrier can fail when you need it most. Fortunately, with the right tools and techniques, you can restore its strength and reliability. This guide covers everything from quick field fixes to heavy-duty repairs, ensuring your plate carrier remains mission-ready.

Why Repairing Your Plate Carrier Matters

A plate carrier is a critical piece of tactical gear, designed to hold armor plates and distribute weight efficiently. When torn, its structural integrity weakens, leading to:

  • Reduced ballistic protection (if plates shift or become exposed).
  • Increased strain on seams and straps, accelerating further damage.
  • Poor load distribution, causing discomfort and mobility issues.

Ignoring small tears can turn them into catastrophic failures. A proper repair extends your gear’s lifespan, saving money and ensuring performance when it counts.

Step-by-Step Guide to Repairing a Ripped Plate Carrier

1. Assess the Damage

Before starting, determine the extent of the tear:

  • Seam Rip: Common in high-stress areas like shoulder straps or side seams.
  • Fabric Tear: Often in Cordura or nylon panels due to abrasion.
  • MOLLE Webbing Damage: Can affect pouch attachment points.

Check for:
✔️ Loose threads or fraying edges.
✔️ Weak spots near the tear that may need reinforcement.

2. Gather the Right Tools

For a field-expedient repair, you’ll need:

  • Ripstop tape (like Gear Aid Tenacious Tape)
  • Fabric glue (such as Seam Grip or Shoe Goo)
  • Lighter (to melt frayed edges and prevent further unraveling)

For a permanent, heavy-duty fix, use:

  • Bonded polyester or nylon thread (avoid cotton—it rots over time).
  • Sewing awl or heavy-duty needle (for thick fabrics).
  • Cordura or ballistic nylon patch (for large tears).
  • Bar tack stitching (reinforced stitching used in military gear).

3. Prepare the Torn Area

  • Trim loose threads with scissors.
  • Use a lighter to carefully melt frayed edges (prevents further tearing).
  • If using a patch, cut it slightly larger than the tear for full coverage.

4. Sewing the Repair (Best for Long-Term Durability)

For Seam Repairs:

  1. Use a backstitch for maximum strength.
  2. Sew at least ¼ inch from the edge to prevent pull-through.
  3. Double-stitch high-stress areas (shoulders, side buckles).

For Fabric Tears:

  1. Place a fabric patch behind the tear (glue it first for stability).
  2. Use a box stitch (X-pattern) to secure the patch.
  3. Seal edges with fabric glue for waterproofing.

For MOLLE Webbing:

  1. Re-stitch using a zigzag pattern to maintain flexibility.
  2. Add a reinforcing bar tack at stress points.

5. Field-Expedient Fixes (When You Can’t Sew)

  • Ripstop Tape: Apply on both sides of the tear for an instant bond.
  • Zip Ties or Paracord: Temporarily secure loose straps or webbing.
  • Super Glue + Fabric: Works for small tears but isn’t as flexible.

6. Stress-Test the Repair

  • Load the carrier with plates and gear.
  • Tug firmly on the repaired area to check for weak points.
  • Adjust stitching or reinforcement if needed.

Pro Tip: Preventing Future Damage

🔥 Rotate Your Carriers: If used daily, alternate between two to reduce wear.
🔥 Wash Properly: Hand-wash with mild soap; avoid harsh detergents that weaken fibers.
🔥 Inspect Regularly: Check stitching and fabric after each use.

Conclusion: How to Repair a Ripped Plate Carrier

A ripped plate carrier doesn’t have to mean the end of its service life. With How to Repair a Ripped Plate Carrier—whether a quick field fix or a reinforced stitch—you can restore its strength and reliability. For more on extending tactical gear lifespan, check our Ultimate Tactical Gear Maintenance Guide.

FAQ About How to Repair a Ripped Plate Carrier

1. Can I use a regular sewing machine for plate carrier repairs?

Yes, but only if it’s heavy-duty (like a Sailrite or industrial machine). Most home machines struggle with thick nylon webbing.

2. How long will a fabric glue repair last?

Temporary fixes (like glue or tape) hold for weeks, but stitching is the only permanent solution.

3. What’s the strongest stitch for tactical gear?

Bar tacking (used in military gear) or a triple-stitched box pattern provides the best durability.

4. Can I repair a torn plate carrier strap?

Yes—either re-stitch it with a patch or replace the strap entirely if too damaged.

5. Does duct tape work for emergency repairs?

It’s a last-resort option—duct tape loses adhesion quickly under movement and sweat.

Continue Reading

Articles

How Much Paint to Paint a Car: Estimating Paint Quantity

Published

on

How Much Paint to Paint a Car

Repainting your car can transform its appearance, but one of the biggest challenges is figuring out how much paint you’ll need. Use too little, and you risk an uneven, patchy finish. Use too much, and you’re wasting money on excess material. This comprehensive guide will walk you through every factor that affects paint quantity—from car size to paint type—so you can budget accurately and achieve professional results.

Why Calculating Paint Quantity Correctly Matters

Getting the right amount of paint isn’t just about saving money—it’s about ensuring a smooth, long-lasting finish. Running out of paint mid-job can lead to color mismatches, while excess paint may go to waste. Proper estimation helps you:

  • Avoid costly mistakes (uneven coats, color inconsistencies).
  • Save money by buying only what you need.
  • Ensure durability (correct paint thickness prevents premature peeling).

Step-by-Step Guide to Calculating How Much Paint You Need

1. Determine Your Car’s Size & Surface Area

The larger your vehicle, the more paint it will require. Here’s a general breakdown:

Vehicle Type Approx. Paint Needed (Gallons) Surface Area (Sq. Ft.)
Compact Car (e.g., Honda Civic) 1–1.5 gallons 150–175 sq ft
Mid-Size Sedan (e.g., Toyota Camry) 1.5–2 gallons 175–200 sq ft
Full-Size SUV/Truck (e.g., Ford F-150) 2–3 gallons 200–250 sq ft
Large Van/Commercial Vehicle 3+ gallons 250+ sq ft

Pro Tip: If you’re painting only certain sections (like a hood or fender), measure their square footage separately.

2. Choose the Right Paint System

Different paint systems require varying amounts of product:

  • Single-Stage Paint: Combines color and clear coat in one layer (requires less paint—about 1 gallon for a small car).
  • Basecoat + Clearcoat: Needs multiple layers (basecoat: 1–1.5 gallons, clearcoat: 0.5–1 gallon).
  • Metallic/Pearl Finishes: Often need extra coats for even coverage (add 10–20% more paint).

3. Factor in the Application Method

How you apply paint affects how much you’ll use:

  • HVLP (High Volume Low Pressure) Spray Gun: Most efficient (minimal overspray, 90% transfer rate).
  • Conventional Spray Gun: Wastes more paint (30–40% overspray).
  • Brush/Roller (Rare for cars): Uses more paint but is harder to apply smoothly.

4. Don’t Forget Primer & Clearcoat

  • Primer: Essential for adhesion (1 gallon typically covers a car).
  • Clearcoat: Adds gloss and protection (0.5–1 gallon depending on layers).

5. Adjust for Paint Brand & Coverage Rate

Different brands have varying coverage rates (check the label). For example:

  • 1 Gallon of Standard Automotive Paint ≈ Covers 100–150 sq ft per coat.
  • High-Solid Paints (better coverage) may require 10–15% less.

Pro Tip: Always Buy Extra (The 10–20% Rule)

Even with careful measuring, unexpected issues can arise:

  • Overspray waste
  • Mistakes requiring reapplication
  • Inconsistent coverage on certain panels
    Ordering 10–20% more paint than calculated ensures you won’t run out mid-project.

How Much Does It Cost to Paint a Car Yourself?

  • Paint Only: 100–500 (depending on quality).
  • Primer & Clearcoat: 50–200.
  • Supplies (Spray gun, sandpaper, masking): 200–500.
  • Total DIY Cost: 300–1,500 (vs. 2,000–10,000 for professional work).

Conclusion: Smart Planning = Flawless Paint Job

Estimating paint correctly ensures a smooth, professional finish without overspending. Small cars typically need 1–1.5 gallons, while trucks may require 3+ gallons. Always check manufacturer specs, account for primer/clearcoat, and buy a little extra for safety.

FAQ – Your Paint Quantity Questions Answered

1. Can I paint a whole car with just 1 gallon?

Yes, for a small car with single-stage paint, but 1.5 gallons is safer to avoid running out.

2. Does color affect how much paint I need?

  • Darker colors (black, navy): May need extra coats for full coverage.
  • Metallic/pearl paints: Require more careful application (add 10–20% more).

3. How many coats of paint does a car need?

  • Basecoat: 2–3 coats.
  • Clearcoat: 2 coats (for durability).

4. Can I mix different paint brands?

Not recommended—stick to one brand/system to avoid adhesion or color-matching issues.

5. How long does a gallon of car paint last?

Unopened: 2–3 years (stored properly). Once opened: 6–12 months (sealed tightly).

Continue Reading

Articles

How Much Is a Private Investigator: Costs & Key Factors

Published

on

How Much Is a Private Investigator

Introduction

Hiring a private investigator (PI) can feel overwhelming, especially with unclear pricing. Costs vary based on case complexity, location, and experience—typically 50–150/hour or 500–5,000+ per case. This guide breaks down pricing factors to help you budget wisely and avoid surprises.

Why Private Investigator Costs Matter

Whether you need surveillance, background checks, or legal support, understanding PI fees ensures you hire the right professional without overspending. Hidden costs or inexperienced investigators can derail your case, so transparency is key.

Step-by-Step Guide to PI Pricing

1. Understand Common Pricing Models

  • Hourly Rates50–150/hour (e.g., surveillance or interviews).
  • Flat Fees500–3,000 for simple cases (like locating a person).
  • Retainers: Upfront payments (e.g., 2,000–5,000) for long-term cases.

2. Identify Cost Factors

  • Case Type: Cheating spouse (75–125/hour) vs. corporate fraud (100–200/hour).
  • Location: Urban areas (higher demand = higher rates).
  • Expertise: Ex-law enforcement/PIs with niche skills charge premium rates.

3. Get Quotes & Compare

  • Ask for itemized estimates (e.g., travel fees, report writing).
  • Verify licenses and reviews (NAPIA is a trusted resource).

4. Budget for Extras

  • Court testimony (150–300/hour) or database access fees (50–200).

5. Negotiate Smartly

  • Bundle services (e.g., surveillance + background check) for discounts.

Pro Tip: Avoid PIs who demand full payment upfront. Reputable investigators bill incrementally or offer payment plans.

Conclusion

Private investigator costs depend on your needs, but research and clear contracts prevent overpaying. Prioritize experience over low rates—quality evidence saves time and money long-term.

FAQ

1. What’s the cheapest PI service?
Basic background checks start at $200, but complex cases (e.g., missing persons) cost more.

2. Are online PIs legit?
Some are, but verify licenses and avoid those refusing in-person consultations.

3. Can I deduct PI costs legally?
Sometimes (e.g., child custody cases); consult a tax professional.

Continue Reading

Trending