Connect with us

Food And Drinks

Alaska Roll: A Fresh Take on Sushi

Published

on

Alaska Roll

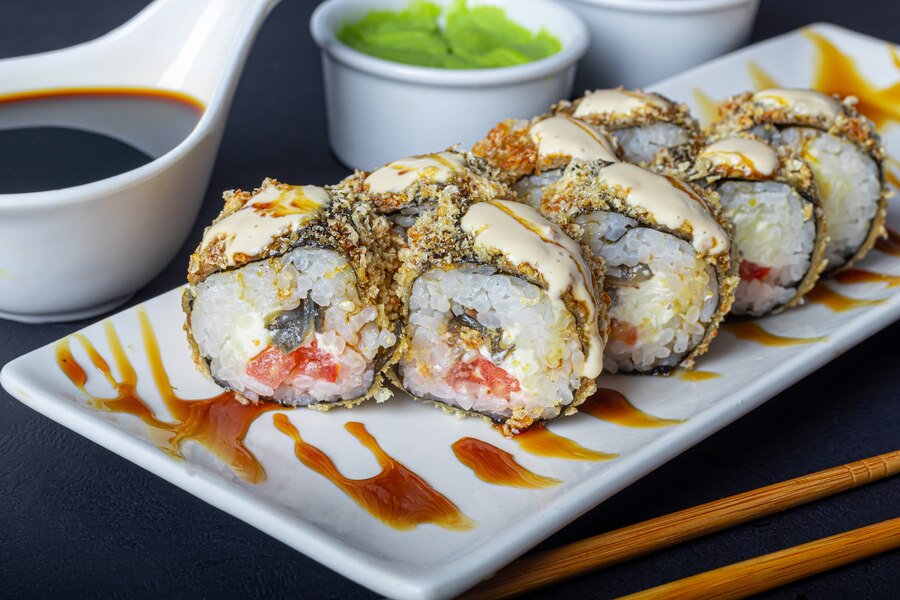
When it comes to sushi, the Alaska Roll stands out for its unique combination of flavors and textures. This delightful sushi roll features fresh salmon, avocado, and cucumber, making it a favorite among sushi enthusiasts. In this article, we will explore the origins of the Alaska Roll, its key ingredients, the preparation process, and tips for enjoying this delicious dish.

The Origins of the Alaska Roll

A Fusion of Cultures

Sushi, originally from Japan, has evolved significantly as it spread across the globe. The Alaska Roll is a prime example of this evolution, blending traditional Japanese sushi techniques with ingredients commonly found in American cuisine. While the exact origins of the Alaska Roll are unclear, it is believed to have been created in the United States, where sushi chefs began experimenting with local ingredients to appeal to Western tastes.

Popularity in the U.S.

The Alaska Roll has become a staple in many sushi restaurants across the United States. Its combination of fresh, high-quality ingredients and mild flavors makes it accessible and enjoyable for both sushi novices and seasoned aficionados.

Key Ingredients of the Alaska Roll

Salmon

The star of the Alaska Roll is fresh, high-quality salmon. Known for its rich flavor and buttery texture, salmon adds a delicious depth to the roll. Opt for sushi-grade salmon to ensure the best taste and safety.

Avocado

Avocado provides a creamy contrast to the salmon’s richness. Its mild flavor and smooth texture complement the other ingredients perfectly, making it a key component of the Alaska Roll.

Cucumber

Cucumber adds a refreshing crunch to the roll. Its crisp texture balances the softness of the avocado and salmon, providing a pleasant variety of textures in each bite.

Nori

Nori, or seaweed, is used to wrap the roll. It adds a subtle, briny flavor that enhances the overall taste of the sushi.

Sushi Rice

Properly prepared sushi rice is essential for any sushi roll. Seasoned with rice vinegar, sugar, and salt, the rice should be sticky enough to hold the roll together but not too mushy.

Preparation Steps for the Alaska Roll

Step-by-Step Instructions

  1. Prepare the Sushi Rice: Rinse 1 cup of sushi rice under cold water until the water runs clear. Cook the rice according to the package instructions, then transfer it to a large bowl. While the rice is still warm, gently fold in a mixture of 2 tablespoons of rice vinegar, 1 tablespoon of sugar, and 1 teaspoon of salt. Allow the rice to cool to room temperature.
  2. Prepare the Fillings: Slice the salmon into thin strips. Cut the avocado in half, remove the pit, and slice it into thin strips. Peel the cucumber and cut it into matchstick-sized pieces.
  3. Assemble the Roll: Place a bamboo sushi mat on a clean surface and cover it with a sheet of plastic wrap. Place a sheet of nori, shiny side down, on the mat. Wet your hands with water to prevent the rice from sticking, then spread a thin, even layer of sushi rice over the nori, leaving a 1-inch border at the top edge.
  4. Add the Fillings: Arrange a few strips of salmon, avocado, and cucumber along the bottom edge of the nori.
  5. Roll the Sushi: Using the bamboo mat, carefully lift the bottom edge of the nori and roll it tightly over the fillings, pressing gently but firmly to ensure the roll holds together. Continue rolling until you reach the top edge, then gently press the seam to seal the roll.
  6. Slice and Serve: Use a sharp knife to slice the roll into bite-sized pieces, wiping the knife with a damp cloth between cuts to keep it clean and sharp. Arrange the slices on a serving plate and garnish with pickled ginger, wasabi, and soy sauce.

Serving Suggestions for the Alaska Roll

Traditional Accompaniments

To enjoy the Alaska Roll to the fullest, consider serving it with traditional sushi accompaniments:

  • Soy Sauce: For dipping, enhancing the savory flavors of the roll.
  • Wasabi: A small dab of wasabi adds a spicy kick that pairs well with the mild flavors of the Alaska Roll.
  • Pickled Ginger: Also known as gari, pickled ginger is used to cleanse the palate between bites.

Modern Twists

For a modern twist on the Alaska Roll, try these creative serving ideas:

  • Drizzle with Spicy Mayo: A mixture of mayonnaise and sriracha sauce adds a creamy, spicy flavor.
  • Top with Tobiko: Flying fish roe adds a pop of color and a crunchy texture.
  • Sprinkle with Sesame Seeds: Lightly toasted sesame seeds add a nutty flavor and extra crunch.

Health Benefits of the Alaska Roll

Rich in Omega-3 Fatty Acids

Salmon is an excellent source of omega-3 fatty acids, which are known for their heart-healthy benefits. Regular consumption of omega-3s can help reduce inflammation, lower blood pressure, and improve overall heart health.

High in Vitamins and Minerals

The ingredients in the Alaska Roll are rich in essential vitamins and minerals. Salmon provides vitamin D and B12, avocado is packed with potassium and healthy fats, and cucumber offers a good amount of vitamins K and C.

Low in Calories

Compared to many other dishes, sushi rolls like the Alaska Roll are relatively low in calories, making them a healthy choice for those looking to enjoy a delicious meal without overindulging.

Conclusion

The Alaska Roll is a delightful fusion of fresh ingredients and traditional sushi techniques. Its combination of rich salmon, creamy avocado, and crisp cucumber makes it a popular choice for sushi lovers. Whether you’re a seasoned sushi enthusiast or new to the cuisine, the Alaska Roll offers a delicious and satisfying experience that’s sure to please your palate. Next time you’re at a sushi restaurant or making sushi at home, be sure to give the Alaska Roll a try—you won’t be disappointed.

Continue Reading
Click to comment

Leave a Reply

Your email address will not be published. Required fields are marked *

Food And Drinks

Float Dr Pepper: The Refreshing Drink Hack You Need to Try

Published

on

Float Dr Pepper

Why Is Everyone Raving About Float Dr Pepper?

Have you ever craved a drink that’s both nostalgic and refreshingly unique? Enter Float Dr Pepper—a fizzy, creamy, and utterly delicious twist on the classic soda float. Combining the bold, caramel-infused flavor of Dr Pepper with smooth vanilla ice cream creates a taste sensation that’s hard to resist.

But what makes this drink so special? Is it just a passing trend, or is there real magic in this combination? In this guide, we’ll explore:

  • The origins of the Dr Pepper float

  • Why the flavor profile works so well

  • Step-by-step instructions to make the perfect float

  • Creative variations to try

  • Expert tips for the best experience

Whether you’re a soda enthusiast or just looking for a fun new treat, this guide will help you master the art of the Float Dr Pepper.

The Origins of the Dr Pepper Float

A Brief History of Floats

The classic root beer float has been a beloved American treat since the late 1800s. But as soda flavors expanded, so did float variations. Dr Pepper, with its unique 23-flavor blend, became a natural candidate for a float—offering a more complex taste than traditional root beer or cola.

Why Dr Pepper Works So Well

Dr Pepper’s flavor is a mix of:

  • Fruity notes (cherry, blackberry)

  • Warm spices (vanilla, licorice, clove)

  • Caramel undertones

When paired with vanilla ice cream, the creaminess softens the soda’s sharpness while enhancing its sweetness. The result? A perfectly balanced, creamy, and effervescent drink.

How to Make the Perfect Float Dr Pepper

What You’ll Need

  • 1 can or bottle of Dr Pepper (chilled)

  • 2 scoops of high-quality vanilla ice cream

  • A tall glass (16 oz or larger)

  • A long spoon and straw (optional)

Step-by-Step Instructions

  1. Chill Your Glass – For extra frosty goodness, place your glass in the freezer for 5–10 minutes before making your float.

  2. Add the Ice Cream – Scoop 2 generous balls of vanilla ice cream into the glass.

  3. Pour Slowly – Gently pour Dr Pepper over the ice cream to prevent excessive fizzing.

  4. Let It Settle – Wait 10–15 seconds for the foam to rise, then top off with more soda if needed.

  5. Serve Immediately – Enjoy with a spoon and straw for the full experience!

Pro Tips for the Best Float

✔ Use real cane sugar Dr Pepper (if available) for a richer taste.
✔ Try Dr Pepper Cream Soda for an even creamier twist.
✔ Add a splash of heavy cream for extra decadence.

Creative Float Dr Pepper Variations

Want to take your float to the next level? Try these fun twists:

1. Chocolate Dr Pepper Float

  • Add a scoop of chocolate ice cream instead of vanilla.

  • Drizzle with chocolate syrup for extra indulgence.

2. Spiced Dr Pepper Float

  • Sprinkle cinnamon or nutmeg on top.

  • Use eggnog ice cream during the holidays.

3. Bourbon Dr Pepper Float (For Adults)

  • Mix in 1 oz of bourbon before adding soda.

  • Garnish with a cherry for a boozy twist.

4. Vegan Dr Pepper Float

  • Swap dairy ice cream for coconut or almond milk vanilla ice cream.

  • Use organic cane sugar Dr Pepper for a fully plant-based treat.

Why Float Dr Pepper Is a Crowd-Pleaser

Perfect for Any Occasion

  • Summer BBQs – A refreshing alternative to beer or lemonade.

  • Movie Nights – A fun, nostalgic snack.

  • Dessert Menus – Impress guests with a unique sweet treat.

A Viral Sensation?

Thanks to social media, #FloatDrPepper has gained traction on TikTok and Instagram, with users sharing their own takes on the drink. Some even layer it with whipped cream and sprinkles for extra flair.

Final Thoughts: Should You Try It?

If you love Dr Pepper and enjoy creamy, fizzy treats, the Float Dr Pepper is a must-try. It’s easy to make, endlessly customizable, and delivers a satisfying mix of flavors and textures.

Ready to give it a shot? Grab a cold Dr Pepper, your favorite vanilla ice cream, and get blending! Whether you stick to the classic or experiment with fun variations, this float is guaranteed to become a new favorite.

Continue Reading

Food And Drinks

Spain Butter: A Hidden Gem in the World of Dairy

Published

on

Spain Butter

Have you ever wondered what makes Spanish butter stand out in a world dominated by French and Irish varieties? While Spain might be famous for its olive oil and jamón, its butter is an underrated culinary treasure. Rich, creamy, and often infused with regional flavors, Spanish butter offers a unique taste experience worth exploring.

In this article, we’ll dive into:
✔ The history and tradition of Spanish butter
✔ What sets it apart from other European butters
✔ Top brands to try (and where to buy them)
✔ Creative ways to use Spanish butter in your cooking

Ready to discover why this dairy delight deserves a spot in your kitchen? Let’s get started.

The Rich Heritage of Spanish Butter

Unlike France or Ireland, Spain isn’t typically associated with butter—olive oil has long been the country’s fat of choice. However, northern regions like Galicia, Asturias, and the Basque Country have a deep dairy tradition, producing high-quality butter from grass-fed cows.

Historically, butter was a staple in these cooler, rainier regions where cows thrived. Artisanal methods, such as slow churning and minimal processing, have been preserved, giving Spanish butter its distinct texture and flavor.

What Makes Spanish Butter Unique?

  1. Grass-Fed Cows – Many Spanish dairy farms prioritize pasture-raised cows, resulting in butter with a richer, more complex taste.

  2. Lower Salt Content – Unlike heavily salted European butters, Spanish varieties often use minimal salt, letting the natural creaminess shine.

  3. Regional Variations – Some butters are smoked, infused with herbs, or blended with local ingredients like honey or truffles.

Top Spanish Butter Brands to Try

If you’re eager to taste authentic Spanish butter, here are some standout brands:

1. Leche Pascual (Mantequilla de Burgos)

A well-known dairy brand, Pascual produces smooth, slightly tangy butter perfect for baking and spreading.

2. Central Lechera Asturiana

Hailing from Asturias, this butter is ultra-creamy with a subtle sweetness, ideal for toast and pastries.

3. Mantequerías Arias (Galicia)

A premium artisanal brand, Arias uses traditional churning methods for a velvety texture and rich flavor.

4. Lurpak (Spanish Variant)

While Danish in origin, Lurpak’s Spanish-produced butter is tailored to local tastes—less salty and incredibly spreadable.

Where to Buy?

  • Specialty food stores (like La Tienda or Despaña in the US)

  • Online retailers (Amazon, Mercadona’s international delivery)

  • Local markets in Spain (Mercado de San Miguel in Madrid, La Boqueria in Barcelona)

How to Use Spanish Butter Like a Pro

Spanish butter isn’t just for spreading on bread—here are some delicious ways to enjoy it:

1. Paella Finishing Touch

A dollop of butter stirred into paella at the end adds a luxurious creaminess.

2. Herb-Infused Butter

Mix Spanish butter with smoked paprika, garlic, and parsley for a flavorful topping for grilled meats.

3. Basque-Style Butter Cake (Pastel Vasco)

This traditional dessert relies on high-quality butter for its rich, crumbly texture.

4. Seared Scallops with Brown Butter

Spanish butter’s high fat content makes it perfect for achieving a golden, nutty sear.

Why Spanish Butter Deserves More Recognition

While French and Irish butters dominate global markets, Spain’s offerings bring something different—subtle sweetness, artisanal craftsmanship, and regional diversity. Whether you’re a home cook, a professional chef, or just a butter enthusiast, exploring Spanish varieties can elevate your dishes in unexpected ways.

Final Tip:

Next time you’re in Spain (or browsing gourmet food shops), skip the usual souvenirs and grab a pack of locally made butter. Your taste buds will thank you!

Continue Reading

Food And Drinks

The Irresistible World of French Sweets: A Delicious Guide

Published

on

French Sweets

Have you ever bitten into a buttery, flaky croissant and wondered why French sweets are so incredibly addictive? From delicate macarons to rich chocolate éclairs, French desserts are a celebration of flavor, texture, and artistry. But what makes them so special? And how can you enjoy them like a true connoisseur?

In this guide, we’ll explore the most iconic French sweets, their fascinating history, and expert tips on how to savor them—whether you’re in Paris or your own kitchen.

Why French Sweets Are Universally Loved

French desserts are more than just sugar and flour—they’re a blend of precision, tradition, and innovation. Here’s why they stand out:

✔ Perfect Balance – French patisserie masters the harmony of sweet, salty, and buttery flavors.
✔ Artful Presentation – Every dessert is crafted like a miniature masterpiece.
✔ Time-Tested Techniques – Centuries of refinement result in flawless textures.

Now, let’s dive into the most beloved French sweets you need to try.Top 10 Must-Try French Sweets

1. Macarons

What Makes Them Special?
These colorful almond meringue cookies, filled with ganache or buttercream, are crisp on the outside and chewy inside.

Pro Tip: Look for macarons from Ladurée or Pierre Hermé in Paris—the pioneers of this iconic treat.

2. Croissant

The King of Breakfast Pastries
A perfectly baked croissant should be golden, with layers that shatter at the first bite. The secret? High-quality butter and precise lamination.

Fun Fact: The croissant actually originated in Austria but was perfected by the French.

3. Crème Brûlée

Creamy, Vanilla-Infused Perfection
This custard dessert, topped with a caramelized sugar crust, is a textural dream.

Expert Tip: Tap the top with a spoon—it should crack cleanly!

4. Éclair

Elegance in Every Bite
A choux pastry filled with pastry cream and topped with glossy chocolate ganache.

Best Flavor Variations: Coffee, pistachio, or salted caramel.

5. Tarte Tatin

The Upside-Down Apple Tart
Caramelized apples sit atop buttery pastry—best served warm with vanilla ice cream.

History Lesson: Created by accident in the 19th century by the Tatin sisters!

6. Madeleines

The Shell-Shaped Tea Cake
Soft, spongy, and lightly citrusy, these petite cakes are perfect with coffee.

Pro Baker’s Secret: Let the batter rest overnight for the best texture.

7. Pain au Chocolat

The Chocolate Lover’s Croissant
Flaky layers wrapped around dark chocolate batons—pure indulgence.

Where to Find the Best? Try Du Pain et des Idées in Paris.

8. Canelé

Caramelized & Custardy
A Bordeaux specialty with a crispy, rum-infused exterior and soft center.

Why It’s Unique: Baked in copper molds for the perfect crust.

9. Mille-Feuille (Napoleon)

Layers of Flaky Goodness
Puff pastry stacked with pastry cream and topped with icing—a true classic.

How to Eat It? Turn it sideways to avoid a mess!

10. Profiteroles

Cream Puffs with a Chocolate Finish
Choux pastry filled with vanilla ice cream or custard, drizzled with warm chocolate sauce.

Best Served: At Le Procope, Paris’ oldest café.

How to Enjoy French Sweets Like a Pro

Want the ultimate experience? Follow these expert-backed tips:

✔ Pair with the Right Drink – Macarons go with tea, croissants with coffee, and crème brûlée with dessert wine.
✔ Eat Them Fresh – French pastries are best consumed within hours of baking.
✔ Visit Local Boulangeries – Skip tourist spots and ask locals for hidden gems.
✔ Try Making Them at Home – Start with madeleines or crème brûlée—they’re beginner-friendly!

Final Thoughts: Why French Sweets Are Worth the Hype

French desserts aren’t just treats—they’re edible art. Whether you’re biting into a crisp macaron or savoring a warm pain au chocolat, each bite tells a story of tradition and craftsmanship.

So, which French sweet will you try first? Head to a patisserie, or better yet, bake your own and taste a piece of France at home.

Continue Reading

Trending